Fiamma VENT F PRO Instructions De Montage Et Mode D'emploi
Table des Matières
Liens rapides
Installation and usage instructions
Montage-und Gebrauchsanleitung
Instructions de montage et mode d'emploi
Instruciones de montaje y uso
Istruzioni di montaggio e d'uso
Montage- en gebruiksinstructies
Monterings- och bruksanvisning
Ovenlysvindue
Monterings- og brugsvejLedning
Monterings- og bruksinstruksjoner
Asennus- ja käyttöohjeet
Instruções de montagem e de uso
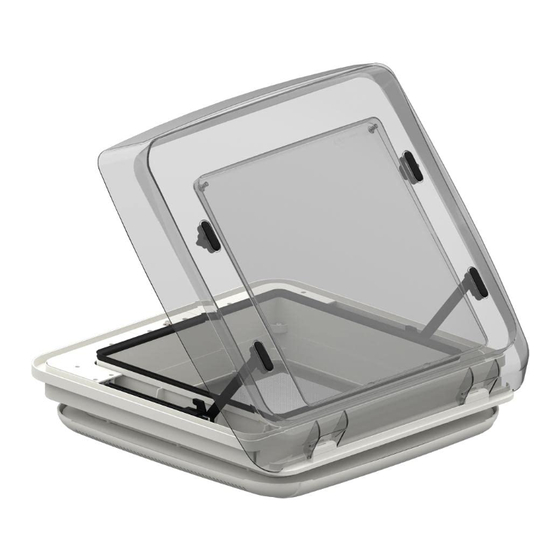
VENT F PRO
Roofl ight
EN
Dachhaube
DE
Lanterneau
FR
Claraboya
ES
Obló
IT
Dakluik
NL
Takhuv
SV
DA
Takluke
NO
Luukku
FI
Vigia
PT
07380-01-
Table des Matières

Manuels Connexes pour Fiamma VENT F PRO


Sommaire des Matières pour Fiamma VENT F PRO
- Page 1 Instruciones de montaje y uso Obló Istruzioni di montaggio e d’uso Dakluik Montage- en gebruiksinstructies Takhuv Monterings- och bruksanvisning Ovenlysvindue Monterings- og brugsvejLedning Takluke Monterings- og bruksinstruksjoner Luukku Asennus- ja käyttöohjeet Vigia Instruções de montagem e de uso VENT F PRO 07380-01-...
- Page 2 COMFORT - Tech VENT F PRO...
- Page 3 COMFORT - Tech 40 cm 49 cm 53 cm 100 cm² 4,7 kg Package contents / Verpackungsinhalt / Contenu de l’emballage / Contenido del embalaje / Contenuto dell’imballo / Inhoud van de verpakking / Förpackningens innehåll / Pakkens indhold / Innholdet i pakningen / Pakkauksen sisältö...
- Page 4 COMFORT - Tech Check that nothing has been damaged or deformed during transport. In the event of doubts or questions concerning the installation, use or limitations of the product, contact the dealer. We recommend that the installation is carried out by qualifi ed personnel and in compliance with current local regulations.
- Page 5 COMFORT - Tech 1) Decide where the roofl ight should be installed and make a square hole of 40cm. The roofl ight can be installed on roofs with thickness between 28 and 55mm. 2) Seal the lower part of the external frame with a minimum width of 10 mm by following the appropriate rails.
- Page 6 COMFORT - Tech 1) Una vez elegido el punto donde instalar la claraboya, hacer una abertura cuadrada de 40 cm de lado. La claraboya se instala en los techos con espesor entre 28 y 55 mm. 2) Sellar bien la parte inferior del marco externo por una anchura mínima de 10 mm siguiendo el recorrido correspondiente.
- Page 7 COMFORT - Tech 1) Välj platsen där ventilfönstret ska installeras och skapa en 40 cm kvadrat öppning på sidan. Ventilfönstret installeras på taken med en tjocklek mellan 28 och 55 mm. 2) Försegla riktigt delen under den externa ramen med en minimal bredd på 10 mm och genom att följa skenorna.
- Page 8 COMFORT - Tech 1) Kun on valittu luukun asennuspiste, tee neliömäinen aukko, jonka reunan pituus on 40 cm. Luukku asennetaan kattoihin, joiden paksuus on välillä 28-55 mm. 2) Tiivistä hyvin ulkorungon alla oleva osa vähintään 10 mm:n leveydeltä seuraten asianmukaisia kiskoja. Suositeltu tiivistysaine: SIKALASTOMER-710/THEROSTAT II.
- Page 9 COMFORT - Tech SIKALASTOMER-710/THEROSTAT II...
- Page 10 COMFORT - Tech F 1.5 N.m...
- Page 11 COMFORT - Tech...
- Page 12 COMFORT - Tech OPENING AND CLOSING THE COVER Opening: pull the hand wheel from its seat and turn it in the direction of the arrow, 8 turns: complete opening of the cover. Closing: pull the hand wheel from its seat and turn it in the direction of the arrow, the cover closes completely after an audible click.
- Page 13 COMFORT - Tech ÅPNING OG LUKKING AV DEKSELET Åpning: trekk sveiven ut fra plassen sin og drei den i pilretningen (8 omdreininger for å åpne dekselet fullstendig). Lukking: trekk sveiven ut fra plassen sin og drei den i pilretningen. Dekselet er fullstendig lukket når du hører et tydelig klikk.
- Page 14 COMFORT - Tech OPENING AND CLOSING THE ROLLER BLIND: - Insert the fi ngers in the proper concave seat on the roller blind and pull it to the desired position. - In strong sunlight, only close the roller blind two thirds of the way to avoid a build-up of heat. ÖFFNUNG UND SCHLIESSUNG DER VERDUNKLUNG: - Durch den vorgesehenen Griff bei der Verdunklung kann dies in die entsprechende Position geschoben werden.
- Page 15 COMFORT - Tech Km/h...
-
Page 16: Care And Maintenance
Consultar o sítio web para a vista explosiva das peças sobresselentes. Fiamma declines all responsibility for any personal injury and damage to property due to incorrect assembly or use of the product; it is suggested to keep the instructions inside the vehicle. -
Page 17: Pflege Und Wartung
Reinigungsmittel, Lösungsmittel oder andere korrosive Flüssigkeiten benutzen. Das Moskitonetz kann mit Wasser und einem neutralen Reinigungsmittel gereinigt werden. Fiamma décline toute responsabilité en cas de dommages aux biens ou de lésions corporelles qui dériveraient d’un usage inapproprié de l’article. Conserver les notices à l’intérieur du véhicule. Respecter les consignes de montage contenues dans la notice;... -
Page 18: Mantenimiento Y Limpieza
La mosquitera debe limpiarse con agua y detergente neutro. Fiamma declina ogni responsabilità per eventuali lesioni personali e danni alle cose dovute al montaggio oppure all’uso errato del prodotto; si suggerisce di custodire le istruzioni all’interno del veicolo. Il montaggio del prodotto deve essere eseguito rispettando le istruzioni di montaggio: il prodotto non deve essere modifi... -
Page 19: Verzorging En Onderhoud
Het insectengaas kan worden gereinigd met water en een neutraal reinigingsmiddel. Fiamma frånsäger sig allt ansvar för eventuella skador på personer eller föremål som uppstår genom monteringen eller felaktig användning av produkten; vi rekommenderar att förvara instruktionerna inuti fordonet. -
Page 20: Pleje Og Vedligeholdelse
COMFORT - Tech Fiamma fralægger sig ethvert ansvar for personskade og skade på ejendom på grund af forkert montering eller anvendelse af produktet. Det anbefales at opbevare instruktionerne i køretøjet. Produktet skal monteres i overensstemmelse med monteringsanvisningerne. Produktet må ikke ændres på... -
Page 21: Hoito Ja Huolto
Lisäksi älä koskaan käytä pesuaineita, jotka sisältävät alkoholia, liuottimia tai muita syövyttävää nestettä. Hyttysverkko voidaan puhdistaa käyttämällä vettä ja mietoa pesuainetta. Fiamma declina quaisquer responsabilidades por eventuais lesões pessoais e danos nos bens devidos à montagem ou ao uso errado do produto; aconselhamos a guardar as instruções no interior do veículo. - Page 22 COMFORT - Tech SPOILER UNIVERSAL SPOILER 40 Item No. 06289-01- Item No. 03585-01- KIT TURBO-VENT F PREMIUM Item No. 07501-01- KIT TURBO-VENT F Item No. 07501A01- KIT TURBO-VENT F P3 Item No. 07501B01- 100%...
- Page 23 COMFORT - Tech Warranty Fiamma In case of defects with regards to materials and manufacturing, the customer is entitled to the warranty in accordance with local laws and regulations of the country in which the product was purchased. Garantie Fiamma Im Falle einer Mangelhaftigkeit der Ware, kann der Verbraucher unter den erforderlichen Voraussetzungen gegenüber dem Verkäufer von dem Garantieanspruch zu den...
- Page 24 All rights reserved. Fiamma S.p.A. reserves the right to modify at any time, without notice, prices, materials, Fiamma S.p.A. - Italy specifi cations and models or to cease Via San Rocco, 56 production of any model. 21010 Cardano al Campo (VA)