Publicité

Les langues disponibles

Les langues disponibles

Liens rapides

BIOMA
S
ILENT UNIT
 Installation Instructions
 Instructions d'installation
 Installationsanvisning
 Montageanleitung

Publicité

Table des Matières
loading

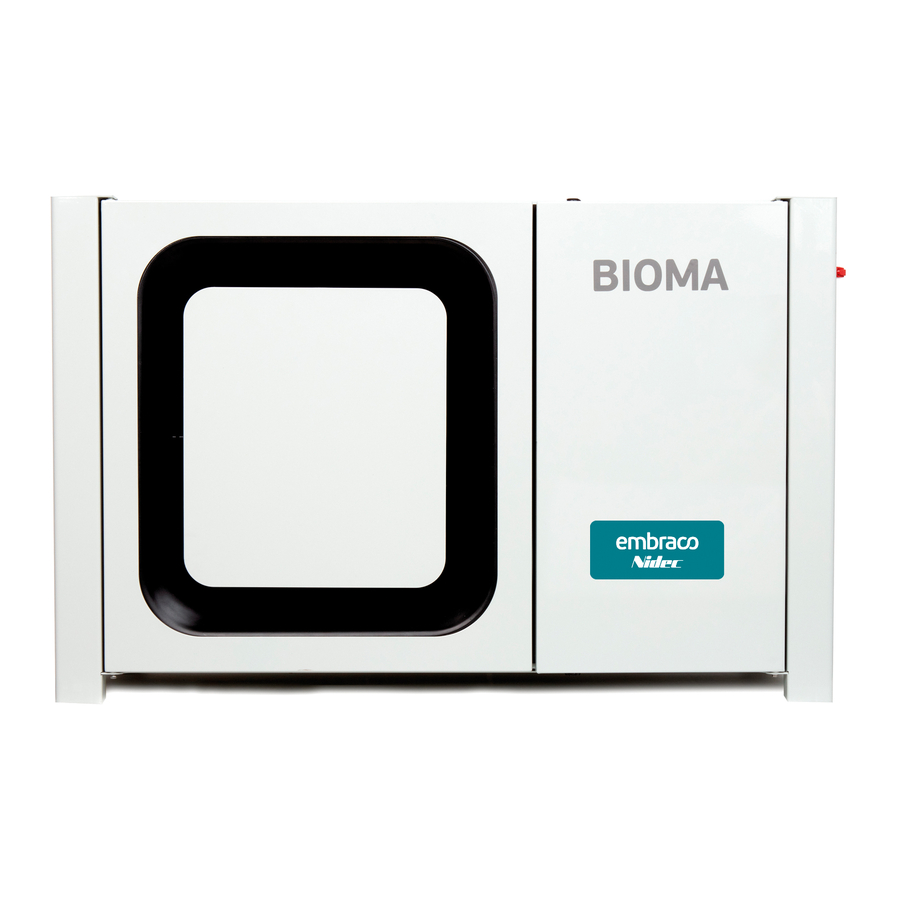
Sommaire des Matières pour Embraco Bioma Silent Unit

  • Page 1 BIOMA ILENT UNIT  Installation Instructions  Instructions d’installation  Installationsanvisning  Montageanleitung...
  • Page 3: Installations Instructions

    Introduction: Thank you for choosing an EMBRACO condensing unit. This unit has been designed specifically for refrigeration and with service friendly installation in mind to save time on site: Easy access to components to facilitate the commissioning, start up and maintenance.
  • Page 4: Technical Data

    • EMBRACO shall not under any circumstances be liable if the installation and maintenance are not carried out in accordance with the instructions given in this manual. 1.4 Cautions • Units in the application must be used within a working range specified by manufacturer.
  • Page 5: Noise Levels

    To ensure the quality of our products, the condensing unit has been vacuumed and charged with nitrogen gas. Warning: To maintain the quality of a EMBRACO condensing unit and to ensure it functions correctly, the following precautions must be taken: •...
  • Page 6: Refrigerant Charge

    Warning: To ensure the quality of EMBRACO condensing unit it is essential to: • Check that the installation power supply voltage is compatible with the voltage supply of the condensing unit (refer to identification label). • Check the compatibility of the wiring diagram that of the installation (refer to picture 4) •...
  • Page 7: Servicing And Maintenance

    Any faulty part must be replaced with the original spare part. In case a replacement of electrical components of compressor is required, please use a full KIT from EMBRACO. In order to maintain the low noise of the condensing unit over time, we recommend replacing the anti-vibrations mounts as soon as any change on the noise or vibration level of the unit is noticed.
  • Page 8: Declaration Of Conformity

    6. WARRANTY For information concerning the condensing unit warranty, please refer to our sales terms and conditions. 7. DECLARATION OF CONFORMITY Supplied units are in conformity with the following Directive (s): • 2014/35/EU Low Voltage Directive (LVD) • 2006/42/EU Machinery Directive •...
  • Page 9 Condensing unit nameplate There are 2 labels available in the condensing unit. One is available in the back of the unit above the pipe connection, the second is available inside the unit, you have to open the front door. Legend: 1: Code number 2: Designation 3: Serial number...
  • Page 10 Stackability The units can be stacked in a maximum of 2. Setting of the pressure switch In case the pressure switch is not easy to read the scale, you can remove it via 2 screws accessible from the fan door. You can then easily changing the settings and put it in place again.
  • Page 11: Lire Les Instructions Suivantes Avec Précaution Avant D'installer Ce Groupe

    Introduction: Merci d’avoir choisi une unité de condensation EMBRACO. Cette unité a été conçue spécifiquement pour la réfrigération et avec une installation et un entretien facile afin de gagner du temps sur site : Accès facile aux composants pour faciliter le dépannage, la mise en service et la maintenance.
  • Page 12: Données Techniques

    • L'installation doit être effectuée conformément aux normes de réfrigération et d'électricité applicables dans ce pays. Les meilleures pratiques de réfrigération doivent être suivies. • EMBRACO ne sera en aucun cas tenu responsable si l'installation et la maintenance ne sont pas effectuées conformément aux instructions données dans ce manuel.
  • Page 13: Emplacement

    • Embraco n'est pas responsable du choix des produits anti vibrations et de leur potentiel d'absorption des vibrations. • Le niveau de bruit final de l'installation dépend des propriétés de réflexion / absorption de l'environnement. Gardez à...
  • Page 14: Demarrage De L'installation

    Tout le câblage sur site doit être conforme à la norme EN60204. Avertissement: Pour assurer la qualité du groupe de condensation EMBRACO, il est essentiel de: • Vérifiez que la tension d'alimentation de l'installation est compatible avec celle du groupe de condensation (reportez-vous à...
  • Page 15: Entretien Et Maintenance

    Si le remplacement des composants électriques du compresseur est requis, veuillez utiliser un KIT complet de EMBRACO. Afin de maintenir le faible bruit de l'unité de condensation dans le temps, nous vous recommandons de remplacer les supports anti-vibrations dès que vous remarquez un changement du niveau de bruit ou de vibration de l'unité.
  • Page 16: Garantie

    5.3 Contrôle des fuites et inspections périodiques. Un contrôle d'étanchéité doit être effectué au moins une fois par an. Il peut varier en fonction de la teqCO2, du réfrigérant et de la charge utilisée. Veuillez-vous référer à votre réglementation locale. Vérifiez régulièrement : •...
  • Page 17: Plaque Signalétique De L'unité De Condensation

    Plaque signalétique de l'unité de condensation Il y a 2 étiquettes disponibles dans l'unité de condensation. L'un est disponible à l'arrière de l'unité, sous le raccord de tuyau, le second est disponible à l'intérieur de l'unité, vous devez ouvrir la porte avant. Légende: 1: numéro de code 2: désignation...
  • Page 18: Réglage Du Pressostat

    Stackability Empilage Les unités peuvent être empilées avec un maximum de 2 . Réglage du pressostat Si le pressostat n’est pas facile à lire, vous pouvez le retirer à l’aide de 2 vis accessibles par la porte du ventilateur. Vous pouvez ensuite modifier facilement les paramètres et les remettre en place.
  • Page 19: Transport Och Hantering

    Installationsanvisning Läs följande instruktioner noga innan du installerar enheten Introduction: Tack för att du valt en Embraco Bioma, luftkylt utomhusaggregat. Denna enhet är speciellt designad för en servicevänlig tidsbesparande installation för enkel åtkomst underhåll service. Denna tekniska bruksanvisning innehåller detaljerade uppgifter om installation, igångkörning, service och underhåll.
  • Page 20: Tekniska Data

    1.4 Försiktighetsåtgärder • Detta kylaggregat får endast användas i det driftområde som tillverkaren föreskriver. • Köldmedie i sugledningen måste vara i ångfas. • Var noga vid lödning och annan anslutning i kylsystemet, för att undvika läckage. • Använd en läcksökare för avsett köldmedie, så maximala driftegenskaper garanteras och för kontroll av eventuellt läckage.
  • Page 21 Se till att strömförsörjningen är bruten innan du utför någon service eller reparation på enheten. Alla elektriska installationer på plats måste uppfylla den nuvarande lagstiftningen (EN 60204 i EU). Varning: För att säkerställa funktionen på ett Embraco kylaggregat, är det viktigt att: • Kontrollera att nätspänningen är kompatibel med den för kylaggregatet (semärkskylt på enheten).
  • Page 22 • Se till att strömförsörjningen till enheten är korrekt skyddad och jordad. • Se till att enheten är jordad vid service och när du byter komponenter. För aggregat med 3-fas scrollkompressor, se till att rätt fassekvens är inkopplad för att få korrekt rotationsriktning på kompressorn.
  • Page 23 Säkerställ att inställningarna och funktionerna på elanslutningarna är korrekta. 5. UNDERHÅLL OCH UNDERHÅLL Inga obehöriga modifieringar på kylaggregatet 23a tillåtna. Tillstånd från Embraco måste erhållas före eventuella ändringar. Höljet kan rengöras med varmt vatten (70 ° C). Använd inte produkter som innehåller 23arden23 vid rengöring.
  • Page 24 6. GARANTI För information om kylaggregatets garanti, se våra försäljningsvillkor. 7. DECLARATION OF CONFORMITY Kylaggregatet uppfyller följande direktiv: • 2014/35/EU Low Voltage Directive (LVD) • 2006/42/EU Machinery Directive • 2011/65/EU RoHs Directive • 2014/68/EU Pressure Equipment Directive (PED) • 2009/125/EC Eco-design Directive Följande standarder tillämpas: •...
  • Page 25 Märkskyltar på aggregat Det finns 2 märkskyltar på aggregatet. Den ena är placerad på enhetens baksida, under röranslutningarna, den andra sitter på insidan (man får öppna frontdörren). Förklaringar: Produktkod Modellbeteckning Serienummer Applikation Anslutningsspänning Max kontinuerlig ström LRA: Låst rotor ström Fläktens märkeffekt Kyleffekt (enl.
  • Page 26 Stapling Enheterna kan staplas max 2 st på varandra Inställning av pressostat Om det är svårt att läsa av skalan på pressostaten, kan denna lossas med 2 skruvar som nås från fläktdörren. Det är då enkelt att ändra inställningen och därefter monteras fast pressostaten igen.
  • Page 27: Warnung Und Vorsichtsmaßnahmen

    Installation der Einheit aufmerksam durch Einführung : Vielen Dank für die Wahl eines EMBRACO Verflüssigungssatzes. Das Gerät wurde speziell für Kälteanwendungen mit einem Auge auf eine servicefreundliche Montage vor Ort geplant : Die Komponenten sind leicht zugänglich Diese Anleitung umfasst folgende BIOMA Verflüssigungssätze : UP - ** Diese technische Anleitung enthält detaillierte Informationen zu Installation, Inbetriebnahme, Start, Bedienung und...
  • Page 28: Technische Daten

    • Die Installation hat unter Beachtung der kälte- und elektrotechnischen Standards des jeweiligen Landes zu erfolgen. Es müssen die optimalen kältetechnischen Verfahren angewendet werden. • Unter keinen Umständen haftet EMBRACO für Installations- und Wartungsarbeiten, die nicht in Übereinstimmung mit den Anleitungen dieses Handbuches durchgeführt wurden.
  • Page 29: Kältetechnische Anschlüsse

    Wandhalterungen und der Wand einzufügen. Dazu eine isolierende Unterlage oder schwingungsdämpfende Halterungen verwenden (nicht im Lieferumfang), die gemäß Herstellerempfehlungen für die Montage geeignet sind. • EMBRACO ist nicht für die Auswahl von schwingungsdämpfenden Produkten und deren Wirkungsgrad verantwortlich • Der letztendliche Lärmpegel der Anlage hängt von Reflexions-/Absorptionseigenschaften der Umgebung ab.
  • Page 30: Elektrische Anschlüsse

    Stellen Sie vor Arbeiten an der Verkabelung oder Reparaturarbeiten sicher, dass die Stromversorgung getrennt wurde. Alle vor Ort montierten Kabel müssen der Norm EN 60204 entsprechen. Achtung: Für eine optimale Qualität eines EMBRACO-Verflüssigungssatzes ist folgendes erforderlich: • Kontrollieren,ob die Versorgungsspannung am Installationsort mit dem Verflüssigungssatz kompatibel ist (siehe Typenschild).
  • Page 31 • Alle Verbindungen müssen systematisch auf jegliche Leckage überprüft werden unter Verwendung eines elektronischen Lecksuchgeräts, welches für das jeweilige Kältemittel geeignet ist • Wird ein Leck entdeckt, repariert man das Leck und wiederholt die Dichtheitsermittlung. 4.2 Vacuum dehydration • Never use the compressor to vacuum the system. •...
  • Page 32: Bedienung Und Wartung

    Geräusche). Sicherstellen, dass die Einstellungen und Funktionen der Schaltkreise einwandfrei sind. 5. BEDIENUNG UND WARTUNG Unbefugte Änderungen am Verflüssigungssatz sind nicht zulässig. Jegliche Änderung muss von Embraco genehmigt werden. Das Gehäuse kann mit Heißwasser (70 °C) gereinigt werden. Keine alkohol- oder ethanolhaltige Mittel verwenden. Fehlerhafte Teile sind durch Originalersatzteile zu ersetzen.
  • Page 33: Konformitatserklarung

    5.4 Elektrische Kontrollen. Alle elektrische Komponenten mit Schraubklemmen sorgfältig prüfen. Anschlüsse ein mal im Jahr festziehen. Folgendes regelmäßig kontrollieren: • Sicherheit und Kontrollvorrichtungen. • Betrieb der Kurbelwannenheizung. 5.5 Filter drier . Condensing units are fitted with a brazed filter drier. When changing the filter drier, ensure that it is replaced with an equivalent in capacity and pressure drop and with the correct direction of flow.
  • Page 34 Typschild des Verflüssigungssatzes Es gibt 2 Typschilder im Verflüssigungssatz. Eine befindet sich im hinteren Abschnitt der Einheit unter der Rohrleitung, die zweite befindet sich in der Einheit, sie müssen die Vordertür öffnen. Legende: 1: Kennzahl 2: Bezeichnung 3: Seriennummer 4: Anwendung 5: Spannungsversorgung 6: Max.
  • Page 35: Einstellung Des Druckschalters

    Stapelbarkeit Es können maximal 2 Einheiten aufeinander gestapelt werden. Einstellung des Druckschalters Falls der Druckschalter nicht einfach zu abzulesen ist, können Sie ihn über 2 Schrauben aus der Lüftertür entfernen. Sie können dann einfach die Einstellungen ändern und den Schalter wieder einsetzen.
  • Page 36 Dimensions / Dimensions / Dimensioner / Abmessungen Housing 1 / Carosserie 1 / Storlek 1 / Gehäuse 1: Housing 2 / Carosserie 2 / Storlek 2 / Gehäuse 2: Housing 3 / Carosserie 3 / Storlek 3 / Gehäuse 3:...
  • Page 37 Wiring diagram / Schéma de câblage / Elschema / Schaltplan: Hermetic reciprocating compressors 230V-1ph-50Hz / Compresseurs hermétiques à piston 230V-1ph-50Hz / Hermetisk kolvkompressor 230 V 1-fas 50 Hz / Hermetische Kolbenverdichter 230V-1ph-50Hz :...
  • Page 38 Hermetic reciprocation compressors 400V-3ph-50Hz / Compresseurs hermétiques à piston 400V-3ph-50Hz / Hermetisk kolvkompressor 400 V 3-fas 50 Hz / Hermetische Kolbenverdichter 400V-3ph-50Hz :...
  • Page 39 Hermetic scroll compressors 230V-1ph-50Hz / Compresseurs hermétiques scroll 230V-1ph-50Hz / Hermetisk scrollkompressor 230 V 1-fas 50 Hz / Hermetische Scrollverdichter 230V-1ph-50Hz:...
  • Page 40 Hermetic scroll compressors 400V-3ph-50Hz / Compresseurs hermétiques scroll 400V-3ph-50Hz / Hermetisk scrollkompressor 400 V 3-fas 50 Hz / Hermetische Scrollverdichter 400V-3ph-50Hz:...
  • Page 41 ECODESIGN – Directive 2009/125/EC – Efficiency requirements R-404A LBP Condensing Ambient Cooling Cooling Power input Power input Compressors Eco design units temperature capacity (W) capacity (W) Voltage supply COP / Models Models (°C) -35°C -10°C -35°C -10°C Type SEPR 1780 1572 NT2180GK-A-CSR 230/1/50...
  • Page 42 R-452A LBP Condensing Ambient Cooling Cooling Power input Power input Compressors Eco design units temperature capacity (W) capacity (W) Voltage supply COP / Models Models (°C) -35°C -10°C -35°C -10°C Type SEPR 1799 1583 1001 NT2180GK-A-CSR 230/1/50 0,98 1393 1026 1234 1033 1872...
  • Page 43 R449 - LBP Condensing Ambient Cooling Cooling Power input Power input Compressors Eco design units temperature capacity (W) capacity (W) Voltage supply COP / Models Models (°C) -35°C -10°C -35°C -10°C Type SEPR 1341 3656 1062 1463 1270 3366 1185 1629 SE2006GK-C 230/1/50...
  • Page 44 R-134a MBP Condensing Ambient Cooling Power input Compressors Eco design units temperature capacity (W) Voltage supply COP / Models Models (°C) -10°C -10°C Type SEPR NEU6214Z-A-CSR 230/1/50 1,79 1337 1182 NJ6220Z-A-CSIR 230/1/50 1,60 1053 HOUSING 1 1718 1519 NJ6226Z-A-CSR 230/1/50 1,72 1353 1219...
  • Page 45 R-134a MBP Condensing Ambient Cooling Power input Compressors Eco design units temperature capacity (W) Voltage supply COP / Models Models (°C) -10°C -10°C Type SEPR 2879 1152 2680 1254 SE6018GS-O 400/3/50 2,14 2497 1348 2342 1433 3247 1345 3018 1465 HOUSING 2 SE6021GK-C 230/1/50...
  • Page 46 R-404a MBP Condensing Ambient Cooling Power input Compressors Eco design units temperature capacity (W) Voltage supply COP / Models Models (°C) -10°C -10°C Type SEPR NEU6212GK-A-CSIR 230/1/50 1,74 1283 1152 NEU6215GK-A-CSR 230/1/50 1,84 1039 1566 1389 NT6222GK-A-CSR 230/1/50 1,60 1233 1103 1950 1736...
  • Page 47 R-404a MBP Condensing Ambient Cooling Power input Compressors Eco design units temperature capacity (W) Voltage supply COP / Models Models (°C) -10°C -10°C Type SEPR 3831 1710 3426 1819 NJX6250GS-M 400/3/50 1,88 3080 1907 2788 1978 4175 1752 3806 1951 SE6015GK-C 230/1/50 1,95...
  • Page 48: Ambient Temperature

    R-452A MBP Condensing Ambient Cooling Power input Compressors Eco design units temperature capacity (W) Voltage supply COP / Models Models (°C) -10°C -10°C Type SEPR NEU6212GK-A-CSIR 230/1/50 1,73 1296 1152 NEU6215GK-A-CSR 230/1/50 1,82 1029 1573 1378 NT6222GK-A-CSR 230/1/50 1,60 1211 1076 1976 1740...
  • Page 49 R-452A MBP Condensing Ambient Cooling Power input Compressors Eco design units temperature capacity (W) Voltage supply COP / Models Models (°C) -10°C -10°C Type SEPR 3821 1722 3404 1817 NJX6250GS-M 400/3/50 1,88 3043 1892 2744 1953 4125 1833 3746 2020 SE6015GK-C 230/1/50 1,86...
  • Page 50 R-449A MBP Condensing Ambient Cooling Power input Compressors Eco design units temperature capacity (W) Voltage supply COP / Models Models (°C) -10°C -10°C Type SEPR NEU6212GK-A-CSIR 230/1/50 1,76 1210 1104 NEU6215GK-A-CSR 230/1/50 1,84 1016 1485 1342 NT6222GK-A-CSR 230/1/50 1,63 1208 1084 1834 1660...
  • Page 51 R-449A MBP Condensing Ambient Cooling Power input Compressors Eco design units temperature capacity (W) Voltage supply COP / Models Models (°C) -10°C -10°C Type SEPR 3685 1599 3329 1696 NJX6250GS-M 400/3/50 1,93 3011 1775 2743 1841 4142 1720 3810 1909 SE6015GK-C 230/1/50 1,96...

Table des Matières