Publicité

Les langues disponibles
  • FR

Les langues disponibles

Liens rapides

User Guide
English ( 3 – 17 )
Guía del usuario
Español ( 18 – 32 )
Guide d'utilisation
Français ( 33 – 47 )
Guida per l'uso
Italiano ( 48 – 62 )
Benutzerhandbuch
Deutsch ( 63 – 77 )
Appendix
English ( 78 – 79 )

Publicité

Table des Matières
loading

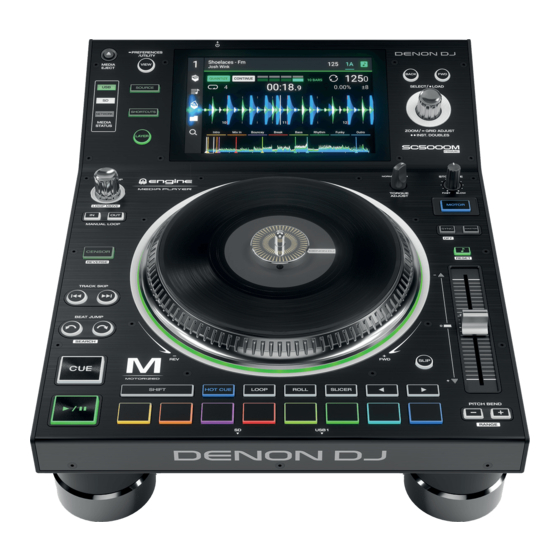
Sommaire des Matières pour Denon DJ SC5000M Prime

  • Page 1 User Guide English ( 3 – 17 ) Guía del usuario Español ( 18 – 32 ) Guide d’utilisation Français ( 33 – 47 ) Guida per l’uso Italiano ( 48 – 62 ) Benutzerhandbuch Deutsch ( 63 – 77 ) Appendix English ( 78 –...
  • Page 3 User Guide (English) Introduction Thank you for purchasing the SC5000M Prime. At Denon DJ, we know how serious music is to you. That’s why we design our equipment with only one thing in mind—to make your performance the best it can be.
  • Page 4 5. Connect all of your devices to power sources. When starting a session, power on (1) SC5000M Prime and other input sources, (2) your mixer, and then (3) output devices. When ending a session, power off (1) output devices, (2) your mixer, and then (3) SC5000M Prime and other...
  • Page 5: Connection Diagrams

    Connection Diagrams Items shown but not listed under Introduction > Box Contents are sold separately. Example 1 This example shows 2 SC5000M Prime units with their Link ports connected to each other directly. SC5000M Prime SC5000M Prime (rear panel) (rear panel)
  • Page 6 DJ X1800 Prime mixer. All 4 units are networked through the mixer. Note: If you will use a different mixer with this setup, connect the Link ports all 4 SC5000M Prime units to an Ethernet hub instead of to the mixer.
  • Page 7 If you are using only two SC5000M Prime units, connect their two Link ports. • If you are using two or more SC5000M Prime units, connect each of their Link ports to a Link port (1–4) on your Denon DJ X1800 Prime mixer.
  • Page 8: Top Panel

    SC5000M Prime units, USB drives, SD card, etc.). Tap a device in the list to select it. Media Eject: Press this button to show a list of available devices connected to that SC5000M Prime unit in the main display (i.e., USB drives connected to its USB ports or an SD card inserted into its SD card slot).
  • Page 9: Performance Controls

    21. Sync/Sync Off: Press this button to activate Sync. To sync two or more SC5000M Prime units, press Sync on the unit that you want to control the BPM, which becomes the “master.” After Sync is activated on that unit, press Sync on any additional units. The tempo of each unit will immediately synchronize to match the tempo of the master unit.
  • Page 10: Front Panel

    Press and hold this button for 10 seconds to reset SC5000M Prime. Link Port: Use the included networking cable to connect this port to another SC5000M Prime or to your Denon DJ X1800 Prime mixer. Each networked SC5000M Prime can share track databases, timing and BPM information, and other track data over this connection.
  • Page 11 Operation Main Display Overview Performance View Continuous Bars Track play on/off elapsed tempo Track Sync Quantize state Track key Artist Beat counter on/off Key lock on/off Deck Crates Deck tempo Pitch fader Playlists/ range History Total pitch Prepare List adjustment Waveform Files Bar numbers...
  • Page 12 Important: Visit denondj.com and find the webpage for SC5000M Prime to download the Engine Prime software. Use the five icons on the left side to navigate while in Browse View: •...
  • Page 13 Performing Loading & Removing Tracks While viewing any track list: To load a track to the deck, swipe the track to the right. Alternatively, press the Select/Load knob. To add a track to the Prepare list, swipe the track to the left. Alternatively, press and hold Shift and press the Select/Load knob.
  • Page 14 To adjust the track’s pitch, move the pitch fader. You can do this only when the deck is not synced. Important: If Sync is activated, moving the pitch fader on the “master” SC5000M Prime unit will change the speed of all synced units, while moving the pitch fader on other units will do nothing.
  • Page 15 Pad Modes The 8 pads have different functions in each pad mode. The Parameter / buttons will make adjustments specific to each pad mode. To enter each pad mode, press the corresponding button: Hot Cue, Loop, Roll, or Slicer. Hot Cue Mode Cue 1 Cue 2 Cue 3...
  • Page 16: Configuration

    • Sync Mode: This setting determines the degree of synchronization applied when you press the Sync button on SC5000M Prime: Tempo: Only the tempo will be synced (the BPM will match that of the master deck). Beat: The tempo will be synced, and the track will be automatically be beat-matched with the track on the master unit.
  • Page 17 • Layer B: This determines whether this SC5000M Prime will use both deck layers (On) or just one (Off). • Screen Brightness: This setting determines the brightness of the main display: Low, Mid, High, or Max.
  • Page 18: Contenido De La Caja

    Guía del usuario (Español) Introducción Gracias por comprar el SC5000M Prime. En Denon DJ, sabemos que usted se toma la música en serio. Por eso es que diseñamos nuestros equipos con una sola cosa en mente—hacer que pueda tocar su mejor interpretación.
  • Page 19 Al iniciar una sesión, encienda (1) el SC5000M Prime y las demás fuentes de entrada, (2) su mezclador y luego (3) los dispositivos de salida. Al finalizar una sesión, apague (1) los dispositivos de salida, (2) su mezclador y luego (3) el SC5000M Prime y las demás fuentes de entrada.
  • Page 20: Diagramas De Conexión

    Los elementos que se muestran pero que no se enumeran en Introducción > Contenido de la caja se venden por separado. Ejemplo 1 Este ejemplo muestra 2 unidades SC5000M Prime con sus puertos Link conectados entre sí directamente. SC5000M Prime SC5000M Prime (panel trasero) (panel trasero)
  • Page 21 Ejemplo 2 Este ejemplo muestra 4 unidades SC5000M Prime con sus puertos Link conectados a los Puertos Link 1 – de un mezclador X1800 Prime de Denon DJ. Todas las unidades están en red a través del mezclador. Nota: Si utilizará un mezclador diferente para esta configuración, conecte los puertos Link de las 4 unidades SC5000M Prime a un concentrador Ethernet en lugar de al mezclador.
  • Page 22 • Si sólo está usando dos unidades SC5000M Prime, conecte sus dos puertos Link. • Si está usando dos o más unidades SC5000M Prime, conecte cada uno de sus puertos Link a un puerto Link (1–4) en su mezclador X1800 Prime de Denon DJ.
  • Page 23: Características

    Para expulsar un dispositivo, asegúrese de que no se esté reproduciendo ninguna de sus pistas (expulsar un dispositivo descarga todas sus pistas de todas las unidades SC5000M Prime conectadas a la red), y luego toque y mantenga su dedo sobre su nombre en la pantalla principal hasta que ya no aparezca el nombre del dispositivo.
  • Page 24 21. Sync/Sync Off: Pulse este botón para activar la sincronización. Para sincronizar dos o más unidades SC5000M Prime, pulse Sync en la unidad que desea que controle los BPM, la cual se convierte en la unidad “maestra”. Una vez que se activa la sincronización en esa unidad, pulse Sync en las unidades adicionales.
  • Page 25: Panel Frontal

    Mantenga pulsado este botón durante 10 segundos para desconectar el SC5000M Prime. Puerto Link: Use el cable de red incluido para conectar este puerto a otro SC5000M Prime o a su mezclador X1800 Prime de Denon DJ. Cada unidad SC5000M Prime conectada en red puede compartir bases de datos de pistas, información de sincronización y BPM y cualquier otro dato de forma transparente a través de esta conexión.
  • Page 26 Funcionamiento Vista general de la pantalla principal Vista de actuación Reproducción continua Barras Tempo de la pista encendida/apagada transcurridas Pista Estado de Cuantización Nota de la pista sincroni- Contador de beats Artista encendida/ zación apagada Bloqueo de nota Bandeja Tempo de la Cajas de bandeja discos...
  • Page 27 Vista de exploración Use la vista de exploración para ver su biblioteca de música y cargar una pista en la bandeja. También puede explorar las cajas y las listas de reproducción, añadir pistas a la lista de preparación y recorrer sus pistas usando las funciones de ordenamiento y filtrado.
  • Page 28 Actuaciones Carga y descarga de pistas Mientras visualiza cualquier lista de pistas: Para cargar una pista en la bandeja, deslice la pista hacia la derecha. Como alternativa, pulse la perilla Select/Load. Para agregar una pista a la lista de pistas preparadas, deslice la pista hacia la izquierda. Como alternativa, mantenga pulsado Shift y pulse la perilla Select/Load.
  • Page 29 Para ajustar el tono de la pista, mueva el fader de tono. Sólo podrá hacer esto cuando la bandeja no esté sincronizada. Importante: Si se activa la sincronización, al mover el fader de tono en la unidad SC5000M Prime “maestra” se modificarán las velocidades de todas las unidades sincronizadas, mientras que mover el fader de tono en las otras unidades no hará...
  • Page 30 Modos de pad Los 8 padres tienen diferentes funciones en cada modo de pad. Los botones Parameter (parámetro) / harán ajustes específicos a cada modo de pad. Para entrar a cada modo de pad, pulse el botón correspondiente: Hot Cue, Loop, Roll o Slicer. Modo de cue rápido rápido 1 rápido 2...
  • Page 31: Accesos Directos

    • Sync Mode: Este ajuste determina el grado de sincronización que se aplica cuando pulsa el botón Sync en el SC5000M Prime: Tempo: Solo el tempo estará sincronizado (el BPM igualará el de la bandeja maestra). Beat: Se sincronizará el tempo y el beat de la pista se igualará automáticamente con el de la pista de la unidad maestra.
  • Page 32 Player #: Este ajuste determina el número de este reproductor. Al seleccionar un dispositivo fuente a explorar, este número se muestra junto al nombre del dispositivo en la pantalla. • Layer B (Capa B): Este ajuste determina si este SC5000M Prime utilizará ambas capas de bandeja (On) o sólo una (Off). •...
  • Page 33: Présentation

    Guide d’utilisation (Français) Présentation Merci d’avoir fait l’acquisition du SC5000M Prime. Chez Denon DJ, nous savons à quel point la musique est importante pour vous. C’est pourquoi nous concevons nos produits avec une seule chose en tête — faire de votre performance la meilleure qui soit.
  • Page 34: Assembler Le Plateau

    5. Branchez tous les appareils à l’alimentation secteur. Lors de la mise en marche, commencez par allumer (1) le SC5000M Prime et les autres sources d’entrée, (2) la console de mixage, puis (3) les appareils de sortie.
  • Page 35: Schémas De Connexion

    Les articles qui ne figurent pas dans la section Présentation > Contenu de la boîte sont vendus séparément. Exemple 1 : Cet exemple montre 2 SC5000M Prime reliés directement par les ports Link. SC5000M Prime SC5000M Prime (panneau arrière) (panneau arrière) X1800 Prime mixer (panneau arrière)
  • Page 36 Exemple 2 : Cet exemple montre 4 SC5000M Prime reliés aux ports Link (1-4) d’une console de mixage Denon DJ X1800 Prime. Les 4 appareils sont branchés en réseau par le biais de la console de mixage. Remarque : Si vous utilisez une console de mixage différente avec cette configuration, branchez les ports Link des 4 SC5000M Prime à...
  • Page 37: Appareils Et Analyse Des Fichiers

    Appareils et analyse des fichiers Le SC5000M Prime peut faire la lecture des fichiers audio à partir de lecteur USB, de carte SD ou d’autres SC5000M Prime auxquels il est branché. Assurez-vous que vous utilisez uniquement les systèmes de fichiers pris en charge (pour les lecteurs USB ou des cartes SD) et les formats de fichiers (pour les fichiers audio) énumérés ci-...
  • Page 38: Caractéristiques

    Pour éjecter un appareil, veillez à ce qu’aucune de ses pistes ne soit en cours de lecture (éjecter un appareil supprime toutes ses pistes de tous les SC5000M Prime connectés, puis tapez et laissez le doigt sur son nom sur l’écran principal.
  • Page 39: Commandes De Lecture

    Sync, selon le réglage du paramètre Sync Button Action dans les Préférences. 22. Master : Appuyez sur cette touche afin de définir cette unité SC5000M Prime comme étant celle qui commande le tempo principal. Toutes les unités SC5000M Prime connectées dont la fonction de synchronisation a été activée utiliseront ce tempo. Si vous arrêtez le SC5000M Prime «...
  • Page 40: Panneau Avant

    Maintenir cette touche enfoncée pendant 10 secondes permet de réinitialiser le SC5000M Prime. Port Link : Utilisez le câble réseau fourni afin de relier ce port à un autre SC5000M Prime ou à une console de mixage Denon DJ X1800 Prime. Chaque SC5000M Prime connecté peut partager leur base de données de piste, des informations sur le minutage et le BPM, et autres données par le biais de cette connexion.
  • Page 41: Fonctionnement

    Fonctionnement Présentation de l’écran principal Mode d’affichage Performance View Mesures Tempo de la piste Lecture continue écoulées Piste État de la Compteur de synchro- Quantification battements nisation Tonalité de la piste Artiste Verrouillage Module tonal Tempo du Crates module Plage du Listes de lecture curseur /Historique...
  • Page 42: Mode D'affichage Browse View

    Important : Veuillez visiter denondj.com afin de trouver la page Web du SC5000M Prime et télécharger le logiciel Engine Prime. Utilisez les cinq icônes sur le côté gauche pour naviguer en mode d’affichage Browse View : •...
  • Page 43: Recherche Et Filtrage De Pistes

    En prestation Chargement et suppression de pistes Lors de l’affichage d’une liste de piste : Pour charger une piste sur le module, balayez la piste vers la droite. Vous pouvez également appuyer sur le bouton Select/Load. Pour ajouter une piste sur la liste des pistes en attente, balayez la piste vers la gauche. Vous pouvez également maintenir la touche Shift enfoncée et appuyez sur le bouton Select/Load.
  • Page 44: Bouclage Et Parcourir Rapidement Une Piste

    « maître ». Une fois que la fonction de synchronisation est activée sur cette unité, appuyez sur la touche Sync des autres SC5000M Prime. Le tempo de chaque unité sera immédiatement synchronisé au tempo de l’unité maître.
  • Page 45 Modes de fonctionnement des pads Les 8 pads ont différentes fonctions selon le mode Pad. Les touches Parameter / permettent d’apporter des modifications à chaque mode de pad. Pour accéder à chaque mode de pad, appuyez sur la touche correspondante : Hot Cue, Loop, Roll ou Slicer. Mode Hot Cue Cue 1 Cue 2...
  • Page 46: Fenêtre Shortcuts

    • Sync Mode : Ce paramètre détermine le degré de synchronisation appliqué lorsque vous appuyez sur la touche Sync du SC5000M Prime : Tempo : Seulement le tempo est synchronisé (le BPM correspondra à celui du module maître). Beat : Le tempo sera synchronisé et la piste sera automatiquement synchronisée à celle de la piste sur l’unité...
  • Page 47: Fenêtre Utility

    Player # : Ce paramètre indique le numéro du lecteur. Lorsque vous sélectionnez un appareil source à parcourir, ce numéro est indiqué à côté du nom de l’appareil à l’écran. • Layer B : Ce paramètre permet de déterminer si le SC5000M Prime utilise les deux niveaux du module (On) ou juste un (Off). •...
  • Page 48: Contenuti Della Confezione

    Guida per l’uso (Italiano) Introduzione Grazie per aver acquistato l’SC5000M Prime. Noi di Denon DJ sappiamo che per te la musica è una cosa seria. Ecco perché progettiamo i nostri dispositivi con un unico obiettivo in mente: rendere le tue prestazioni le migliori possibili.
  • Page 49 4. Collegare i dispositivi di uscita (giradischi, cuffie, amplificatori, altoparlanti, ecc.) alle uscite del mixer. 5. Collegare tutti i dispositivi a fonti di alimentazione. Quando si avvia una sessione, accendere (1) SC5000M Prime e altre fonti di ingresso, (2) il mixer e quindi (3) dispositivi di uscita.
  • Page 50: Schema Dei Collegamenti

    Schema dei collegamenti Elementi non elencati sotto Introduzione > Contenuti della confezione sono venduti separatamente. Esempio 1 Questo esempio mostra 2 unità SC5000M Prime con le loro porte Link collegate direttamente l’una con l’altra. SC5000M Prime SC5000M Prime (pannello posteriore)
  • Page 51 Esempio 2 Questo esempio mostra 4 unità SC5000M Prime con le loro porte Link collegate alle Porte 1–4 Link di un mixer Denon DJ X1800 Prime. Le 4 unità sono collegate a formare una rete tramite il mixer. Nota bene: se si desidera utilizzare un mixer diverso con questo impianto, collegare le porte Link di tutte e 4 le unità...
  • Page 52: Collegamento A Una Rete

    • Se si utilizzano solo due unità SC5000M Prime, collegare le loro due porte Link. • Se si utilizzano due o più unità SC5000M Prime, collegare ciascuna delle loro por Link a una porta Link (1–4) del mixer Denon DJ X1800 Prime.
  • Page 53: Pannello Superiore

    Scelta dei supporti e navigazione Display principale: questo display multi-touch a colori mostra informazioni specifiche per l’operazione corrente dell’SC5000M Prime. Toccare il display (e servirsi dei comandi hardware) per controllare l’interfaccia. Per maggiori informazioni, si veda Operazione > Panoramica Display Principale.
  • Page 54 21. Sync/Sync Off: premere questo tasto per attivare la sincronizzazione. Per sincronizzare due o più unità SC5000M Prime, premere Sync sull’unità che si desidera che controlli il BPM, che diventa “master”. Dopo aver attivato la sincronizzazione su quella unità, premere Sync sulle ulteriori unità. Il tempo di ciascuna unità...
  • Page 55: Pannello Anteriore

    Tenere premuto questo tasto per 10 secondi per resettare l’SC5000M Prime. Porta Link: servirsi del cavo di rete in dotazione per collegare questa porta a un altro SC5000M Prime o al mixer Denon DJ X1800 Prime. Ciascun SC5000M Prime presente nella rete può condividere database di tracce, tempi e informazioni sul BPM e altri dati tramite questo collegamento.
  • Page 56 Operazione Panoramica display principale Vista Performance Riproduzione Battute Track continua on/off trascorse tempo Traccia Stato di Artist Tonalità Quantizzazione sincro- (artista) on/off Contatore beat nizzazione traccia Blocco tonalità on/off Deck Tempo del Crate deck Intervallo Playlist/ fader del pitch cronologia Regolazione Prepara lista totale del pitch...
  • Page 57 Prepara lista e cercare tra le tracce utilizzando le funzioni di classificazione e filtro. Importante: recarsi su denondj.com trovare la pagina dell’SC5000M Prime per scaricare il software Engine Prime. Servirsi delle cinque icone presenti sul lato sinistro per navigare in Browse View.
  • Page 58 Esibizione Caricare e rimuovere tracce Durante la visualizzazione di qualsiasi elenco di tracce: Per caricare una traccia sul deck, farla scorrere col dito verso destra. Alternativamente, premere la manopola Select/Load. Per aggiungere una traccia a Prepara lista, farla scorrere col dito verso sinistra. Alternativamente, tenere premuto Shift e premere la manopola Select/Load.
  • Page 59 Per regolare il pitch della traccia, spostare il fader del pitch. Questo può essere fatto solo quando il deck non è sincronizzato. Importante: se Sync è attivato, spostando il fader del pitch dell’unità SC5000M Prime “master” cambierà la velocità di tutte le unità sincronizzate, mentre spostando il fader del pitch delle altre unità non succederà nulla.
  • Page 60 Modalità Pad Gli 8 pad hanno diverse funzioni in ogni modalità. I tasti Parametro / creano regolazioni specifiche per ciascuna modalità pad. Per entrare in ciascuna modalità pad, premere il tasto corrispondente: Hot Cue, Loop, Roll o Slicer. Modalità Hot Cue Cue 1 Cue 2 Cue 3...
  • Page 61 • Sync Mode: questa impostazione determina ilgrado di sincronizzazione applicato quando si preme il tasto Sync sull’SC5000M Prime: Tempo: solo il tempo sarà sincronizzato (il BPM corrisponderà a quello del deck master). Beat: il tempo sarà sincronizzato e il beat della traccia sarà automaticamente abbinato a quello della traccia presente sull’unità...
  • Page 62 • Layer B: stabilisce se l’SC5000M Prime utilizzerà entrambi gli strati del deck (On) o solo uno (Off). • Screen Brightness: questa impostazione determina la luminosità del display principale: Low, Mid, High o Max.
  • Page 63: Lieferumfang

    Benutzerhandbuch (Deutsch) Einführung Vielen Dank für den Kauf des SC5000M Prime. Wir von Denon DJ wissen, wie wichtig Ihnen die Musik ist. Darum entwerfen wir unsere Geräte stets nur mit einem einzigen Ziel vor Augen: Ihre Performance so gut wie möglich zu unterstützen.
  • Page 64 1. Stellen Sie sicher, dass alle Geräte ausgeschaltet sind, bzw. dass alle Lautstärken auf Minimum eingestellt sind. 2. Schließen Sie die Audioausgänge von SC5000M Prime (Layer A/B oder Digital Outputs A/B) an den Eingängen des Mixers an. 3. Verbinden Sie die Link-Ports von SC5000M Prime nach einem der folgenden Diagramm-Beispiele.
  • Page 65 Anschlusspläne Artikel, die unter Einführung > Lieferumfang aufgeführt sind, sind separat erhältlich. Beispiel 1 Dieses Beispiel zeigt 2 SC5000M Prime-Einheiten mit ihren Link-Ports, die direkt miteinander verbunden sind. SC5000M Prime SC5000M Prime (Rückseite) (Rückseite) X1800 Prime-Mixer (Rückseite) Steckdose Steckdose USB-Laufwerk...
  • Page 66 Beispiel 2 Dieses Beispiel zeigt 4 SC5000M Prime-Einheiten, deren Link-Ports an Link-Ports 1-4 eines Denon DJ X1800 Prime-Mixers angeschlossen sind. Alle 4 Einheiten sind über den Mixer vernetzt. Hinweis: Wenn Sie einen anderen Mixer mit diesem Setup verwenden, verbinden Sie die Link-Ports aller vier SC5000M Prime-Einheiten mit einem Ethernet-Hub statt mit dem Mixer.
  • Page 67: Konfiguration

    Ogg Vorbis FLAC WAV (44,1–192 kHz, 16–32-Bit) Obwohl SC5000M Prime Tracks abspielen kann, die noch nicht analysiert worden sind, ermöglicht die Voranalyse, dass die Funktionen effektiv arbeiten. Sie können Tracks auf eine von zwei Arten analysieren: • Laden Sie den Track auf SC5000M Prime: Wenn Sie einen Track für die Wiedergabe laden, analysiert SC5000M Prime ihn automatisch (wenn es nicht bereits analysiert wurde).
  • Page 68 Wenn Sie ein Gerät auswerfen möchten, stellen Sie sicher, dass keines seiner Tracks wiedergegeben wird (das Auswerfen eines Geräts entfernt seine Tracks von allen vernetzten SC5000M Prime-Geräten). Tippen und halten Sie dann den Finger auf seinen Namen in der Hauptanzeige, bis der Gerätename nicht mehr angezeigt wird.
  • Page 69 21. Sync/Sync Off: Drücken Sie diese Taste, um Sync zu aktivieren. Um zwei oder mehr SC5000M Prime-Einheiten zu synchronisieren, drücken Sie Sync auf dem Gerät, mit dem Sie die BPM steuern möchten, welches dann zum "Master" wird. Wenn Sync auf diesem Gerät aktiviert ist, drücken Sie Sync auf allen weiteren Einheiten.
  • Page 70 Drücken und halten Sie diese Taste für 10 Sekunden, um SC5000M Prime zurückzusetzen. Link Port: Verwenden Sie das mitgelieferte Netzkabel zum Anschließen dieses Ports an ein anderes SC5000M Prime oder an Ihren Denon DJ X1800 Prime-Mixer. Jede vernetzte SC5000M Prime-Einheit kann Track-Datenbanken, Timing und BPM-Informationen sowie andere Track-Daten über diese Verbindung teilen.
  • Page 71 Betrieb Haupt-Display-Übersicht Performance-Ansicht Kontinuierliche Abgelaufene Track- Track Wiedergabe ein/aus Takte Tempo Track- Sync- Quantisieren Status Schlüssel Beat-Zähler Künstler ein/aus Key Lock Deck ein/aus Crates Deck-Tempo Pitch Fader- Wiedergabeliste/ Bereich Verlauf Insgesamte Pitch- Liste erstellen Anpassung Wellenform Dateien Taktnummern Suche Pad- Funktionen Layer Track-...
  • Page 72 “ Sortieren und Filtern durchsuchen. Wichtig: Besuchen Sie denondj.com und die Webseite für SC5000M Prime zum Herunterladen der Engine Prime-Software. Verwenden Sie die fünf Symbole auf der linken Seite, um in der Browse-Ansicht zu navigieren: • Crates: Ihre Crates sind Sammlungen von Tracks in beliebiger Reihenfolge.
  • Page 73 Performance Laden und Entfernen von Tracks Beim Anzeigen von Track-Listen: Um einen Track auf das Deck zu laden, ziehen Sie den Track nach rechts. Alternativ drücken Sie den –Regler Select/Load (Auswählen/Laden). Um der Vorbereitungsliste einen Track hinzuzufügen, wischen Sie den Track nach links. Drücken und halten Sie alternativ Shift (Umschalten), und drücken den Regler Select/Load (Auswählen/Laden).
  • Page 74 Zum Anpassen der Tonhöhe des Tracks verschieben Sie den Pitch Fader. Sie können dies nur durchführen, wenn das Deck nicht synchronisiert ist. Wichtig: Wenn Sync aktiviert ist, ändert das Verschieben des Pitch Faders an der „Master"- SC5000M Prime- Einheit die Geschwindigkeit aller synchronisierten Einheiten, während das Verstellen des Pitch Faders an anderen Einheiten nichts bewirkt.
  • Page 75 Pad-Modi Die 8 Pads haben in jedem Pad-Modus unterschiedliche Funktionen. Die Parameter /-Tasten nehmen für jeden Pad-Modus spezifische Einstellungen vor. Um in die Pad-Modi zu gelangen, drücken Sie die entsprechende Taste: Hot Cue, Loop, Roll oder Slicer. Hot-Cue-Modus Cue 1 Cue 2 Cue 3 Cue 4...
  • Page 76 Funktionen. Wählen Sie 1/8 Beat, 1/4 Beat, 1/2 Beat, 1 Beat oder 4 Beats. • Sync-Modus: Diese Einstellung bestimmt den Grad der Synchronisierung, wenn Sie auf SC5000M Prime auf die Sync- Taste drücken: Tempo: Es wird nur das Tempo synchronisiert (BPM wird dem Masterdeck angepasst).
  • Page 77 Nummer in der Anzeige neben dem Gerät eingeblendet. • Layer B: Diese Einstellung legt fest, ob diese SC5000M Prime–Einheit beide Deck-Layers (Ein) oder nur eine (Aus) verwendet. • Screen Brightness (Helligkeit des Bildschirms): Diese Einstellung bestimmt die Helligkeit der Hauptanzeige: Low (Niedrig), Mid (Mittel), High (Hoch) oder Max.
  • Page 78: Appendix (English)

    Appendix (English) Technical Specifications 2.0 Vrms Analog Output (0 dBFS, 1 kHz) Signal-to-Noise Ratio 116 dB Distortion < 0.0015% (THD+N) 22–22,000 Hz Frequency Range 96 kHz Digital Output Sampling Rate Bit Depth 24-bit Playable Media Type SD, SDHC, SDXC card USB mass-storage devices (flash memory, external HDD enclosures)
  • Page 79: Dimensions

    Specifications are subject to change without notice. Trademarks & Licenses Denon is a trademark of D&M Holdings Inc., registered in the U.S. and other countries. Denon DJ products are produced by inMusic Brands, Inc., Cumberland, RI 02864, USA. Engine Prime incorporates élastique Pro V3 and [tONaRT] V2 by zplane.development.
  • Page 80 Manual Version 1.0...

Table des Matières