Télécharger Imprimer la page

Publicité

Les langues disponibles

Les langues disponibles

Liens rapides

Mode d'emploi
User Manual
Gebrauchsanweisung
Modo de empleo
Gebruiksaanwijzing
Istruzioni per l'uso
用户手册
用戶手冊

Publicité

loading

Sommaire des Matières pour Eurocave INSPIRATION

  • Page 1 Mode d’emploi User Manual Gebrauchsanweisung Modo de empleo Gebruiksaanwijzing Istruzioni per l’uso 用户手册 用戶手冊...
  • Page 2 EuroCave ne pourra être tenue pour responsable des erreurs contenues dans le présent manuel ni de tout dommage lié ou consécutif à la fourniture, la performance ou l’utilisation de cet appareil. Ce document contient des informations originales, protégées par copyright. Tous droits sont réservés.
  • Page 3 BIENVENUE DANS L’UNIVERS EUROCAVE SOMMAIRE Notre unique volonté est d’accompagner au mieux votre passion du vin tout au long des années… Pour cela, EuroCave déploie tout son savoir-faire pour réunir les 6 critères essentiels au service des vins : 1 - Descriptif de votre cave à vin La température...
  • Page 4 Faites vérifier la prise secteur par un électricien qualifié qui vous assurera qu’elle est bien mise à la terre et qui effectuera, si nécessaire, les travaux de mise en conformité. Rendez-vous chez votre revendeur EuroCave habituel pour changer le cordon d’alimentation s’il est endommagé. Il doit être remplacé par une pièce EuroCave garantie d’origine constructeur.
  • Page 5 4/ INSTALLATION DE VOTRE CAVE À VIN 4/ INSTALLATION DE VOTRE CAVE À VIN Précautions (suite) Sens de circulation de l’air Pour les modèles 1 température uniquement, après quelques jours • • N'obstruez jamais les deux grilles de ventilation frontales. suivants la mise en service de votre cave à...
  • Page 6 4/ INSTALLATION DE VOTRE CAVE À VIN 4/ INSTALLATION DE VOTRE CAVE À VIN 3. Montage des fileurs 5. Encastrement de la cave et fixation au meuble de cuisine scie à métaux (non fournie) pz1 (non fourni) Pour assurer votre sécurité ainsi que le bon fonctionnement de votre appareil, la fixation de la cave aux meubles de cuisine adjacents est obligatoire. pz1 (non fourni) 6.
  • Page 7 4/ INSTALLATION DE VOTRE CAVE À VIN 4/ INSTALLATION DE VOTRE CAVE À VIN II. Intégrée dans un coffre de cuisine Montage installation intégrée Précautions • Les réglages et montages doivent être effectués avant l’intégration de l’appareil dans son emplacement. •...
  • Page 8 4/ INSTALLATION DE VOTRE CAVE À VIN 4/ INSTALLATION DE VOTRE CAVE À VIN 5. Intégration de la cave et fixation au coffre de cuisine pz1 (non fourni) 4. Réglage des pieds Avec une course maximale de 36mm, conserver les pieds installés sur la cave. Si la course est supérieure à 36 mm, choisir un des deux autres lots de pieds livrés avec la cave.
  • Page 9 Il est fortement recommandé de saisir la cave par les pieds pour la sortir de son emplacement. Puis débranchez le cave du secteur. Attention, il est conseillé de faire changer le sens d'ouverture de la porte par un professionnel agréé EuroCave.
  • Page 10 4/ INSTALLATION DE VOTRE CAVE À VIN 4/ INSTALLATION DE VOTRE CAVE À VIN pz1 (non fourni) 180° 2 (non fourni) 2 (non fourni) Reconduire cette manipulation sur la seconde vitre du bandeau supérieur. 2,5 (non fourni) T25 (non fourni)
  • Page 11 4/ INSTALLATION DE VOTRE CAVE À VIN 4/ INSTALLATION DE VOTRE CAVE À VIN T25 (non fourni) 2.5 (non fourni) Lors de la réversibilité de la patte de fermeture, les vis avec rondelles doivent être placées à l'opposé de la patte de fermeture. Il est recommandé...
  • Page 12 Il est fortement recommandé de ne pas laisser vos bouteilles de vin : Enveloppées dans leur papier de soie à l’intérieur de votre cave à vin EuroCave. Le papier de soie est peu tolérant à l’humidité ambiante sur une longue durée. Le papier imbibé collera et endommagera les étiquettes de vos bouteilles de vin.
  • Page 13 5/ AMÉNAGEMENT – RANGEMENT 5/ AMÉNAGEMENT – RANGEMENT III. Ajout ou changement d’emplacement d’une clayette de stockage Faites glisser la clayette jusqu'à ce que les crochets arrière de la Logez ensuite les tétons avant de la clayette dans les emplacements clayette soient enclenchés dans les emplacements prévus dans les prévus à...
  • Page 14 6/ MISE EN SERVICE DE VOTRE CAVE À VIN 6/ MISE EN SERVICE DE VOTRE CAVE À VIN 1. Branchement et mise en fonctionnement Appuyez sur le bouton pour entrer dans le Appuyez sur le bouton pour valider. Après avoir attendu 48 heures, allumez votre cave à vin en appyant sur le réglage de la température.
  • Page 15 6/ MISE EN SERVICE DE VOTRE CAVE À VIN 6/ MISE EN SERVICE DE VOTRE CAVE À VIN Pour la température la plus basse, la consigne par défaut est de 8°C. • • Pour la température la plus basse, la consigne par défaut est de 7°C. En revanche, cette consigne peut-être réglée entre 5 et 10°C.
  • Page 16 6/ MISE EN SERVICE DE VOTRE CAVE À VIN 6/ MISE EN SERVICE DE VOTRE CAVE À VIN VI. Réglage du mode éclairage Retirez une bouteille à température : Retirez la tête pour Tournez en position fermé le libérer la bouteille bouchon de tirage au vide 3 sec.
  • Page 17 24h. toujours "LO" ou "HI" après les EuroCave. actions correctives précédentes Votre cave à vin EuroCave est un appareil au fonctionnement simple et éprouvé. La porte est ouverte Assurez vous que la porte est bien fermée. Les pictogrammes...
  • Page 18 Si le fonctionnement de votre appareil vous paraît anormal, Votre appareil est équipé d'une sécurité vous protégeant d'une S-INSP-S Multi-températures Porte Pleine technique prenez contact avec votre revendeur EuroCave ou son service défaillance de la commande du circuit froid, constituant un S-INSP-S Multi-températures Porte Full Glass après-vente.
  • Page 19 NOTES EuroCave shall not be held responsible for any errors in this manual or for any damage relating to or resulting from the supply, performance or use of this appliance. This document contains original information, protected by copyright. All rights are reserved. Translating, reproducing or photocopying all or part of this document is strictly forbidden without EuroCave’s prior,...
  • Page 20 WELCOME TO THE WORLD OF EUROCAVE CONTENTS Our greatest desire is to help you find the best solution for your wine storage needs… To ensure this, EuroCave has drawn on its considerable expertise in order to bring together the 6 criteria essential for storing wine:...
  • Page 21 Have the power supply socket checked by a qualified electrician who will confirm if it is correctly earthed or will carry out, if necessary, work to make it compliant. Visit your usual EuroCave stockist to change the power lead if it is damaged. It must be replaced by a EuroCave genuine manufacturer’s part.
  • Page 22 4/ INSTALLING YOUR WINE CABINET 4/ INSTALLING YOUR WINE CABINET Precautions (continued) • For setting the height of the feet, you have a choice of 3 feet For single-temperature models only: (see chap 4 §1). - If you notice low humidity levels (<55%) a few days after setting your wine cabinet into operation, we recommend that you use the humidity cartridge, supplied in a bag with the appliance.
  • Page 23 4/ INSTALLING YOUR WINE CABINET 4/ INSTALLING YOUR WINE CABINET 3. Assembling the filler strips 5. Built into the cabinet and fastening to the kitchen unit pz1 (not supplied) Hack saw (not supplied) For your safety and to ensure that your appliance functions correctly, fixing the cabinet to the adjacent kitchen units is compulsory. pz1 (not supplied) 6.
  • Page 24 4/ INSTALLING YOUR WINE CABINET 4/ INSTALLING YOUR WINE CABINET II. Flush-fitting in a kitchen unit carcass Flush-fitted installation assembly Precautions • Adjusting and assembling must be carried out before the appliance is flush-fitted its chosen location. • Assembling the filler strips is compulsory. They are an integral part of the cabinet body and ensure that it functions correctly. 1.
  • Page 25 4/ INSTALLING YOUR WINE CABINET 4/ INSTALLING YOUR WINE CABINET 5. Installing the cabinet and fastening to the kitchen unit carcass pz1 (not supplied) 4. Setting the feet For your safety, and to ensure your appliance functions correctly, fastening the cabinet to the kitchen unit carcass is compulsory. With a maximum height of 36 mm, retain the feet already installed on the cabinet.
  • Page 26 We strongly recommended that you grasp the cabinet by its feet to remove it from its location. Then unplug the cabinet. III. Door reversibility pz1 (not supplied) N.B., if changing the direction of opening of the door, we recommend that you have this work carried out by a EuroCave approved professional. A Door I Self-tapping screw Ø5x12*...
  • Page 27 4/ INSTALLING YOUR WINE CABINET 4/ INSTALLING YOUR WINE CABINET pz1 (not supplied) 180° 2 (not supplied) 2 (not supplied) Repeat this process on the second upper glass panel. 2.5 (not supplied) T25 (not supplied)
  • Page 28 4/ INSTALLING YOUR WINE CABINET 4/ INSTALLING YOUR WINE CABINET T25 (not supplied) 2.5 (not supplied) When reversing the door catch, the screws with washers must be placed on the opposite side of the door catch. We recommended that you carry out the following procedure with 2 people. Carry out the procedure in an environment which will not cause damage to the appliance.
  • Page 29 - Stored in cardboard packaging or a wooden case in your EuroCave wine cabinet, in order to encourage maximum air flow around the bottles and prevent the packaging from deteriorating, which could eventually contaminate your wine bottles.
  • Page 30 5/ LAYOUT – STORAGE 5/ LAYOUT – STORAGE III. Adding or changing the position of a storage shelf Slide the shelf until the rear shelf fasteners are fully locked into the Then slot the front lugs of the shelf in the spaces provided in the spaces provided in the runners.
  • Page 31 6/ USING YOUR WINE CABINET FOR THE FIRST TIME 6/ USING YOUR WINE CABINET FOR THE FIRST TIME 1. Connecting and starting up - Fuse of 10A for one unit, 15A for two and 25A for three; - Use of multi-socket plugs is not recommended if it does not respect above electrical data as well;...
  • Page 32 6/ USING YOUR WINE CABINET FOR THE FIRST TIME 6/ USING YOUR WINE CABINET FOR THE FIRST TIME • For the lowest temperature, the default setting is 8 °C / 46,4°F. • For the lowest temperature, the default setting is 7°C. However you can set the temperature between 5 - 10 °C / 41-50°F.
  • Page 33 6/ USING YOUR WINE CABINET FOR THE FIRST TIME 6/ USING YOUR WINE CABINET FOR THE FIRST TIME VI. Setting the lighting mode To remove a bottle at serving temperature Take off the head to Turn the oxygen extraction bung to release the bottle.
  • Page 34 10%, and taking care to rinse the • desired value Contact your EuroCave stockist if the problem persists in spite of you having Clean inside the compartments with water and a gentle seal well with clean water.
  • Page 35 Stainless steel glass door and technical glass door If your appliance does not seem to be operating correctly, from any possible malfunction of the cold circuit control, contact your EuroCave stockist or his customer service. D-INSP-M 2-temperature Full Glass door constituting a frost protection device (1-temperature model only).
  • Page 36 EuroCave kan niet aansprakelijk worden gesteld voor fouten in deze handleiding of voor schade in verband NOTES met of als gevolg van de levering, prestatie of gebruik van dit apparaat. Dit document bevat originele, onder auteursrecht beschermde informatie. Alle rechten voorbehouden.
  • Page 37 WELKOM IN DE WERELD VAN EUROCAVE INHOUDSOPGAVE Al jarenlang stellen wij ons ten doel u zo goed mogelijk te begeleiden bij uw passie voor wijn. Hiervoor zet EuroCave haar knowhow in en combineert de 6 essentiële criteria voor het serveren van wijn:...
  • Page 38 In geval van verhuizing naar het buitenland dient u na te gaan of de kenmerken van de wijnkast voldoen aan die in het betreffende land (spanning/frequentie). Ga met een beschadigd elektriciteitssnoer naar uw dealer van EuroCave. Het moet worden vervangen door een elektriciteitssnoer met fabrieksgarantie.
  • Page 39 4/ INSTALLATIE VAN UW WIJNKAST 4/ INSTALLATIE VAN UW WIJNKAST Voorzorgsmaatregelen (vervolg) • Bij 3 voeten kan de hoogte worden ingesteld (zie hoofdstuk 4 §1). ls u bij de modellen met 1 temperatuur Installatie • - na enkele dagen na ingebruikname van uw wijnkast een lage •...
  • Page 40 4/ INSTALLATIE VAN UW WIJNKAST 4/ INSTALLATIE VAN UW WIJNKAST 5. Inbouw van de wijnkast en bevestiging aan het keukenmeubel 3. Montage van de verbindingslijsten Om uw veiligheid en de goede werking van uw apparaat te garanderen, moet de wijnkast aan de aangrenzende keukenmeubels worden bevestigd. metaalzaag (niet meegeleverd) pz1 (niet meegeleverd) pz1 (niet meegeleverd)
  • Page 41 4/ INSTALLATIE VAN UW WIJNKAST 4/ INSTALLATIE VAN UW WIJNKAST Montage geïntegreerde installatie II. Geïntegreerd in een keukenblok Voorzorgsmaatregelen • De instellingen en montages moeten worden uitgevoerd voordat het apparaat wordt geïntegreerd. • De montage van de verbindingslijsten is verplicht. Ze maken integraal deel uit van de behuizing van de wijnkast en garanderen het juiste gebruik ervan.
  • Page 42 4/ INSTALLATIE VAN UW WIJNKAST 4/ INSTALLATIE VAN UW WIJNKAST 5. Integratie van de wijnkast en bevestiging aan het keukenmeubel pz1 (niet meegeleverd) 4. Afstelling van de voeten Om uw veiligheid en de goede werking van uw apparaat te garanderen, moet de wijnkast aan het keukenblok worden bevestigd. De op de wijnkast gemonteerde voeten mogen maximaal 36 mm speling hebben.
  • Page 43 Het wordt sterk aanbevolen om de wijnkast bij de voeten vast te pakken om hem te verplaatsen. Haal vervolgens de stekker uit het stopcontact. pz1 (niet meegeleverd) III. Links- of rechtsom draaiende deur Let op: geadviseerd wordt om de draairichting van de deur indien nodig te laten wijzigen door een erkende installateur van EuroCave. A Deur I Zelfvormende schroefØ5x12*...
  • Page 44 4/ INSTALLATIE VAN UW WIJNKAST 4/ INSTALLATIE VAN UW WIJNKAST pz1 (niet meegeleverd) 180° 2 (niet meegeleverd) 2 (niet meegeleverd) Voer deze handeling opnieuw uit met de tweede glaslijst aan de bovenkant. T25 (niet meegeleverd) 2,5 (niet meegeleverd)
  • Page 45 4/ INSTALLATIE VAN UW WIJNKAST 4/ INSTALLATIE VAN UW WIJNKAST T25 (niet meegeleverd) 2,5 (niet meegeleverd) Bij het omkeren van de vergrendelhaak dienen de schroeven met sluitringen aan de andere kant van de vergrendelhaak worden geplaatst. Aanbevolen wordt om de volgende handeling met 2 personen uit te voeren. Zorg voor voldoende vrije ruimte. Het gebruik van een beschermdeken wordt aanbevolen.
  • Page 46 Het doordrenkte papier gaat plakken en zal de etiketten van uw wijnflessen beschadigen. - Niet in een kartonnen doos of houten kist in uw wijnkast van EuroCave te plaatsen teneinde een optimale ventilatie rond de flessen te bevorderen en bederf van doos of kist en daardoor ook aantasting van uw wijnflessen te vermijden.
  • Page 47 5/ INRICHTING – INDELING 5/ INRICHTING – INDELING III. Toevoeging of wijziging locatie opslagplateau Schuif het plateau vervolgens totdat de haakjes aan de achterkant Plaats vervolgens de pinnen aan de voorkant van het schuifplateau in van het schuifplateau in de hiervoor bestemde ruimte van de ge- de hiervoor bestemde ruimte aan de voorkant van de geleiders.
  • Page 48 6/ INGEBRUIKNAME VAN UW WIJNKAST 6/ INGEBRUIKNAME VAN UW WIJNKAST 1. Aansluiting en inwerkingstelling Na 48 uur te hebben gewacht, kunt u uw wijnkast inschakelen door de knop 5 seconden ingedrukt te houden. Druk op de knop om het menu voor de Druk op de knop om te bevestigen.
  • Page 49 6/ INGEBRUIKNAME VAN UW WIJNKAST 6/ INGEBRUIKNAME VAN UW WIJNKAST • De laagste temperatuur is standaard ingesteld op 8°C. • De laagste temperatuur is standaard ingesteld op 7°C. Deze temperatuur kan echter worden ingesteld tussen 5 en 10°C. Deze temperatuur kan echter worden ingesteld tussen 6 en 11°C. •...
  • Page 50 6/ INGEBRUIKNAME VAN UW WIJNKAST 6/ INGEBRUIKNAME VAN UW WIJNKAST VI. Instelling van de verlichting Een fles op temperatuur uitnemen: Verwijder Draai de vacuümtrekker in de vacuümtrekker om gesloten stand. de fles vrij te maken. Druk ongeveer 3 sec. op de toets 3 sec.
  • Page 51 De deur is langer dan Zorg ervoor dat de deur goed gesloten is. Uw wijnkast van EuroCave werkt volgens een eenvoudig en beproefd concept. De pictogrammen 5 minuten geopend knipperen Onderhoudswerkzaamheden ongeveer 1 maal per uitsluitend een neutrale zeepoplossing te gebruiken.
  • Page 52 Uw apparaat is uitgerust met een beveiliging die u beschermt tegen een gegevens met betrekking tot het energieverbruik van onze apparaten op basis van EPREL, door middel van neem dan contact op met uw dealer van EuroCave. het scannen van de code op het energie-etiket van uw apparaat.
  • Page 53 10 - 1 TEMP. V-INSP-S / 1 單溫型 V-INSP-S 10 - MULTI-TEMP. S-INSP-S / 多溫型號 S-INSP-S 30 bouteilles - 30 bottles - 30 Flaschen 29 bouteilles - 29 bottles - 29 Flaschen 28 bouteilles - 28 bottles - 28 Flaschen 30 botellas - 30 flessen - 30 bottiglie - 30瓶...
  • Page 54 10 - 1 TEMP. V-INSP-M / 1 單溫型 V-INSP-M 10 - 2 TEMP. D-INSP-M / 2 溫型 D-INSP-M 51 bouteilles - 51 bottles - 51 Flaschen 58 bouteilles - 58 bottles - 58 Flaschen 58 botellas - 58 flessen - 58 bottiglie - 58瓶 - 58瓶 * 51 botellas - 51 flessen - 51 bottiglie - 51瓶...
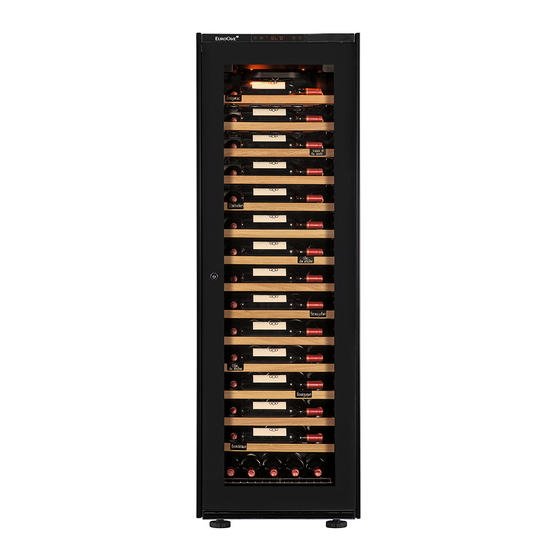
  • Page 55 10 - 1 TEMP. V-INSP-L / 1 單溫型 V-INSP-L 89 bouteilles - 89 bottles - 89 Flaschen 89 botellas - 89 flessen - 89 bottiglie - 89瓶 - 89瓶 * Access - Mixed - Gemischte - Regalsysteme Mixta Gemengd - Misto - 存取层架组合 - 混合式 89 bouteilles - 89 bottles - 89 Flaschen 88 bouteilles - 88 bottles - 88 Flaschen 89 botellas - 89 flessen - 89 bottiglie - 89瓶...
  • Page 56 作 为 红 酒 储 藏 、 陈 列 和 服 务 的 佼 佼 Bereich der Lagerung, der Präsentation 者 , 在 过 去 的 40年 , EuroCave一 直 und dem Ausschank von Weinen schlägt 致 力 于 为 您 量 身 定 制 适 合 您 的 方...

Ce manuel est également adapté pour:

V-insp-lV-insp-mV-insp-sS-insp-sD-insp-m