Table des Matières
Publicité
Les langues disponibles
Les langues disponibles
Liens rapides
Publicité
Table des Matières
Dépannage

Manuels Connexes pour NEC MultiSync FE772M


Sommaire des Matières pour NEC MultiSync FE772M
- Page 1 User’s Manual Manuel d’utilisation MultiSync™ FE772M To learn about other special offers, register online at www.necdisplay.com. Pour en savoir plus long sur d’autres offres spéciales, inscrivez-vous en ligne à www.necdisplay.com.
-
Page 2: Table Des Matières
Index Warning........................1 Contents........................2 Quick.Start.......................3 Controls........................6 Audio.Functions..................... 13 Recommended.Use....................16 Specifications......................18 Features........................19 Troubleshooting....................20 References......................21 Limited.Warranty....................22 Avertissement....................... 24 Contenu........................25 Mise.en.marche.rapide..................26 Commandes......................29 Utilisation.des.fonctions.audio................36 Usage.recommandé....................39 Fiche.techniques....................41 Fonctions. -
Page 3: Fcc Information
CAN/CSA C22.2 No.950. FCC Information 1. Use the attached specified cables with the MultiSync FE772M color monitor so as not to interfere with radio and television reception. (1) Please use the supplied power cable or equivalent to ensure FCC compliance. - Page 4 Contents Your new NEC MultiSync ™ monitor box* should contain the following: • MultiSync Monitor with tilt/swivel base • Power Cord • Captive Signal Cable • User’s Manual Captive Signal Cable MultiSync FE772M Power Cord To learn about other special offers, register online at www.necdisplay.com.
-
Page 5: Quick.start
Quick Start Connecting the Tilt/Swivel stand 1. With the monitor unplugged from your system and the wall outlet, carefully turn the monitor down on a firm table 2. Align the hooks on the tilt/swivel stand with the matching slots in the base of the monitor. - Page 6 D-SUB end of the video signal cable to the Macintosh cable adapter on the computer (Figure B.1). Tighten all screws. NOTE: To obtain the Macintosh cable adapter, call NEC Display Solutions of America, Inc. at (800) 632-4662. 4. Connect one end of the power cord to the MultiSync monitor and the other end to the power outlet (Figure C.1).
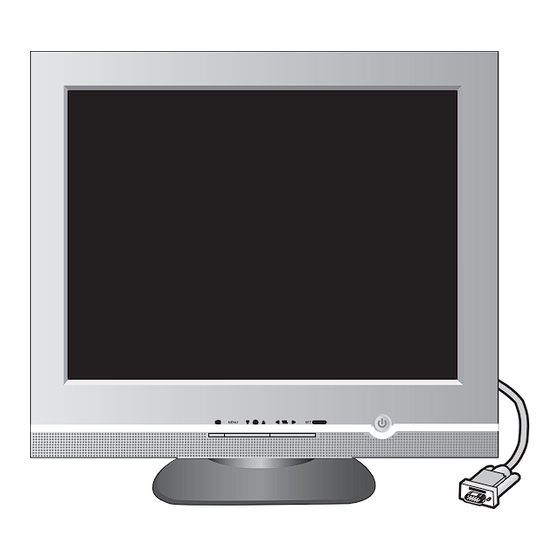
- Page 7 Quick Start - continued Figure A.1 15-pin mini D-SUB Captive Signal Cable Figure B.1 Mac Adapter (Not Included) 15-pin mini D-SUB Captive Signal Cable Figure C.1 Power Outlet Power Cord...
-
Page 8: Controls
Controls OSD (On Screen Display) control buttons on the front of the monitor function as follows: Control Function Power Button Use this button to turn the monitor on or off. This Indicator lights up blue when the monitor Power (DPMS) operates normally. - Page 9 Controls - continued Control Direct Access Function Button Bring up Contrast adjustment Button Bring up Brightness adjustment The Contrast and Brightness functions are also available in the On Screen Display (OSD) menu. CONTROLS LOCKED/UNLOCKED This function allows you to lock the current control settings, so that they cannot be inadvertently CONTROLS LOCKED changed.
- Page 10 Controls - continued Screen Adjustment Making adjustments to the image size, position and operating parameters of the monitor is quick and easy with the On Screen Display Control system. A short example is quick and easy given below to familiarize you with the use of the controls.
- Page 11 Controls - continued The following table indicates all the On Screen Display control, adjustment, and setting menus. Main menu Sub menu Reference To adjust the brightness and Brightness contrast of the screen Contrast BRIGHTNESS/ CONTRAST V Position To adjust the position of the screen H Position POSITION...
- Page 12 Controls - continued Brightness To adjust the brightness of the screen. Contrast To adjust the contrast of the screen. Vertical Position To move image up and down. Horizontal Position To move image left and right. Vertical Size To adjust image height. Horizontal Size To adjust image width.
- Page 13 Controls - continued PRESET 6500K/ 9300K Select the screen color. • 6500K: Slightly reddish white. • 9300K: Slightly bluish white. TEMP Select the screen temperature which you prefer among reddish or bluish or any color in between. Set your own color levels. GREEN BLUE VIDEO LEVEL...
- Page 14 Controls - continued CONVER- This is to adjust the alignment of red and GENCE* blue fields. PURITY* Use to adjust the purity on the screen if the color appears uneven.
-
Page 15: Audio.functions
Audio Functions Side Jacks Automatically mutes the speaker volume Headphone Jack when the headphones are plugged in. Microphone Jack Can be used instead of the built-in microphone. Rear Panel Jacks Connects to the *LINE OUT jack of the PC Audio In -Sky Blue sound card. - Page 16 Audio Functions Control Function Audio Mute Use to mute audio source. Button Brings up to the audio menu. Use these buttons to choose or adjust items in Button the on screen display. Audio Selection and Adjustment You were introduced to the procedure of selection and adjusting an item using the OSD system.
- Page 17 Audio Functions VOLUME Main menu Description Raises or lowers audio level. VOLUME Raises or lowers treble level. TREBLE Raises or lowers bass level. BASS Changes levels of left/right speaker. BALANCE Enables or disables microphone usage. MICROPHONE : Adjustable...
-
Page 18: Recommended.use
Recommended Use Safety Precautions and Maintenance FOR OPTIMUM PERFORMANCE, PLEASE NOTE THE FOLLOWING WHEN SETTING UP AND USING THE MULTISYNC ™ COLOR MONITOR: • DO NOT OPEN THE MONITOR. There are no user serviceable parts inside and opening or removing covers may expose you to dangerous shock hazards or other risks. Refer all servicing to qualified service personnel. - Page 19 Recommended Use - continued CORRECT PLACEMENT AND ADJUSTMENT OF THE MONITOR CAN REDUCE EYE, SHOULDER AND NECK FATIGUE. CHECK THE FOLLOWING WHEN YOU POSITION THE MONITOR: • Adjust the monitor height so that the top of the screen is at or slightly below eye level. Your eyes should look slightly downward when viewing the middle of the screen.
-
Page 20: Specifications
Specifications Picture Tube 17 inches (16.0 inches viewable) 90 degree deflection 0.25mm dot pitch AGARAS (Anti-Glare Anti-Reflective Anti-Static) coating Sync Input Horizontal Freq. 30 - 71kHz (Automatic) Vertical Freq. 50 - 160Hz (Automatic) Input Form Separate TTL, Positive/Negative Signal Input 15 pin D-Sub Connector Video Input Input Form... -
Page 21: Features
Features ClearFlat™ Shadow Mask CRT: Delivers an outstanding viewing experience with a virtually flat image, eliminating distortion and reducing glare so that what you see on-screen is as realistic and lifelike as what you see on your printed output. The patented ClearFlat CRT also offers a high contrast screen with a fine grille pitch, delivering crisp, clean text and graphics. -
Page 22: Troubleshooting
Troubleshooting No picture • Display card should be completely seated in its slot. • Power Button and computer power switch should be in the ON position. • Signal cable should be completely connected to display card/computer and monitor. • Check connector for bent or pushed-in pins. Image is scrolling or unstable •... -
Page 23: References
References NEC Monitor Customer Service & Support Customer Service and Technical Support: (800) 632-4662 Fax: (800) 695-3044 Parts and Accessories/Macintosh Cable Adapter: (800) 632-4662 Warranty Information: www.necdisplay.com Online Technical Support www.necdisplay.com Sales and Product Information Sales Information Line: (888) 632-6487... -
Page 24: Limited.warranty
Product distribution in the U.S.A. or Canada by NEC DISPLAY SOLUTIONS No warranty service is provided outside of the U.S.A. or Canada. Proof of Purchase will be required by NEC DISPLAY SOLUTIONS to substantiate date of purchase. Such proof of purchase must be an original bill of sale or receipt containing name and address of seller, purchaser, and the serial number of the product. -
Page 25: Declaration Of The Manufacturer
This includes monitors and electrical accessories, such as signal cables or power cords. When you need to dispose of your NEC display products, please follow the guidance of your local authority, or ask the shop where you purchased the product, or if applicable, follow any agreements made between yourself and NEC. -
Page 26: Déclaration De Conformité - Département Des Communications Du Canada
AVERTISSEMENT AFIN D’ÉVITER TOUT RISQUE D’INCENDIE OU D’ÉLECTROCUTION, NE PAS EXPOSER CET APPAREIL À LA PLUIE OU À L’HUMIDITÉ. NE PAS UTILISER LA FICHE D’ALIMENTATION POLARISÉE AVEC UNE PRISE DE CORDON DE RALLONGE OU AUTRE PRISE SAUF SI LES BROCHES PEUVENT ÊTRE ENTIÈREMENT INTRODUITES. NE PAS OUVRIR LE BOÎTIER, LEQUEL CONTIENT DES COMPOSANTS À... -
Page 27: Contenu
Contenu La boîte de votre nouveau moniteur NEC MultiSync MC contient : • Moniteur MultiSync avec socle inclinable/rotatif • Cordon d’alimentation • Câble d’interface captif • Manuel de l’utilisateur Câble d’interface captif MultiSync FE772M Cordon d’alimentation To learn about other special offers, register online at www.necdisplay.com. -
Page 28: Mise.en.marche.rapide
Mise en marche rapide Raccorder Socle Inclinable/Rotatif 1. Le moniteur étant débranché du système et de la prise de courant, renverser soigneusement le moniteur sur une table solide. 2. Alignez les crochets du socle inclinable et pivotant par rapport aux logements correspondants dans la base du moniteur. - Page 29 15 broches du câble d’interface à l’adaptateur de câble Macintosh sur l’ordinateur (Figure B.1). Serrer toutes les vis. REMARQUE : Pour obtenir un adaptateur de câble Macintosh, appeler NEC Display Solutions of America, Inc. au (800) 632-4662. 4. Connecter une extrémité du cordon d’alimentation au moniteur et l’autre extrémité à...
- Page 30 Mise en marche rapide - suite Figure A.1 Mini-fiche D-SUB à 15 broches Câble d’interface captif Figure B.1 Adaptateur Mac (non fourni) Mini-fiche D-SUB à 15 broches Câble d’interface captif Figure C.1 Prise de courant Cordon d’alimentation...
-
Page 31: Commandes
Commandes Les boutons de réglage OSD situés sur l’avant du moniteur fournissent les fonctions suivantes : Control Function Bouton Ce bouton permet d’allumer et éteindre le moniteur. d’alimentation Cette diode luminescente est verte lorsque le moniteur Témoin est en mode de fonctionnement normal. S’il passe en d’alimentation mode DPMS (économie d’énergie), la diode prend la (DPMS) -
Page 32: Verouillage Controllé/De-Verouillage Controllé
Commandes - suite Commande Fonction à accès direct Boutons Accès au réglage du contraste Boutons Accès au réglage de la luminosité Les fonctions de contraste et de luminosité sont également accessibles par le menu sur écran (OSD). VEROUILLAGE CONTROLLÉ/DE-VEROUILLAGE CONTROLLÉ Cette function permet de protéger les réglages en VEROUILLAGE CONTROLLÉ... -
Page 33: Réglage De L'affichage
Commandes - suite Réglage de l’affichage Le réglage de la taille et de la position de l’image ainsi que des paramètres de fonctionnement du moniteur se fait facilement et rapidement à l’aide du système de commande OSD (menu sur écran). Le bref exemple ci-dessous vous permettra de vous familiariser avec ces commandes. - Page 34 Commandes - suite Le tableau ci-dessous détaille les menus de contrôle, de réglage et de paramétrage de l’OSD. Menu principal Sous-menu Référence Réglage de la luminosité et du Luminosité contraste de l’image Contraste LUMINOSITÉ/ CONTRASTE Réglage de la position de l’écran Position V Position H POSITION...
-
Page 35: Commandes - Suite
Commandes - suite Luminosité Réglage de la luminosité de l’écran. Contraste Réglage du contraste de l’écran. Position V Positionnement de l’image en hauteur. Position H Positionnement de l’image en largeur. Taille V Réglage de la hauteur de l’image. Taille H Réglage de la largeur de l’image. - Page 36 Commandes - suite PRÉDÉF 6500K/ 9300K Sélectionez la couleur voulue. • 6500K : blanc tirant sur le rouge. • 9300K : blanc tirant sur le bleu. TEMP Sélectionnez la température d’écran que vous préférez parmi les couleurs allant du rouge au bleu. ROUGE Paramétrez les niveaux de couleur vou- VERT...
- Page 37 Commandes - suite CONVER- Permet de régler l'alignement des faisceaux rouges et bleus. GENCE Réglage de la pureté de l'image en PURETÉ cas d'inégalité de couleur.
-
Page 38: Utilisation.des.fonctions.audio
Utilisation des fonctions audio Prises latérales Automatically mutes the speaker volume Prise pour casque when the headphones are plugged in. Prise pour microphone Vous pouvez brancher ici un microphone externe à la place du microphone intégré. Prises du panneau arrière Se connecte sur la prise pour microphone Mic Out (Sortie de la carte son du PC. - Page 39 Utilisation des fonctions audio - suite Commande Fonction Marche/arrêt audio Permet de désactiver la source audio. Boutons Fait apparaître le menu audio. Ces boutons permettent de sélectionner et de Boutons paramétrer les éléments du menu affiché. Sélection et paramétrage de l'audio Maintenant que vous connaissez la procédure de sélection et de réglage des éléments à l'aide du système OSD, voici la liste de tous les icônes (ainsi que leur nom et description) présents dans le menu OSD.
- Page 40 Utilisation des fonctions audio - suite VOLUME Menu principal Description Augmente ou réduit le volume sonore. VOLUME Augmente ou réduit le volume des fréquences aiguës. TREBLE Augmente ou réduit le volume des basses fréquences. BASS Modifie les niveaux sonores des haut- parleurs droit et gauche.
-
Page 41: Consignes De Sécurité Et De Maintenance
Usage recommandé Consignes de sécurité et de maintenance POUR UN FONCTIONNEMENT OPTIMAL, PRIÈRE DE NOTER CE QUI SUIT POUR LE RÉGLAGE ET L’UTILISATION DU MONITEUR COULEUR MultiSync MC : • NE PAS OUVRIR LE MONITEUR. Aucune pièce intérieure ne nécessite l’intervention de l’utilisateur, et l’ouverture ou la dépose des couvercles peut entraîner des risques de décharges électriques dangereuses ou d’autres risques. - Page 42 Usage recommandé - suite LA MODIFICATION DE LA POSITION ET DU RÉGLAGE DU MONITEUR PEUT RÉDUIRE LA FATIGUE DES YEUX, DES ÉPAULES ET DE LA NUQUE. OBSERVER LES DIRECTIVES CI-APRÈS LORS DU POSITIONNEMENT DU MONITEUR : • Régler la hauteur du moniteur de sorte que le dessus de l’écran soit au niveau ou légèrement en-dessous du niveau des yeux.
-
Page 43: Alimentation
Fiche techniques Tube cathodique 17 pouces (pour une zone visualisable de 16 pouces) déflection à 90 ° pas de masque de 0,25 mm revêtement AGARAS (anti-éblouissement, anti-reflet et anti-statique) Entrée sync Fréquence horiz. 30 - 71kHz (Automatique) Fréquence vertic. 50 - 160Hz (Automatique) Forme TTL séparé, Positif/Negatif Entrée signal... -
Page 44: Fonctions
Fonctions Écran cathodique à masque perforé ClearFlat™ Vous offre une vision exceptionnelle avec une image virtuellement plate, en éliminant la distorsion et en réduisant les reflets, ainsi ce que vous voyez à l’écran est aussi réaliste et proche de la réalité que ce que vous pouvez voir sur une copie imprimée. -
Page 45: Dépannage
Dépannage Pas d’image • La carte vidéo doit être complètement introduite dans sa fente. • La touche d’alimentation et le commutateur d’alimentation de l’ordinateur doivent être en position ON (Marche). • Le câble de signal doit être bien connecté à la carte vidéo /l’ordinateur. •... -
Page 46: Références
Références Service à la clientèle et assistance technique du moniteur NEC Service à la clientèle et assistance technique: (800) 632-4662 Télécopieur: (800) 695-3044 Pièces et accessoires/adaptateur de câble Macintosh: (800) 632-4662 Information sur la garantie: www.necdisplay.com Assistance technique en ligne www.necdisplay.com... -
Page 47: Garantie.limitée
Pour obtenir un service au titre de la garantie, vous devez expédier le produit en port prépayé ou le déposer chez le revendeur agréé qui vous l’a vendu ou dans un autre centre autorisé par NEC DISPLAY SOLUTIONS, soit dans l’emballage d’origine, soit dans un emballage similaire procurant un niveau équivalent de protection. -
Page 48: Déclaration Du Fabricant
électriques, tels que les cˆsbles-signaux et les cordons d’alimentation. Lorsque vous a vendu le produit en question. Vous pouvez oussi respecter tout accord passé entre NEC et vous-même, le cas éché- ant. Ce symbole présent sur les produits électriques et électroniques ne s’pplique qu”aux membres actuels de l’Union Européenne. -
Page 49: Déclaration De Conformité
été directement délivrés à d’autres. Les produits de NEC Display Solutions of America, Inc. dont il est question dans ce document sont garantis conformé- ment aux termes de la déclaration de garantie limitée accompagnant chaque produit. Cependant, les performances réelles de chaque produit dépendent de facteurs tels que la configuration du système, les données du client et la... -
Page 50: Declaration Of Conformity
The information disclosed in this document, including all designs and related materials, is the valuable property of NEC Display Solutions of America, Inc. and/or its licensors, as appropriate, reserve all patent, copyright and other proprietary rights to this document, including all design, manufacturing, reproduction, use and sales rights thereto, except to the extent said rights are expressly granted to others.