Publicité

Les langues disponibles
  • FR

Les langues disponibles

Liens rapides

FR
MANUEL D'UTILISATION P2
ES
INSTRUCCIONES DE USO P10
EN
USAR MANUAL P20
DE
BENUTZERHANDBUCH
NL
GEBRUIKSAANWIJZING P38
Ref : SW40
Mod : TX-1601MF
P29
Ventilateur – Humidificateur

Publicité

Table des Matières
loading

Sommaire des Matières pour Domair TX-1601MF

  • Page 1 MANUEL D’UTILISATION P2 INSTRUCCIONES DE USO P10 USAR MANUAL P20 BENUTZERHANDBUCH GEBRUIKSAANWIJZING P38 Ventilateur – Humidificateur Ref : SW40 Mod : TX-1601MF...
  • Page 2: Table Des Matières

    Lire attentivement toutes les instructions avant d’utiliser l’appareil Sommaire Instructions de sécurité _ _ _ _ _ _ _ _ _ _ _ _ _ _ _ _ _ _ 2-3 Télécommande _ _ _ _ _ _ _ _ _ _ _ _ _ _ _ _ _ _ _ _ _ _ _ _ _ _ 7 Description _ _ _ _ _ _ _ _ _ _ _ _ _ _ _ _ _ _ _ _ _ _ _ _ _ _ _3 Inclinaison _ _ _ _ _ _ _ _ _ _ _ _ _ _ _ _ _ _ _ _ _ _ _ _ _ _ _ _ 7 Assemblage _ _ _ _ _ _ _ _ _ _ _ _ _ _ _ _ _ _ _ _ _ _ _ _ _ 3-4...
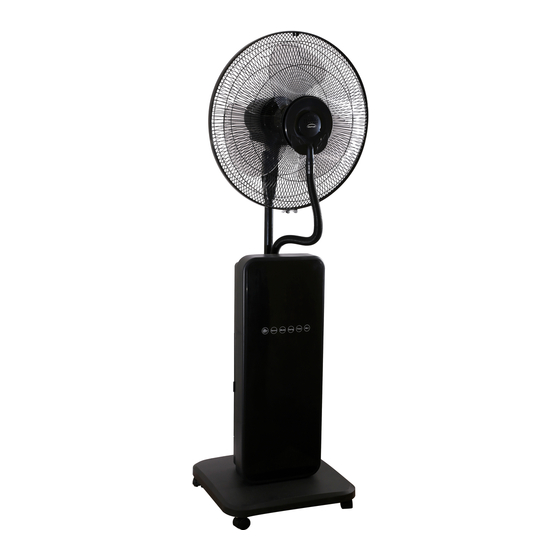
  • Page 3: Pour Réduire Le Risque De Feu Ou De Choc

    • • Seul le personnel autorisé effectuera le travail Ne pas utiliser l’appareil à proximité immédiate des baignoires, lavabos, douches, piscines, de réparation. • Si le câble d’alimentation est endommagé, etc. L’Utilisation de cet appareil en volume 0 ,1 ou 2 d’une salle de bains est strictement il doit être changé...
  • Page 4: Remplissage Du Réservoir

    Remplissage du réservoir Débranchez l’appareil de l’alimentation électrique avant toute manipulation du réservoir. Ouvrez le Soulevez le Retirez le réceptacle du réservoir. réservoir. réservoir. Revissez le Retournez le Dévissez le connecteur et réservoir. connecteur situé replacez le réservoir sur le fond du sur l’humidificateur.
  • Page 5: Fonctionnement

    Fonctionnement • Positionnez l'appareil sur une surface ferme, plane et horizontale. • Pour éviter toute surcharge du circuit électrique utilisé, évitez de raccorder d'autres appareils sur la même prise de courant. L’appareil peut être commandé soit avec sa télécommande, soit directement à partir de son panneau de commande. 1.
  • Page 6 3. SWING = touche OSCILLATION : Faire un appui pour faire osciller le ventilateur horizontalement. Pour arrêter l'oscillation ré appuyer sur la touche. normal / NORMAL, naturel / NATURAL, sommeil / SLEEPING 4. MODE = touche de sélection du MODE : Normal : fonctionne à...
  • Page 7: Télécommande

    6. MIST = touche BRUME : commande la mise en route ou l'arrêt de la diffusion de brume. NOTA : lorsque le réservoir d’eau est vide, le voyant correspondant (goutte d’eau barrée) s’éclaire en rouge sur le panneau de contrôle. La télécommande La télécommande est fournie sans pile.
  • Page 8 Pour le stockage en cas de non-utilisation prolongée, s’assurer que la pièce de stockage est propre et sans humidité. Protégez l'appareil des poussières pour lui assurer une meilleure longévité. Retirez les piles de la télécommande. Données techniques TX-1601MF symbole valeur unité...
  • Page 9: Bon De Garantie

    BON DE GARANTIE CACHET DU REVENDEUR DATE : NOM DU CLIENT : GARANTIE Cet appareil est garanti 2 ans, pièces et main d’œuvre. La garantie ne couvre pas les dégâts occasionnés par : mauvaises utilisations, détérioration par choc, chute ou phénomène atmosphérique. En cas d’anomalie fonctionnement, l’ensemble...
  • Page 10 Instrucciones de uso INSTRUCCIONES DE USO Ventilador – Brumizador Ref : SW40 Mod : TX-1601MF Rev 0_02 09 19 Fabriqué en Chine Page 10...
  • Page 11: Important

    Lea con atención todas las instrucciones antes de utilizar el aparato Resumen Importante _ _ _ _ _ _ _ _ _ _ _ _ _ _ _ _ _ _ _ _ _ _ 11-12 Mando a distancia _ _ _ _ _ _ _ _ _ _ _ _ _ _ _ _ _ _ _ _ 17 Descripcion _ _ _ _ _ _ _ _ _ _ _ _ _ _ _ _ _ _ _ _ _ _ _ _ 12 Inclinacion _ _ _ _ _ _ _ _ _ _ _ _ _ _ _ _ _ _ _ _ _ _ _ _ 17 Instalacion _ _ _ _ _ _ _ _ _ _ _ _ _ _ _ _ _ _ _ _ _ _ _ 12-13...
  • Page 12: Importante

    El aparato está únicamente reservado a un uso mantenimiento personas doméstico. cualificación similar con el fin de evitar peligros. Si el cable de alimentación está dañado, lo debe sustituir el fabricante, su servicio de Descripción A – carcasa del motor + unidad de control B –...
  • Page 13: Relleno Del Deposito

    Relleno del deposito Desenchufe la unidad de la fuente de alimentación antes de manipular el tanque. Abra el Levante el Retire el depósito. compartimento depósito. del depósito. Vuelva a enroscar el Gire el depósito. Desenrosque el conector y vuelva a conector situado en colocar el depósito sobre el extremo del...
  • Page 14: Funcionamiento

    Funcionamiento • Coloque el aparto sobre una superficie firme, plana y horizontal. • Con el fin de evitar sobrecargas en el circuito eléctrico utilizado, evite conectar otros aparatos a la misma toma de corriente. E aparato se puede controlar desde el mando a distancia o directamente en el panel de control. 1.
  • Page 15 3. SWING = botón OSCILACIÓN: este botón hace oscilar en ventilador horizontalmente. Para detener la oscilación, vuelva a pulsar el botón. Rev 0_02 09 19 Fabriqué en Chine Page 15...
  • Page 16 normal/NORMAL, natural/NATURAL, sueño/SLEEPING MODE = botón de selección del MODO: Normal: funciona a la velocidad seleccionada Natural: alterna velocidades de manera aleatoria El ciclo varía en función de la velocidad inicial seleccionada. Sueño: misma alternancia aleatoria de velocidades que el modo NATURAL, pero con reducción progresiva de la velocidad en tramos de 30 minutos para cada velocidad, hasta que alcanza un funcionamiento continuo en velocidad baja.
  • Page 17: Mando A Distancia

    Mando a distancia El mando a distancia se suministra sin pilas. En el caso de que no lo vaya a utilizar durante un periodo Este mando a distancia utiliza dos pilas de tipo LR03 AAA prolongado, retire la pila del mando a distancia. de 1,5 V.
  • Page 18: Datos Tecnicos

    Datos tecnicos FS-1619R symbole valeur unité Flujo de aire máximo 53,36 m3/min Potencia consumida Valor de servicio 1.36 (m3/min)/W Consumo de electricidad en modo Poff 0.27 "dormido" Nivel de dB(A) potencia acústica Velocidad máxima del aire 3.38 Norma de medida del valor de servicio IEC 60879 : 1986 +cor1 :1992 AVISO SOBRE EL CORRECTO DESECHO DEL PRODUCTO SEGÚN LA DIRECTIVA EUROPEA 2012/19/UE Al término de su vida útil, el producto no se debe desechar con los residuos urbanos.
  • Page 19: Certificado De Garantia

    CERTIFICADO DE GARANTÍA SELLO DEL DISTRIBUIDOR FECHA : NOMBRE DEL CLIENTE : GARANTÍA Este aparato cuenta con una garantía de dos años para las piezas y la mano de obra. La garantía no cubre los daños ocasionados por: uso inadecuado, deterioro causado por golpes, caídas o fenómenos climatológicos.
  • Page 20 User Manual Fan – Humidifier Ref: SW40 Mod: TX-1601MF Rev 0_02 09 19 Fabriqué en Chine Page 20...
  • Page 21 Read all the instructions carefully before using the product. Contents Safety instructions _ _ _ _ _ _ _ _ _ _ _ _ _ _ _ _ _ _ _ _ 21 The remote control _ _ _ _ _ _ _ _ _ _ _ _ _ _ _ _ _ _ _ _26 Description _ _ _ _ _ _ _ _ _ _ _ _ _ _ _ _ _ _ _ _ _ _ _22 Tilt _ _ _ _ _ _ _ _ _ _ _ _ _ _ _ _ _ _ _ _ _ _ _ _ _ _26 Assembly _ _ _ _ _ _ _ _ _ _ _ _ _ _ _ _ _ _ _ _ _ _ _ 22...
  • Page 22: Description

    Description A – motor unit + control unit B – front protection guard + mist diffuser C – rear protection guard D – fan propeller E – base F – castors G – rear guard fastening nut and control unit H –...
  • Page 23: Refilling The Tank

    Refilling the tank Unplug the unit from the power supply before handling the tank. Open the tank Lift up the Remove the receptacle. tank. tank. Screw the Turn the tank Unscrew the connector back on upside down. connector on and replace the tank the bottom of on the humidifier.
  • Page 24: Operation

    Operation • Position the unit on a firm, flat, horizontal surface. • To avoid overloading the electrical circuit used, avoid connecting other devices to the same power outlet. The device can be controlled either with its remote control or directly from its control panel. 3.
  • Page 25 4. SWING key: Press to swing the fan horizontally. To stop the swing, press the key again. NORMAL, NATURAL, SLEEPING 4. MODE selection key: Normal: operates at the selected speed Natural: alternates speeds randomly. The cycle varies according to the initial speed chosen. Sleep: alternates speeds randomly with the NATURAL mode, but with a gradual reduction in speeds per 30 minutes for each speed, until continuous low speed operation is achieved.
  • Page 26: The Remote Control

    NOTE: when the water tank is empty, the corresponding indicator (water drop marked) lights up in red on the control panel. The remote control The remote control is supplied without a battery. This remote control uses two batteries of the type LR03_AAA_1.5V. Do not use other types of batteries. When installing and replacing the batteries, make sure that they are installed correctly, matching the polarities.
  • Page 27: Technical Data

    • For storage in the case of extended non-use, ensure that the storage room is clean and not humid. Protect the device from dust to ensure longevity. Remove the batteries from the remote control. Technical data TX-1601MF symbol value unit Maximum airflow 53.36...
  • Page 28: Warranty Card

    WARRANTY CARD DEALER’S STAMP DATE : CLIENT'S NAME: GUARANTEE This appliance is guaranteed for 2 years, including parts and labour. guarantee does not cover the damage caused by: incorrect usage, deterioration by shock, fall or atmospheric phenomenon. In case of malfunction, the product in its entirety (packaging, product, accessories) must be returned by the user (In postage paid if sent by mail.
  • Page 29 Benutzerhandbuch Lüfter - Luftbefeuchter Artikelnummer : SW40 Modell : TX-1601MF...
  • Page 30 Lesen Sie das Benutzerhandbuch vollständig und sorgfältig durch Bevor Sie das Gerät benutzen Inhalt Sicherheitshinweise _ _ _ _ _ _ _ _ _ _ _ _ _ _ _ _ 30-31 Fernbedienung _ _ _ _ _ _ _ _ _ _ _ _ _ _ _ _ _ _ _ _ _ 35 Beschreibung _ _ _ _ _ _ _ _ _ _ _ _ _ _ _ _ _ _ _ _ _ 31 Neigung _ _ _ _ _ _ _ _ _ _ _ _ _ _ _ _ _ _ _ _ _ _ _ _ 35 Zusammenbau _ _ _ _ _ _ _ _ _ _ _ _ _ _ _ _ _ _ _ _ 31...
  • Page 31: Beschreibung

    • Nur einem Badezimmer ist strengstens untersagt. autorisiertes Personal darf Tauchen Sie das Gerät nicht in Wasser. Reparaturarbeiten durchführen. • • Sollte das Netzkabel beschädigt sein, muss Zerlegen Sie das Gerät nicht, um die Gefahr Bränden oder Stromschlägen es vom Hersteller, seinem technischen vermeiden.
  • Page 32 Befüllen des Tanks Trennen Sie das Gerät von der Stromversorgung, bevor Sie eine Handlung am Tank ausüben. 2. Heben Sie Öffnen Sie Entfernen Sie den Tank an. den Tank. Tankbehälter. 4. Drehen Sie Stecken Sie den Schrauben Stecker wieder ein den Tank um.
  • Page 33 Betrieb • Stellen Sie das Gerät auf eine feste, ebene und horizontale Oberfläche. • Schließen Sie keine anderen Geräte an dieselbe Steckdose an, um eine Überlastung des verwendeten Stromkreises zu vermeiden. Das Gerät kann entweder mit der Fernbedienung oder direkt über das Bedienfeld gesteuert werden. 5.
  • Page 34 normal / NORMAL, natürlich / NATURAL, schlafen / SLEEPING 4. MODE = MODUS-Auswahltaste: Normal: Arbeitet mit der ausgewählten Geschwindigkeit Natürlich: Wechselnde Geschwindigkeiten nach dem Zufallsprinzip. Der Zyklus variiert je nach gewählter Anfangsgeschwindigkeit. Schlafmodus: Wechselt die Geschwindigkeit nach dem Zufallsprinzip mit dem NATURAL-Modus, wobei die Geschwindigkeit für jede Geschwindigkeit schrittweise um 30 Minuten verringert wird, bis ein kontinuierlicher Betrieb mit niedriger Geschwindigkeit erreicht wird.
  • Page 35: Die Fernbedienung

    6. MIST = NEBEL-Taste: Steuert Starten oder Stopp der Nebeldiffusion. HINWEIS: Wenn der Wassertank leer ist, leuchtet die entsprechende Anzeige (durchgestrichener Wassertropfen) auf dem Bedienfeld rot auf. Die Fernbedienung Die Fernbedienung wird ohne Batterie geliefert. Diese Fernbedienung verwendet zwei Batterien vom Typ LR03_AAA_1,5V. Verwenden Sie keine anderen Batterietypen. Vergewissern Sie sich beim Einlegen und Austauschen der Batterien, dass sie korrekt und unter Beachtung der Polarität eingelegt sind.
  • Page 36 Geben Sie regelmäßig ein paar Tropfen Schmiermittel auf die Motorachse, um die Lebensdauer des Motors zu erhalten. • Stellen Sie bei längerer Nichtbenutzung sicher, dass der Lagerraum sauber und trocken ist. Schützen Sie das Gerät vor Staub für eine längere Lebensdauer. Entfernen Sie die Batterien aus der Fernbedienung. Technische Daten TX-1601MF Piktogramm Bedeutung Einheit Maximaler Luftstrom 53,36 m³/min...
  • Page 37 GARANTIEKARTE HÄNDLERSTEMPEL DATUM : NAME DES KUNDEN : GARANTIE Dieses Gerät hat eine Garantie von 2 Jahren auf Teile und Arbeit. Die Garantie deckt keine Schäden ab, die durch: unsachgemäße Verwendung, Beschädigung durch Stoß, Sturz oder witterungsbedingte Ereignisse verursacht wurden. Falle einer Fehlfunktion...
  • Page 38 Gebruiksaanwijzing Ventilator - Bevochtiger Ref : SW40 Mod: TX-1601MF Rev 0_02 09 19 Fabriqué en Chine Page 38...
  • Page 39 Lees alle instructies aandachtig door voordat u het apparaat gebruikt Inhoudsopgave Veiligheidsinstructies _ _ _ _ _ _ _ _ _ _ _ _ _ _ _ _ 39-40 Afstandsbediening _ _ _ _ _ _ _ _ _ _ _ _ _ _ _ _ _ _ _ _44 Beschrijving _ _ _ _ _ _ _ _ _ _ _ _ _ _ _ _ _ _ _ _ _ _ _40 Helling _ _ _ _ _ _ _ _ _ _ _ _ _ _ _ _ _ _ _ _ _ _ _ _ _ 44 Montage _ _ _ _ _ _ _ _ _ _ _ _ _ _ _ _ _ _ _ _ _ _ _ _ 40...
  • Page 40: Montage

    • • Als de stroomkabel beschadigd is, moet Haal het apparaat niet uit elkaar om het risico brand elektrische schokken deze om gevaar te voorkomen worden verminderen. Er is geen reden om dit apparaat vervangen door fabrikant, zijn te openen om een bruikbaar onderdeel te onderhoudsafdeling of een vergelijkbare vinden, omdat het dit niet bevat.
  • Page 41: Het Reservoir Vullen

    Het reservoir vullen Trek de stekker uit het stopcontact voordat u het reservoir aanraakt. Open de Til het Verwijder het reservoirhouder. reservoir op. reservoir. Schroef de Draai het Draai de connector weer vast reservoir connector aan en plaats het ondersteboven. de onderkant reservoir op de van het...
  • Page 42: Werking

    Werking • Plaats het apparaat op een stevig, vlak en horizontaal oppervlak. • Sluit geen andere apparaten aan op hetzelfde stopcontact om overbelasting van het gebruikte elektrische circuit te voorkomen. Het apparaat kan worden bediend met de afstandsbediening of rechtstreeks via het bedieningspaneel. 7.
  • Page 43 normaal / NORMAL, natuurlijk / NATURAL, slaapstand / SLEEPING 4. MODE = MODUS-selectietoets: Normaal: werkt op de geselecteerde snelheid Natuurlijk: wisselt snelheden willekeurig af. De cyclus varieert volgens de gekozen beginsnelheid. Slaapstand: wisselt snelheden willekeurig af met de NATUURLIJKE modus, maar met een geleidelijke vermindering van de snelheden per 30 minuten voor elke snelheid, totdat een voortdurende werking op lage snelheid wordt bereikt.
  • Page 44: Afstandsbediening

    OPMERKING: wanneer het waterreservoir leeg is, gaat de bijbehorende indicator (doorgestreepte waterdruppel) op het bedieningspaneel rood branden. De afstandsbediening De afstandsbediening wordt zonder batterij geleverd. Deze afstandsbediening gebruikt twee batterijen van het soort LR03_AAA_1.5V. Gebruik geen andere soorten batterijen. Zorg er bij het plaatsen en vervangen van de batterijen voor dat ze correct worden geïnstalleerd, met inachtneming van de polariteit.
  • Page 45 • Controleer voor opslag wegens langdurig niet gebruiken of de opslagruimte schoon en vrij van vocht is. Bescherm het apparaat tegen stof voor een langere levensduur. Verwijder de batterijen uit de afstandsbediening. Technische gegevens TX-1601MF symbool waarde eenheid Maximale luchtstroom...
  • Page 46: Garantiebewijs

    GARANTIEBEWIJS STEMPEL VAN DE WEDERVERKOPER DATUM: NAAM VAN DE KLANT: GARANTIE Dit apparaat heeft 2 jaar garantie op onderdelen en arbeid. De garantie dekt geen schade veroorzaakt door: slecht gebruik, verslechtering door schok, val of atmosferisch fenomeen. In geval van storing moet het geheel (verpakking, product, accessoires) door de gebruiker worden geretourneerd (met port betaald indien verzonden per post.

Ce manuel est également adapté pour:

Sw40

Table des Matières