Publicité

Les langues disponibles
  • FR

Les langues disponibles

  • FRANÇAIS, page 1

Liens rapides

FR
MANUEL D'UTILISATION P2
ES
INSTRUCCIONES DE USO P9
GR
ΕΓΧΕΙΡΙΔΙΟ ΧΡΗΣΗΣ P17
EN
USAR MANUAL P25
DE
BENUTZERHANDBUCH
NL
GEBRUIKSAANWIJZING P41
Ref: FL40II
Mod: TX-1608B
REV 1 – 26 08 19 Fabriqué en Chine
P33
Ventilateur sur pied
Page 1

Publicité

Table des Matières
loading

Sommaire des Matières pour Domair TX-1608B

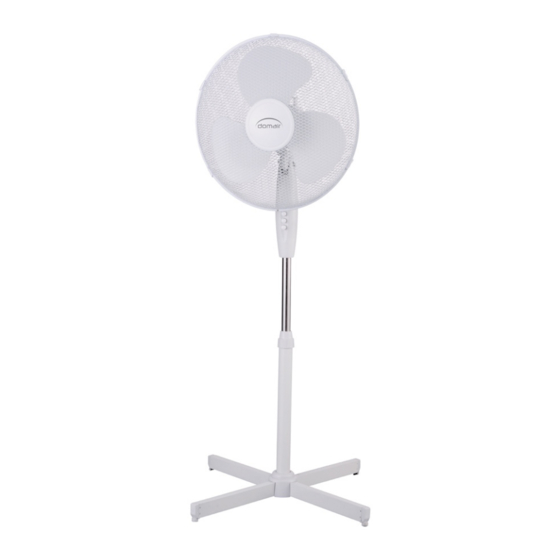
  • Page 1 MANUEL D’UTILISATION P2 INSTRUCCIONES DE USO P9 ΕΓΧΕΙΡΙΔΙΟ ΧΡΗΣΗΣ P17 USAR MANUAL P25 BENUTZERHANDBUCH GEBRUIKSAANWIJZING P41 Ventilateur sur pied Ref: FL40II Mod: TX-1608B REV 1 – 26 08 19 Fabriqué en Chine Page 1...
  • Page 2: Table Des Matières

    Lire attentivement toutes les instructions avant d’utiliser le ventilateur Sommaire Instructions de sécurité _ _ _ _ _ _ _ _ _ _ 2-4 Entretien _ _ _ _ _ _ _ _ _ _ _ _ _ _ _ _ 7 Montage _ _ _ _ _ _ _ _ _ _ _ _ _ _ _ _ _ _ _4-6 Données techniques _ _ _ _ _ _ _ _ _ _ _ 7 Fonctionnement _ _ _ _ _ _ _ _ _ _ _ _ _ _ _ _6...
  • Page 3 connaissance, s'ils (si elles) Ne pas utiliser l’appareil dans • sont correctement des zones humides, dans des surveillé(e)s zones où température instructions relatives à excède les 40°C ou dans des l'utilisation de l'appareil en zones poussiéreuses. toute sécurité leur ont été Ne pas exposer un bébé...
  • Page 4: Montage

    L’APPAREIL LUI-MEME Il n’y a aucune raison d’ouvrir • POUR DEBRANCHER cet appareil pour trouver une FICHE DE LA PRISE DE quelconque pièce utile car il COURANT. n’en contient pas. Ne pas utiliser l’appareil à Seul le personnel autorisé • •...
  • Page 5 MONTAGE DE LA TÊTE Axe moteur Commande de l’oscillation Disque plastique Tétons de Grille frontale Ecrou de position Ecrou de Goupille de serrage de la serrage de l’axe moteur grille l’hélice Grille arrière Hélice de sécurité Monter la grille arrière en disposant correctement les tétons de position.
  • Page 6: Fonctionnement

    MONTAGE DU PIED Assembler les deux jambes de la base. Assembler le tube externe sur la base : le visser en vous assurant que les 4 vis soient bien serrées. Mettre en place le cache plastique sur le tube externe. externe.
  • Page 7: Entretien

    être nettoyées à l'aide d'un en contact avec le moteur ou tout aspirateur ou d'une brosse souple. autre partie électrique pendant le nettoyage. Données techniques Mod: TX-1608B symbole Valeur unité Débit d’air maximal 70,98 m3/min Puissance absorbée...
  • Page 8: Bon De Garantie

    BON DE GARANTIE CACHET DU REVENDEUR DATE : NOM DU CLIENT : GARANTIE Cet appareil est garanti 2 ans, pièces et main d’œuvre. La garantie ne couvre pas les dégâts occasionnés par : mauvaises utilisations, détérioration par choc, chute ou phénomène atmosphérique. En cas d’anomalie de fonctionnement, l’ensemble (emballage, produit, accessoires) doit être retourné...
  • Page 9 Manuel d’utilisation INSTRUCCIONES DE USO Ventilador Ref: FL40II Mod: TX-1608B REV 1 – 26 08 19 Fabriqué en Chine Page 9...
  • Page 10 LEA CON ATENCIÓN LAS INSTRUCCIONES ANTES DE UTILIZAR EL APARATO Resumen Importante _ _ _ _ _ _ _ _ _ _ _ _ _ _ _ 10-12 Mantenimiento _ _ _ _ _ _ _ _ _ _ _ _ _ _ _ 15 Instalacion _ _ _ _ _ _ _ _ _ _ _ _ _ _ _ _ 12-14 Datos tecnicos _ _ _ _ _ _ _ _ _ _ _ _ _ _ _ 15 Funcionamiento _ _ _ _ _ _ _ _ _ _ _ _ _ _ _ 14...
  • Page 11 instrucciones relativas al uso aparato durante del aparato en condiciones demasiado manera seguras y comprendiendo los continua. riesgos implica. Asegúrese de que el aparato • niños no deben jugar con el se coloque en un lugar aparato. Los niños no deben estable.
  • Page 12 No utilice el aparato cerca de una pieza útil, ya que no • bañeras, lavabos, duchas, existen. piscinas, etc. Solo el personal autorizado • Está totalmente prohibido el puede realizar los trabajos • uso de este aparato en las de reparación. potencias 0, 1 o 2 en un El aparato está...
  • Page 13 INSTALACIÓN DEL CABEZAL Eje motor Control de oscilación Disco de plástico Pasadores Rejilla frontal Tuerca de de posición Tuerca de Guía del eje retención de retención de motor la rejilla la hélice Tornillo Rejilla trasera Hélice de seguridad 1 - Monte la rejilla trasera colocando 3-Fije el disco plástico en la rejilla correctamente pasadores...
  • Page 14 INSTALACIÓN DEL PIE 1 - Ensamble las dos piernas de la base. 2 - Instale el tubo externo en la base: atorníllelo asegurándose de que los 4 tornillos estén bien apretados. Afloje la ruedecilla de ajuste de la altura que se encuentra en la parte 3 - Coloque la cubierta de plástico en superior del tubo externo.
  • Page 15 Datos tecnicos FL40 II : Símbolo Valor Unidad TX-1608B Flujo de aire máximo 70,98 m3/min Potencia consumida 39,30 Valor de servicio 1,81 (m3/min)/W...
  • Page 16: Certificado De Garantía

    CERTIFICADO DE GARANTÍA SELLO DEL DISTRIBUIDOR FECHA: NOMBRE DEL CLIENTE: GARANTÍA Este aparato cuenta con una garantía de dos años para las piezas y la mano de obra. La garantía no cubre los daños ocasionados por: uso inadecuado, deterioro causado por golpes, caídas o fenómenos climatológicos.
  • Page 17 ΕΓΧΕΙΡΙΔΙΟ ΧΡΗΣΗΣ ΑΝΕΜΙΣΤΗΡΑΣ Ref : FL40II Mod : TX-1608B REV 1 – 26 08 19 Fabriqué en Chine Page 17...
  • Page 18 ΔΙΑΒΑΣΤΕ ΠΡΟΣΕΚΤΙΚΑ ΟΛΕΣ ΤΙΣ ΟΔΗΓΙΕΣ ΠΡΙΝ ΧΡΗΣΙΜΟΠΟΙΗΣΕΤΕ ΤΗ ΣΥΣΚΕΥΗ περίληψη ΣΗΜΑΝΤΙΚΟ _ _ _ _ _ _ _ _ _ _ _ _ _ _ 18-20 ΣΥΝΤΗΡΗΣΗ _ _ _ _ _ _ _ _ _ _ _ _ _ _ 23 ΣΥΝΑΡΜΟΛΟΓΗΣΗ...
  • Page 19 άτομα που δεν έχουν εμπειρία Απαγορεύεται η χρήση της • και γνώσεις ή με περιορισμένες συσκευής σε περιοχές με σωματικές, αντιληπτικές ή υγρασία, σε περιοχές όπου η διανοητικές ικανότητες, αν θερμοκρασία υπερβαίνει τους επιβλέπονται σωστά ή αν 40°C, καθώς και σε περιοχές λάβουν...
  • Page 20 ΣΥΣΚΕΥΗ ΜΕ ΒΡΕΓΜΕΝΑ Ή Για να μειώσετε τον κίνδυνο • ΝΩΠΑ ΧΕΡΙΑ Ή ΠΟΔΙΑ – πυρκαγιάς ή ηλεκτροπληξίας, ΜΗΝ ΧΡΗΣΙΜΟΠΟΙΕΙΤΕ ΤΗ μην αποσυναρμολογείτε τη ΣΥΣΚΕΥΗ ΣΕ ΕΞΩΤΕΡΙΚΟΥΣ συσκευή. ΧΩΡΟΥΣ - ΜΗΝ ΤΡΑΒΑΤΕ Για να μειώσετε τον κίνδυνο • ΤΟ ΚΑΛΩΔΙΟ ΠΑΡΟΧΗΣ Ή πυρκαγιάς...
  • Page 21 ΣΥΝΑΡΜΟΛΟΓΗΣΗ ΤΗΣ ΚΕΦΑΛΗΣ Άξονας µοτέρ Μπουτόν περιστροφής Πλαστικός δίσκος Στοιχεία Μπροστινή σχάρα Παξιµάδι τοποθέτησης Παξιµάδι Στέλεχος σύσφιξης σύσφιξης άξονα µοτέρ σχάρας έλικας Βίδα Πίσω σχάρα Έλικα ασφαλείας 1 - Τοποθετήστε την πίσω σχάρα, 3 - Τοποθετήστε τον πλαστικό δίσκο τοποθετώντας σωστά...
  • Page 22 ΣΥΝΑΡΜΟΛΟΓΗΣΗ ΒΑΣΗΣ 1 - Συναρμολογήστε τα δύο στελέχη της βάσης. 2 - Συνδέστε τον εξωτερικό σωλήνα Ξεβιδώστε τον περιστροφικό διακόπτη επάνω στη βάση: βιδώστε τον, αφού ρύθμισης ύψους, το οποίο βρίσκεται πρώτα βεβαιωθείτε ότι οι 4 βίδες είναι στο επάνω μέρος του εξωτερικού καλά...
  • Page 23 καθαρίσετε τον Προστατέψτε τον από τη σκόνη, για να ανεμιστήρα σας, κατόπιν σκουπίστε του εξασφαλίσετε μεγαλύτερη τον. μακροζωία. • Μην χρησιμοποιείτε ΔΙΑΛΥΤΙΚΑ, ΤΕΧΝΙΚΑ ΔΕΔΟΜΕΝΑ TX-1608B σύμβολο Τιμή μονάδα Μέγιστη ροή αέρα 70,98 /λεπτό Κατανάλωση ισχύος 39,30 Τιμή λειτουργίας 1,81 /λεπτό)/W Κατανάλωση...
  • Page 24 ΕΓΓΥΗΣΗ ΣΦΡΑΓΙΔΑ ΕΜΠΟΡΟΥ ΗΜΕΡΟΜΗΝΙΑ : ΟΝΟΜΑΤΕΠΩΝΥΜΟ ΠΕΛΑΤΗ : ΕΓΓΥΗΣΗ Αυτή η συσκευή καλύπτεται από 2ετή εγγύηση για ανταλλακτικά και εργασία. Η εγγύηση δεν καλύπτει ζηµίες λόγω: κακής χρήσης, βλάβης λόγω χτυπήµατος, πτώσης ή καιρικών φαινοµένων. Σε περίπτωση µη φυσιολογικής λειτουργίας, η συσκευή στο σύνολό της (συσκευασία, προϊόν, παρελκόµενα) πρέπει...
  • Page 25 User Manual Floor standing fan Ref: FL40II Mod: TX-1608B REV 1 – 26 08 19 Fabriqué en Chine Page 25...
  • Page 26 Read all the instructions carefully before using the fan Contents Safety Instructions _ _ _ _ _ _ _ _ _ 26-28 Maintenance _ _ _ _ _ _ _ _ _ _ _ _ _ _ 31 Mounting _ _ _ _ _ _ _ _ _ _ _ _ _ _ 28-30 Technical Data _ _ _ _ _ _ _ _ _ _ _ _ _ 31 Operation _ _ _ _ _ _ _ _ _ _ _ _ _ _ _ 30 Warranty _ _ _ _ _ _ _ _ _ _ _ _ _ _ _ _ 32...
  • Page 27 Before handling or moving the Do not remove the front grille • • appliance, be sure that it is cleaning operations. unplugged. Make sure Take the plug and remove it to disconnected from the mains • disconnect it from the power before maintenance supply.
  • Page 28: Mounting

    does not contain anything power cable like that. damaged, it must be changed Only authorised personnel manufacturer, • may perform the repair work. maintenance department or a This appliance strictly similarly qualified person to • reserved for domestic use. avoid a potential hazardous situation.
  • Page 29 Motor shaft Oscillation control Plastic disk Positioning Front grille Grille pins Impeller Motor axle pin tightening clamping Screw Rear grille Impeller lock screw 1- Fit the rear grille by correctly positioning the pins. The hole for the security screw must be at the bottom. Then screw the grille tightening nut.
  • Page 30: Operation

    FOOT MOUNTING Assemble the two legs of the base. Assemble the outer tube to the base: screw it in, making sure that the 4 screws are tight. Fit the plastic cover on the outer tube. Unscrew the height adjustment knob Set up the 4 feet as shown in at the top of the outer tube.
  • Page 31: Maintenance

    Take care that water or other cleaned with a vacuum cleaner or soft liquids do not come in contact with the brush. motor or any other electrical parts during cleaning. Technical data Mod: TX-1608B symbol Value unit Maximum airflow 70.98 m3/min Absorbed power 39.30...
  • Page 32: Warranty

    WARRANTY CARD DEALER’S STAMP DATE: CLIENT'S NAME: GUARANTEE This appliance is guaranteed for 2 years, including parts and labour. The guarantee does not cover the damage caused by: incorrect usage, deterioration by shock, fall or atmospheric phenomenon. In case of malfunction, the product in its entirety (packaging, product, accessories) must be returned by the user (In postage paid if sent by mail.
  • Page 33 Benutzerhandbuch Standventilator Ref: FL40II Mod: TX-1608B REV 1 - 26 08 19 Fabriqué en Chine Seite 33...
  • Page 34 Lesen Sie die Bedienungsanleitung vollständig und sorgfältig durch bevor Sie den Lüfter benutzen Inhalt Sicherheitshinweise _ _ _ _ _ _ _ _ _ 34-36 Wartung _ _ _ _ _ _ _ _ _ _ _ _ _ _ _ 39 Montage _ _ _ _ _ _ _ _ _ _ _ _ _ _ _ 36-37 Technische Daten _ _ _ _ _ _ _ _ _ _ _ 39 Bedienung _ _ _ _ _ _ _ _ _ _ _ _ _ _ _ _38...
  • Page 35 Sicherheitsanweisungen Zeit ohne Unterbrechung dem dieses Gerätes vertraut Gerät aus. gemacht. Kinder dürfen mit Stellen Sie sicher, dass der • diesem Gerät nicht spielen. Standort des Geräts stabil ist. Die Reinigung und Wartung Dieses Gerät ist nur für den • des Gerätes darf nicht von Hausgebrauch bestimmt.
  • Page 36 Verwendung dieses Nur autorisiertes Personal darf • • Geräts auf Stellung 0, 1 oder Reparaturarbeiten 2 in einem Badezimmer ist durchführen. strengstens untersagt. Gerät, das ausschließlich für • GERÄT NICHT den Hausgebrauch bestimmt • WASSER TAUCHEN. ist. Zerlegen Sie das Gerät nicht, •...
  • Page 37: Montage Des Kopfes

    MONTAGE DES KOPFES Motorachs Schwenksteuer Kunststoffscheibe Positionsn vorderes Befestigun ippel Propellers Stift der Gitter gsmutter pannmutte Motorachse des Gitters Schraube hinteres Propelle schraube Gitter 1- Montieren Sie das hintere Gitter, ob sich der Propeller frei dreht, indem indem Sie die Positionsnippel richtig Sie ihn von Hand drehen.
  • Page 38 FUßBEFESTIGUNG Montieren Sie die beiden Beine des Sockels. Montieren Sie das Außenrohr an MONTAGE der Basis: Schrauben Sie es ein, DES KOPFES AUF DEM FUß und achten Sie darauf, dass die 4 Lösen Sie den Höheneinstellknopf oben Schrauben fest sitzen. Außenrohr.
  • Page 39 Die Schutzgitter müssen mit noch eine andere Flüssigkeit mit dem einem Staubsauger oder einer Motor in Berührung kommt. weichen Bürste gereinigt werden. Technische Daten Piktogramm Bedeutung Einheit Mod: TX-1608B Maximaler Luftstrom 70,98 m³/min Leistungsaufnahme 39,30 Sollverbrauch 1,81 (m³/min)/ Stromverbrauch im "Schlaf"-Modus Schalldruckpegel...
  • Page 40 GARANTIEKARTE HÄNDLERSTEMPEL DATUM: NAME DES KUNDEN: GARANTIE Dieses Gerät hat eine Garantie von 2 Jahren auf Teile und Arbeit. Garantie deckt keine Schäden ab, die durch: unsachgemäße Verwendung, Beschädigung durch Stoß, Sturz oder witterungsbedingte Ereignisse verursacht wurden. Im Falle einer Fehlfunktion muss alles (Verpackung, Produkt, Zubehör) vom Benutzer (Porto bezahlt, wenn per Post gesendet, nichtfrankierte Pakete werden nicht akzeptiert) zusammen mit einer Fotokopie des datierten Kaufbelegs...
  • Page 41 Gebruiksaanwijzing Ventilator op voet Ref: FL40II Mod: TX-1608B REV 1 – 26 08 19 Fabriqué en Chine Pagina 41...
  • Page 42 Lees alle instructies aandachtig door voordat u de ventilator gebruikt Inhoudsopgave Veiligheidsinstructies _ _ _ _ _ _ _ _ 42-44 Onderhoud _ _ _ _ _ _ _ _ _ _ _ _ _ _ _47 Montage _ _ _ _ _ _ _ _ _ _ _ _ _ _ 44-46 Technische gegevens _ _ _ _ _ _ _ _ _ 47 Werking _ _ _ _ _ _ _ _ _ _ _ _ _ _ _ _ 46 Garantiebewijs _ _ _ _ _ _ _ _ _ _ _ _ _ 48...
  • Page 43 risico's hebben begrepen. Zorg ervoor dat de plek waar • Kinderen mogen niet spelen het apparaat zich bevindt met het apparaat. De reiniging stabiel is. en het onderhoud door de Dit apparaat is uitsluitend • gebruiker mogen niet worden bedoeld voor huishoudelijk uitgevoerd door kinderen...
  • Page 44: Montage

    Het gebruik van dit apparaat Uitsluitend bevoegd personeel • • in stand 0, 1 of 2 in een mag reparatiewerkzaamheden badkamer is ten strengste uitvoeren. verboden. Het apparaat is strikt bestemd • Dompel apparaat niet voor huishoudelijk gebruik. • onder in water. Haal het apparaat niet uit stroomkabel •...
  • Page 45 MONTAGE VAN DE KOP Motoras Bediening van Plastic schijf schommeling Positiepen Voorrooster Klemmoe Klemmoe Pen van de r van het r van de motoras rooster Schroef propeller Achterroost Propell schroef 1- Monteer het achterrooster door de positioneringsnippels correct plaatsen. voor veiligheidsschroef moet zich...
  • Page 46: Werking

    MONTAGE VAN DE VOET 1- Monteer de twee poten van de basis. 2- Monteer de buitenste buis op de basis: draai deze in en zorg ervoor dat de 4 schroeven goed vastzitten. 3- Plaats de plastic afdekking op de buitenste buis. binnenste buis omhoog,...
  • Page 47: Onderhoud

    Technische gegevens Mod: TX-1608B symbool Waarde eenheid Maximale luchtstroom 70,98 m3/min Opgenomen vermogen 39,30 Servicewaarde...
  • Page 48: Garantiebewijs

    GARANTIEBEWIJS STEMPEL VAN DE WEDERVERKOPER DATUM : NAAM VAN DE KLANT : GARANTIE Dit apparaat heeft 2 jaar garantie op onderdelen en arbeid. De garantie dekt geen schade veroorzaakt door: slecht gebruik, verslechtering door schok, val of atmosferisch fenomeen. In geval van storing moet het geheel (verpakking, product, accessoires) door de gebruiker worden geretourneerd (met port betaald indien verzonden per post.

Ce manuel est également adapté pour:

Fl40ii

Table des Matières