Publicité
Les langues disponibles
Les langues disponibles
Liens rapides
Publicité

Manuels Connexes pour Bresser NATIONAL GEOGRAPHIC 9071000


Sommaire des Matières pour Bresser NATIONAL GEOGRAPHIC 9071000
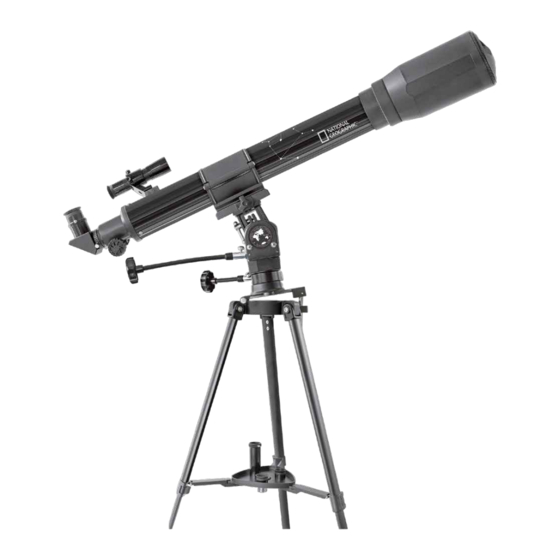
- Page 1 TELESKOP TELESCOPE 70/900 Multi-Purpose Montierung Multi-Purpose Mount Bedienungsanleitung Operating instructions Mode d’emploi Handleiding Istruzioni per l’uso Instrucciones de uso Instrukcja obsługi Руководство по эксплуатации Art.No. 9071000...
- Page 2 (DE) WARNUNG! Schauen Sie mit diesem optischen Gerät niemals direkt oder in die Nähe der Sonne! Achten Sie besonders darauf, wenn es von Kindern benutzt wird! Es besteht ERBLINDUNGSGEFAHR! Verpackungsmaterial (Plastiktüten, Gummibänder, etc.) von Kindern fernhalten! (EN) CAUTION: Never attempt to observe the sun with this telescope. Make sure children do not attempt to observe the sun with the telescope.
- Page 3 (DE) Bedienungsanleitung ................6 (EN) Operating instructions ................12 (FR) Mode d’emploi ..................16 (NL) Handleiding ..................20 (IT) Istruzioni per l’uso ................. 24 (ES) Instrucciones de uso ................28 (PL) Instrukcja Obsługi ................32 (RU) Руководство по эксплуатации ............. 36...
- Page 4 No. 1 No. 2 No. 3 Zubehör kann je nach Modell variieren. Gli accessori possono variare a seconda del modello. Accessories may vary depending on the model. Los accesorios pueden variar según el modelo. Les accessoires peuvent varier en fonction du modèle. Akcesoria różnią...
- Page 5 No. 4 No. 8 No. 9 No. 10 No. 11 No. 13 No. 12 No. 14a No. 14b No. 5 No. 6 No. 7...
- Page 6 No. 15 No. 16 No. 17...
- Page 7 No. 18 No. 19 f=20 mm f=12.5 mm f=4 mm No. 20 The Moon No. 21 Orion Nebula (M42) No. 22 Ring Nebula in Lyra constellation (M57) No. 23 Dumbbell Nebula in the Vulpecula (Fox) constellation (M27)
- Page 8 Allgemeine Informationen Okulare Zenit-Spiegel Zu dieser Anleitung Umkehrlinse Lesen Sie bitte aufmerksam die Sicherheitshinweise in dieser Anleitung. Teile (No. 15): Montierung Verwenden Sie dieses Produkt nur wie in der Anleitung beschrieben, um Vertikale Klemmung Schäden am Gerät oder Verletzungen zu vermeiden. Bewahren Sie die Neigeplatte Bedienungsanleitung auf, damit Sie sich jederzeit über alle Bedienungsfunktionen Deklinationsachse...
- Page 9 TEIL II – Die Handhabung Achten Sie darauf, dass der Okulareinblick senkrecht nach oben zeigt. Das erleichtert den Einblick. Andernfalls lösen Sie die Klemmschraube (No. 8, X) am Okularstutzen und drehen den Zenitspiegel in diese Position. 1. Die Montierung Danach wird die Schraube (Y) für die Justierstange abgedreht und die Ihr Teleskop ist mit einer neuartigen Montierung ausgestattet die Ihnen zwei Justierstange am anderen Ende angesetzt.
- Page 10 6. Nachführ- bzw. Beobachtungsposition Sie feststellen, dass er nach kurzer Zeit aus dem Gesichtsfeld Ihres Okulars verschwunden ist. Um diesen Effekt auszugleichen, betätigen Sie die biegsame Welle (No. 15, D) der Stundenachse und Ihr Teleskop wird der scheinbaren Neigen Sie das Hauptteleskop ( Tubus ) um 90 ° (No. 15, C). Flugbahn dieses Sternes folgen.
-
Page 11: Garantie & Service
Kaufs. Die vollständigen Garantiebedingungen und Serviceleistungen Mit einer Entfernung von etwa 1.344 Lichtjahren ist der Orion-Nebel (M42) der können Sie unter www.bresser.de/garantiebedingungen einsehen. hellste diffuse Nebel am Himmel - mit dem bloßen Auge sichtbar, und ein loh- nendes Objekt für Teleskope in allen Größen, vom kleinsten Feldstecher bis zu den größten erdgebundenen Observatorien und dem Hubble Space Telescope. - Page 12 General Information Accessories may vary depending on the model. About This Instruction Manual Parts (No. 1-3) Please read the safety instructions in this manual carefully. To avoid damage to Telescope tube the unit and the risk of injury, only use this product as described in the manual. Keep the instruction manual handy so that you can easily look up information Viewfinder scope on all the functions of your telescope.
- Page 13 3. Accessory Tray 7. Protection Caps The accessory tray (No. 1 and 3, 10) should be attached to the center of the In order to protect the inside of your telescope from dust and dirt, the barrel tripod brace (No. 1, 16) with the flat side down. The center hole in the tray opening (No.
- Page 14 Once you make this alignment, do not move or adjust the telescope, or it will If you have aligned your telescope accurately to observe one of these stars, you become misaligned. The telescope is now correctly aligned. This procedure is will find that it vanishes from your field of view after a few minutes.
-
Page 15: Warranty & Service
You can consult the full guarantee terms and details of our stantly changing; one sees this change in the phases of the moon. The time services at: www.bresser.de/warranty_terms. between two consecutive new moon phases is about 29.5 days (709 hours). - Page 16 Informations générales Les accessoires peuvent varier en fonction du modèle. A propos de ce manuel Toutes les pièces (No. 1-3) Veuillez lire attentivement les consignes de sécurité présentées dans ce manuel. N’utilisez ce produit comme décrit dans ce manuel, afin d’éviter tout Tube du télescope risque de blessure ou de dommage sur l’appareil.
- Page 17 7. Capuchons de protection 4. Tube Afin de protéger l’intérieur de votre télescope contre la poussière et la saleté, un Pour monter le tube du télescope (graph. 1, 1), commencez par desserrer la capuchon de protection (graph. 12, X) est placé devant l’ouverture du tube. Un vis du collier de serrage du tube (graph.
- Page 18 Desserrez le blocage de serrage de la hauteur du pôle (graph. 14, X) et inclinez le plateau jusqu’à ce que le chiffre qui se trouve sur la tige de réglage du degré INDICATION ! de latitude (graph. 14, Y) corresponde à votre emplacement. (par exemple 51°). Les oculaires sont un système de lentilles tourné...
-
Page 19: Elimination
Vous pouvez consulter l’intégralité des conditions de garantie Avec une distance de 1344 années lumière env.la nébuleuse Orion (M42) est et les prestations de service sur www.bresser.de/warranty_terms. la nébuleuse diffuse la plus brillante dans le ciel - visible à l‘oeil nu, et un objet valable pour des télescopes de toutes les tailles, des jumelles les plus... - Page 20 Algemene informatie Accessoires kunnen variëren, afhankelijk van het model. Over deze handleiding Alle onderdelen (No. 1-3) Leest u aandachtig de veiligheidsinstructies in deze handleiding. Gebruik dit Telescoopbuis product, om schade aan het apparaat of verwondingen te voorkomen, alleen zoals in de handleiding is beschreven. Zoeker Bewaar deze gebruikershandleiding zodat u zich op elk moment weer kunt Stelschroeven (Zoeker)
- Page 21 4. Buis 7. Berschermkappen Om de telescoopbuis te monteren (afb. 1, 1) dienen de schroeven van de clip te Om de binnenkant van de telescoop tegen stof e.d. te beschermen is de tube worden losgedraaid (afb. 6, X) en de clip geopend. opening door een stofbeschermkap beschermd.
- Page 22 5. Eindinstelling 9. Sterren zoeken Draai de declinatieas (afb. 15, C) incl. telescoop-houder 90° om. In het begin valt de oriëntering aan de sterrenhemel beslist niet mee, omdat sterren en sterrenbeelden altijd in beweging zijn en afhankelijk van het seizoen, Zet de buis in de goede richting (zie afbeelding / markering) in de houder en datum en de tijd hun positie in de hemel veranderen.
- Page 23 De volledige garantievoorwaarden en servicediensten kunt u Met een afstand van circa 1.344 lichtjaar is de Orionnevel (M42) de meest bekijken op www.bresser.de/warranty_terms. heldere diffuse nevel aan de hemel - met het blote oog zichtbaar, en een bij- zonder lonend object om met telescopen in alle uitvoeringen te bekijken, van de kleinste verrekijker tot de grootste aardse observatoria en de Hubble Space Telescope.
- Page 24 Informazioni generali 1* Oculari 1( Diagonale a specchio 2) Lente di inversione Informazioni sul presente manuale Componenti (No. 15): Montatura Leggere con attenzione le avvertenze di sicurezza riportate nel manuale. Per evitare danni all‘apparecchio o possibili lesioni, utilizzare questo prodotto sol- Dispositivo di bloccaggio verticale tanto come descritto manuale.
- Page 25 L’asta più corta (No. 1, 15) viene montata lateralmente. Fissare Allentare la vite di fissaggio (No. 8, X) sul portaoculare e inserire il diagonale. Successivamente stringere di nuovo la vite di fissaggio (No. 8, X). l’asta con la vite di bloccaggio posta sull’apposita scanalatura dell’as- Poi sempre nello stesso modo, allentando e stringendo la vite di fissaggio (No.
- Page 26 Questa procedura è necessaria per consentire l’inseguimento degli oggetti flessibile (No.15, D) dell’asse polare si può bilanciare quest’effetto e il Suo celesti. telescopio seguirà la traiettoria apparente di tale stella. 6. Posizione di inseguimento e osservazione 10. Accessori Inclinare il corpo del telescopio (tubo) di 90° (No. 15, C). Ruotare il telescopio Il Suo telescopio nella versione di base ha in dotazione tre oculari (No.
-
Page 27: Garanzia E Assistenza
Le condizioni complete di garanzia e i servizi di assistenza sono dal più piccolo cannocchiale ai più grandi osservatori terrestri, fino all’Hubble visibili al sito www.bresser.de/warranty_terms. Space Telescope. Si tratta della parte principale di una nuvola in realtà ben più grossa di idrogeno e polvere che si estende per più... - Page 28 Informaciones de carácter general Oculares Prisma diagonal Sobre este manual Lente erectora (de inversión) de 1,5 x Lea atentamente las indicaciones de seguridad recogidas en este manual. Partes (No. 15): Montaje Emplee este producto exclusivamente de la forma descrita en el manual, con el Abrazadera vertical fin de evitar daños en el aparato o lesiones.
- Page 29 Asegúrese de que el ocular está apuntando verticalmente hacia arriba. De lo 1. Afloje el tornillo de ajuste de la vertical polar (14 bis ilustración, X) y baje la contrario aflojar el tornillo (No. 8, X) en el tubo y gire el prisma diagonal en la placa de inclinación hasta que esté...
- Page 30 7. Buscador 11. Desmontaje El telescopio está ahora alineado y ajustado. Después de una observación interesante y esperamos con éxito, se recomienda que guarde el telescopio en un lugar seco y bien ventilado. En algunos telesco- Con el fin de obtener una posición de observación cómoda, usted debe aflojar pios el trípode y la montura se pueden separar fácilmente.
-
Page 31: Smaltimento
Garantía y servicio El período regular de garantía es 5 anos iniciándose en el día de la compra. Las condiciones de garantía completas y los servicios pueden encontrarse en www.bresser.de/warranty_terms. - Page 32 Ogólne informacje Akcesoria różnią się w zależności od modelu. Informacja dotycząca tej instrukcji Wszystkie części (No. 1-3) Należy uważnie przeczytać wskazówki dotyczące bezpieczeństwa zawarte w Tubus teleskopu tej instrukcji. Produktu należy używać zgodnie z opisem w instrukcji, pozwoli to uniknąć uszkodzeń urządzenia oraz obrażeń. Szukacz lunetkowy Należy zachować...
- Page 33 4. Tubus CZĘŚĆ II – Obsługa 1. Montaż: Aby zamontować tutbus teleskopu (rys. 1, 1) proszę odkręcić śrubę zacisku tubusa (rys. 6, X) i otworzyć ją. Następnie proszę ustawić tubus na środku uch- wytu i ponownie zamknąć zacisk. Proszę zamknąć uchwyt poprzez dokręcenie Teleskop wyposażony jest montaż...
- Page 34 Wzór na obliczenie powiększenia: ryc. 15, A), zwrócić tubus w pożądanym kierunku i ponownie dociągnąć zaciski. Ogniskowa (Teleskopu) ÷ Ogniskowa (Okularu) = Powiększenie Nastawienie precyzyjne przeprowadzamy przy pomocy wałów giętkich (ryc. 1, 14 + 15). Przykłady: Ogniskowość Ogniskowość Powiększenie Powiększenie z WSKAZÓWKA! teleskopu okularu...
-
Page 35: Gwarancja I Serwis
Standardowy okres gwarancji wynosi 5 lata i rozpoczyna się z dniem Odległość: 1.344 lat świetlnych oddalona od ziemi dokonania zakupu. Wszelkie informacje dotyczące gwarancji i świad- czeń serwisowych można znaleźć na stronie: www.bresser.de/warran- W odległości 1344 lat świetlnych Mgławica Oriona (M42) jest najjaśniejszą ty_terms. - Page 36 Общая информация Комплектация может изменяться в зависимости от модели. О руководстве пользователя Устройство телескопа (No. 1-3) Внимательно прочтите данное руководство пользователя. Неправильное Труба телескопа использование или обслуживание прибора может привести к травмам или повреждению самого прибора. Искатель Держите данное руководство под рукой в качестве справочника по Регулировочные...
- Page 37 Гибкие рычаги Установите трубу с зажимом на монтировку так, чтобы тот край трубы, где находится объектив, смотрел на север. Прикрепите держатель трубы к верхней части монтировки (см. рис. 7) с помощью зажимного Для упрощения настройки осей склонения и прямого восхождения винта.
- Page 38 Трекинг и позиционирование наблюдений Формула вычисления увеличения: Фокусное расстояние (Телескоп) ÷ Фокусное расстояние (окуляра) = Увеличение Наклоните трубу телескопа на 90° (рис. 15с). Поверните ее на 180° вправо например: или влево так, чтобы линза объектива смотрела в небо. расстояние фокусное Увеличение...
-
Page 39: Гарантия И Обслуживание
утилизации можно получить в коммунальной службе утилизации или в отделе по защите окружающей среды. Гарантия и обслуживание Стандартный гарантийный срок составляет 5 года, начиная со дня покупки. Подробные условия гарантии, и о наших сервис- ных центрах можно получить на нашем сайте www.bresser.de/ warranty_terms. - Page 40 © National Geographic Partners LLC. All rights reserved. NATIONAL GEOGRAPHIC and Yellow Border Design are trademarks of National Geographic Society, used under license. Bresser GmbH Gutenbergstr. 2 DE-46414 Rhede www.bresser.de · info@bresser.de Irrtümer und technische Änderungen vorbehalten. Manual_9071000_Telescope_de-en-fr-nl-it-es-pl-ru_NATGEO_v012021a Errors and technical changes reserved.