Télécharger Imprimer la page

Publicité

Les langues disponibles

Les langues disponibles

Liens rapides

Perpetual Calendar • Fly-back Chronograph
• Fly-back Chrono Compass• Linear Chronograph • World Time
• Compass • Tide Temp and Compass • Altimeter • Depth
Calendrier Perpétuel • Chronographe avec Fly-back
• Boussole Chrono avec Fly-back • Chronographe linéaire
• Heure Mondiale • Boussole • Marée Température et Boussole
• Altimètre • Profondeur
Eeuwige kalender • Fly-back chronograaf
• Fly-back chronograaf kompas • Lineaire chronograaf • Wereldtijd
• Kompas • Getij Temp en Kompas • Hoogtemeter • Diepte
Calendario perpetuo • Cronografo fly-back
• Bussola del cronografo fly-back • Cronografo Lineare
• Ora mondiale • Bussola • Marea temperatura e bussola
• Altimetro • Profondità
W273 EU1 355-095009-02

Publicité

loading

Sommaire des Matières pour Timex FLYBACK CHRONO

  • Page 1 Perpetual Calendar • Fly-back Chronograph • Fly-back Chrono Compass• Linear Chronograph • World Time • Compass • Tide Temp and Compass • Altimeter • Depth Calendrier Perpétuel • Chronographe avec Fly-back • Boussole Chrono avec Fly-back • Chronographe linéaire • Heure Mondiale • Boussole • Marée Température et Boussole •...
  • Page 2 English ......Page 1 Français ......page 89 Nederlands ...... pagina 185 Italiano ......pagina 281...
  • Page 3 INTELLIGENT QUARTZ watch. Please read these instructions carefully ™ to understand how to operate your Timex watch. Your watch may not have all of the features described in this booklet. For more information, and to register your product please visit:...
  • Page 4 TABLE OF CONTENTS Compass................45 Tide Temp and Compass ..........52 Altimeter ................61 How to Start Your Watch ............ 5 Depth ................69 Water and Shock Resistance ..........6 Tachymeter Function ............73 Indiglo Night-Light ............8 ® Slide-Rule Bezel Function ..........74 Date and Time Setting ............
  • Page 5 With Timex Some watches require the setting crown to be screwed Intelligent Quartz watches, the technology is written into in.
  • Page 6 WATEr AND SHOCK rESISTANCE WArNING: TO MAINTAIN WATEr-rESISTANCE, DO NOT PrESS ANY BuTTONS uNDEr WATEr uNLESS If your watch is water-resistant, meter marking (WR_M) YOur WATCH IS INDICATED AS 200 METEr WATEr- is indicated. rESISTANT. NEVEr PuLL OuT THE CrOWN WHILE uNDEr WATEr.
  • Page 7 INDIGLO NIGHT-LIGHT DATE AND TIME SETTING ® Press button or crown to activate light. NOTE: The watch crown has three positions: closed, Electroluminescent technology used in the INDIGLO ® middle and outer. To familiarize yourself with the night-light illuminates the watch face at night and in low difference between the various positions extend the light conditions.
  • Page 8 date during this timeframe. Doing so could damage the PErPETuAL CALENDAr watch movement. OVErVIEW Push crown to closed position after setting date/time. The date Hand second hand will begin moving. Button A day Hand (RECESSED) NOTE: For months with fewer than 31 days, the date will Hour Hand need to be adjusted.
  • Page 9 Timex factory. You only need to adjust the time. The watch has two recessed push buttons for use by Timex Service Center to set the day and date after battery replacement. They have no use otherwise.
  • Page 10 FLY-BACK CHrONOGrAPH 4TH CENTEr HAND ADjuSTMENT To readjust a misaligned 4th center hand: OVErVIEW 1. Pull the crown to its outer position. The upper and lower hands reset to the ends of their sweeps Hour Hand 4tH center Hand automatically. Button A uPPer Hand 2.
  • Page 11 shows the second time zone time and the 4th center SECOND TIME zONE hand shows the minutes. The upper hand shows the time for the second time zone. Note that the scale is 2. Assuming that the second time zone time has the 24-hours, with midnight same minutes value as the first time zone, the 4th at either end and noon in...
  • Page 12 4. To reset the fly-back chronograph to zero position, FLY-BACK CHrONOGrAPH press Button B (FLY-BACk/RESET). The watch provides a 4-hour fly-back chronograph. When the chronograph is reset, all hands move to 1. To start, press Button A (START/STOP). zero position. After another eight seconds, the watch The 4th center hand shows the seconds with 1/5 resumes normal display of the second time zone.
  • Page 13 FLY-BACK CHrONOGrAPH COMPASS INDICATOr HAND (4TH CENTEr HAND) ADjuSTMENT To readjust a misaligned indicator hand: OVErVIEW 1. Pull the crown to its outer position. The upper and lower hands reset to the ends of their sweeps Minute Hand 4tH center Hand automatically.
  • Page 14 2. Press B to move the 4th center hand forward. Hold the SECOND TIME zONE button to move the hand quickly. The upper and 4th The upper hand normally shows the time for the second center hands move together; as the 4th center hand time zone.
  • Page 15 2. To stop, press A again (START/STOP). All hands freeze. FLY-BACK CHrONOGrAPH The watch provides a 4-hour fl y-back chronograph. 3. To resume, press A (START/STOP) again, or to reset the chronograph to zero, press B (FLY-BACk/RESET). 1. To start, press A (START/STOP). The 4th center hand shows the seconds with 1/5-second resolution and When the chronograph is reset, all hands move to the lower hand shows...
  • Page 16 COMPASS CALIBrATION than normal concentrations of hard and soft iron, as they may cause inaccurate headings. Whenever a heading is Before use, the compass must be calibrated. suspect, recalibrate. Since a compass uses the earth’s magnetic field, you must be aware of large metallic objects, such as vehicles Do not store the watch near any source of magnetism, such as a computer, appliance, or television, as the or bridges, or objects that give off electromagnetic...
  • Page 17 3. Press C (COMPASS) to begin. The 4th center hand 5. If you do not wish to set the magnetic declination, rotates two revolutions to remind you to rotate the push the crown in. Otherwise, to have watch watch. While level, SLOWLY rotate the watch two automatically compensate for the declination angle, revolutions, taking at least 15 seconds per revolution.
  • Page 18 available through buttons A (START/STOP) and B (FLY- COMPASS OPErATION BACk/RESET). Normally, the compass is inactive, with the 4th center hand pointing to 12 o’clock or showing the chronograph NOTE: During compass operation, the second hand seconds. moves in two-second increments. Also, when the compass is activated, the upper and lower hands may While holding the watch level, press C (COMPASS) to shift position slightly, returning to their proper positions...
  • Page 19 LINEAr CHrONOGrAPH LINEAr AND 4TH CENTEr HAND ADjuSTMENT To readjust a misaligned 4th center hand: OVErVIEW 1. Pull the crown to its outer position. The lower hand Hour Hand resets to the end of its sweep automatically. 4tH center Hand 2.
  • Page 20 SECOND TIME zONE TO SET THE SECOND TIME zONE: 1. Pull crown to its middle position. The lower hand The lower hand shows the second time zone time and the 4th center shows the time for hand shows the minutes. the second time zone.
  • Page 21 When the chronograph is reset, all hands move to zero LINEAr CHrONOGrAPH position. After another eight seconds, the watch resumes The watch provides a 4-hour split chronograph. normal display of the second time zone. While the 1. To start, press Button A (Start/Stop). The 4th center chronograph is running, you may take a split time.
  • Page 22 WOrLD TIME TO SET THE WOrLD TIME: 1. Pull the crown to its middle position. The center hand OVErVIEW shows the world time zone city and the upper hand 24 citieS Hour Hand shows the time in that city. 4tH center Hand uPPer Hand Button A World tiMe...
  • Page 23 2. Press A or B to move the center hand to the city that 4. If the displayed season is not correct for the home represents your home time zone. Hold a button to time zone, press C to change it. If the home time zone move the hand quickly.
  • Page 24 INDICATOr HAND (4TH CENTEr HAND) ADjuSTMENT CITY TIME DISPLAY To readjust a misaligned indicator hand: Press A or B to move the center 1. Pull the crown to its outer position. The upper and hand backward or lower hands reset to the ends of their sweeps, forward, respec- automatically.
  • Page 25 The watch provides one setting to represent the two peri- COMPASS ods all cities that observe daylight savings time have. For OVErVIEW the watch, the period of daylight savings time is SUMMER and the period of standard time is WINTER. declination Scale coMPaSS Hand Middle...
  • Page 26 COMPASS HAND ADjuSTMENT properly near them. For best results, calibrate in the area of intended use. Pull CROWN all the way out. Compass hand should point to 12 o’clock. If it does not, press either A or B to move In calibrating and taking headings, it is important, as with compass hand until it points to 12 o’clock.
  • Page 27 4. When done, press A or B, keeping the watch level. The To calibrate the compass: 4th center hand moves back and forth to acknowledge 1. Pull the crown to its middle position and wait for the the end of calibration and then moves to the current indicator hands to stop moving.
  • Page 28 compass will automatically turn off and the 4th center hand will return to its normal operation. This conserves battery life. Press A or B at any time to keep the compass on for another 20 seconds. NOTE: During compass operation, the second hand moves in two-second increments.
  • Page 29 TIDE TEMP AND COMPASS INDICATOr HAND ADjuSTMENT Pull crown all the way out. Indicator hand should point OVErVIEW to 12 o’clock. If it does not, press either TIDE or TEMP push button to move hand until it points to 12 o’clock. TIDE and TEMP push buttons move hand clockwise and declination teMPerature Scale...
  • Page 30 THErMOMETEr Tides are influenced by sun position and shape of shore- line, so tide clock cannot precisely give times of high and When worn on wrist, thermometer reading is affected by body heat. For more accurate readings, remove watch low tides. Periodic adjustment may be necessary. and put in shade for at least several minutes.
  • Page 31 work properly in that same location. If the compass To calibrate the compass: is calibrated away from such objects, it will not work 1. Pull the crown to its middle position and wait for the properly near them. For best results, calibrate in the area indicator hands to stop moving.
  • Page 32 4. When done, press C (Compass), keeping the watch level. The 4th center hand moves back and forth to acknowledge the end of calibration and then moves to the current magnetic declination setting. 5. If you do not wish to set the magnetic declination, push the crown in.
  • Page 33 seconds, the compass will automatically turn off and the ALTIMETEr 4th center hand will return to its normal operation. This OVErVIEW conserves battery life. Press C (COMPASS) at any time to keep the compass on for another 20 seconds. aliMeter NOTE: During compass operation, the second hand Scale moves in two-second increments.
  • Page 34 INDICATOr HAND (4TH CENTEr HAND) ADjuSTMENT if your location has not changed. Recalibrate to a known altitude when drastic pressure changes occur. Pull crown all the way out. The upper and lower retro- grade hands reset to the start of their scales automati- To calibrate the altimeter: cally.
  • Page 35 will move the center hand more rapidly. The upper To change the unit from METERS to FEET, press C a retrograde hand moves relative to the altitude value second time. To change the unit from FEET to METERS, displayed by the 4th center hand. press C twice (altimeter is turned off first then turned back on with the unit in METERS).
  • Page 36 To turn the altimeter off with the current unit set to maximum altitude’s thousands value with divisions every FEET, press C. To turn the altimeter off with the unit set one thousand METERS/FEET. to METERS, press C twice (lower hand goes to FEET first The maximum recorded altitude is displayed for ten before going to the OFF position).
  • Page 37 ten METERS/FEET. The upper retrograde hand shows the DEPTH minimum altitude’s thousands value with divisions every OVErVIEW one thousand METERS/FEET. center Hand The minimum recorded altitude is displayed for ten Button A seconds. To extend the display duration for another ten seconds, press B before the previous ten second duration expires To change the unit from METERS to FEET or FEET to METERS, press C.
  • Page 38 TEMPErATurE for 5 minutes, the sensor will automatically turn off. To turn the sensor off manually, press and hold button B The temperature sensor is always on and will take a for 2 seconds. The 4th center hand will move to the OFF reading at least once every 60 seconds.
  • Page 39 shall move by five hand positions. At this point, depth BATTErY LEVEL DETECTION sensor can not be activated, and the user must replace The watch determines the battery level status and provides the user with a visual indication corresponding the battery immediately. to the current battery level.
  • Page 40 3. Stop the chronograph once the target for speed Inner ring measurement passes the finish marker. On the inner ring, “MPH” (mile per hour) refers to “speed index”. This index is used to calculate the speed involving 4. The chronograph second hand is compared to the any data per hour.
  • Page 41 The following examples serve as a guide of how to use Known Factors: Speed: 40 miles per hour Distance: the slide rule. 10 nautical miles • Align “40” on the outer ring with the mark “MPH” SPEED CALCuLATION: marking on the inner ring. What speed is required to go 10 nautical miles in 15 minutes? •...
  • Page 42 HOW TO ADjuST BrACELET • The distance travelled can be obtained above the “15” marker on the inner ring. The number indicated on the (Variations of the following bracelet sections apply to all outer ring is “10”. watch models). The answer: the distance travelled is 10 nautical miles.
  • Page 43 BrACELET LINK rEMOVAL FOLDOVEr CLASP BrACELET 1. Find spring bar that connects bracelet to clasp. rEMOVING LINKS: 1. Place bracelet upright and insert pointed tool in 2. Using a pointed tool, push in spring bar and gently opening of link. twist bracelet to disengage.
  • Page 44 DO NOT DISPOSE OF BATTErY IN FIrE. DO NOT When the battery needs to be changed, we recommend rECHArGE. KEEP LOOSE BATTErIES AWAY FrOM that only TIMEX replace it. Your watch will need to be CHILDrEN. recalibrated to correct time and date after changing the TIMEX INTErNATIONAL WArrANTY battery.
  • Page 45 4. from accidents, tampering or abuse; and To obtain warranty service, please return your watch to Timex, one of its affiliates or the Timex retailer where 5. lens or crystal, strap or band, watch case, attachments the watch was purchased, together with a completed or battery.
  • Page 46 Canada; and a Uk£3.50 cheque or money Available in U.S. only. Extend your warranty for an order in the U.k. In other countries, Timex will charge additional 4 years from date of purchase for $5. You can you for postage and handling.
  • Page 47 MONTrES TIMEX ® Félicitations pour votre achat d’une montre Timex ® INTELLIGENT QUARTZ ™ . Lire les instructions attentivement pour bien comprendre le fonctionnement de votre montre Timex. Il est possible que ce modèle ne présente pas toutes les fonctions décrites dans le dépliant.
  • Page 48 SOMMAIrE Boussole ................. 135 Marée Température et Boussole ........142 Comment mettre la montre en marche ......93 Altimètre ................ 152 Résistance aux chocs et à l’eau ........94 Profondeur ..............161 Veilleuse Indiglo ............. 96 ® Fonction Tachymètre ............. 166 Réglage de la date et de l’heure ........
  • Page 49 , la technologie à ™ EN MArCHE quartz du futur. La technologie Timex Intelligent Quartz (Ne concerne pas les modèles à calendrier perpétuel.) combine la puissance d’un microprocesseur à la fiabilité Pour mettre la montre en marche, retirer la bague de et la précision des montres à...
  • Page 50 rÉSISTANCE AuX CHOCS ET À L’EAu ATTENTION : POur PrÉSErVEr L’ÉTANCHÉITÉ, NE PAS ENFONCEr LES BOuTONS SOuS L’EAu, SAuF Sur Si la montre est étanche, la profondeur maximale (WR_M) LES MODÈLES ÉTANCHES juSQu’À 200 MÈTrES. NE est indiquée. jAMAIS TIrEr LA COurONNE ALOrS QuE LA MONTrE EST SOuS L’EAu.
  • Page 51 VEILLEuSE INDIGLO rÉGLAGE DE LA DATE ET DE L’HEurE ® Appuyez sur le bouton ou la couronne pour activer rEMArQuE : La couronne de montre possède 3 l’éclairage. La technologie électroluminescente utilisée positions : enfoncée, intermédiaire et extrême. Pour dans la veilleuse INDIGLO permet d’illuminer le cadran vous familiariser avec les différentes positions, tirez la ®...
  • Page 52 CALENDrIEr PErPÉTuEL Date (Ne concerne pas les modèles à calendrier perpétuel) VuE D’ENSEMBLE Tirez la couronne en position intermédiaire puis tournez aiGuille de la date jusqu’à apparition de la date courante dans le dateur. Bouton A aiGuille Remarque : La date change entre 10 pm (22h00) et 2 am (EnCAStRÉ) deS jourS (2h00).
  • Page 53 Le jour à leur affichage habituel du jour, du mois et de la date. et la date ont été préréglés à l’usine Timex. Il ne reste qu’à régler l’heure. La montre possède également deux boutons poussoirs encastrés permettant au centre...
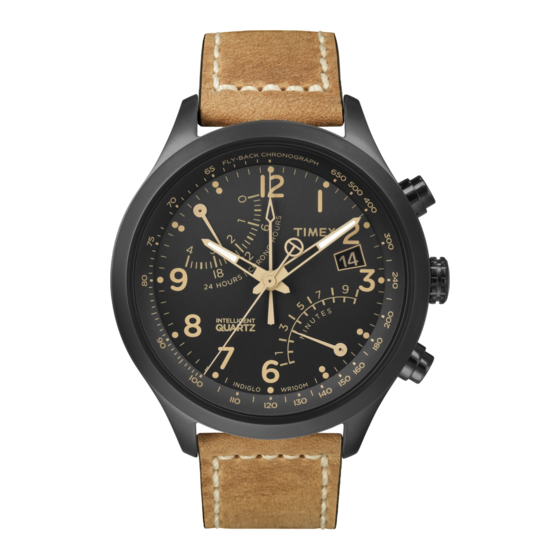
  • Page 54 CHrONOGrAPHE AVEC FLY-BACK rÉGLAGE DE LA 4ÈME AIGuILLE CENTrALE Pour réaligner la 4ème aiguille centrale : VuE D’ENSEMBLE 1. Tirez complètement la couronne. Les aiguilles 4èMe aiGuille supérieure et inférieure se règlent automatiquement aiGuille deS HeureS centrale en allant se placer en bout de trajectoire. Bouton A aiGuille 2.
  • Page 55 SECOND FuSEAu HOrAIrE POur rÉGLEr LE SECOND FuSEAu HOrAIrE : L’aiguille supérieure indique l’heure pour le second fuseau 1. Tirez la couronne en position intermédiaire. L’aiguille supérieure indique l’heure du second fuseau horaire et horaire. Notez qu’il s’agit d’une échelle sur 24 heures, minuit se situant à...
  • Page 56 2. Pour l’arrêter, appuyez de nouveau sur le bouton A 4. Enfoncez la couronne pour valider. (START/STOP). Toutes les aiguilles s’arrêtent. CHrONOGrAPHE AVEC FLY-BACK Ou rETOur À LA VOLÉE 3. Pour redémarrer, appuyez de nouveau sur le bouton A La montre comporte un chronographe avec fly-back ou (START/STOP).
  • Page 57 BOuSSOLE CHrONO AVEC FLY-BACK rÉGLAGE DE L’AIGuILLE INDICATrICE (4ÈME AIGuILLE CENTrALE) VuE D’ENSEMBLE POur rÉALIGNEr uNE AIGuILLE INDICATrICE : 1. Tirez complètement la couronne. Les aiguilles 4èMe aiGuille aiGuille deS MinuteS centrale supérieure et inférieure se règlent automatiquement Bouton A aiGuille en allant se placer en bout de trajectoire.
  • Page 58 2. Appuyez sur B pour faire avancer la 4ème aiguille SECOND FuSEAu HOrAIrE centrale. Maintenez le bouton enfoncé pour déplacer L’aiguille supérieure indique normalement l’heure pour le l’aiguille rapidement. L’aiguille supérieure et la 4ème second fuseau horaire. Noter qu’il s’agit d’une échelle sur aiguille centrale se déplacent ensemble, l’aiguille 24 heures, minuit se situant à...
  • Page 59 dernier chiffre des minutes, en comptant jusqu’à dix utilisez le second fuseau horaire de cette manière, assurez-vous que l’affi chage heure/minute correspond puis en répétant l’opération. L’aiguille supérieure bien à l’affi chage sur 24 heures en vérifi ant que la date indique le temps total, heures et minutes, avec des divisions toutes les dix minutes.
  • Page 60 4. Vous pouvez également remettre à zéro et/ou redé- ÉTALONNAGE DE LA BOuSSOLE marrer le chronographe lorsqu’il est en marche. Pour La boussole doit être étalonnée avant utilisation. cela, appuyez et maintenez enfoncé le bouton B (FLY- Une boussole utilise le champ magnétique terrestre ; BACk OU RETOUR À...
  • Page 61 à l’étalonnage ou à des relevés d’orientation alors que 2. Tenez la montre en position horizontale ou posez-la la montre n’est pas en position horizontale peut aboutir sur une surface plane (si le bracelet gêne, poser la à d’importantes erreurs. Veillez également à éviter les montre sur une tasse retournée).
  • Page 62 4. Ensuite, appuyez sur C (BOUSSOLE), en maintenant 7. Enfoncer la couronne pour valider. la montre en position horizontale. L’aiguille centrale oscille pour confi rmer que l’étalonnage est terminé et se déplace ensuite pour le réglage de la déclinaison magnétique du moment. 5.
  • Page 63 automatiquement et l’aiguille centrale reprend son rEMArQuE : Au cours de l’utilisation de la boussole, la fonctionnement habituel. Ceci permet de prolonger la trotteuse se déplace par intervalles de deux secondes. durée de vie de la pile. Appuyez sur C (BOUSSOLE) à tout Lorsque la boussole est activée, il se peut aussi que les moment pour maintenir la boussole activée pendant 20 aiguilles inférieure et supérieure changent légèrement de...
  • Page 64 CHrONOGrAPHE LINÉAIrE rÉGLAGE DE L’AIGuILLE LINÉAIrE ET DE LA 4ÈME AIGuILLE CENTrALE VuE D’ENSEMBLE Pour réaligner la 4ème aiguille centrale : aiGuilleS deS HeureS 1. Tirez complètement la couronne. L’aiguille inférieure 4èMe aiGuille se règle automatiquement en allant se placer en bout centrale Bouton A de trajectoire.
  • Page 65 SECOND FuSEAu HOrAIrE rÉGLAGE Du SECOND FuSEAu HOrAIrE : L’aiguille inférieure 1. Tirez la couronne en position intermédiaire. L’aiguille indique l’heure pour le inférieure indique l’heure du second fuseau horaire et second fuseau horaire. la 4ème aiguille centrale indique les minutes. Notez qu’il s’agit d’une 2.
  • Page 66 4. Enfoncez la couronne pour valider. 3. Pour remettre le chronographe à zéro, appuyez sur le bouton B (Temps intermédiaire/Remise à zéro). CHrONOGrAPHE LINÉAIrE Lors de la remise à zéro du chronographe, toutes les La montre comporte un chronographe multi-cadrans avec aiguilles se placent sur zéro.
  • Page 67 HEurE MONDIALE POur rÉGLEr L’HEurE MONDIALE : 1. Tirez la couronne en position intermédiaire. L’aiguille VuE D’ENSEMBLE centrale indique la ville située dans le fuseau horaire 24 villeS aiGuille deS HeureS mondial et l’aiguille supérieure indique l’heure dans 4èMe aiGuille aiGuille cette ville.
  • Page 68 2. Appuyez sur A ou B pour déplacer l’aiguille centrale et 4. Si la saison affichée n’est pas celle correspondant au indiquer la ville correspondant à votre fuseau horaire. fuseau horaire local, appuyez sur C pour la modifier. Maintenez le bouton enfoncé pour déplacer l’aiguille Si le fuseau horaire local observe le passage à...
  • Page 69 rÉGLAGE DE L’AIGuILLE INDICATrICE L’HEurE DANS uNE VILLE SÉLECTIONNÉE (4ÈME AIGuILLE CENTrALE) Appuyez sur A ou B pour déplacer l’aiguille centrale Pour réaligner une aiguille indicatrice : respectivement vers 1. Tirez complètement la couronne. Les aiguilles supéri- l’arrière ou vers l’avant eure et inférieure se règlent automatiquement en et sélectionner une ville.
  • Page 70 La montre gère cela à l’aide d’un réglage signalant les BOuSSOLE deux périodes concernées par le changement d’heure VuE D’ENSEMBLE dans toutes les villes. Pour la montre, la période cor- respondant à l’heure d’été est SUMMER et la période aiGuille de la BouSSole correspondant à...
  • Page 71 rÉGLAGE DE L’AIGuILLE DE LA BOuSSOLE ne fonctionnera correctement qu’à cet endroit. Si la bous- sole est étalonnée loin de tels objets, elle ne fonctionnera Tirez la COURONNE complètement. L’aiguille de la bous- sole devrait indiquer 12 heures. Sinon, appuyez sur A ou pas correctement près d’eux.
  • Page 72 électriques, téléviseurs) car cela pourrait l’aimanter et fausser les mesures ultérieures. La précision typique des montres-boussoles est de +/- 10 degrés. Pour étalonner la boussole : 1. Tirez la couronne en position intermédiaire et attendez l’arrêt des aiguilles indicatrices. 4. Ensuite, appuyez sur A ou B, en maintenant la montre 2.
  • Page 73 6. Appuyez sur A ou B pour déplacer la 4ème aiguille FONCTIONNEMENT DE LA BOuSSOLE centrale respectivement vers l’ouest (-) ou vers l’est Normalement, la boussole est inactive et la 4ème aiguille (+) afi n d’indiquer l’angle de déclinaison de l’endroit où centrale pointe sur 12 heures ou indique les secondes du vous vous trouvez à...
  • Page 74 MArÉE TEMPÉrATurE ET BOuSSOLE rÉGLAGE DE L’AIGuILLE DE L’INDICATEur Tirez la couronne complètement. L’aiguille indicatrice VuE D’ENSEMBLE devrait indiquer 12 heures. Sinon, appuyez sur le bouton poussoir MARÉE ou TEMPÉRATURE pour faire avancer écHelle de l’aiguille jusqu’à ce qu’elle indique 12 heures. Les boutons teMPérature écHelle de poussoirs pour MARÉE et TEMPÉRATURE font avancer...
  • Page 75 est indiquée, appuyez sur le bouton poussoir TEMPÉRA- HEurE DES MArÉES TURE pour sélectionner le thermomètre. L’aiguille se Dans ce mode, l’aiguille de l’indicateur se déplace place au début de l’échelle des températures et indique toujours dans le sens des aiguilles d’une montre. Ainsi, ensuite la température courante.
  • Page 76 dans le sens des aiguilles d’une montre et inversement. Lors de l’étalonnage et des relevés d’orientation, il im- Enfoncez la couronne pour valider. porte, comme avec toutes les boussoles, de maintenir la montre dans un plan horizontal. Procéder à l’étalonnage ÉTALONNAGE DE LA BOuSSOLE ou à...
  • Page 77 Pour étalonner la boussole : 1. Tirez la couronne en position intermédiaire et attendez l’arrêt des aiguilles indicatrices. 2. Tenez la montre en position horizontale ou posez-la sur une surface plane (si le bracelet gêne, poser la montre sur une tasse retournée). La montre peut être 4.
  • Page 78 6. Appuyez sur A ou B pour déplacer la 4ème aiguille FONCTIONNEMENT DE LA BOuSSOLE centrale respectivement vers l’ouest (-) ou vers l’est Normalement, la boussole est inactive et la 4ème aiguille (+) afi n d’indiquer l’angle de déclinaison de l’endroit où centrale pointe sur 12 heures ou indique les secondes du vous vous trouvez à...
  • Page 79 ALTIMÈTrE rÉGLAGE DE L’AIGuILLE INDICATrICE (4ÈME AIGuILLE CENTrALE) VuE D’ENSEMBLE Tirez la couronne complètement. Les aiguilles rétrogrades supérieure et inférieure se règlent automatiquement en écHelle allant se placer en début de trajectoire. L’aiguille indi- d’altiMètre catrice (4ème aiguille centrale) doit indiquer 12 heures. (centaineS) Bouton A Sinon, appuyez sur les boutons A et ou B pour faire...
  • Page 80 atmosphérique varie d’un point à un autre, il est très l’altimètre a été utilisé. Autrement, l’aiguille rétrograde important de régler l’altimètre par rapport à une valeur inférieure indiquera l’unité sélectionnée dans le mode d’altitude de référence connue ou par rapport à l’altitude d’affichage de l’altitude.
  • Page 81 ACTIVATION/DÉSACTIVATION DE L’ALTIMÈTrE Pour activer l’altimètre, appuyez sur C. L’aiguille rétrograde inférieure indique MÈTRES. La 4ème aiguille centrale indique sur l’anneau externe les valeurs de l’altitude courante en centaines et en dizaines avec des divisions tous les dix MÈTRES/PIEDS. L’aiguille rétrograde supérieure indique les valeurs de l’altitude courante en milliers avec des divisions tous les mille MÈTRES/PIEDS.
  • Page 82 La montre désactive automatiquement l’altimètre au bout appuyez sur A avant l’expiration des dix premières de 60 minutes. secondes. rAPPEL DES ALTITuDES MIN/MAX Pour changer les unités et passer des MÈTRES aux PIEDS, Pour afficher l’altitude maximale enregistrée, appuyez ou des PIEDS aux MÈTRES, appuyez sur C. sur A.
  • Page 83 L’altitude minimale enregistrée s’affi che pendant dix PrOFONDEur secondes. Pour prolonger l’affi chage de dix secondes, VuE D’ENSEMBLE appuyez sur B avant l’expiration des dix premières aiGuille secondes. Pour changer les unités et passer des MÈTRES centrale Bouton A aux PIEDS ou des PIEDS aux MÈTRES, appuyez sur C. couronne Bouton B indicateur off...
  • Page 84 TEMPÉrATurE En augmentant la profondeur, la 4ème aiguille centrale Le capteur de température est toujours en marche et indiquera la profondeur actuelle comme indiqué sur prendra la température au moins une fois toutes les l’échelle de profondeur. Si la lecture reste dans les limites 60 secondes.
  • Page 85 la plus récente. Lorsque le capteur de profondeur est Pour l’état de niveau normal, la seconde aiguille se déplace d’une seconde à chaque mouvement correspon- réactivé, la mémoire sera effacée. dant à un fonctionnement normal. Si la montre n’a jamais été utilisée auparavant, les aiguilles centrales et inférieures indiqueront respectivement Lorsque la montre est en état de niveau de décharge de la pile, la seconde aiguille se déplace à...
  • Page 86 FONCTION TACHYMÈTrE 3. Arrêter le chronographe une fois que la cible de la mesure de vitesse dépasse le marqueur de fin. (certains modèles) 4. L’aiguille des secondes du chronographe indique sur En utilisant cette méthode, le tachymètre déterminera l’échelle tachymétrique la vitesse de la cible. uniquement les vitesses supérieures à...
  • Page 87 FONCTION rÈGLE À CALCuL DE LA BAGuE interne, « STAT » (mille terrestre) et « NAUT » (mille marin) servent à la conversion des unités de distance. D’ENCADrEMENT La fonction règle à calcul du cercle supérieur fonctionne anneau externe en faisant pivoter l’anneau externe. L’anneau interne ne bouge pas.
  • Page 88 Les exemples suivants servent de guide sur la manière Facteurs connus : Vitesse : 40 milles/heure Distance : d’utiliser la règle à calculer. 10 milles marins • Alignez « 40 » sur l’anneau externe avec le marquage CALCuL DE LA VITESSE : «...
  • Page 89 COMMENT AjuSTEr LE BrACELET • La distance parcourue peut être obtenue au-dessus du marquage « 15 » sur l’anneau interne. Le chiffre (Les sections suivantes s’appliquent aux bracelets de tous indiqué sur l’anneau externe est « 10 ». les modèles de montre.) La réponse : la distance parcourue est de 10 milles BrACELET À...
  • Page 90 DÉMONTAGE DE MAILLONS Du BrACELET BrACELET À FErMOIr DÉPLIANT 1. Trouvez la barrette à ressort qui attache le bracelet au DÉMONTAGE DE MAILLONS : fermoir. 1. Placez le bracelet verticalement et introduisez un outil 2. À l’aide d’un outil pointu, enfoncez la barrette et pointu dans l’ouverture du maillon.
  • Page 91 LA PILE. GArDEr LES PILES HOrS DE LA POrTÉE DES nouveau pour régler l’heure et la date après le change- ENFANTS. ment de la pile. Lorsque la montre est renvoyée à Timex, les frais de port doivent être prépayés. Pour obtenir un emballage pré-affranchi, composer le 1-800-448- 4639, consulter le détaillant chez lequel la montre a été...
  • Page 92 Timex Group USA, Inc. pour une période du boîtier, des accessoires ou de la pile. Le remplace- d’UN AN, à compter de la date d’achat. Timex ainsi que ment de ces pièces peut vous être facturé par Timex.
  • Page 93 Pour obtenir le service de garantie, veuillez retourner Aux É.-U. veuillez composer le 1-800-448-4639 pour plus votre montre à Timex, à une de ses filiales ou au détaillant de renseignements sur la garantie. Au Canada, composer Timex où la montre a été achetée. Inclure un coupon le 1-800-263-0981.
  • Page 94 5 $ US par courrier à : Timex Extended Warranty, P.O. Box 1676, Dept. EF, Little Rock, AR 72203. ©2013 Timex Group USA, Inc. TIMEX, INDIGLO, et INTELLIGENT QUARTZ sont des marques déposées de Timex Group B.V. et de ses filiales.
  • Page 95 QUARTZ ™ horloge. Lees de instructies goed door zodat u weet hoe u uw Timex horloge moet bedienen. Het is mogelijk dat uw horloge niet alle functies heeft die in dit boekje worden beschreven. Bezoek voor meer informatie en om uw product te registreren: www.timex.com...
  • Page 96 INHOuDSOPGAVE kompas ................. 231 Getij Temp en kompas ........... 239 Hoogtemeter ..............250 Uw horloge starten ............189 Diepte ................259 Waterbestendigheid en schokvastheid ......190 Tachymeterfunctie ............263 Indiglo nachtverlichting ..........192 ® Rekenliniaalfunctie ............265 Tijd en datum instellen ........... 193 Armband afstellen ............
  • Page 97 Bij Bij sommige horloges moet de instelkroon naar binnen Timex Intelligent Quartz horloges is de technologie in worden gedraaid. Als de horlogekast een uitsteeksel met het ontwerp ingebouwd en biedt de wijzerplaat een schroefdraad heeft, moet de kroon naar binnen worden nieuw niveau van complexiteit.
  • Page 98 WATErBESTENDIGHEID EN SCHOKVASTHEID WAArSCHuWING: OM HET HOrLOGE WATErBESTEN- DIGHEID TE HOuDEN MAG u ONDEr WATEr OP GEEN Als het horloge waterbestendig is, wordt de metermarke- ENKELE KNOP DruKKEN TENzIj IS AANGEGEVEN DAT ring (WR_M) aangegeven. uW HOrLOGE TOT 200 METEr WATErBESTENDIG IS. TrEK DE KrOON NOOIT uIT ONDEr WATEr.
  • Page 99 INDIGLO NACHTVErLICHTING TIjD EN DATuM INSTELLEN ® Druk op de knop of kroon om het licht in te schakelen. De OPMErKING: De kroon van het horloge heeft drie in de INDIGLO ® nachtverlichting gebruikte elektrolumines- standen: gesloten, middelste en buitenste. Om bekend te centietechnologie verlicht de wijzerplaat van het horloge raken met het verschil tussen de verschillende standen, ‘s nachts en wanneer er weinig licht is.
  • Page 100 EEuWIGE KALENDEr Datum (niet van toepassing op modellen met eeuwige kalender) OVErzICHT Trek de kroon tot de middelste stand en draai hem totdat datuMWijZer de juiste datum in het datumvenster verschijnt. Opmer- Knop A daGWijZer king: De datum verandert tussen 22 en 2 uur. Verander de (VERZonKEn) datum niet tijdens deze tijd.
  • Page 101 1 = 1 jaar na schrikkeljaar; 2 = 2 jaar na schrikkeljaar; en datum. De dag en datum zijn in de Timex-fabriek 3 = 3 jaar na schrikkeljaar; 4 = schrikkeljaar. Druk de kroon vooringesteld.
  • Page 102 FLY-BACK CHrONOGrAAF 4E MIDDELSTE WIjzEr AFSTELLEN Een verkeerd ingestelde 4e middelste wijzer bijstellen: OVErzICHT 1. Trek de kroon naar de buitenste stand. De bovenste 4e MiddelSte en onderste wijzer gaan automatisch naar het einde uurWijZer WijZer van hun traject. Knop A BovenSte 2.
  • Page 103 wijzer toont de tweede tijdzone en de 4e middelste TWEEDE TIjDzONE wijzer toont de minuten. De bovenste wijzer toont de tijd voor de tweede tijdzone. U kunt zien dat de schaal 2. Als we aannemen dat de tijd van de tweede tijdzone 24 uur heeft met midder- dezelfde minuten heeft als de eerste tijdzone, hoort nacht aan beide einden...
  • Page 104 4. Druk op knop B (FLY-BACk/RESET) om de fly-back FLY-BACK CHrONOGrAAF chronograaf op nul terug te stellen. Het horloge heeft een fly-back chronograaf van 4 uur. Wanneer de chronograaf wordt teruggesteld, gaan 1. Druk op knop A (START/STOP) om te beginnen. alle wijzer naar nul.
  • Page 105 FLY-BACK CHrONOGrAAF/KOMPAS rODE WIjzEr (4E MIDDELSTE WIjzEr) AFSTELLEN Een verkeerd ingestelde rode wijzer bijstellen: OVErzICHT 1. Trek de kroon naar de buitenste stand. De bovenste en 4e MiddelSte onderste wijzer gaan automatisch naar het einde van MinuutWijZer WijZer Knop A hun traject.
  • Page 106 2. Druk op B om de 4e middelste wijzer vooruit te TWEEDE TIjDzONE draaien. Houd de knop ingedrukt om de wijzer snel te De bovenste wijzer toont normaliter de tijd voor de draaien. De bovenste en 4e middelste wijzer draaien tweede tijdzone.
  • Page 107 verdeling om de tien minuten. De chronograaf loopt minutenweergave met de 24-uurs weergave overeenkomt door te controleren of de datum om middernacht en niet tot vier uur voordat hij automatisch stopt. om 12 uur 's middags verandert. 2. Druk nogmaals op A (START/STOP) om te stoppen. Alle FLY-BACK CHrONOGrAAF wijzers stoppen.
  • Page 108 de knop loslaat; het opnemen van de tijd begint intern de buurt van dergelijke voorwerpen wordt gekalibreerd, vanaf het moment dat u de knop loslaat. Met deze werkt het alleen naar behoren op diezelfde plek. Als het “fly-back” functie kunt u een rondetijd meten. kompas uit de buurt van dergelijke voorwerpen wordt gekalibreerd, werkt het niet naar behoren nabij deze Het kompas kan worden gebruikt terwijl de chrono-...
  • Page 109 Berg het horloge niet op nabij een bron van magnetisme 3. Druk op C (kOMPAS) om te beginnen. De 4e middelste zoals een computer, huishoudelijke apparaten of een wijzer draait tweemaal rond om u eraan te herinneren televisie omdat het horloge een magnetische lading het horloge te draaien.
  • Page 110 4. Wanneer u klaar bent, houdt u het horloge horizontaal 7. Druk de kroon naar binnen wanneer u klaar bent. en drukt u op C (kompas). De 4e middelste wijzer beweegt heen en weer om het einde van het kalibreren aan te geven en beweegt vervolgens naar de huidige magnetische miswijzingsinstelling.
  • Page 111 WErKING VAN KOMPAS onderste wijzer blijven de chronograaftijd tonen en alle chronograaffuncties zijn beschikbaar via knop A (START/ Gewoonlijk wordt het kompas niet gebruikt; de 4e middelste wijzer wijst dan naar 12 uur of toont de STOP) en B (FLY-BACk/RESET). seconden van de chronograaf.
  • Page 112 LINEAIrE CHrONOGrAAF LINEAIrE EN 4E MIDDELSTE WIjzEr AFSTELLEN Een verkeerd ingestelde 4e middelste wijzer bijstellen: OVErzICHT 1. Trek de kroon naar de buitenste stand. De onderste wijzer wordt automatisch naar het einde van het uurWijZer traject gereset. 4e MiddelSte 2. De 4e middelste wijzer hoort naar 12 uur te wijzen. Als WijZer Knop A de 4e middelste wijzer niet binnen 5 seconden nadat...
  • Page 113 TWEEDE TIjDzONE DE TWEEDE TIjDzONE INSTELLEN: De onderste wijzer 1. Trek de kroon naar de middelste stand. De onderste toont de tijd voor de wijzer toont de tijd van de tweede tijdzone en de 4e tweede tijdzone. middelste wijzer toont de minuten. U kunt zien dat de 2.
  • Page 114 4. Druk de kroon naar binnen wanneer u klaar bent. Wanneer de chronograaf wordt teruggesteld, gaan alle wijzers naar nul. Na acht seconden verschijnt het LINEAIrE CHrONOGrAAF gewone display van de tweede tijdzone weer. Terwijl de Het horloge heeft een chronograaf van 4 uur met tussentijd. chronograaf loopt, kunt u een tussentijd opnemen.
  • Page 115 WErELDTIjD DE WErELDTIjD INSTELLEN: 1. Trek de kroon naar de middelste stand. De middelste OVErzICHT wijzer toont de stad in de wereldtijdzone en de 24 Steden uurWijZer bovenste wijzer toont de tijd in die stad. BovenSte 4e MiddelSte WijZer WijZer Knop A Wereldtijd­...
  • Page 116 de knop ingedrukt om de wijzer snel te draaien. Elke 4. Als het weergegeven seizoen niet juist is voor de stad kan worden gebruikt. thuistijdzone, drukt u op C om het te veranderen. Als de thuistijdzone zomertijd heeft, draait de bovenste 3.
  • Page 117 rODE WIjzEr (4E MIDDELSTE WIjzEr) AFSTELLEN WEErGAVE VAN STAD EN TIjD Een verkeerd ingestelde rode wijzer bijstellen: Druk op A of B om de middelste wijzer respec- 1. Trek de kroon naar de buitenste stand. De bovenste tievelijk achter- of vooruit en onderste wijzer gaan automatisch naar het einde te draaien en selecteer van hun traject.
  • Page 118 KOMPAS SEIzOEN INSTELLEN Met de seizoeninstelling kan het horloge zomertijd OVErzICHT compenseren. MiSWijZinGSScHaal Het horloge heeft één instelling die de twee perioden KoMPaSnaald Midden vertegenwoordigt die alle steden met zomertijd hebben. (Het noorden iS rood PuntiG/ Middel Ste Voor het horloge is de periode van zomertijd ZOMER lanGer) Kroon (SUMMER) en de periode van standaardtijd WINTER.
  • Page 119 KOMPASNAALD AFSTELLEN de buurt van dergelijke voorwerpen wordt gekalibreerd, werkt het alleen naar behoren op diezelfde plek. Als het Trek de kROON helemaal naar buiten. De kompasnaald hoort naar 12 uur te wijzen. Als dat niet het geval is, drukt kompas uit de buurt van dergelijke voorwerpen wordt u op A of B om de kompasnaald te verplaatsen totdat gekalibreerd, werkt het niet naar behoren nabij deze...
  • Page 120 Berg het horloge niet op nabij een bron van magnetisme 3. Druk op A of B om te beginnen. De 4e middelste wijzer zoals een computer, huishoudelijke apparaten of een draait tweemaal rond om u eraan te herinneren het televisie omdat het horloge een magnetische lading horloge te draaien.
  • Page 121 4. Wanneer u klaar bent, houdt u het horloge horizontaal 7. Druk de kroon naar binnen wanneer u klaar bent. en drukt u op A of B. De 4e middelste wijzer beweegt heen en weer om het einde van het kalibreren aan te geven en beweegt vervolgens naar de huidige magne- tische miswijzingsinstelling.
  • Page 122 naar het noorden. Na 20 seconden gaat het kompas GETIj TEMP EN KOMPAS automatisch uit en keert de 4e middelste wijzer naar de OVErzICHT normale stand terug. Hierdoor gaat de batterij langer mee. Druk op elk gewenst moment op A of B om het kompas MiSWijZinGSScHaal teMPeratuurScHaal nog 20 seconden aan te laten staan.
  • Page 123 rODE WIjzEr AFSTELLEN begin van de thermometerschaal en dan naar de huidige temperatuur. Trek de kroon helemaal naar buiten. De rode wijzer hoort naar 12 uur te wijzen. Als dat niet het geval is, drukt u THErMOMETEr op de drukknop GETIJ of TEMP om de wijzer te draaien Wanneer het horloge om de pols wordt gedragen, totdat deze naar 12 uur wijst.
  • Page 124 GETIjKLOK KOMPAS KALIBrErEN Voor de getijklok draait de rode wijzer altijd met de klok Het kompas moet worden gekalibreerd voordat u het mee zodat het vloed wordt wanneer de wijzer naar links gebruikt. wijst en het eb wordt wanneer de wijzer naar rechts Omdat een kompas gebruik maakt van het magne- wijst.
  • Page 125 Bij het kalibreren en het aflezen van de koers is het Het kompas kalibreren: belangrijk, zoals bij alle kompassen, om het kompas 1. Trek de kroon naar de middelste stand en wacht tot de horizontaal te houden. Het kalibreren of het aflezen wijzers niet meer draaien.
  • Page 126 3. Druk op C (kOMPAS) om te beginnen. De 4e middelste kalibreren aan te geven en beweegt vervolgens naar wijzer draait tweemaal rond om u eraan te herinneren de huidige magnetische miswijzingsinstelling. het horloge te draaien. Terwijl het horloge horizontaal 5.
  • Page 127 hij steeds naar het noorden. Na 20 seconden gaat het kompas automatisch uit en keert de 4e middelste wijzer naar de normale stand terug. Hierdoor gaat de batterij langer mee. Druk op elk gewenst moment op C (kOMPAS) om het kompas nog 20 seconden aan te laten staan. OPMErKING: Terwijl het kompas werkt, draait de Magnetische miswijzing ingesteld op -14°...
  • Page 128 HOOGTEMETEr rODE WIjzEr (4E MIDDELSTE WIjzEr) AFSTELLEN Trek de kroon helemaal naar buiten. De bovenste en OVErzICHT onderste teruglopende wijzer worden automatisch teruggesteld naar het begin van hun schaal. De (4e HooGteMeter­ middelste) wijzer hoort naar 12 uur te wijzen. Als dat ScHaal (Honderdtallen) niet het geval is, drukt u op knop A en/of B om de wijzer...
  • Page 129 verschilt, is het belangrijk om de hoogtemeter op een de onderste teruglopende wijzer naar de momenteel bekende referentiehoogtewaarde of een standaard geselecteerde eenheid in het hoogtedisplay. De 4e referentiehoogte van een bepaalde plaats in te stellen. middelste wijzer en de bovenste teruglopende wijzer Plotselinge veranderingen in druk vanwege weersver- horen naar de huidige hoogte te wijzen.
  • Page 130 HOOGTEMETEr AAN/uIT Druk op C om de hoogtemeter aan te zetten. De onderste teruglopende wijzer wijst naar METERS. Aan de hand van de markeringen op de bovenste ring toont de 4e middel- ste wijzer de waarde van de huidige hoogte in honderd- en tientallen met een verdeling om de tien METER/FT.
  • Page 131 Het horloge zet de hoogtemeter automatisch 60 minuten te geven drukt u op A voordat de vorige tien seconden na activering uit. verstreken zijn. MIN/MAX HOOGTE VAN HOOGTEMETEr TEruGrOEPEN Druk op C om de eenheid van METERS in FEET of van Druk op A om de maximale geregistreerde hoogte te FEET in METERS te veranderen.
  • Page 132 De minimale geregistreerde hoogte wordt tien seconden DIEPTE weergegeven. Om het display nog tien seconden weer OVErzICHT te geven drukt u op B voordat de vorige tien seconden MiddelSte WijZer verstreken zijn. Druk op C om de eenheid van METERS in Knop A FEET of van FEET in METERS te veranderen.
  • Page 133 TEMPErATuur middelste wijzer naar de werkelijke diepte zoals aange- geven op de diepteschaal. Als de waarden gedurende 5 De temperatuursensor is altijd aan en leest de minuten binnen het bereik van 0 tot 2 meter (0-6 ft) blij- tempe ratuur minstens eenmaal per 60 seconden af. De ven, gaat de sensor automatisch uit.
  • Page 134 Als het horloge nog niet gebruikt is, dan bewegen de 2 seconden en wel twee wijzerstanden. De gebruiker middelste en onderste wijzers en geven respectievelijk wordt aangeraden om de batterij te vervangen wanneer 0 meter/ft en 0 ºC/32 ºF weer. De kroon moet weer erin het horloge de status Batterij bijna leeg heeft.
  • Page 135 mijl, zeemijl, kilometer, meter enz.) zolang dezelfde rEKENLINIAALFuNCTIE lengte-eenheid voor alle berekeningen wordt gebruikt. De rekenliniaalfunctie van de bovenste ring werkt door 1. Bepaal de begin- en eindmarkeringen voor uw vooraf de buitenste ring te draaien. De binnenste ring draait niet. bepaalde afstand.
  • Page 136 BuitenSte De volgende voorbeelden dienen als leidraad voor het rinG gebruik van de rekenliniaal. BinnenSte rinG SNELHEID BErEKENEN: Welke snelheid is nodig om 10 zeemijl in 15 minuten af te leggen? Bekende factoren: Afstand: 10 zeemijl Tijd: 15 minuten • Lijn de pijl “10” op de buitenste ring uit met “15” op de binnenste ring.
  • Page 137 • Lijn “40” op de buitenste ring uit met het merkteken • De afgelegde afstand vindt u boven het merkteken “MPH” op de binnenste ring. “15” op de binnenste ring. Het getal op de buitenste ring is “10”. • De vereiste tijd vindt u vlak onder de pijl “10” op de Het antwoord: de afgelegde afstand is 10 zeemijl.
  • Page 138 ArMBAND AFSTELLEN ArMBAND MET KLAPSLuITING 1. Zoek het veerstaafje op waarmee de armband aan de (Variaties van de volgende gedeelten over de armband sluiting vastzit. gelden voor alle horlogemodellen.) 2. Druk het veerstaafje met een puntig stuk gereedschap ArMBAND MET CLIPSLuITING naar binnen en draai de armband voorzichtig los.
  • Page 139 2. Duw de pen terug in de schakel in de richting tegen- of gaat u naar www.TIMEX.com. Wilt u het volgende met gesteld aan de pijl. uw horloge sturen voor port en behandeling (dit zijn geen...
  • Page 140 Het TIMEX horloge heeft een garantie van de Timex ® Canada; en in andere landen zal Timex port en behande- Group USA, Inc. voor gebreken in fabricage gedurende ling in rekening brengen. een periode van EEN JAAR vanaf de oorspronkelijke STuur NOOIT EEN SPECIAAL HOrLOGEBANDjE OF aankoopdatum.
  • Page 141 3. als gevolg van reparaties die niet door Timex zijn tot schade toe, zodat deze beperkingen wellicht niet voor uitgevoerd; u van toepassing zijn. Deze garantie geeft u specifieke wettelijke rechten en u kunt ook andere rechten hebben 4. als gevolg van ongelukken, knoeien of misbruik en die van land tot land en van staat tot staat verschillen.
  • Page 142 5 tekens bestaande modelnummer zijn vereist. 01-800-01-060-00. Voor Midden-Amerika, het Caribische U kunt ook een cheque voor $5 sturen naar: Timex gebied, Bermuda en de Bahamas (501) 370-5775 (VS). Voor Extended Warranty, P.O. Box 1676, Dept. EF, Little Rock, Azië...
  • Page 143 ® INTELLIGENT QUARTZ ™ . Si prega di leggere attentamente le istruzioni per capire come usare l’orologio Timex ® L’orologio in dotazione potrebbe non disporre di tutte le funzioni descritte in questo opuscolo. Per ulteriori informazioni, e per registrare il prodotto, si prega di visitare il sito: www.timex.com...
  • Page 144 INDICE ANALITICO Bussola ................327 Marea temperatura e bussola ........334 Altimetro ................ 344 Come avviare l’orologio ..........285 Profondità ............... 353 Resistenza all’acqua e agli urti ........286 Funzione di tachimetro ..........358 Illuminazione del quadrante Indiglo ......288 ®...
  • Page 145 Alcuni orologi richiedono l’avvitamento in dentro della tempo analogica al quarzo. Negli orologi Timex Intelligent corona di impostazione. Se la cassa dell’orologio in dota- Quartz, la tecnologia è incorporata nel design, offrendo zione presenta una sporgenza con filettature, la corona un nuovo livello di complessità...
  • Page 146 rESISTENzA ALL’ACQuA E AGLI urTI AVVErTENzA: PEr SALVAGuArDArE LA rESISTENzA ALL’ACQuA DELL’OrOLOGIO, NON PrEMErE ALCuN Se l’orologio in dotazione è resistente all’acqua, riporta PuLSANTE SOTT’ACQuA, A MENO CHE NON SIA una dicitura in metri di profondità (WR_M). INDICATO CHE L’OrOLOGIO È IMPErMEABILE FINO A 200 METrI.
  • Page 147 ILLuMINAzIONE DEL QuADrANTE INDIGLO IMPOSTAzIONE DI DATA E OrA ® Premere un pulsante o la corona per attivare l’illumina- NOTA: la corona dell’orologio presenta tre posizioni: zione del quadrante. La tecnologia elettroluminescente chiusa, intermedia ed esterna. Per faniliarizzarsi con impiegata nell’illuminazione del quadrante INDIGLO la differenza fra le varie posizioni, estendere la corona ®...
  • Page 148 CALENDArIO PErPETuO Data (non pertiene ai modelli con Calendario perpetuo) Estrarre la corona nella sua posizione intermedia e girarla PANOrAMICA finché nella finestrella della data non appare la data lancetta della data giusta. Nota: la data cambia fra le 10 di sera e le 2 del lancetta pulSAntE A mattino.
  • Page 149 La lancetta della data parte del Timex Service Center per impostare il giorno e mostra la compensazione: 1 = 1 anno dopo l’anno la data dopo la sostituzione della batteria. Questi pulsanti bisestile;...
  • Page 150 CrONOGrAFO FLY-BACK rEGOLAzIONE DELLA QuArTA LANCETTA CENTrALE Per regolare di nuovo una quarta lancetta centrale (CON rITOrNO INDIETrO) allineata erroneamente PANOrAMICA 1. Estrarre la corona nella sua posizione esterna. lancetta delle ore 4a lancetta Le lancette superiore e inferiore si ripristinano centrale pulSAntE A automaticamente al termine della loro rivoluzione.
  • Page 151 SECONDO FuSO OrArIO COME IMPOSTArE IL SECONDO FuSO OrArIO La lancetta superiore indica l’ora per il secondo fuso 1. Estrarre la corona nella sua posizione intermedia. La lancetta superiore mostra l’ora del secondo fuso orario. Tenere presente che la scala è di 24 ore, orario, mentre la 4a lancetta centrale indica i minuti.
  • Page 152 2. Per fermare il cronografo, premere di nuovo il Pulsante rapidamente la lancetta, premere e tenere premuto il Pulsante A. A (START [Avvio]/STOP). Tutte le lancette si fermano. 4. Spingere in dentro la corona quando si finisce. 3. Per riprendere, premere di nuovo il Pulsante A (START [Avvio]/STOP).
  • Page 153 BuSSOLA DEL CrONOGrAFO FLY-BACK rEGOLAzIONE DELLA LANCETTA INDICATrICE (4A LANCETTA CENTrALE) PANOrAMICA Per regolare di nuovo una lancetta indicatrice allineata 4a lancetta erroneamente lancetta dei Minuti centrale 1. Estrarre la corona nella sua posizione esterna. Le pulSAntE A lancetta SuPeriore lancette superiore e inferiore si ripristinano automati- fineStrella ore/crono Grafo...
  • Page 154 2. Premere B per spostare in avanti la 4a lancetta SECONDO FuSO OrArIO centrale. Tenere premuto il pulsante per spostare La lancetta superiore indica normalmente l’ora per il la lancetta rapidamente. Le lancette superiore e 4a secondo fuso orario. Tenere presente che la scala è di centrale si spostano insieme;...
  • Page 155 superiore indica il tempo totale, incluse le ore ed i 24 ore. Quando si imposta in questo modo il secondo fuso orario, assicurarsi che la visualizzazione di ore/minuti minuti, con divisioni ogni dieci minuti. Il cronografo corrisponda alla visualizzazione a 24 ore, verifi cando che conta fi no a quattro ore prima di fermarsi automatica- mente.
  • Page 156 premuto B (FLY-BACk/RESET [RIPRISTINA]) per emettono radiazioni elettromagnetiche, come televisori o azzerare il cronografo e rilasciarlo quando si desidera computer, che potrebbero influenzare il campo magnetico riavviarlo. Non occorre attendere che tutte le lancette che circonda l’orologio. Se la bussola viene calibrata in raggiungano lo zero prima di rilasciare il pulsante;...
  • Page 157 Non conservare l’orologio in prossimità di qualsiasi fonte 4a lancetta centrale ruota di due giri per ricordare di magnetismo, come un computer, un elettrodomestico all’utente di ruotare l’orologio. Mentre l’orologio o un televisore, in quanto l’orologio può assumere una è livellato, LENTAMENTE fargli eseguire due giri, impiegando per ogni giro almeno 15 secondi.
  • Page 158 5. Se non si desidera impostare la declinazione magnetica, spingere in dentro la corona. Altrimenti, perché l’orologio esegua la compensazione auto - matica per l’angolo di declinazione, girare l’anello della bussola fi nché il nord non si trova in corrispondenza delle ore 12.
  • Page 159 il consumo della batteria. Per riattivare la bussola per altri CrONOGrAFO LINEArE 20 secondi, premere di nuovo il pulsante C (COMPASS/ PANOrAMICA BUSSOLA) in qualsiasi momento. La bussola può essere attivata mentre il cronografo è in lancetta delle ore Quarta lancetta uso.
  • Page 160 rEGOLAzIONE DELLA LANCETTA LINEArE 3. Se il cronografo è stato ripristinato e la lancetta E DELLA QuArTA LANCETTA CENTrALE lineare non punta sullo zero, premere e tenere Come regolare di nuovo una quarta lancetta centrale premuto il Pulsante B per 5 secondi, per innestare allineata erroneamente una calibrazione completa dell’indicatore lineare che richiederà...
  • Page 161 SECONDO FuSO OrArIO COME IMPOSTArE IL SECONDO FuSO OrArIO La lancetta inferiore 1. Estrarre la corona nella sua posizione intermedia. La indica l’ora per il lancetta inferiore mostra l’ora del secondo fuso orario, secondo fuso orario. mentre la quarta lancetta centrale indica i minuti. Tenere presente che 2.
  • Page 162 rapidamente la lancetta, premere e tenere premuto 2. Per fermare il cronografo, premere di nuovo il il Pulsante A. Pulsante A (Avvio/Stop). Tutte le lancette si fermano. 4 Spingere in dentro la corona quando si finisce. 3. Per azzerare il cronografo, premere il Pulsante B (Tempo intermedio/Ripristina).
  • Page 163 OrA MONDIALE PEr IMPOSTArE L’OrA MONDIALE 1. Estrarre la corona nella sua posizione intermedia. PANOrAMICA La lancetta centrale indica la città del fuso orario 24 città lancetta delle ore mondiale, mentre la lancetta superiore indica l’ora in 4a lancetta lancetta quella città.
  • Page 164 2. Premere A o B per spostare la lancetta centrale sulla (Circa 10 secondi dopo che la corona viene estratta città che rappresenta il proprio fuso orario locale. nella sua posizione esterna.) Tenere premuto un pulsante per spostare la lancetta 4.
  • Page 165 rEGOLAzIONE DELLA LANCETTA INDICATrICE VISuALIzzAzIONE DELL’OrA DELLE CITTÀ (4A LANCETTA CENTrALE) Premere A o B per spostare Per regolare di nuovo una lancetta indicatrice allineata la lancetta centrale rispet- erroneamente tivamente all’indietro o in 1. Estrarre la corona nella sua posizione esterna. Le avanti e selezionare una lancette superiore e inferiore si ripristinano automati- città.
  • Page 166 L’orologio offre un’impostazione per rappresentare i due BuSSOLA periodi che hanno tutte le città che osservano l’ora legale. PANOrAMICA Per l’orologio, il periodo dell’ora legale è L’ESTATE ed il aGo della BuSSola periodo dell’ora solare è L’INVERNO. Scala di declinaZione (l’eStreMità...
  • Page 167 rEGOLAzIONE DELL’AGO DELLA BuSSOLA prossimità di tali oggetti, funzionerà adeguatamente solo nello stesso luogo. Se la bussola viene calibrata lontano Estrarre completamente la CORONA. L’ago della bussola deve puntare sulle ore 12. In caso contrario, premere il da tali oggetti, non funzionerà adeguatamente in loro pulsante A o B per spostare l’ago della bussola in modo prossimità.
  • Page 168 carica magnetica e dare letture inaccurate. L’accuratezza tipica di strumenti indossati al polso rientra in +/- 10 gradi. Per calibrare la bussola 1. Estrarre la corona nella sua posizione intermedia e attendere che le lancette indicatrici smettano di muoversi. 4. Al termine, premere A o B, tenendo l’orologio livellato. 2.
  • Page 169 6. Premere A o B per spostare la quarta lancetta FuNzIONAMENTO DELLA BuSSOLA centrale rispettivamente verso ovest (-) o verso est Di solito, la bussola è inattiva, con la 4a lancetta centrale (+), per puntare sull’angolo di declinazione della che punta sulle ore 12 o indica i secondi del cronografo. propria ubicazione usando la scala di declinazione.
  • Page 170 MArEA TEMPErATurA E BuSSOLA COME rEGOLArE LA LANCETTA INDICATrICE Estrarre completamente la corona. L’ago della lancetta PANOrAMICA deve puntare sulle ore 12. In caso contrario, premere il pulsante TIDE (MAREA) o TEMP per spostare la lancetta Scala di Scala teMPeratura in modo che punti in tale direzione.
  • Page 171 La lancetta si sposta all’inizio della scala del termometro OrOLOGIO DELLA MArEA e poi sulla temperatura corrente. Per l’orologio della marea, la lancetta indicatrice ruota sempre in senso orario, quindi la marea si sta alzando TErMOMETrO quando la lancetta punta a sinistra e sta calando quando Quando il termometro viene indossato al polso, la sua la lancetta punta a destra.
  • Page 172 mente la lancetta in senso orario e antiorario. Spingere in Nel calibrare e nell’usare la bussola per le letture, è dentro la corona quando si finisce. importante, come nel caso di tutte le bussole, mantenerla a livello. In caso contrario, si può incorrere in gravi errori CALIBrAzIONE DELLA BuSSOLA di lettura.
  • Page 173 Per calibrare la bussola 1. Estrarre la corona nella sua posizione intermedia e attendere che le lancette indicatrici smettano di muoversi. 2. Tenere l’orologio a livello o posarlo su una superficie a livello (se il cinturino interferisce, mettere l’orologio 4. Al termine, premere C (compass/bussola), tenendo sopra una tazza capovolta).
  • Page 174 6. Premere A o B per spostare la quarta lancetta FuNzIONAMENTO DELLA BuSSOLA centrale rispettivamente verso ovest (-) o verso est Di solito, la bussola è inattiva, con la 4a lancetta centrale (+), per puntare sull’angolo di declinazione della che punta sulle ore 12 o indica i secondi del cronografo. propria ubicazione usando la scala di declinazione.
  • Page 175 ALTIMETrO rEGOLAzIONE DELLA LANCETTA INDICATrICE (4A LANCETTA CENTrALE) PANOrAMICA Estrarre completamente la corona. Le lancette del retrogrado superiore e inferiore si azzerano automatica- Scala altiMetro mente all’inizio delle loro scale. La lancetta indicatrice (centinaia) (quarta lancetta centrale) deve puntare sulle ore 12. In pulSAntE A caso contrario, premere il pulsante A e/o B per spostare (altitudine MaSSiMa)
  • Page 176 punta all’unità selezionata l’ultima volta che l’altimetro è importante impostare l’altimetro su un valore di alti- tudine noto di riferimento, oppure su un’altitudine di riferi- è stato usato; altrimenti, la lancetta del retrogrado mento standard di un determinato luogo. Cambiamenti di inferiore punta sull’unità...
  • Page 177 ACCENSIONE/SPEGNIMENTO DELL’ALTIMETrO Per accendere l’altimetro, premere C. La lancetta del retrogrado inferiore punta sui METRI (METERS). Usando i contrassegni sull’anello superiore, la 4a lancetta centrale indica il valore delle centinaia e delle decine relative all’altitudine attuale con divisioni ogni dieci METRI/PIEDI. La lancetta del retrogrado superiore mostra il valore delle migliaia dell’attuale altitudine con divisioni ogni mille METRI/PIEDI.
  • Page 178 L’altitudine massima registrata viene visualizzata per dieci L’orologio spegne automaticamente l’altimetro dopo 60 minuti dall’attivazione. secondi. Per estendere la durata di visualizzazione per altri dieci secondi, premere A prima che scada il periodo rICHIAMO DELL’ALTITuDINE MIN/MAX di durata precedente di dieci secondi. DELL’ALTIMETrO Per visualizzare l’altitudine massima registrata, premere Per cambiare le unità...
  • Page 179 migliaia dell’altitudine minima con divisioni ogni mille PrOFONDITÀ METRI/PIEDI. PANOrAMICA L’altitudine minima registrata viene visualizzata per dieci lancetta secondi. Per estendere la durata di visualizzazione per centrale pulSAntE A altri dieci secondi, premere B prima che scada il periodo di durata precedente di dieci secondi. Per cambiare le unità...
  • Page 180 la 4a lancetta centrale punta sulla profondità effettiva, che TEMPErATurA viene indicata sulla scala della profondità. Se le letture Il sensore della temperatura è sempre abilitato e restano nell’intervallo compreso fra 0 e 2 metri (0-6 piedi) registra una lettura almeno una volta ogni 60 secondi. per 5 minuti, il sensore si spegne automaticamente.
  • Page 181 Se l’orologio non è ancora stato usato, le lancette centrale Quando l’orologio presenta uno stato di Livello batteria e inferiore si spostano per visualizzare rispettivamente bassa, la lancetta dei secondi si sposta solo ad intervalli di 0 metri/piedi e 0 ºC/32 ºF. Prima dell’uso/immersione, la 2 secondi, e si sposta di due posizioni alla volta.
  • Page 182 FuNzIONE DI TACHIMETrO 3. Fermare il cronografo una volta che l’obiettivo della misurazione di velocità supera il marcatore di fine. (non tutti i modelli) 4. La lancetta dei secondi del cronografo viene confron- Il tachimetro determina solo le velocità superiori a 60 tata con i marcatori del tachimetro per determinare la unità...
  • Page 183 FuNzIONE DI rEGOLO A SCOrrIMENTO Sull’anello interno, “STAT” (miglia terrestri) e “NAUT” (miglia nautiche) servono per la conversione delle unità DELLA LuNETTA di distanza. anello eSterno La funzione di regolo a scorrimento dell’anello superiore anello interno funziona ruotando l’anello esterno. L’anello interno non si muove.
  • Page 184 Gli esempi che seguono vogliono fungere da guida su Fattori noti: velocità: 40 miglia all’ora; distanza: 10 miglia come usare il regolo a scorrimento. nautiche • Allineare “40” sull’anello esterno con il contrassegno CALCOLO DELLA VELOCITÀ “MPH” sull’anello interno. Quale velocità si richiede per percorrere 10 miglia •...
  • Page 185 COME rEGOLArE IL BrACCIALE • La distanza percorsa si ottiene guardando sopra il con- trassegno “15” sull’anello interno. Il numero indicato (Variazioni delle seguenti sezioni sul bracciale sono sull’anello esterno è “10”. applicabili a tutti i modelli di orologio.) risposta: la distanza percorsa è di 10 miglia nautiche. BrACCIALE CON FErMAGLIO rEGOLABILE 1.
  • Page 186 3. Determinare la misura del polso, quindi inserire la barretta a molla nel corrispondente foro inferiore. 4. Premere la barretta a molla, allinearla con il foro superiore, quindi rilasciarla per bloccare il bracciale in posizione. 4. Premere verso il basso la piastrina di chiusura finché non scatta.
  • Page 187 2. Spingere con forza lo spillo in direzione della freccia Quando la batteria necessita di sostituzione, raccoman- finché la maglia non si stacca (gli spilli sono difficili diamo di farla sostituire solo dalla TIMEX. L’orologio deve da rimuovere). essere ricalibrato sull’ora e sulla data giuste dopo aver 3.
  • Page 188 è garantito contro difetti di produzione ® NON ALLEGArE MAI ALLA SPEDIzIONE uN CINTurINO dalla Timex Group USA, Inc. per un periodo di UN ANNO SPECIALE O QuALSIASI ALTrO ArTICOLO DI VALOrE dalla data di acquisto originaria. Timex e le sue affiliate di PErSONALE.
  • Page 189 Questa garanzia dà al 3. causati da servizi di riparazione non eseguiti da Timex; cliente diritti legali specifici, e il cliente potrebbe avere 4. causati da incidenti, manomissione o abuso; e anche altri diritti, che variano da Paese a Paese e da Stato 5.
  • Page 190 Negli altri Paesi, la Timex addebiterà il cliente per le spese GArANzIA ESTESA di spedizione e la gestione. NON ALLEGARE MAI ALLA Disponibile sono negli Stati Uniti. Estende la garanzia per SPEDIZIONE UN CINTURINO SPECIALE O QUALSIASI ALTRO un ulteriore periodo di 4 anni dalla data dell’acquisto per ARTICOLO DI VALORE PERSONALE.