hager EE600 Mode D'emploi
Table des Matières
Les langues disponibles
Les langues disponibles
Liens rapides
EE600
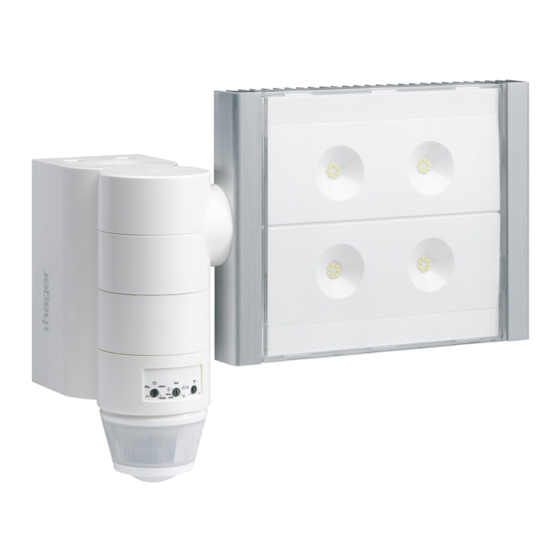
Projecteur LED avec détecteur infrarouge
a
LED floodlight with IR detector
z
LED-Strahler mit IR Bewegungsmelder
e
LED-projector met IR bewegingsmelder
i
Proiettore LED con rilevatore IR
y
Proyector LED con detector infrarrojo
r
Projector LED com sensor IV
t
Προβολέας LED με ανιχνευτή υπερύθρων
u
All manuals and user guides at all-guides.com
Table des Matières

Manuels Connexes pour hager EE600


Sommaire des Matières pour hager EE600
- Page 1 All manuals and user guides at all-guides.com EE600 Projecteur LED avec détecteur infrarouge LED floodlight with IR detector LED-Strahler mit IR Bewegungsmelder LED-projector met IR bewegingsmelder Proiettore LED con rilevatore IR Proyector LED con detector infrarrojo Projector LED com sensor IV...
-
Page 3: Table Des Matières
All manuals and user guides at all-guides.com Sommaire Inhalt Présentation Beschreibung ......................... Installation Installation .......................... Réglages Einstellungen ......................... Caractéristiques techniques Technische Merkmale ............... Contents Inhoudsopgave Presentation Beschrijving ........................Installation Installatie ..........................Settings Instellingen .......................... -
Page 4: Présentation Du Produit Et Principes De Fonctionnement
Description Présentation du produit Panneau lumineux orientable et principes de fonctionnement Le projecteur LED EE600 est équipé d’un détecteur sensible au rayonnement infrarouge lié à l’émission 180 ° calorifique de tout corps en mouvement. Le détecteur allume le projecteur lorsqu’un corps 340°... -
Page 5: Installation
All manuals and user guides at all-guides.com Installation 1- Visser le bloc au mur 2- Câbler selon le schéma 3- Clipser le projecteur sur le bloc (le clac confirme la fermeture) 4- Visser le projecteur sur le bloc (vis derrière la tête de détection). Dimensions 150 mm Clac ! -
Page 6: Réglages
vue 30-30° All manuals and user guides at all-guides.com Réglages Test et validation de la zone de détection Temporisation Luminosité Sensibilité Mettre le potentiomètre 2 en mode “test” et (durée de (modification si besoin, utiliser les obturateurs fournis pour l’éclairement) de la portée) délimiter la zone de détection. -
Page 7: Utilisation De La Télécommande
All manuals and user guides at all-guides.com Utilisation de la télécommande Action Réglages Potentiomètre (option, réf. EE806/ 52900) Utiliser les réglages Réglages Auto Le détecteur reçoit des commandes de la Auto (usine) Mettre le potentiomètre Lux télécommande quand le potientiomètre 2 est sur ou régler par la sur “auto test”. -
Page 8: Spécifications Techniques
All manuals and user guides at all-guides.com Spécifications techniques Que faire si… Le projecteur ne s’allume pas : Puissance : env. 60 W (300W incandescent) • En fonctionnement diurne, réglage Couleur de la lumière : 5700 kelvin crépuscularité est positionné sur fonctionnement Flux lumineux : 3400 lumen nocturne. - Page 44 All manuals and user guides at all-guides.com Votre installateur Hager Electro S.A.S., Boulevard d’Europe, B.P. 3, 67215 OBERNAI CEDEX, France - www.hager.com Hager 10.16 6LE002536A...