Lifetime 60170 Instructions D'assemblage
HORIZONTAL STORAGE
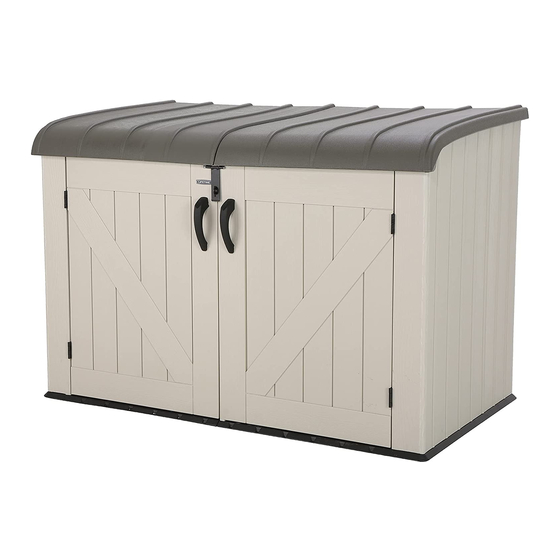
SHED
MODEL 60170
BEFORE ASSEMBLY:
• Assemble on a level surface
• At least 2 people are recommended for setup
GET ASSEMBLY HELP
WATCH THE INSTRUCTIONAL VIDEOS ON YOUTUBE.
Scan the code, or search http://go.lifetime.com/60170playlist
ADDITIONAL ASSEMBLY HELP
TOOLS REQUIRED
QUESTIONS?
Call: 1-800-225-3865
7:00 am–5:00 pm (Monday–Friday) MST
and 9:00 am–1:00 pm Saturday MST
For assembly help, scan:
Electric Drill
Hammer Drill
CONTACT LIFETIME
Live Chat: www.lifetime.com/customerservice
(click on "LIVE CHAT" tab)
For our customer service in mainland Europe:
E-mail: cs@lifetimeproducts.eu
ASSEMBLY INSTRUCTIONS
Pour le français, voir la page 2. Para el español, ver la página 3.
or search
1178993 C
in the BILT app.
5/16" (8 mm) Wood Drill Bit
5/16" (8 mm) Masonry Drill Bit
®
CUSTOMER SERVICE:
MODEL# AND PRODUCT ID
Model Number: 60170
Product ID:
TABLE OF CONTENTS
Icon Legend................................4
Warnings & Notices.....................5
Parts Identifi er............................6
Floor & Wall Assembly..................8
Door Assembly..........................21
Lid Assembly............................33
Storage Box Anchoring..............43
Cleaning & Care........................47
Registration..........................48
Warranty.................................49
(both are needed when contacting us)
Table des Matières

Manuels Connexes pour Lifetime 60170


Sommaire des Matières pour Lifetime 60170
- Page 1 • Assemble on a level surface • At least 2 people are recommended for setup GET ASSEMBLY HELP WATCH THE INSTRUCTIONAL VIDEOS ON YOUTUBE. Scan the code, or search http://go.lifetime.com/60170playlist ADDITIONAL ASSEMBLY HELP For assembly help, scan: or search 1178993 C in the BILT app.
-
Page 2: Instructions D'assemblage
Perceuse électrique Perceuse à percussion QUESTIONS ? ® CONTACTER AUX SERVICES À LA CLIENTÈLE LIFETIME N° DE MODÈLE ET RÉFÉRENCE DU PRODUIT Chat en direct: www.lifetime.com/customerservice Composer le 1-800-225-3865 (il faut avoir les deux en entrant en contact av ec nous) (cliquer sur la languette «... -
Page 3: Instrucciones De Ensamblaje
5/16” (8 mm) Broca para albañilería Taladro eléctrico Martillo perforador ¿PREGUNTAS? ® PONERSE EN CONTACTO CON LOS SERVICIOS DE CLIENTES LIFETIME MODEL E ID DEL PRODUCTO Chat en vivo: www.lifetime.com/customerservice Marcar : 1-800-225-3865 (cliquear en la lengüeta «LIVE CHAT») (se necesitan los dos al contactarnos) Número de modelo: 60170... - Page 4 ICON LEGEND / LÉGENDE DES ICÔNES / SIGNIFICADO DE LOS ÍCONOS • Indicates special heed should be taken when reading. • Indique qu’une attention spéciale doit être portée à la lecture. • Indica que uno debe prestar atención al leer. •...
- Page 5 WARNINGS & NOTICES / AVERTISSEMENTS ET AVIS / ADVERTENCIAS Y AVISOS TOOLS & HARDWARE REQUIRED / OUTILS ET QUINCAILLERIE REQUIS INSTRUMENTAL Y HERRAJE REQUERIDOS English: • Failure to follow these warnings may result in serious injury or property damage and will void warranty. •...
- Page 6 PARTS IDENTIFIER / IDENTIFICATEUR DE PIÈCES / IDENTIFICADOR DE PIEZAS Plastic Parts / Pièces en plastique Piezas de plástico DRI (x1) DRH (x1) AGY (x1) AGL (x2) AGN (x1) AHD (x2) AGO (x1) AGZ (x1) DRK (x1) DRJ (x1) Metal Parts / Pièces en métal Piezas de metal DWK (x1)
- Page 7 PARTS IDENTIFIER / IDENTIFICATEUR DE PIÈCES / IDENTIFICADOR DE PIEZAS Metal Parts / Pièces en métal Piezas de metal DUM (x1) DUN (x1) DUP (x1) DUO (x1) Blister Packs / Blisters Blísteres Small Parts Bags / Sacs de petites pièces Bolsas de piezas pequeñas...
- Page 8 FLOOR & WALL ASSEMBLY / ASSEMBLAGE DU PLANCHER ET DES PORTES / ENSAMBLAJE DEL PISO Y LAS PUERTAS HARDWARE REQUIRED / QUINCAILLERIE REQUISE / HERRAJE REQUERIDO Blister Pack / Blister Blíster BHJ (x2) ADZ (x22) DUL (x2) AYR (x2) EEV (x1) ADV (x12) PARTS REQUIRED / PIÈCES REQUISES / PIEZAS REQUERIDAS Metal Parts /...
- Page 9 FLOOR & WALL ASSEMBLY / ASSEMBLAGE DU PLANCHER ET DES PORTES / ENSAMBLAJE DEL PISO Y LAS PUERTAS PARTS REQUIRED / PIÈCES REQUISES / PIEZAS REQUERIDAS Plastic Parts / Pièces en plastique Piezas de plástico DRI (x1) DRH (x1) AGN (x1) AGY (x1) AGL (x2) AHD (x2)
- Page 10 (DRH) entre ellas en el panel de piso izquierdo, empujando contra el panel izquierdo al aplanar el panel derecho. http://go.lifetime.com/hsboxfloorandwall • Insert the Screws (AYR) into the divots in the Floor Panels • Insert the tabs at the bottom of the panel (AHD) to secure them together.
- Page 11 SECTION 1 (CONTINUED) / SECTION 1 (SUITE) SECCIÓN 1 (CONTINUACIÓN) TOOLS & HARDWARE REQUIRED / OUTILS ET QUINCAILLERIE REQUIS INSTRUMENTAL Y HERRAJE REQUERIDOS • Slide the panel to the left. • Faire glisser le panneau à gauche. • Deslizar el panel a la izquierda. •...
- Page 12 SECTION 1 (CONTINUED) / SECTION 1 (SUITE) SECCIÓN 1 (CONTINUACIÓN) TOOLS & HARDWARE REQUIRED / OUTILS ET QUINCAILLERIE REQUIS INSTRUMENTAL Y HERRAJE REQUERIDOS ADZ (x4) • Slide the panel to the right. • Faire glisser le panneau à droite. • Deslizar el panel a la derecha. •...
- Page 13 SECTION 1 (CONTINUED) / SECTION 1 (SUITE) SECCIÓN 1 (CONTINUACIÓN) TOOLS & HARDWARE REQUIRED / OUTILS ET QUINCAILLERIE REQUIS INSTRUMENTAL Y HERRAJE REQUERIDOS ADZ (x4) 1.10 • Slide the panel forward. • Tilt the panel as you bend it to get it in front of •...
- Page 14 SECTION 1 (CONTINUED) / SECTION 1 (SUITE) SECCIÓN 1 (CONTINUACIÓN) TOOLS & HARDWARE REQUIRED / OUTILS ET QUINCAILLERIE REQUIS INSTRUMENTAL Y HERRAJE REQUERIDOS ADZ (x12) 1.12 1.13 • Repeat steps 1.9–1.11 for the left side. • Insert the tabs at the bottom of the Corner panel •...
- Page 15 SECTION 1 (CONTINUED) / SECTION 1 (SUITE) SECCIÓN 1 (CONTINUACIÓN) TOOLS & HARDWARE REQUIRED / OUTILS ET QUINCAILLERIE REQUIS INSTRUMENTAL Y HERRAJE REQUERIDOS 1.17 1.16 • Flip the Assembly on its back. • Attach the two Vertical Support Tubes (DUM & DUN). •...
- Page 16 SECTION 1 (CONTINUED) / SECTION 1 (SUITE) SECCIÓN 1 (CONTINUACIÓN) TOOLS & HARDWARE REQUIRED / OUTILS ET QUINCAILLERIE REQUIS INSTRUMENTAL Y HERRAJE REQUERIDOS BHJ (x1) 1.19 • Slide the Tubes through the holes in the Floor Panels and into the Wall Panels until the Tubes hang out about 6" (≈15 cm).
- Page 17 SECTION 1 (CONTINUED) / SECTION 1 (SUITE) SECCIÓN 1 (CONTINUACIÓN) TOOLS & HARDWARE REQUIRED / OUTILS ET QUINCAILLERIE REQUIS INSTRUMENTAL Y HERRAJE REQUERIDOS ADV (x6) 1.20 • Attach the two Horizontal Support Tubes (DUO & DUP). • Attacher les deux tubes de support horizontaux (DUO & DUP). •...
- Page 18 SECTION 1 (CONTINUED) / SECTION 1 (SUITE) SECCIÓN 1 (CONTINUACIÓN) TOOLS & HARDWARE REQUIRED / OUTILS ET QUINCAILLERIE REQUIS INSTRUMENTAL Y HERRAJE REQUERIDOS ADV (x6) 1.22 • Align the holes in the Rear Wall Panels with those in the Tubes. Loosely insert six (6) Screws (ADV). Adjust rear Tubes so that the corners are at 90°.
- Page 19 SECTION 1 (CONTINUED) / SECTION 1 (SUITE) SECCIÓN 1 (CONTINUACIÓN) TOOLS & HARDWARE REQUIRED / OUTILS ET QUINCAILLERIE REQUIS INSTRUMENTAL Y HERRAJE REQUERIDOS BHJ (x1) DUL (x2) 1.23 • Insert a Self-Drilling Screw (BHJ) into the Tubes at the location shown. •...
- Page 20 SECTION 1 (CONTINUED) / SECTION 1 (SUITE) SECCIÓN 1 (CONTINUACIÓN) TOOLS & HARDWARE REQUIRED / OUTILS ET QUINCAILLERIE REQUIS INSTRUMENTAL Y HERRAJE REQUERIDOS ADZ (x2) EEV (x1) 1.25 • Set the Door Stop (EEV) onto the Floor at the location indicated and align the holes. Secure with two Screws (ADZ). •...
- Page 21 DOOR ASSEMBLY / ASSEMBLAGE DES PORTES / ENSAMBLAJE DE LAS PUERTAS HARDWARE REQUIRED / QUINCAILLERIE REQUISE / HERRAJE REQUERIDO Blister Pack / Blister Blíster DUL (x9) ADX (x14) ADW (x2) ADZ (x4) BYZ (x4) DXW (x8) AEE (x6) Small Parts Bag / Sac de petites pièces Bolsa de piezas pequeñas ENI (x1)
- Page 22 DOOR ASSEMBLY / ASSEMBLAGE DES PORTES / ENSAMBLAJE DE LAS PUERTAS PARTS REQUIRED / PIÈCES REQUISES / PIEZAS REQUERIDAS Plastic Parts / Pièces en plastique Piezas de plástico AGO (x1) AGZ (x1) TOOLS REQUIRED / OUTILS REQUIS / INSTRUMENTAL REQUERIDO...
- Page 23 • En caso de tener problemas con esta sección, seguir el código debajo para ver un video sobre el ensamblaje de esta sección. http://go.lifetime.com/hsboxdoor • Attach a Support Channel (DZA) to the back of the Left Door (AGO), and align the holes.
- Page 24 SECTION 2 (CONTINUED) / SECTION 2 (SUITE) SECCIÓN 2 (CONTINUACIÓN) TOOLS & HARDWARE REQUIRED / OUTILS ET QUINCAILLERIE REQUIS INSTRUMENTAL Y HERRAJE REQUERIDOS ADX (x4) • Secure the Channel using four (4) Screws (ADX). • Attacher le canal à l’aide de quatre (4) vis (ADX). •...
- Page 25 SECTION 2 (CONTINUED) / SECTION 2 (SUITE) SECCIÓN 2 (CONTINUACIÓN) TOOLS & HARDWARE REQUIRED / OUTILS ET QUINCAILLERIE REQUIS INSTRUMENTAL Y HERRAJE REQUERIDOS ADZ (x2) ENI (x1) • Attach the Locking Tab (ENI) to the Left Door using the hardware included. Do not overtighten. •...
- Page 26 SECTION 2 (CONTINUED) / SECTION 2 (SUITE) SECCIÓN 2 (CONTINUACIÓN) TOOLS & HARDWARE REQUIRED / OUTILS ET QUINCAILLERIE REQUIS INSTRUMENTAL Y HERRAJE REQUERIDOS BYZ (x2) ADX (x6) BYR (x1) ADW (x1) AEE (x3) BYS (x1) • Attach the Channel to the Left Door using six (6) Screws (ADX). •...
- Page 27 SECTION 2 (CONTINUED) / SECTION 2 (SUITE) SECCIÓN 2 (CONTINUACIÓN) TOOLS & HARDWARE REQUIRED / OUTILS ET QUINCAILLERIE REQUIS INSTRUMENTAL Y HERRAJE REQUERIDOS DXW (x4) DWJ (x2) • These Screws (DXW) go through the Hinge, Door, and through the holes in the Channel. •...
- Page 28 SECTION 2 (CONTINUED) / SECTION 2 (SUITE) SECCIÓN 2 (CONTINUACIÓN) TOOLS & HARDWARE REQUIRED / OUTILS ET QUINCAILLERIE REQUIS INSTRUMENTAL Y HERRAJE REQUERIDOS DUL (x1) AHS (x1) • Slide the Tube (DWK) into the Right Door (AGZ) until it hangs out about six inches. •...
- Page 29 SECTION 2 (CONTINUED) / SECTION 2 (SUITE) SECCIÓN 2 (CONTINUACIÓN) TOOLS & HARDWARE REQUIRED / OUTILS ET QUINCAILLERIE REQUIS INSTRUMENTAL Y HERRAJE REQUERIDOS ADX (x4) 2.10 • Align the four (4) holes in this Channel (DZA) with those in the Right Door. •...
- Page 30 SECTION 2 (CONTINUED) / SECTION 2 (SUITE) SECCIÓN 2 (CONTINUACIÓN) TOOLS & HARDWARE REQUIRED / OUTILS ET QUINCAILLERIE REQUIS INSTRUMENTAL Y HERRAJE REQUERIDOS BYR (x1) BYZ (x2) AEE (x3) ADW (x1) BYS (x1) EOO (x1) ADZ (x2) 2.12 • Attach the Handle (BYR & BYS) to the Right Door as indicated. •...
- Page 31 SECTION 2 (CONTINUED) / SECTION 2 (SUITE) SECCIÓN 2 (CONTINUACIÓN) TOOLS & HARDWARE REQUIRED / OUTILS ET QUINCAILLERIE REQUIS INSTRUMENTAL Y HERRAJE REQUERIDOS DXW (x4) DWJ (x2) 2.14 • These Screws (DXW) go through the Hinge, Door, and through the holes in the Channel. •...
- Page 32 SECTION 2 (CONTINUED) / SECTION 2 (SUITE) SECCIÓN 2 (CONTINUACIÓN) TOOLS & HARDWARE REQUIRED / OUTILS ET QUINCAILLERIE REQUIS INSTRUMENTAL Y HERRAJE REQUERIDOS DUL (x8) 2.15 • Attach the Right Door to the Assembly using Self-Drilling Screws (DUL). • Attacher la porte droite à l’assemblage à l’aide des vis autoperforantes (DUL). •...
- Page 33 LID ASSEMBLY / ASSEMBLAGE DU COUVERLE / ENSAMBLJE DE LA TAPA HARDWARE REQUIRED / QUINCAILLERIE REQUISE / HERRAJE REQUERIDO Blister Pack / Blister Blíster BES (x6) ADJ (x4) BLB (x4) BER (x6) ADX (x15) DDL (x8) ADZ (x6) Small Parts Bag / Sac de petites pièces Bolsa de piezas pequeñas DWD (x1)
- Page 34 LID ASSEMBLY / ASSEMBLAGE DU COUVERLE / ENSAMBLAJE DE LA TAPA PARTS REQUIRED / PIÈCES REQUISES / PIEZAS REQUERIDAS Metal Parts / Pièces en métal Piezas de metal DWA (x2) Plastic Parts / Pièces en plastique Piezas de plástico DRK (x1) DRJ (x1) TOOLS REQUIRED / OUTILS REQUIS / INSTRUMENTAL REQUERIDO 7/16 in/po (11 mm)
- Page 35 (DRK). código debajo para ver un video sobre el ensamblaje de esta sección. http://go.lifetime.com/hsboxlid • Align the six holes and secure the Lid pieces together. • Aligner les six trous et attacher les couvercles.
- Page 36 SECTION 3 (CONTINUED) / SECTION 3 (SUITE) SECCIÓN 3 (CONTINUACIÓN) TOOLS & HARDWARE REQUIRED / OUTILS ET QUINCAILLERIE REQUIS INSTRUMENTAL Y HERRAJE REQUERIDOS 7/16 in/po (11 mm) ADJ (x4) BLB (x4) ENL (x1) ADX (x2) • Tighten the Keeper (ENL) to the Lid Supports (DWA). Then, insert the left end of the Lid Support into the slit in the Lid as indicated.
- Page 37 SECTION 3 (CONTINUED) / SECTION 3 (SUITE) SECCIÓN 3 (CONTINUACIÓN) TOOLS & HARDWARE REQUIRED / OUTILS ET QUINCAILLERIE REQUIS INSTRUMENTAL Y HERRAJE REQUERIDOS 1/2 in/po (x2) (13 mm) (x2) BET (x2) ADX (x4) AAO (x2) DWB (x1) DWD (x1) • Attach the hardware to the Left Hinge (DWD), and tighten securely. •...
- Page 38 SECTION 3 (CONTINUED) / SECTION 3 (SUITE) SECCIÓN 3 (CONTINUACIÓN) TOOLS & HARDWARE REQUIRED / OUTILS ET QUINCAILLERIE REQUIS INSTRUMENTAL Y HERRAJE REQUERIDOS DDL (x4) • Insert the end of the left Hinge into the notch in the Lid, and rotate downward. •...
- Page 39 SECTION 3 (CONTINUED) / SECTION 3 (SUITE) SECCIÓN 3 (CONTINUACIÓN) TOOLS & HARDWARE REQUIRED / OUTILS ET QUINCAILLERIE REQUIS INSTRUMENTAL Y HERRAJE REQUERIDOS 1/2 in/po (x2) (13 mm) (x2) BET (x2) AAO (x2) DDL (x4) DWE (x1) 3.10 • Attach the hardware to the Right Hinge (DWE), and tighten securely. •...
- Page 40 SECTION 3 (CONTINUED) / SECTION 3 (SUITE) SECCIÓN 3 (CONTINUACIÓN) TOOLS & HARDWARE REQUIRED / OUTILS ET QUINCAILLERIE REQUIS INSTRUMENTAL Y HERRAJE REQUERIDOS 7/16 in/po (x2) (11 mm) (x2) BES (x6) ADX (x3) BER (x6) 3.12 • Place the Hinges down onto the rear Panels. Align the three holes, and secure with the hardware shown. Do not overtighten Nuts.
- Page 41 SECTION 3 (CONTINUED) / SECTION 3 (SUITE) SECCIÓN 3 (CONTINUACIÓN) TOOLS & HARDWARE REQUIRED / OUTILS ET QUINCAILLERIE REQUIS INSTRUMENTAL Y HERRAJE REQUERIDOS Bottom / Inférieur Inferior Top / Supérieur Superior AFK (x2) 3.14 • Orient the Gas Spring (AFK) as shown. The end of the Gas Spring can be rotated to align it with the Ball Stud. •...
- Page 42 SECTION 3 (CONTINUED) / SECTION 3 (SUITE) SECCIÓN 3 (CONTINUACIÓN) TOOLS & HARDWARE REQUIRED / OUTILS ET QUINCAILLERIE REQUIS INSTRUMENTAL Y HERRAJE REQUERIDOS ADX (x6) 3.15 • Open the Right Door completely, and close the Lid. Close the Hasp over the Locking Tab. If necessary, adjust the position of the Hasp in step 3.16.
- Page 43 STORAGE SHED ANCHORING / ANCRAGE DE L’ABRI DE RANGEMENT / ANCLAJE DEL CASETA/ COBERTIZO DE ALMACENAMIENTO HARDWARE REQUIRED / QUINCAILLERIE REQUISE / HERRAJE REQUERIDO Hardware / Quincaillerie Herraje NO HARDWARE OR PARTS INCLUDED FOR THIS SECTION AUCUNE QUINCAILLERIE OU PIÈCE INCLUSE POUR CETTE SECTION NINGÚN HERRAJE O PIEZA INCLUIDO PARA ESTA SECCIÓN 8 mm (5/16") Wood Drill Bit 1/2 in/po (13 mm)
- Page 44 SECTION 4 (CONTINUED) / SECTION 4 (SUITE) SECCIÓN 4 (CONTINUACIÓN) TOOLS & HARDWARE REQUIRED / OUTILS ET QUINCAILLERIE REQUIS INSTRUMENTAL Y HERRAJE REQUERIDOS • If you wish, you can anchor your storage shed to a concrete or wood platform. Tilt the box on its back and drill through the Floor at the points shown using a 8 mm (5/16") drill bit.
- Page 45 SECTION 4 (CONTINUED) / SECTION 4 (SUITE) SECCIÓN 4 (CONTINUACIÓN) TOOLS & HARDWARE REQUIRED / OUTILS ET QUINCAILLERIE REQUIS INSTRUMENTAL Y HERRAJE REQUERIDOS 14 mm (9/16 in/po) 8 mm (5/16 in/po) (x4) or / ou / o and / et / y (x4) (x4) 8 mm (5/16 in/po)
- Page 46 NOTES / REMARQUES / NOTAS...
-
Page 47: Cleaning & Care
Congratulations on your Lifetime ® product purchase. By following the instructions below, your new Lifetime product should provide you with years of service and enjoyment. The polyethylene panels are stain and solvent resistant. Most stains can be removed using a mild soap and a soft-bristled brush. - Page 48 à des tiers, et ne leur permettra pas d’utiliser vos données personnelles à leurs propres fi ns. Nous vous invitons à lire notre politique de confi dentialité à www.lifetime.com (en anglais seulement) ENREGISTRER CE PRODUIT aujourd’hui! REGISTRAR EL PRODUCTO EN LÍNEA EN WWW.LIFETIME.COM...
- Page 49 2. This warranty is nontransferable and is expressly limited to the repair or replacement of defective Horizontal Sheds. If the product is defective within the terms of this warranty, Lifetime Products, Inc. will repair or replace defective parts at no cost to the purchaser. Shipping charges to and from the factory or distribution center are not covered and are the responsibility of the purchaser.
-
Page 50: Garantie Limitée De 10 Ans
DISPONIBLES OR SONT OBSOLÈTES 1. Lifetime garantit à l’acheteur d’origine ses niches contre tout défaut de matériel ou de fabrication pour une période de 10 ans à compter de la date d’achat. On entend par « défaut » une imperfection qui nuit à l’utilisation du produit. Tout défaut découlant d’une mauvaise utilisation, d’un abus ou d’une négligence a pour effet d’annuler cette garantie. - Page 51 7. Esta garantía se otorga en reemplazo expreso de toda otra garantía, expresa o implícita, incluidas las garantías de comercialización o adaptación para el uso en la medida permitida por las leyes federales y estatales. Ni Lifetime Products, Inc., ni ninguno de sus representantes asume ninguna otra responsabilidad en conexión con este producto. Esta garantía le otorga derechos legales específi...
- Page 52 ® MEJORAR LA COMPRA DE LIFETIME AGREGANDO ACCESORIOS U OTROS MARAVILLOSOS PRODUCTOS Para comprar accesorios u otros productos de Lifetime®, visitarnos en: www.lifetime.com O marcar al 1-800-424-3865 De lunes hasta viernes 7:00 h–17:00 h Horario Éstandar de la Montaña (MST) y sábados 9:00 h–13:00 h (MST)