Table des Matières
Publicité
Les langues disponibles
Les langues disponibles
Liens rapides
Deutsch
.........................................................................................................................................................................................................................
English
...........................................................................................................................................................................................................................
........................................................................................................................................................................................................................
..........................................................................................................................................................................................................................
.........................................................................................................................................................................................................................
..............................................................................................................................................................................................................
......................................................................................................................................................................................................................
............................................................................................................................................................................................................................
LEDs Com GmbH, Dohrweg 2a, D-41066 Mönchengladbach, www.leds-com.de, Tel. +49 (0) 2161 - 5 75 99 76
2
4
6
8
10
12
14
16
Publicité
Table des Matières

Manuels Connexes pour ledscom LC-L-186-WW

Sommaire des Matières pour ledscom LC-L-186-WW
-
Page 1: Table Des Matières
Deutsch ............................................English ............................................Français ............................................Español ............................................Italiano ............................................Nederlands ..........................................Svenska ............................................Polski ............................................LEDs Com GmbH, Dohrweg 2a, D-41066 Mönchengladbach, www.leds-com.de, Tel. +49 (0) 2161 - 5 75 99 76... - Page 2 Unterbauleuchte (LC-L-186-WW) - Montagehinweise Bitte lesen Sie diese Montageanleitung Folgende umweltbedingte Einflüsse können sorgfältig, bevor Sie dieses Produkt unerwünschte Wirkungen auf die Oberfläche installieren und bewahren Sie diese für des Produktes haben: späteres Nachschlagen auf. hoher Salzgehalt in der Luft Reinigungsmittel 1.
- Page 3 Unterbauleuchte (LC-L-186-WW) - Montagehinweise Abbildung 1 1. Schalten Sie die gebäudeseitige Anschlussleitung spannungsfrei und sichern Sie diese gegen Wiedereinschalten. Lösen Sie hierzu den entsprechenden Sicherungsautomaten der Hausinstallation aus. 2a. Montage mit Montageplatte (Abbildung 1. Schrauben Sie die Montageplatten (1) direkt mit den beiliegenden Schrauben (2) auf den Montagegrund (weiches, nicht sprödes Material, zum Beispiel Holz).
- Page 4 English Under-cabinet light (LC-L-186-WW) - Assembly instructions Please read these installation instructions Protect the product by taking appropriate carefully before installing this product and measures to avoid changes to the surface. keep them for future reference. First disconnect the entire product from the...
- Page 5 English Under-cabinet light (LC-L-186-WW) - Assembly instructions Figure 1 1. Disconnect the building-side connecting cable from the power supply and secure it against being switched on again. To do this, trip the corresponding circuit breaker of the house installation. 2a. Mounting with mounting plate (Figure 1.
-
Page 6: Entretien Et Maintenance
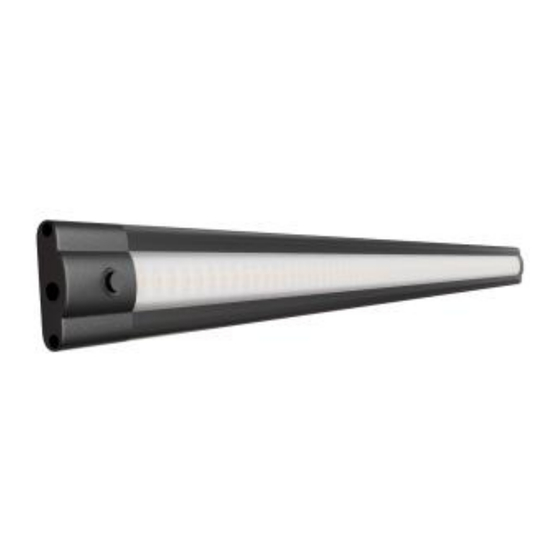
Français Luminaire d'agencement (LC-L-186-WW) - Instructions de montage Veuillez lire attentivement ces instructions Les influences environnementales suivantes de montage avant d'installer ce produit et peuvent avoir des effets indésirables sur la conservez-les pour pouvoir vous y référer surface du produit : ultérieurement. - Page 7 Français Luminaire d'agencement (LC-L-186-WW) - Instructions de montage Figure 1 1. Mettez le câble de raccordement côté bâtiment hors tension et sécurisez-le contre toute remise en marche. Pour ce faire, déclenchez le disjoncteur correspondant de l'installation domestique. 2a. Montage avec plaque de montage (figure 1) : 1.
-
Page 8: Mantenimiento Y Cuidado
Español Luminaria bajo armario (LC-L-186-WW) - Instrucciones de montaje Lea atentamente estas instrucciones de Productos de limpieza instalación antes de instalar este producto y otras sustancias químicas (por ejemplo, el consérvelas para futuras consultas. quitamanchas) Proteja el producto tomando las medidas 1. - Page 9 Español Luminaria bajo armario (LC-L-186-WW) - Instrucciones de montaje Figura 1 1. Desconecte el cable de conexión del lado del edificio de la fuente de alimentación y asegúrelo para que no se vuelva a conectar. Para ello, active el correspondiente disyuntor de la instalación de la casa.
-
Page 10: Italiano
Italiano Apparecchio sottopensile (LC-L-186-WW) - Istruzioni per il montaggio Si prega di leggere attentamente queste Agenti di pulizia istruzioni di installazione prima di installare altre sostanze chimiche (ad esempio, rimuovi- il prodotto e di conservarle per riferimenti muffa) futuri. Proteggere il prodotto prendendo misure appropriate per evitare modifiche alla 1. - Page 11 Italiano Apparecchio sottopensile (LC-L-186-WW) - Istruzioni per il montaggio Figura 1 1. Scollegare il cavo di collegamento lato edificio dall'alimentazione e assicurarlo contro una nuova accensione. Per fare questo, attivate l'interruttore corrispondente dell'installazione della casa. 2a. Montaggio con piastra di montaggio (Figura 1): 1.
-
Page 12: Nederlands
Nederlands Armatuur voor onder de kast (LC-L-186-WW) - Montage-instructies Lees deze installatie-instructies zorgvuldig Hoog zoutgehalte in de lucht door voordat u dit product installeert en Reinigingsmiddelen bewaar ze voor toekomstig gebruik. andere chemische stoffen (b.v. schimmelverwijderaar) 1. Veiligheidsinstructies Bescherm het product door passende... - Page 13 Nederlands Armatuur voor onder de kast (LC-L-186-WW) - Montage-instructies Figuur 1 1. Koppel de aansluitkabel aan de kant van het gebouw los van de stroomvoorziening en beveilig hem tegen opnieuw inschakelen. Schakel daartoe de overeenkomstige stroomonderbreker van de huisinstallatie in.
-
Page 14: Svenska
Svenska Armatur under skåp (LC-L-186-WW) - Monteringsanvisningar Läs dessa installationsanvisningar Skydda produkten genom att vidta lämpliga noggrant innan du installerar produkten och åtgärder för att undvika förändringar av ytan. spara dem för framtida referens. Koppla bort hela produkten från strömförsörjningen och låt den svalna innan du utför rengörings- eller underhållsarbete på... - Page 15 Svenska Armatur under skåp (LC-L-186-WW) - Monteringsanvisningar Figur 1 1. Koppla bort anslutningskabeln på byggnadssidan från strömförsörjningen och säkra den så att den inte kan sättas på igen. För att göra detta utlöser du motsvarande strömbrytare i husinstallationen. 2a. Montering med monteringsplatta (figur 1.
-
Page 16: Instrukcje Bezpieczeństwa
Polski Oprawa podszafkowa (LC-L-186-WW) - Instrukcja montażu Prosimy o dokładne zapoznanie się z niniejszą niepożądany wpływ na powierzchnię produktu: instrukcją montażu przed instalacją produktu i zachowanie jej na przyszłość. Wysoka zawartość soli w powietrzu Środki czyszczące inne substancje chemiczne (np. środki do 1. - Page 17 Polski Oprawa podszafkowa (LC-L-186-WW) - Instrukcja montażu Rysunek 1 1. Odłączyć kabel przyłączeniowy od strony budynku od sieci i zabezpieczyć go przed ponownym włączeniem. W tym celu należy uruchomić odpowiedni wyłącznik w instalacji domowej. 2a. Montaż za pomocą płyty montażowej (rys.