Publicité

Les langues disponibles

Les langues disponibles

Liens rapides

Scan the QR code to register your product
https://dreamonme.com/customercare/registration/
Read all instructions before
assembling and using product.
IMPORTANT - Keep instructions for
future use.
SYNERGY
Convertible Crib
Owner's Manual
0722R3-657

Publicité

Table des Matières
loading

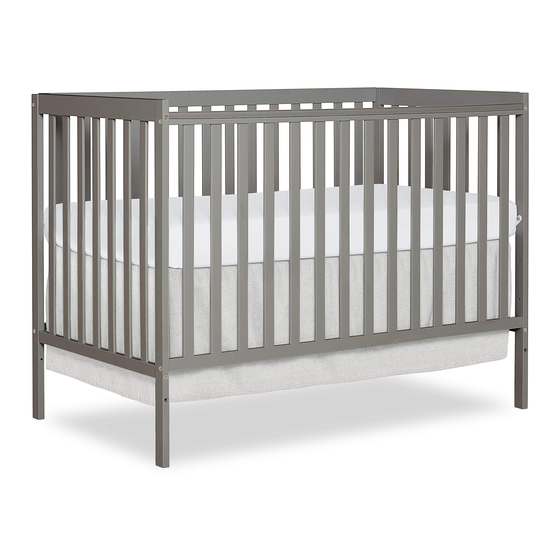
Sommaire des Matières pour Dream On Me Synergy Convertible Crib

  • Page 1 SYNERGY Convertible Crib Owner’s Manual Scan the QR code to register your product https://dreamonme.com/customercare/registration/ Read all instructions before assembling and using product. IMPORTANT - Keep instructions for future use. 0722R3-657...
  • Page 2 SAFE SLEEP TIPS Small parts may Adult Assembly present choking Required. hazard prior to assembly. DO NOT use the Please read the product if it is instructions damaged, broken, thoroughly. Identify all and/or components are parts & hardware. missing or broken. To protect your parts Do Not Use Power during assembly,...
  • Page 3 LIMITED WARRANTY: • Dream On Me warrants its product to be free from defects in material and workmanship and agrees to remedy any such defect. • This warranty covers 1 year from the date of original purchase.
  • Page 4 SHARP EDGES BEFORE AND AFTER ASSEMBLY AND FREQUENTLY DURING USE. • DO NOT USE THIS CRIB IF ANY PARTS ARE MISSING, DAMAGED OR BROKEN. CONTACT DREAM ON ME - 1532 S. WASHINGTON AVE, PISCATAWAY, NJ 08854 FOR REPLACEMENT PARTS. • DO NOT USE A WATER MATTRESS WITH THIS CRIB.
  • Page 5 WARNINGS (cont.) WARNING • Do not use this crib if you cannot exactly follow the accompanying instructions. • Do not use this crib for a child who can climb out of it or who is taller than 90 cm. • Do not place in or near this crib any cord, strap or similar item that could become wrapped around a child’s neck.
  • Page 6 PARTS If there are any missing parts, please contact Dream On Me before using the product. Footboard Right Front Leg Left Front Leg Headboard Right Rear Leg Left Rear Leg www.dreamonme.com/help...
  • Page 7 PARTS (cont.) If there are any missing parts, please contact Dream On Me before using the product. Mattress Support Side Panel (×2) Bottom Bar (Keep the part (9) for Day bed and Toddler Bed Conversion) www.dreamonme.com/help...
  • Page 8 HARDWARE If there are any missing parts, please contact Dream On Me before using the product. Bolt 2-1/5” (×8) Bolt 3” (×8) Barrel Nuts (×16) Allen Key Bolt 3/4” (×4) Wooden Dowels 1-1/5” (×2) Tools Needed: Screw Driver (NOT INCLUDED)
  • Page 9 CRIB ASSEMBLY - RIGHT LEGS ASSEMBLY 1a. Align the Right Front Leg (2) and Right Rear Leg (5) towards the Side Panel (8). 1b. Insert the Bolts (B) inside the holes provided at the top and the lower end. Similarly insert the Barrel Nuts (C) from bottom.
  • Page 10 CRIB ASSEMBLY - LEFT LEGS ASSEMBLY 2a. Align the Left Front Leg (3) and Left Rear Leg (6) towards the Side Panel (8). 2b. Insert the Bolts (B) inside the holes provided at the top and the lower end. Similarly, insert the Barrel Nuts (C) from bottom.
  • Page 11 CRIB ASSEMBLY - SIDE PANEL ASSEMBLY 3a. To assemble the side panels to the Crib, align them to the Headboard (4) as shown in figure. 3b. Insert the Bolts (A) inside the holes provided at the top and the lower end of the Side Panels (8).
  • Page 12 CRIB ASSEMBLY - MATTRESS SUPPORT ASSEMBLY 4a. Attach all the corners of the Mattress Support Panel (7) to the Headboard (4) and Side Panels (8) as shown in the diagram. 4b. Insert the Bolts (E) and tighten it using the Allen Key (D).
  • Page 13 CRIB ASSEMBLY - FOOTBOARD ASSEMBLY 5a. Align the Footboard (1) to the Side Panels as shown in the diagram. 5b. Insert the Bolts (A) inside the holes provided at the top and the lower end. Similarly, insert the Barrel Nuts (C) from bottom.
  • Page 14 WARNING For Toddler Bed Use • FAILURE TO FOLLOW THESE WARNINGS AND ASSEMBLY INSTRUCTIONS COULD RESULT IN SERIOUS INJURY OR DEATH FROM ENTRAPMENT OR STRANGULATION. • DO NOT PLACE BED NEAR WINDOWS WHERE CORDS FROM BLINDS OR DRAPES MAY STRANGLE A CHILD. •...
  • Page 15 CONVERSION MODES - DAYBED ASSEMBLY 1a. In order to convert the crib to a Daybed, you must first remove the Footboard of the crib. 1b. Insert the Barrel Nuts (C) at both sides of and below the Bottom Bar (9). 1c.
  • Page 16 CONVERSION MODES - TODDLER BED ASSEMBLY 2a. In order to convert the crib to a Toddler Bed, you must first remove the Footboard of the crib. 2b. Then attach the Stabilizer Bar and Toddler Guard Rail. 2c. Insert the Barrel Nuts (C) at both sides of and below the Bottom Bar (9).
  • Page 17 3c. Make sure to follow the complete instructions provided with Bed Rails. NOTE: *Make sure to use the Dream On Me Universal Bed Rails (SKU-849) in order to convert the crib to a Full-size Bed with Footboard. *Do not put the mattress...
  • Page 18 FURNITURE CARE INSTRUCTIONS ROOM CLIMATE CONTROL: • Wood, when first cut contains more than 50 percent water. When it is prepared for furniture construction it is placed in a Kiln and the moisture content is brought down to 8 to 10 percent. Wood is porous and responds to its environment. If the room has high humidity it will absorb it and expand and if the humidity is low it will lose moisture and shrink.
  • Page 19 • Clean with a damp, not wet, cloth. Use only a mild soap. Do not use the abrasive cleaners. • Do not scratch or chip the finish. • Inspect the product periodically, contact Dream On Me for replacement parts or questions. • Do not store the product or any parts in extreme temperatures and conditions such as a hot attic or a damp, cold basement.
  • Page 20 1532 S. WASHINGTON AVE STE1 PISCATAWAY, NJ 08854-9908 E-mail: info@dreamonme.com www.dreamonme.com Follow Us @dreamonmeinc to get your nursery featured on our social media. Enter our monthly giveaway! Chat with us! Scan the QR code to register. Scan the QR code to Live Chat.
  • Page 21: Lit D'enfant Transformable

    SYNERGY Lit d'enfant transformable Manuel du propriétaire Scannez le code QR pour enregistrer votre produit https://dreamonme.com/customercare/registration/ Lisez toutes les instructions avant avant d'assembler et d'utiliser le produit. IMPORTANT- Conservez les instructions pour pour une utilisation ultérieure. 0722R3-657...
  • Page 22: Conseils De Sécurité

    N'utilisez pas de Dream On Me nettoyant pour vitres Greenguard Gold ou d'abrasif de Certified Full-Size. nettoyage, car ils rayeraient la surface et...
  • Page 23: Garantie Limitée

    GARANTIE LIMITÉE : • Dream On Me garantit que son produit est exempt de tout défaut de matériel et de fabrication et s'engage à remédier à tout défaut de ce type. • Cette garantie couvre 1 an à partir de la date d'achat originale.
  • Page 24: Avertissements

    MANQUE PAS DE PIÈCES OU QUE LES BORDS NE SONT PAS COUPANTS. - N'UTILISEZ PAS CE LIT D'ENFANT SI DES PIÈCES SONT MANQUANTES, ENDOMMAGÉES OU CASSÉES. CONTACTEZ DREAM ON ME - 1532 S. WASHINGTON AVE, PISCATAWAY, NJ 08854 POUR OBTENIR DES PIÈCES DE RECHANGE.
  • Page 25 AVERTISSEMENTS (suite) • LORS DU RANGEMENT DU LIT D'ENFANT, FAITES ATTENTION CAR DES CHANGEMENTS EXTRÊMES DE TEMPÉRATURE OU D'HUMIDITÉ PEUVENT COMPROMETTRE LE LIT D'ENFANT ET LE RENDRE EXTRÊMEMENT DANGEREUX POUR VOTRE ENFANT. - SOYEZ PRUDENT LORSQU'UN VAPORISATEUR OU UN HUMIDIFICATEUR EST UTILISÉ. ÉLOIGNEZ TOUJOURS LA VAPEUR DU LIT D'ENFANT AINSI QUE DE TOUT AUTRE MEUBLE EN BOIS.
  • Page 26 PIÈCES S'il y a des pièces manquantes, veuillez contacter Dream On Me avant d'utiliser le produit. Pied de lit Jambe avant Jambe avant droite gauche Tête de lit Jambe arrière Jambe arrière droite gauche www.dreamonme.com/help...
  • Page 27 PIÈCES (suite) S'il y a des pièces manquantes, veuillez contacter Dream On Me avant d'utiliser le produit. Support de matelas Panneau latéral (×2) Barre de fond (Gardez la partie (9) pour la conversion de lit de jour et de lit de bébé)
  • Page 28 HARDWARE S'il y a des pièces manquantes, veuillez contacter Dream On Me avant d'utiliser le produit. Boulon 2-1/5” (×8) Boulon 3” (×8) Écrous de barillet (×16) Clé Allen Boulon 3/4” (×4) Chevilles en bois 1-1/5" (×2) Outils nécessaires : Tournevis (NON INCLUS)
  • Page 29: Assemblage Du Lit D'enfant - Assemblage Des Pieds

    ASSEMBLAGE DU LIT D'ENFANT - ASSEMBLAGE DES PIEDS DROITS 1a. Alignez le pied avant droit (2) et le pied arrière droit (5) sur le panneau latéral (8). 1b. Insérez les boulons (B) dans les trous prévus en haut et en bas. Insérez également les écrous (C) par le bas.
  • Page 30 ASSEMBLAGE DU LIT D'ENFANT - ASSEMBLAGE DES PIEDS GAUCHE 2a. Alignez la jambe avant gauche (3) et la jambe arrière gauche (6) vers le panneau latéral (8). 2b. Insérez les boulons (B) dans les trous prévus à cet effet en haut et en bas.De même, insérez les écrous (C) par le bas.
  • Page 31: Assemblage Du Lit D'enfant - Assemblage Des Panneaux Latéraux

    ASSEMBLAGE DU LIT D'ENFANT - ASSEMBLAGE DES PANNEAUX LATÉRAUX 3a. Pour assembler les panneaux latéraux au lit, alignez-les sur la tête de lit (4) comme indiqué sur la figure. 3b. Insérez les boulons (A) dans les trous prévus à cet effet en haut et en bas des panneaux latéraux (8).
  • Page 32: Assemblage Du Lit D'enfant - Assemblage Du Support De Matelas

    ASSEMBLAGE DU LIT D'ENFANT - ASSEMBLAGE DU SUPPORT DE MATELAS 4a. Fixez tous les coins du panneau de support du matelas (7) à la tête de lit (4) et aux panneaux latéraux (8), comme indiqué sur le schéma. (4) et aux panneaux latéraux (8) comme indiqué...
  • Page 33: Assemblage Du Lit D'enfant - Assemblage Du Pied De Lit

    ASSEMBLAGE DU LIT D'ENFANT - ASSEMBLAGE DU PIED DE LIT 5a. Alignez le pied de lit (1) sur les panneaux latéraux comme indiqué sur le schéma. 5b. Insérez les boulons (A) dans les trous prévus à cet effet aux extrémités supérieure et inférieure.
  • Page 34: Pour Le Lit Des Tout-Petits

    AVERTISSEMENT Pour le lit des tout-petits • LE NON-RESPECT DE CES AVERTISSEMENTS ET DES INSTRUCTIONS DE MONTAGE PEUT ENTRAÎNER DES BLESSURES GRAVES OU LA MORT PAR PIÉGEAGE OU ÉTRANGLEMENT. • NE PAS PLACER LE LIT PRÈS D'UNE FENÊTRE OÙ LES CORDONS DES STORES OU DES RIDEAUX POURRAIENT ÉTRANGLER UN ENFANT.
  • Page 35: Modes De Conversion - Assemblage Du Lit De Jour

    MODES DE CONVERSION - ASSEMBLAGE DU LIT DE JOUR 1a. Pour convertir le lit d'enfant en lit de jour, vous devez d'abord retirer le pied de lit du lit d'enfant. 1b. Insérez les écrous de baril (C) des deux côtés et sous la barre inférieure (9).
  • Page 36: Modes De Conversion - Assemblage Du Lit Pour Enfant

    MODES DE CONVERSION - ASSEMBLAGE DU LIT POUR ENFANT 2a. Pour convertir le lit d'enfant en lit de bébé, vous devez d'abord retirer le pied de lit du lit d'enfant. 2b. Ensuite, fixez la barre stabilisatrice et la barrière de protection des tout-petits.
  • Page 37: Modes De Conversion - Assemblage D'un Lit Complet

    REMARQUE : *Assurez-vous d'utiliser les rails de lit universels Dream On Me (SKU-849) afin de convertir le lit d'enfant en un lit de taille normale avec pied de lit. *Ne posez pas le matelas...
  • Page 38: Instructions Pour L'entretien Des Meubles

    INSTRUCTIONS POUR L'ENTRETIEN DES MEUBLES LE CONTRÔLE DU CLIMAT DE LA PIÈCE : • Le bois, lorsqu'il est coupé à l'origine, contient plus de 50 % d'eau. Lorsqu'il est préparé pour la construction de meubles, il est placé dans un four et son taux d'humidité...
  • Page 39 - Ne rayez pas et n'écrasez pas la finition. - Inspectez le produit périodiquement, contactez Dream On Me pour des pièces de rechange ou des questions. - Ne stockez pas le produit ou ses pièces dans des températures et des conditions extrêmes, comme un grenier chaud ou un sous-sol humide et froid.
  • Page 40 1532 S. WASHINGTON AVENUE PISCATAWAY, NJ 08854 Courriel : info@dreamonme.com www.dreamonme.com Suivez-nous @dreamonmeinc pour que votre crèche soit présentée sur nos médias sociaux. Chattez avec nous ! Participez à notre concours mensuel ! Scannez le code QR pour accéder au Scannez le code QR pour vous inscrire.
  • Page 41 SYNERGY Cuna convertible Manual del usuario Escanee el código QR para registrar su producto https://dreamonme.com/customercare/registration/ Lea todas las instrucciones antes de montar y utilizar el producto. IMPORTANTE- Guarde las instrucciones para su uso futuro. 0722R3-657...
  • Page 42: Consejos De Seguridad

    No utilice utilice el colchón limpiacristales o Dream On Me limpiadores abrasivos, Greenguard Gold ya que rayarán la Certified Full-Size. superficie y pueden dañar el revestimiento protector. Póngase en contacto con Dream On Me si necesita ayuda. www.dreamonme.com/help...
  • Page 43: Garantía Limitada

    GRACIAS..por elegir Dream On Me y enhorabuena por unirse a nuestra familia; ¡una familia que lleva más de 30 años transformando vidas! Agradecemos sus comentarios y le deseamos lo mejor en los próximos años con su nueva incorporación. Si tiene alguna pregunta o duda, no dude en ponerse en contacto con nosotros.
  • Page 44 BORDES AFILADOS. - NO UTILICE ESTA CUNA SI FALTA ALGUNA PIEZA, ESTÁ DAÑADA O ROTA. PÓNGASE EN CONTACTO CON DREAM ON ME - 1532 S. WASHINGTON AVE, PISCATAWAY, NJ 08854 PARA LAS PIEZAS DE RECAMBIO. - NO UTILICE UNA CAMA DE AGUA CON ESTA CUNA.
  • Page 45 ADVERTENCIAS (continuación) - CUANDO ALMACENE LA CUNA, TENGA CUIDADO, YA QUE LOS CAMBIOS EXTREMOS DE TEMPERATURA O HUMEDAD PUEDEN COMPROMETER LA CUNA Y HACERLA EXTREMADAMENTE PELIGROSA PARA SU HIJO. - TENGA CUIDADO AL UTILIZAR UN VAPORIZADOR O HUMIDIFICADOR. MANTENGA SIEMPRE EL VAPOR ALEJADO DE LA CUNA Y DE CUALQUIER OTRO MUEBLE DE MADERA.
  • Page 46 PARTES Si falta alguna pieza, póngase en contacto con Dream On Me antes de utilizar el producto. Tablero de pie Pierna delantera Pierna delantera a la derecha a la izquierda Cabecera Pierna trasera Pierna trasera a la derecha izquierda www.dreamonme.com/help...
  • Page 47 PARTES Si falta alguna pieza, póngase en contacto con Dream On Me antes de utilizar el producto. Soporte del colchón Panel lateral (×2) Barra inferior (Conserve la parte (9) para la conversión en cama de día y cuna) www.dreamonme.com/help...
  • Page 48 HARDWARE Si falta alguna pieza, póngase en contacto con Dream On Me antes de utilizar el producto. Perno 2-1/5” (×8) Perno 3” (×8) Tuercas de barril (×16) Llave Allen Perno 3/4” (×4) Clavijas de madera de 1-1/5" (×2) Herramientas necesarias : Destornillador (NO INCLUIDO) www.dreamonme.com/help...
  • Page 49 MONTAJE DE LA CUNA - MONTAJE DE LA PATA RECTA 1a. Alinear la pierna delantera derecha (2) y la pata trasera derecha (5) al panel lateral (8). 1b. Introduzca los pernos (B) en los agujeros previstos en la parte superior e inferior. Del mismo modo, introduzca las tuercas (C) desde abajo.
  • Page 50 MONTAJE DE LA CUNA - MONTAJE DE LA PATA IZQUIERDA 2a. Alinee la pata delantera izquierda (3) y la pata trasera izquierda (6) con el panel lateral (8). 2b. Introduzca los pernos (B) en los agujeros previstos en la parte superior e inferior.
  • Page 51 MONTAJE DE LA CUNA - MONTAJE DEL PANEL LATERAL 3a. Para montar los paneles laterales en la cuna, alinéelos con el cabecero (4) como se muestra en la figura. 3b. Introduzca los pernos (A) en los agujeros previstos en la parte superior e inferior de los paneles laterales (8).
  • Page 52 MONTAJE DE LA CUNA - MONTAJE DEL SOPORTE DEL COLCHÓN 4a. Fije todas las esquinas del panel de soporte del colchón (7) al cabecero (4) y a los paneles laterales (8) como se indica en el diagrama. (4) y los paneles laterales (8) como se indica en el diagrama.
  • Page 53 MONTAJE DE LA CUNA - MONTAJE DEL ESTRIBO 5a. Alinee el estribo (1) con los paneles laterales como se muestra en el diagrama. 5b. Introduzca los pernos (A) en los agujeros previstos en los extremos superior e inferior. Del mismo modo, inserte las tuercas de barril (C) desde la parte inferior.
  • Page 54 ADVERTENCIA Para la cama de los niños pequeños - EL INCUMPLIMIENTO DE ESTAS ADVERTENCIAS E INSTRUCCIONES DE MONTAJE PUEDE PROVOCAR LESIONES GRAVES O LA MUERTE POR ATRAPAMIENTO O ESTRANGULAMIENTO. - NO COLOQUE LA CUNA CERCA DE LAS VENTANAS, DONDE LOS CORDONES DE LAS PERSIANAS O CORTINAS PUEDEN ESTRANGULAR AL NIÑO.
  • Page 55 MODOS DE CONVERSIÓN - MONTAJE DEL SOFÁ CAMA 1a. Para convertir la cuna en una cama de día, primero hay que quitar el piecero de la cuna. 1b. Inserte las tuercas del cañón (C) en ambos lados y debajo del riel inferior (9). 1c.
  • Page 56: Métodos De Conversión - Montaje De La Cuna

    *Asegúrese de utilizar la barandilla para niños pequeños que se incluye con la barandilla universal para niños pequeños Dream On Me (SKU- 692) para convertir la cuna en una cama para niños pequeños. Barandilla (NO INCLUIDA, SE VENDE POR SEPARADO)
  • Page 57: Modos De Conversión - Montaje Completo De La Cama

    NOTA: *Asegúrese de utilizar los raíles de la cama universal Dream On Me (SKU-849) para convertir la cuna en una cama de tamaño completo con piecera. *No coloque el colchón directamente sobre los...
  • Page 58 INSTRUCCIONES PARA EL CUIDADO DE LOS MUEBLES CONTROL DEL CLIMA DE LA HABITACIÓN: • La madera, cuando se corta originalmente, contiene más del 50% de agua. Cuando se prepara para la construcción de muebles, se introduce en un horno y su contenido de humedad se reduce al 8-10%.
  • Page 59 - No raye ni aplaste el acabado. - Inspeccione el producto periódicamente, póngase en contacto con Dream On Me para obtener piezas de repuesto o hacer preguntas. - No almacene el producto o sus piezas en temperaturas y condiciones extremas, como un ático caliente o un sótano húmedo y frío.
  • Page 60 1532 S. WASHINGTON AVENUE PISCATAWAY, NJ 08854 Correo electrónico: info@dreamonme.com www.dreamonme.com Siga con nosotros @dreamonmeinc para que su guardería aparezca en nuestras redes sociales. Participa en nuestro sorteo mensual. Chatea con nosotros. Escanee el código QR para registrarse. Escanee el código QR para el chat en vivo.

Table des Matières