Table des Matières

Publicité

Les langues disponibles

Les langues disponibles

Liens rapides

VM8013HD
Installation and Operation Manual
Instrucciones de la Instalación y de la Operación
Instructions d'installation et d'opération
SRC
BAND
iPod Menu
CH/
DISP
CAT
DIM
PGM
VM8013HD
INT
1
2
RPT
RDM
3
4
DN
UP
5
6
A/V IN
SAT
READY
160
Watts Peak
Vatios el Máximo
Watts en Crête
40W x 4

Publicité

Table des Matières
loading

Sommaire des Matières pour Jensen HD Radio VM8013HD

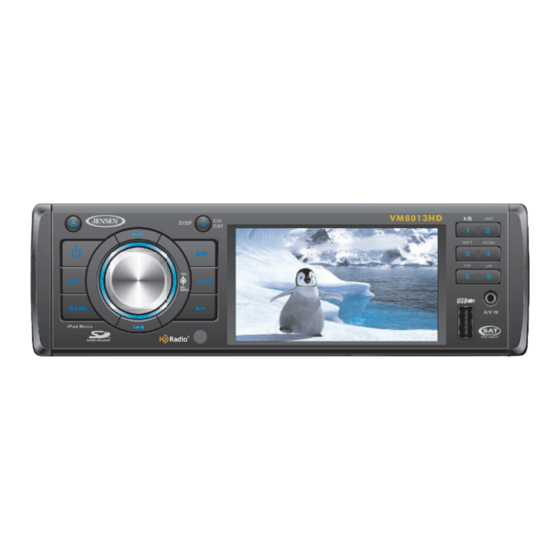
  • Page 1 VM8013HD Installation and Operation Manual Instrucciones de la Instalación y de la Operación Instructions d'installation et d'opération VM8013HD DISP BAND A/V IN iPod Menu READY Watts Peak Vatios el Máximo Watts en Crête 40W x 4...
  • Page 3: Table Des Matières

    VM8023HD TABLE OF CONTENTS TABLE DES MATIÈRES Introduction ....................1 Introduction .................... 47 Installation ....................1 Installation ....................47 Wiring .......................3 Cablage ....................49 Front Panel Release ................4 Relachment du panneau d’avant ............50 Remote Control Operation ...............5 Operation telecommande ..............51 Remote Control Functions ...............6 Fonctions à...
  • Page 4 VM8023HD...
  • Page 5: Introduction

    Radio logos are proprietary trademarks of iBiquity Digital Corporation. TRANSPORT SCREWS INTRODUCTION Congratulations on your purchase of the Jensen VM8013HD Mobile Multimedia Receiver. It’s a good idea to read all of the instructions before HALF SLEEVE beginning the installation. We recommend having your Jensen VM8013HD installed by a reputable installation shop.
  • Page 6: Kit Installation

    VM8013HD ISO Installation carefully and make certain all connections are secure and insulated with wire nuts or electrical tape. See “Wiring” on page 3. After This unit has threaded holes in the chassis completing the wiring connections, turn the unit on to confirm operation side panels which may be used with the (vehicle ignition must be on).
  • Page 7: Wiring

    VM8013HD WIRING NOTE: Only connect speakers with a nominal impedance NOTE: The amplifier in this radio is only designed for use with four of 4 ohms. Speakers with a load impedance less than 4 speakers. Never combine (bridge) outputs for use with two ohms could damage the unit.
  • Page 8: Front Panel Release

    VM8013HD FRONT PANEL RELEASE The front panel release button (23) releases the mechanism that holds the front panel to the chassis. Detaching the Front Panel To detach the front panel, perform the following steps: 1. Press the power button (1) to turn the unit off. 2.
  • Page 9: Remote Control Operation

    VM8013HD REMOTE CONTROL OPERATION Operating Range The remote control will allow you to control the advanced functions of The remote control sensor (19) is located near REMOTE SENSOR the VM8013HD. the bottom of the front panel, left of the LCD screen.
  • Page 10: Remote Control Functions

    VM8013HD REMOTE CONTROL FUNCTIONS Table 1: Remote Control Functions Button Tuner iPod ZOOM Magnify Image TITLE Select Video Mode View DVD Title Screen Power Power On; Power On; Power On; Power On; Power On; Press and hold to Power Off Press and hold to Power Off Press and hold to Power Off Press and hold to Power Off...
  • Page 11: Operation

    VM8013HD OPERATION Power 1. Vol Down 2. Vol Up Press the (power) button (1) to turn the unit on. Press and hold the power 3. Mute button again to turn the unit off. 4. Seek Down / Previous Track 5. Seek Up / Next Track NOTE: LCD panels may take longer to respond when subjected to cold 6.
  • Page 12: Menu Operation

    VM8013HD Menu Operation 12/24 Mode This option allows selection of a 12 hour or 24 hour clock format. “12 Hours” is the default setting. Turn the rotary encoder to change to the 24 hour clock format. VM8013HD Mirror Image DISP This option allows for selection of a mirror image view when a rear view backup camera (sold separately) is connected to the CAMERA IN input on the back of the radio.
  • Page 13: Reset Button

    VM8013HD Reset Button The RESET button (22) is located behind the front panel and can only be accessed with the front panel removed. Resetting the unit will erase the time and preset memories. It should only be activated upon initial installation after all wiring is complete, or if there is a malfunction of any of the switches on the unit.
  • Page 14: Satellite Radio Operation

    VM8013HD SATELLITE RADIO OPERATION Select a Band ® Listeners can subscribe to XM Radio on the Web by visiting Press the BAND button (3) to change between three SAT bands (SAT1, www.xmradio.com, or by calling (800) 967-2346. Customers should SAT2 and SAT3). Each band stores up to six preset stations. have their Radio ID ready (see “Displaying the Identification (ID) Selecting a Station Code”).
  • Page 15: Category Search

    VM8013HD Category Search 3. Turn the rotary encoder again to select the second digit of the desired channel (0 - 9). 1. To access Category Search mode, press the DISP button (7) twice. The 4. Press VOL/SEL/MENU to enter the second number and move to the list of available categories appears on the screen.
  • Page 16: Radio Operation

    VM8013HD RADIO OPERATION About HD Radio™ Technology 6. Current Preset Channels 7. Source Indicator HD Radio technology allows CD-quality digital broadcasting of your local 8. HD Radio Station Indicator AM and FM radio stations. HD Radio broadcasts can include multiple channels on the same frequency, which is called multicasting.
  • Page 17: Preset Stations

    VM8013HD will illuminate. If the digital signal becomes unavailable, the unit will revert to Analog reception. Program Search To view the Program Type categories when listening to HD Radio broadcasting, press the DISP button on the control panel (7) or remote control (23).
  • Page 18: Disc/Mp3/Wma Playback

    USB Device using the buttons on the receiver (or remote control) as described below. Many types of software are available for converting audio files into MP3/ WMA formats. Jensen recommends Nero or Roxio Easy CD Creator. To stop disc play and eject the disc, press the button to flip the front This unit can play MP3 (MPEG1, 2, 2.5 Audio Layer 3).
  • Page 19 VM8013HD • Romeo (31 characters) Bit Rates Up to 200 characters can be displayed in the long file name format. For a The unit supports bit rates from 32 - 320 kbps. list of available characters, see the instruction manual of the writing MP3 Playing Order software and the section “Entering File and Folder Names”...
  • Page 20: Changing The Source

    VM8013HD any tracks directly. Folder 5 is not recognized at all since it is at the fourth 7. Source Indicator level. 8. Elapsed Playing Time for Current Song Controlling Disc or File Playback Pause VM8013HD DISP Press the 1/>/|| button (8) to suspend playback. Press the 1/>/|| button again to resume playback.
  • Page 21 VM8013HD Random (RDM) • ANGLE: Press to select an alternate viewing angle, if available. • ZOOM: Press to zoom the picture at X2, X3, X4, X1/4, X1/2, or select Press the 4/RDM button (11) during playback to select “RANDOM” and play OFF to return to normal view.
  • Page 22: Controlling Your Ipod

    VM8013HD CONTROLLING YOUR iPod The unit will automatically switch to iPod mode when an iPod is plugged Photo/Video Playback into the iPod cable. To return to the iPod screen from any other source, While iPod photos and videos can be viewed on the VM8013HD screen, press the SRC button (6) on the front panel and select SOURCE >>...
  • Page 23: Setup Menu

    VM8013HD SETUP MENU During disc play, press the SETUP button (4) on the remote control to Table 2: System Setup Menu access the SYSTEM SETUP menu. AUTO The color signal output is switched automatically based on the current video input signal - NTSC or PAL.
  • Page 24: Care And Maintenance

    VM8013HD CARE AND MAINTENANCE DVD Player Disc Care and Handling The following guidelines will help you extend the life of your DVD player: Dirt, dust, scratches and warpage can cause skips in the playback and deterioration of sound quality. Please follow these guidelines to take care of 1.
  • Page 25: Troubleshooting

    VM8013HD TROUBLESHOOTING Problem Cause Corrective Action Does not operate (display No power to yellow wire; no power Check connection with test light; check vehi- does not light) to red wire cle fuse with test light Fuse blown Replace fuse No power to unit Fuse blown Check/replace fuse No/low audio output...
  • Page 26: Specifications

    VM8013HD SPECIFICATIONS AM Tuner CEA Power Ratings Tuning Range ..........530 kHz - 1720 kHz Sensitivity (-20dB) .
  • Page 27: Introducción

    Digital Corporation. TORNILLOS DE TRANSPORTE INTRODUCCIÓN Felicitaciones por su compra del Jensen VM8013HD Mobile Multimedia Receiver. Es una buena idea leer todas las instrucciones antes de MEDIA CUBIER comenzar la instalación. Recomendamos hacer instalar su Jensen VM8013HD por un taller de instalación confiable.
  • Page 28: Kit De Instalación

    VM8013HD Instalación ISO 3. Coloque la radio frente a la abertura de la consola de forma tal que el cableado pueda pasarse por la cubierta de montaje. Siga el diagrama La unidad tiene agujeros roscados en los de cableado y asegúrese que todas las conexiones están seguras y paneles laterales del chasis los cuales aisladas con tuercas de cables o cinta aisladora eléctrica.
  • Page 29: Cableado

    VM8013HD CABLEADO NOTA: El amplificador en esta radio está solo diseñado para usar con cuatro parlantes. Nunca combine (puentear) salidas para usar con dos parlantes. Nunca conecte a tierra los terminales negativos de parlantes a la conexión a tierra del chasis. El no seguir el cableado exactamente como se muestra podría causar daños eléctricos a la radio.
  • Page 30: Liberación Del Panel Frontal

    VM8013HD LIBERACIÓN DEL PANEL FRONTAL El botón (abrir) (23) del panel frontal libera el mecanismo que mantiene el panel frontal en el chasis. Como Sacar el Panel Frontal Para quitar el panel frontal, realice los siguientes pasos. 1. Presione el botón de encendido (1) para apagar la unidad. 2.
  • Page 31: Operación De Control Remoto

    VM8013HD OPERACIÓN DE CONTROL REMOTO Rango de Funcionamiento El control remoto le permitirá controlar las funciones avanzadas El sensor del control remoto (19) está ubicado SENSOR REMOTO del VM8013HD. cerca de la parte inferior del panel frontal, a la izquierda de la pantalla LCD. El control remoto puede funcionar a una distancia dentro de los 3 a 5 metros.
  • Page 32: Funciones De Control Remoto

    VM8013HD FUNCIONES DE CONTROL REMOTO Table 1: Funciones de Control Remoto Botón Sintonizador iPod ZOOM Agrandar Imagen TÍTULO Seleccionar modo de Video Ver Pantalla de Título de Encendido Encendido; Encendido; Encendido; Encendido; Encendido; Presione y mantenga para Presione y mantenga para Presione y mantenga para Presione y mantenga para Presione y mantenga para...
  • Page 33 VM8013HD Table 1: Funciones de Control Remoto Botón Sintonizador iPod AUDIO Selecciona Modo de Audio Ve/Cambia el idioma de Audio del disco DISP Ingresar Búsqueda de Muestra el Menú de Ingreso Presione y mantenga para Presione y mantenga para Presione y mantenga para Programa;...
  • Page 34: Operación

    VM8013HD OPERACIÓN Encendido instrucciones incluidas en el adaptador PAC para información detallada de instalación. Presione el botón (encendido) (1) para encender la unidad. Presione y mantenga el botón de energía nuevamente para apagar la unidad. Los siguiente controles están disponibles en la mayoría de los vehículos 1.
  • Page 35 VM8013HD Menú de Operación Modo 12/24 Esta opción permite la selección de un formato de reloj de 12 o 24 horas. “12 Horas” es la fijación predeterminada. Girar el codificador giratorio para cambiar el formato de reloj a 24 horas. VM8013HD Imagen Espejo DISP...
  • Page 36: Botón De Restaurar

    VM8013HD 3. Presione el botón VOL/SEL/MENU (2) para confirmar y mover al campo de horas. 4. Presione el codificador giratorio VOL/SEL/MENU (2) para fijar las horas. 5. Presione el botón DISP para fijar el reloj y salir de la función de fijar el reloj.
  • Page 37: Operación De Radio Satelital

    VM8013HD OPERACIÓN DE RADIO SATELITAL Seleccionar una Banda ® Los oyentes pueden suscribirse a XM Radio en la Web visitando Presione el botón BAND (3) para cambiar entre tres bandas SAT (SAT1, www.xmradio.com, o llamando al (800) 967-2346. Los clientes SAT2 y SAT3).
  • Page 38 VM8013HD Búsqueda de Categoría 3. Gire el codificador giratorio VOL/SEL/MENU para seleccionar el tercer dígito del canal deseado (0-9). 1. Para acceder al modo Búsqueda de Categoría, presione el botón DISP 4. Presione el botón VOL/SEL/MENU para ingresar el número y moverse (7) dos veces.
  • Page 39: Operación De Radio

    VM8013HD OPERACIÓN DE RADIO Acerca de la Tecnología HD Radio™ estaciones transmiten sus letras de identificación (nombre), el nombre del artista, el título de la canción, y la categoría de la música. La tecnología HD Radio permite la difusión digital de calidad CD de sus 6.
  • Page 40: Búsqueda De Vista Previa

    VM8013HD Presione y mantenga el botón PGM para cambiar entre "Auto", "Digital" y cinco segundos, permitiendo una vista previa de cada selección. Cuando "Analog". Cuando se fija en “AUTO”, la estación será recibida primero en usa la función AS, las nuevas estaciones reemplazarán cualquier estación Analógico pero cambiará...
  • Page 41: Reproducción De Disco/Mp3/Wma

    Hay varios tipos de software disponible para convertir archivos de audio en para volcar hacia abajo el panel frontal y luego presione el botón eject formatos MP3/WMA. Jensen recomienda Nero o Roxio Easy CD Creator. (21). Esta unidad puede reproducir MP3 (MPEG1, 2, 2.5 Capa de Audio 3). Sin embargo, los medios de grabación de MP3 y los formatos aceptados están...
  • Page 42 VM8013HD Formatos de Medios Aceptables: carpeta que pueden ingresarse y mostrarse. El usar cualquier otro caracter causará que los nombres de archivo y carpeta se muestren Los siguientes formatos están disponibles para los medios usados en esta incorrectamente. La unidad reconoce y reproduce solo archivos con la unidad.
  • Page 43 VM8013HD Por ejemplo, un medio con la siguiente organización de carpeta/archivo elija la fuente CARD o USB. La pantalla de reproducción MP3 está indicada está sujeto a Búsqueda de Carpeta, Búsqueda de Archivo o Selección de a continuación: Carpeta, como se muestra a continuación. 01:02 (ROOT) DISC...
  • Page 44 VM8013HD Acceso GOTO a tiempo de Pista Navegar Archivos Use la función GOTO para acceder directamente una posición específica Los botones 5/DN (12) y 6/UP (13) son usados para navegar hacia arriba y en una pista. abajo dentro del menú archivo. Presione y mantenga para moverse arriba/ abajo un nivel de carpeta.
  • Page 45 VM8013HD pause >/|| (8) para finalizar avance o retroceso rápido y volver a la reproducción normal. NOTA: La disponibilidad de la función es dependiente de la información incorporada en el DVD. NOTA: El VM8013HD no soporta la decodificación de Sonido Envolvente.
  • Page 46: Como Controlar Su Ipod

    VM8013HD COMO CONTROLAR SU iPod La unidad cambiará automáticamente a modo iPod cuando un iPod es enchufado dentro del cable iPod. Para volver a la pantalla iPod desde Reproducción de Fotos/Videos cualquier otra fuente, presione el botón (6) SRC en el panel frontal y Mientras que las fotos y videos iPod pueden ser vistos en la pantalla seleccione SOURCE >>...
  • Page 47: Menú De Configuración

    VM8013HD MENÚ DE CONFIGURACIÓN Durante la reproducción de un disco, presione el botón (4) SETUP en el Table 2: Menú de Configuración del Sistema control remoto para acceder el menú SYSTEM SETUP. AUTO La señal de color cambia automáticamente basada en la señal de entrada de video actual - NTSC o PAL.
  • Page 48: Cuidado Y Mantenimiento

    VM8013HD CUIDADO Y MANTENIMIENTO Reproductor de DVD Cuidado y Manipulación del Disco Las siguientes guías le ayudarán a extender la vida de su reproductor de La suciedad, polvo, rayones y ondulaciones pueden producir saltos en la DVD: reproducción y deterioro de la calidad de sonido. Por favor siga estas guías para cuidar sus discos compactos.
  • Page 49: Resolución De Problemas

    VM8013HD RESOLUCIÓN DE PROBLEMAS Problema Causa Acción Correctiva No funciona (la pantalla no Sin energía en el cable amarillo; Verifique la conexión con una lámpara de enciende) sin energía en el cable rojo prueba; verifique el fusible del vehículo con una lámpara de pruebas Fusible quemado Reemplace el fusible...
  • Page 50: Especificaciones

    VM8013HD ESPECIFICACIONES Sintonizador AM Especificaciones CEA de Potencia Rango de Sintonía......... . . 530 kHz -1720 kHz Sensibilidad (-20dB) .
  • Page 51: Introduction

    HD Radio sont les marques déposées de iBiquity Digital Corporation. ECROUS DE TRANSPORATION Introduction Félicitations d’avoir acheté un Récepteur Multimédia Portatif Jensen VM8013HD. C’est une bonne idée de lire toutes les instructions avant de commencer MANCHON DE l’installation. Nous recommandons que vous fassiez installer votre Jensen MONTAGE VM8013HD par une boutique d’installation de bonne réputation.
  • Page 52: Aide Technique

    VM8013HD Installation ISO 3. Placez la radio devant l’ouverture du tabeau de bord pour que le câblage puisse être acheminé à travers le manchon de montage. Enlevez la radio d’usiine existante de Suivez le diagramme de câblage et assurez-vous que tous les montage tableau de bord ou du centre branchements sont sûrs et isolé...
  • Page 53: Cablage

    VM8013HD Cablage A NOTER: L’amplificateur dans cette radio est conçu pour utilisation avec quatre hauts parleurs. Ne combinez jamais les sorties pour utilisation avec deux hauts parleurs. Ne terrez jamais les fils de sortie négatifs avec la terre. Le manque de relier des fils exactement comme montrés peut endommager électrique la radio.
  • Page 54: Relachment Du Panneau D'avant

    VM8013HD Relachment du panneau d’avant Le bouton de relâchement du panneau d’avant (23) relâche le mécanisme qui attache le panneau d’avant au châssis. Détacher le panneau d’avant Pour détacher le panneau d’avant exécuter les étapes suivantes : 1. Pressez le bouton de puissance (1) pour éteindre l’appareil. 2.
  • Page 55: Operation Telecommande

    VM8013HD Operation telecommande Gamme d’opération La télécommande vous permet de contrôler les fonctions avancées du La sonde de la télécommande (19) est située TÉLÉDÉTECTEUR VM8013HD. près de la partie inférieure du panneau d’avant, à gauche de l’écran d’affichage aux cristaux liquides. La télécommande peut fonctionner à...
  • Page 56: Fonctions À Télécommande

    VM8013HD Fonctions à télécommande Table 1: Fonctions à télécommande Bouton Tuner iPod ZOOM Grossir l’image TITLE Select Video Mode View DVD Title Screen Power Puissance allumée; Puissance allumée; Puissance allumée; Puissance allumée; Puissance allumée; Pressez et maintenez pour Pressez et maintenez pour Pressez et maintenez pour Pressez et maintenez pour Pressez et maintenez pour...
  • Page 57 VM8013HD Table 1: Fonctions à télécommande Bouton Tuner iPod AUDIO Sélectionner la mode audio Voir/Changer langue du disque Audio DISP Entrée de recherche pro- Affichage du menu entrée Pressez et maintenez pour Pressez et maintenez pour Pressez et maintenez pour gramme;...
  • Page 58: Operation

    VM8013HD Operation Puissance 3.5mm (appelé « SWC Interface ») sur le dos de l’installation de tête permet la connectivité à l’adaptateur PAC. Veuillez vous référer aux instructions Pressez le bouton puissance (1) pour allumer l’appareil. Pressez et inclues avec l’adaptateur PAC pour des informations sur l’installation maintenez le bouton de puissance pour éteindre l’appareil.
  • Page 59: Gradateur

    VM8013HD Operation Menu Mode 12/24 Cette option permet la sélection d’un format à 12 heures ou 24 heures pour l’horloge. « 12 heures » est le réglage par défaut. Tournez l’enchiffreur à rotation pour changer au format d’horloge à 24 heures. VM8013HD Image en miroir DISP...
  • Page 60: Bouton De Réinitialisation

    VM8013HD 3. Pressez le bouton VOL/SEL/MENU (2) pour confirmer et aller au champs des heures. 4. Tournez l’enchiffreur à rotation VOL/SEL/MENU POUR RÉGLER L’HEURE. 5. Pressez le bouton DISP pour régler l’horloge et sortir de la fonction de réglage de l’horloge. Bouton de réinitialisation Le bouton RESET (22) est situé...
  • Page 61: Operation Radio Satellite

    VM8013HD Operation radio satellite Sélectionner une bande ® Les auditeurs peuvent adhérer au XM Radio sur le Web en visitant Pressez le bouton BAND (3) pour changer entre trois bandes SAT (SAT1, www.xmradio.com, ou en appelant (800) 967-2346. Les clients doivent SAT2 et SAT3).
  • Page 62: Entrée Canal Direct

    VM8013HD Recherche catégorie 1. Tournez l’enchiffreur à rotation VOL/SEL/MENU pour sélectionner le troisième chiffre du canal désiré (0-9). 1. Pour accéder au mode Category Search, pressez le bouton DISP (7) 2. Pressez le bouton VOL/SEL/MENU pour entrer le numéro et vous deux fois.
  • Page 63: Operation Radio

    VM8013HD Operation radio Sur la technologie HD Radio™ un signal HD Radio dépend de ce qui est en train d’être transmis. Certaines stations transmettent leurs indicatifs (noms); le nom de La technologie HD Radio permet une émission à qualité digitale-CD de vos l’artiste, le titre de chanson et la catégorie de musique.
  • Page 64: Station Préréglées

    VM8013HD • Utilisez les clés flèches de la télécommande et le bouton ENTER pour que dans la bande actuelle. Après avoir entré des stations en mémoire, sélectionner un canal multiplexage. l’appareil va automatiquement s’arrêter à chaque station pour cinq secondes vous permettant de prévisionner chaque sélection. Lorsque vous Pressez et maintenez le bouton PGM pour changer entre «...
  • Page 65: Reproduction Disc/Mp3/Wma

    Plusieurs types de logiciel sont disponibles pour convertir des fichiers audio Pour arrêter la reproduction du disque et éjecter le disque, pressez le au format MP3/WMA. Jensen recommande Nero ou Roxio Easy CD bouton pour faire basculer le panneau d’avant vers le bas et puis Creator.
  • Page 66 VM8013HD Formats medium acceptables Entrer tag de ID3 Les formats suivants sont disponibles pour la média utilisée dans cet Cet appareil soutient la version ID3 tag appareil. Le nombre maximum de caractères utilisés pour un nom de fichier, 2.0. Pour des codes de caractères, y compris le délimiteur («...
  • Page 67: Commander La Reproduction Du Fichier Ou Du Disque

    VM8013HD Par exemple, un médium avec la hierarchie de dossier/fichier suivante est qui est déjà inséré, choisissez la source CARD ou USB. L’écran de soumise au Recherche Dossier, Recherche Fichier et Sélectionner Dossier reproduction MP3 est indiqué ci-dessous : comme montré ci-dessous. 01:02 (ROOT) DISC...
  • Page 68: Répétition Du Segment (A-B)

    VM8013HD Naviguer des fichiers Pour annuler le segment à répéter, pressez le bouton A->B de nouveau. « A-B CANCEL » apparaît sur l’affichage. Les boutons 5/DN (12) et 6/UP (13) sont utilisés pour naviguer vers le haut Accès temps de piste GOTO et le bas à...
  • Page 69 VM8013HD commande pour rembobinage ralenti/recul ralenti. Pressez une fois pour une vitesse 1/2. Pressez plusieurs fois de suite pour 1/4, 1/6 ou 1/ 8. Pressez le bouton reproduction/pause >/|| button (8) pour terminer l’avance et le recul ralenti et reprendre la reproduction normale. A NOTER: La disponibilité...
  • Page 70: Commander Votre Ipod

    VM8013HD Commander votre iPod L’appareil va automatiquement changer au mode iPod lorsqu’un iPod est pour avance rapide/recul rapide. Relâchez pour reprendre la reproduction branché au câble iPod. Pour revenir à l’écran iPod de n’importe quelle autre normale. source, pressez le bouton SRC (6) sur le panneau d’avant et sélectionnez Reproduction Photo/Vidéo SOURCE >>...
  • Page 71: Menu Configuration

    VM8013HD Menu configuration Pendant la reproduction du disque, pressez le bouton SETUP (4) sur la Table 2: Menu Configuration Système télécommande pour accéder au menu SYSTEM SETUP. AUTO La sortie du signal couleur est automatiquement changée en fonction du signal d’entrée vidéo actuel - NTSC ou PAL.
  • Page 72: Soin Et Maintenance

    VM8013HD Soin et maintenance Lecteur DVD Soin et manipulation du disque Les consignes suivantes vous aideront à prolonger la vie de votre lecteur Des saletés, de la poussière, des égratignures et des voilures peuvent DVD : provoquer des sauts dans la reproduction et la déterioration de qualité de son.
  • Page 73: Depannage

    VM8013HD Depannage Problème Cause Action Corrective Ne fonctionne pas (l’affiche Pas de puissance au fil jaune, pas Vérifiez le branchement avec une lumière ne s’illumine pas) de puissance au fil rouge d’essai, vérifiez le fusible du véhicule avec une lumière d’essai. Fusible a sauté...
  • Page 74: Specifications

    VM8013HD Specifications Tuner AM Ratings de puissance CEA Gamme de syntonisation........530 kHz - 1720 kHz Sensibilité...
  • Page 75 Limited Warranty DO NOT RETURN THIS PRODUCT TO THE STORE CD or Multimedia Radios/Headunits Audiovox Electronics Corporation (“the Company”) is committed to Limitations quality and customer service, and are pleased to offer you this THE EXTENT OF THE COMPANY'S LIABILITY UNDER THIS WARRANTY Warranty.
  • Page 76: Garantía Limitada

    Garantía Limitada NO RETORNE ESTE PRODUCTO A LA TIENDA Radios del CD o de los Multimedia Audiovox Electronics Corporation (“la Compañía) es una corporación Limitaciones comprometida con la calidad y el servicio al cliente, y se complace en LA EXTENSIÓN DE LA RESPONSABILIDAD DE LA COMPAÑÍA BAJO ofrecerle esta Garantía.
  • Page 77: Garantie Limitée

    Garantie Limitée NE RENVOYEZ PAS CE PRODUIT AU MAGASIN Radios CD ou Multimédia / Unités principales Audiovox Electronics Corporation (la Société) s’engage à la qualité et Limitations au service des clients, et est content de vous offrir cette garantie. Nous LA MESURE DE LA RESPONSABILITE DE LA SOCIETE SOUS CETTE vous prions de le lire attentivement et prendre contact avec la Société...
  • Page 78 Audiovox Electronics Corporation Hauppauge, NY 11788 Technical Assistance: 1-800-323-4815 www.jensen.com © 2008 Audiovox Ver. 091208 Printed in China...

Ce manuel est également adapté pour:

Vm8023hd

Table des Matières