Table des Matières

Publicité

Les langues disponibles

Les langues disponibles

Liens rapides

Operating Instructions
RF-PJ-300 Mini projector
Item No. 2301166
Page 2 - 28
Notice d'emploi
Mini projecteur RF-PJ-300
N° de commande 2301166
Page 29 - 56
Gebruiksaanwijzing
RF-PJ-300 Mini-projector
Bestelnr. 2301166
Pagina 57 - 84

Publicité

Table des Matières
loading

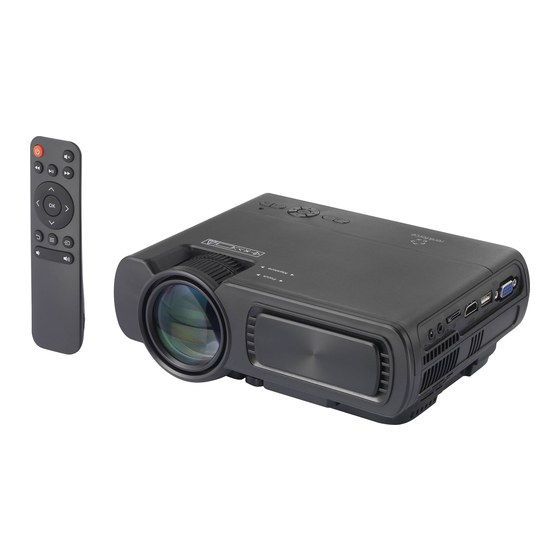
Sommaire des Matières pour Renkforce RF-PJ-300

  • Page 1 Operating Instructions RF-PJ-300 Mini projector Item No. 2301166 Page 2 - 28 Notice d’emploi Mini projecteur RF-PJ-300 N° de commande 2301166 Page 29 - 56 Gebruiksaanwijzing RF-PJ-300 Mini-projector Bestelnr. 2301166 Pagina 57 - 84...
  • Page 2: Table Des Matières

    Table of contents Page 1. Introduction ..........................3 2. Explanation of symbols .......................3 3. Intended use ........................4 4. Package contents ........................4 5. Features and functions ......................5 6. Safety information .......................5 a) General information ......................5 b) Connected devices .......................6 c) LED light ........................6 d) Electrical safety ......................6 e) Persons and product ....................7 Batteries ........................7...
  • Page 3 11. Remote control ........................18 a) Inserting/changing the batteries .................18 b) Using the remote control ....................18 12. Setup ..........................19 a) Turning the projector on/off ..................19 13. Operation ...........................20 a) Selecting the signal source (video) ................20 b) Configuring the projection settings ................20 c) Manually changing the volume ...................20 d) Playing video content ....................20 14.
  • Page 4: Introduction

    1. Introduction Dear customer, Thank you for purchasing this product. This product complies with statutory, national and European regulations. To ensure that the product remains in this state and to guarantee safe operation, always follow the instructions in this manual. These operating instructions are part of this product.
  • Page 5: Intended Use

    3. Intended use This product is intended for projecting, displaying and playing back multimedia content from suitable signal sources, e.g. for presentations. The projector is powered by a 100 - 240 V/ AC mains voltage. The LED light source offers up to 30,000 hours of operating time with a brightness of 3200 lumens, ensuring a long lifespan.
  • Page 6: Features And Functions

    Up-to-date operating instructions Download the latest operating instructions at www.conrad.com/downloads or scan the QR code shown. Follow the instructions on the website. 5. Features and functions • 800 x 480 Mini projector • Works with computers, laptops, tablets, smartphones, amplifiers and game consoles via an AV, VGA or HDMI connection • Plays videos, photo and audio files via USB •...
  • Page 7: Connected Devices

    • Handle the product carefully. Jolts, impacts or a fall even from a low height may damage the product. • Consult a technician if you are not sure how to use or connect the product, or if you have concerns about safety. •...
  • Page 8: Persons And Product

    • Never unplug the mains plug by pulling on the cable. Always use the grips on the plug. • Unplug the mains plug from the mains socket if you do not plan to use the product for an extended period of time. •...
  • Page 9: Product Overview

    7. Product overview 1 Lens 8 Volume + button 2 Focus selection wheel 9 Down button 3 Keystone selection wheel 10 OK button 4 Up button 11 Signal selection button 5 LED 12 Menu button 6 On/off button 13 Infrared sensor 7 ESC button 14 Volume - button...
  • Page 10: Pin Assignment For Vga Connection

    8. Pin assignment for VGA connection 1 R (red) 2 G (green) 3 B (blue) 4 Monitor ID2 5 Earth (horizontal) 6 R (red earth) 7 G (green earth) 8 B (blue earth) 9 5 V 10 Earth (vertical) 11 Monitor ID0 12 DDC data 13 Horizontal sync.
  • Page 11 Ensure that the ventilation openings on the projector are not obstructed or blocked during the installation/mounting process. The projector should be placed at least 10 cm away from other objects to ensure adequate cooling by air circulation.
  • Page 12: Determining The Projection Distance

    b) Determining the projection distance When setting up the projector, observe the correct ratio between the distance of the projector from the projection screen (e.g. screen or similar) and the image size. Refer to the following figure. In addition, bear in mind that the ambient brightness has a significant impact on the visibility of the image. If the brightness of the projector bulb is not sufficient for projecting a clear image, darken the room and/or avoid glare from strong sunlight.
  • Page 13: Installation And Connection

    10. Installation and connection a) Overhead mounting • Mount the projector with a projector ceiling bracket (not included with the product). • Make sure that the load-bearing strength of the mounting surface and the fastening elements (e.g. screws) is sufficient. Do not mount the projector in the vicinity of air conditioning, ventilation or heating systems.
  • Page 14: Wall Mounting

    b) Wall mounting Wall mounting hole • Use the wall mounting hole to attach the projector to a wall. • In addition, make sure that the load-bearing strength of the mounting surface and the fastening elements (e.g. screws) is sufficient. c) Ventilation openings Do not cover the air cooling openings during use, as this may cause the device to overheat or even cause a fire. There must be a continuous flow of air between the air inlet and outlet.
  • Page 15: Keystone Correction

    d) Keystone correction Position the projector as perpendicular as possible to the projection surface. If the projector is not exactly perpendicular to the projection screen, the projected image will appear distorted. The image will appear wider (or higher) on one side than on the opposite side. To compensate for this, use the keystone correction on the device.
  • Page 16 VGA signal parameters for adjusting a computer output signal Resolution Frequency (kHz) Half-frame frequency (Hz) VGA 640 x 480 31.5 34.7 37.9 37.5 SVGA 800 x 600 31.4 35.1 37.9 46.6 48.1 46.9 XGA 1,024 x 768 40.3 48.4 56.5 If the projector is connected to a laptop, the image may not be displayed on both devices at the same time.
  • Page 17 HDMI source signals Connect the supplied HDMI cable to a suitable HDMI signal source. Micro SD USB port The USB port on the projector can be used to connect USB storage devices. Audio output signal 3.5 mm jack socket Use this socket to connect analogue audio devices (e.g.
  • Page 18 Video source signal AV 3.5 mm jack socket: Use Micro SD this socket to connect video source devices such as DVD players, video cameras or video recorders (a suitable AV cable is included with the product). Video cable = yellow, left audio channel = white, right audio channel = red MicroSD card slot Insert a suitable microSD card.
  • Page 19: Remote Control

    11. Remote control a) Inserting/changing the batteries Before first use, insert two new 1.5 V batteries into the remote control. • Open the battery compartment cover on the back of the remote control. • Insert two AAA batteries (not included) with correct polarity into the battery compartment (observe the plus/+ and minus/- markings). •...
  • Page 20: Setup

    Tips • Make sure that there is an unobstructed line of sight between the remote control and the infrared sensor. The signal must not be blocked by opaque objects. • To ensure unobstructed reception, point the remote control towards the rear left of the device or directly at the infrared sensor.
  • Page 21: Operation

    13. Operation a) Selecting the signal source (video) Verify that you have connected the correct signal cable for the desired video signal source. Select the input signal to be displayed by the projector. Proceed as follows: • Press the signal selection button (11) on the device or the signal selection button the remote control to display the selection menu of the input signal sources.
  • Page 22: Settings

    Playback mode • Press the OK button on the remote control to display the OSD navigation bar. • Use the buttons to select a function. Confirm the selected function by pressing the OK button. - Play/pause: Play or pause video (button also available on the remote control) - "FB": Rewind at 2x, 4x, 8x or 16x speed (button also available on the remote control) - "FF": Fast forward at 2x, 4x, 8x or 16x speed (button also available on the remote control) - "Prev": Play the current video - "Next": Play the next video...
  • Page 23: Setting The Menu Language

    b) Setting the menu language • Use the buttons to navigate through the menu. Select the language setting option. Confirm your selection with the OK button (10). • Use the buttons to select the desired language. • Press the menu button to confirm your selection and exit the menu. Press the ESC button to cancel. c) Audio settings •...
  • Page 24: Setting The Duration Of The Menu Display

    e) Setting the duration of the menu display Use this option to set how long the menu is displayed for when you press the OK button. The menu then switches off automatically. • Use the buttons to select the display duration of the OSD menu. •...
  • Page 25: Configuring The Noise Reduction Settings

    h) Configuring the noise reduction settings • Use the buttons to select the noise reduction option. Confirm your selection with the OK button. • Use the buttons to change the noise reduction setting. The following options are available: - Off - Low - Medium - High - Default • Confirm your setting with the Menu button, or press the ESC button to cancel. i) Screen (VGA settings) Set the display options for the VGA image signal.
  • Page 26: Restoring Factory Settings

    k) Restoring factory settings Follow the steps below to restore the projector to the factory settings: • Use the buttons to navigate through the menu and select the "Factory settings" option, and then confirm the reset with the OK button. l) Software update If a software update is available, you can perform the update via USB. Insert the USB stick with the update into the USB port.
  • Page 27: Disposal

    16. Disposal a) Product Electronic devices are recyclable waste and must not be placed in household waste. At the end of its service life, dispose of the product according to the relevant statutory regulations. Remove any inserted (rechargeable) batteries and dispose of them separately from the product. Batteries You are required by law (Battery Directive) to return all used batteries.
  • Page 28 Projector LED brightness ....... 3200 lm Brightness (projection) ......80 lm (average) Contrast ..........2000:1 Sound pressure (operating) ....≤35 dB Sound pressure level ......92 dB LED lifespan .......... 30,000 hours of operation Projection distance ........ 1.25 - 3 m Connections ...........
  • Page 29 Table des matières Page 1. Introduction ........................31 2. Explication des symboles ....................31 3. Utilisation prévue .......................32 4. Contenu d’emballage ......................32 5. Caractéristiques et fonctions .....................33 6. Consignes de sécurité .......................33 a) Généralités .........................33 b) Appareils connectés ....................34 c) Lumière LED ......................34 d) Sécurité...
  • Page 30 11. Télécommande ........................46 a) Insertion/remplacement de la pile ................46 b) Utilisation de la télécommande ..................47 12. Mise en service .........................48 a) Activer/désactiver le projecteur ..................48 13. Utilisation ...........................48 a) Sélection de la source de signaux (vidéo) ..............48 b) Régler la projection ....................49 c) Modifier le volume manuellement ................49 d) Lire du contenu vidéo ....................49 14.
  • Page 31: Introduction

    1. Introduction Chers clients, Nous vous remercions d’avoir choisi ce produit. Ce produit est conforme aux exigences des normes européennes et nationales en vigueur. Afin de maintenir l’appareil en bon état et d’en assurer un fonctionnement sans danger, l’utilisateur doit impérativement respecter ce mode d’emploi ! Ce mode d’emploi fait partie intégrante du produit.
  • Page 32: Utilisation Prévue

    3. Utilisation prévue Le produit est utilisé pour projeter, afficher et lire des contenus multimédias à partir de sources de signaux appropriées, par exemple pour des présentations et similaires. Le projecteur est alimenté en courant par une tension d'alimentation supérieure à 100 - 240 V/CA. La source lumineuse à LED offre jusqu'à 30 000 heures de fonctionnement et une luminosité de 3200 lumens garantit une longue durée de vie de l'appareil.
  • Page 33: Caractéristiques Et Fonctions

    Mode d’emploi actualisé Téléchargez les modes d’emploi actualisés via le lien www.conrad. com/downloads ou scannez le Code QR illustré. Suivez les instructions disponibles sur le site Internet. 5. Caractéristiques et fonctions • Mini-projecteur 800 x 480 • Fonctionne avec ordinateur, ordinateur portable, tablette, smartphone, amplificateurs et consoles de jeu via une connexion AV-VGA ou HDMI •...
  • Page 34: Appareils Connectés

    • Si une utilisation en toute sécurité ne peut plus être garantie, cessez d’utiliser le produit et protégez-le contre toute utilisation accidentelle. Une utilisation en toute sécurité n’est plus garantie si le produit : - présente des traces de dommages visibles, - ne fonctionne plus correctement, - a été...
  • Page 35: Sécurité Électrique

    d) Sécurité électrique • L’appareil est conforme à la classe de protection II. Cet appareil doit impérativement être branché sur une prise de courant standard (100 - 240 V/AC, 50 Hz) du réseau d’alimentation public. • Ne versez jamais de liquides sur les appareils électriques et ne posez pas d’objets contenant des liquides à...
  • Page 36: Personnes Et Produit

    e) Personnes et produit • Ne couvrez pas les orifices d'aération (entrée et sortie d'air) du produit. • Ne placez pas le produit trop près des appareils sensibles aux interférences électromagnétiques. Il peut y avoir des interférences. f) Piles/accumulateurs • Respecte la polarité lors de l’insertion des piles/batteries rechargeables. • Retirez les piles/batteries rechargeables de l’appareil s’il n’est pas utilisé pendant longtemps afin d’éviter les dégâts causés par des fuites. Des piles/batteries rechargeables qui fuient ou qui sont endommagées peuvent provoquer des brûlures acides lors du contact avec la peau.
  • Page 37: Éléments De Fonctionnement

    7. Éléments de fonctionnement 1 Objectif 8 Touche volume + 2 Molette Focus (mise au point) 9 Touche de défilement vers le bas 3 Molette Keystone (trapèze) 10 Touche OK 4 Touche de défilement vers le haut 11 Touche de sélection du signal 5 DEL 12 Touche menu 6 Touche Marche/Arrêt 13 Capteur infrarouge 7 Touche ESC 14 Touche volume -...
  • Page 38: Affectation Des Broches Port Vga

    8. Affectation des broches port VGA 1 R (rouge) 2 G (vert) 3 B (bleu) 4 Moniteur ID2 5 Terre (horizontal) 6 R (terre rouge) 7 G (terre vert) 8 B (terre bleu) 9 5 V 10 Terre (vertical) 11 Moniteur ID0 12 Données DDC 13 Sync.
  • Page 39 Pour chaque type de montage, assurez-vous que les orifices de ventilation du projecteur ne sont pas encrassés ou obstrués. Le projecteur doit être placé à au moins 10 cm des autres objets afin d'assurer un refroidissement suffisant par circulation d'air.
  • Page 40: Déterminer La Distance De Projection

    b) Déterminer la distance de projection Lors de l'installation, respectez le bon rapport entre la distance du projecteur et la surface de projection (par ex. écran ou autre) et la taille de l'image. Pour ce faire, regardez l'illustration suivante. N'oubliez pas que la luminosité ambiante a une grande influence sur la visibilité de l'image. Si la puissance lumineuse du projecteur n'est pas suffisante pour une projection claire, assombrissez la pièce si nécessaire et/ou évitez les éblouissements dus à...
  • Page 41: Montage Et Branchements

    10. Montage et branchements a) Montage au plafond • Montez le projecteur avec un support de plafond pour vidéoprojecteur (non fourni avec le produit). • Assurez-vous que la résistance de la base de montage et des accessoires de fixation tels que les vis et autres sont suffisantes. Ne fixez pas le projecteur à proximité d'un système de climatisation, de ventilation ou de chauffage. Cela peut entraîner des surchauffes de l'appareil, provoquant un arrêt de celui-ci.
  • Page 42: Montage Mural

    b) Montage mural Ouverture de suspension • Fixez le projecteur sur un mur via l'ouverture de suspension. • Veillez également à ce que la résistance de la base de montage et des moyens de fixation tels que les vis et autres soient suffisantes. c) Ouvertures de ventilation Ne couvrez pas les ouvertures pour le refroidissement de l'air pendant le fonctionnement afin d'éviter la surchauffe de l'appareil ou même le déclenchement d'un feu. Un flux d'air continu doit être assuré entre l'entrée et la sortie d'air. Micro SD Lufteinlass Prise d’air Luftauslass Bouche de ventilation...
  • Page 43: Correction De Trapèze Verticale (Correction Keystone)

    d) Correction de trapèze verticale (correction Keystone) Positionnez le projecteur aussi perpendiculaire que possible à la surface de projection. Si le projecteur à la verticale n'est pas exactement perpendiculaire à la surface de projection, l'image projetée apparaît déformée. L'image s'affiche plus large (ou plus haut) sur un côté que sur le côté...
  • Page 44 Paramètres de signalisation VGA pour l'adaptation du signal de sortie d'un ordinateur Résolution Fréquence (kHz) Fréquence de trame (Hz) VGA 640 x 480 31,5 34,7 37,9 37,5 SVGA 800 x 600 31,4 35,1 37,9 46,6 48,1 46,9 XGA 1024 x 768 40,3 48,4 56,5...
  • Page 45 Signaux de source HDMI Branchez le câble HDMI fourni avec une source de signal HDMI adaptée. Micro SD Port USB Le port USB sur le projecteur permet de brancher des clés USB. Signal de sortie audio Fiche jack mâle 3,5 mm Branchez ici des appareils audio analogiques, par exemple un casque, un haut-parleur ou un...
  • Page 46: Télécommande

    Logement pour carte mémoire microSD Insérez une carte microSD adaptée. Faites attention au sens de la carte et ne forcez pas lors de l'insertion. Micro SD Le projecteur peut alors accéder au contenu stocké sur la carte microSD. Brancher l'alimentation électrique Connectez le câble d'alimentation à...
  • Page 47: Utilisation De La Télécommande

    Un remplacement de la pile est nécessaire lorsque la portée de la télécommande diminue de manière significative. • Pour un changement de piles, retirez le couvercle du compartiment des piles situé au dos de la télécommande. . • Retirez les piles usagées avant d’insérer les neuves. Procédez également comme décrit ci- dessus.
  • Page 48: Mise En Service

    12. Mise en service Retirez le cache d'objectif avant de projeter votre image. Une fois la projection terminée, remettez-le en place. a) Activer/désactiver le projecteur • Attendez environ 3 secondes, après avoir branché l'appareil sur le secteur. Le voyant LED passe au rouge.
  • Page 49: Régler La Projection

    b) Régler la projection • Tournez la molette Focus (2) (mise au point) pour ajuster le réglage de l'image. • Tournez la molette Keystone (3) (trapèze) pour régler la correction de trapèze de l'image. c) Modifier le volume manuellement • Appuyez sur la touche volume + (plus) (8) ou - (moins) (14) pour augmenter ou diminuer le volume.
  • Page 50: Paramètres

    - « Next » (suivant) : lire la vidéo suivante - « Stop » : Arrêter la lecture de la vidéo • Appuyez sur la touche pour annuler la fonction/une opération. 14. Paramètres a) Utiliser le menu (général) • Appuyez sur la touche menu (12) de l'appareil ou de la télécommande pour accéder au menu OSD.
  • Page 51: Régler Le Mode Image

    • Appuyez sur les touches pour modifier un réglage. - Aigus et graves (réglables entre 0 et 100). - Équilibre - Réglage automatique du volume désactivé , ou annulez-le avec la touche ESC. • Confirmez votre réglage à l'aide de la touche menu d) Régler le mode image Réglez ici différents paramètres d'affichage de l'image comme suit : • Sélectionnez le paramètre à configurer à l'aide des touches. •...
  • Page 52: Réglage De La Température Des Couleurs

    f) Réglage de la température des couleurs • Sélectionnez l'élément du menu du paramètre de réglage de la température de couleur à . Validez avec la touche OK. l'aide des touches • Sélectionnez les éléments du menu à l'aide des touches •...
  • Page 53: Écran (Paramètres Vga)

    i) Écran (paramètres VGA) Configurez les options d'affichage du signal d'image VGA. La source de signal vidéo doit être VGA. • Sélectionnez le réglage « écran » dans le menu à l'aide des touches . Validez avec la touche OK. • Appuyez sur les touches pour régler - Positionnement automatique - Position horizontale (0 - 100) - Position verticale (0 - 100) - Taille (0 - 100) - Phase de l'image affichée (0 - 100)
  • Page 54: Entretien Et Nettoyage

    15. Entretien et nettoyage N'utilisez en aucun cas des produits de nettoyage agressifs, à base d'alcool ou toute autre solution chimique, car ceux-ci pourraient endommager le boîtier et nuire au bon fonctionnement de l'appareil. • Ne tentez jamais de démonter le produit. •...
  • Page 55: Données Techniques

    Vous pouvez rapporter gratuitement vos piles/accumulateurs usagées aux centres de récupération de votre commune, à nos succursales ou à tous les points de vente de piles/ accumulateurs. Vous respectez ainsi les ordonnances légales et contribuez à la protection de l’environnement. 17.
  • Page 56 Résolutions d'entrée HDMI ......480i, 480p, 576i, 720p, 1080i, 1080p Formats vidéo pris en charge ....MPEG1, MPEG2, MPEG4, RM, AVI, RMVB, MOV, MKV, DIVX, VOB, M-JPEG Formats audio pris en charge ....MP3, M4A (AAC) Formats d'image pris en charge ....JPEG, BMP, PNG Carte à...
  • Page 57 Inhoudsopgave Pagina 1. Inleiding ..........................59 2. Verklaring van de symbolen ....................59 3. Doelmatig gebruik ......................60 4. Omvang van de levering ....................60 5. Eigenschappen en functies ....................61 6. Veiligheidsinstructies ......................61 a) Algemeen ........................61 b) Aangesloten apparaten ....................62 c) Led-licht ........................62 d) Elektrische veiligheid ....................63 e) Personen en product ....................64 Batterijen/accu's ......................64 7.
  • Page 58 11. Afstandsbediening ......................74 a) Batterij plaatsen/vervangen ..................74 b) Afstandsbediening gebruiken ..................75 12. Ingebruikname ........................76 a) Projector in-/uitschakelen ...................76 13. Bediening ..........................76 a) Keuze van de signaalbron (video) ................76 b) Projector instellen .......................77 c) Volume handmatig veranderen ..................77 d) Videoinhoud afspelen ....................77 14.
  • Page 59: Inleiding

    1. Inleiding Geachte klant, Hartelijk dank voor de aankoop van dit product. Het product voldoet aan alle wettelijke, nationale en Europese normen. Om deze situatie te behouden en een veilig gebruik te garanderen, moet u als gebruiker deze gebruiksaanwijzing in acht nemen! Deze gebruiksaanwijzing behoort bij dit product.
  • Page 60: Doelmatig Gebruik

    3. Doelmatig gebruik Het product dient voor het projecteren, weergeven en afspelen van multimedia-inhoud van geschikte signaalbronnen, bijv. voor presentaties en dergelijke. De projector wordt via 100 - 240 V/AC netspanning van stroom voorzien. De led-lichtbron biedt tot 30.000 uur gebruiksduur en 3200 lumen helderheid garandeert een lange levensduur van het apparaat.
  • Page 61: Eigenschappen En Functies

    Actuele gebruiksaanwijzingen Download de meest recente gebruiksaanwijzing via de link www.conrad. com/downloads of scan de afgebeelde QR-code. Volg de instructies op de website. 5. Eigenschappen en functies • Miniprojector 800 x 480 • Werkt met computer, notebook, tablet, smartphones, versterkers en gameconsoles via AV- VGA- of HDMI-aansluiting •...
  • Page 62: Aangesloten Apparaten

    • Als het product niet langer veilig gebruikt kan worden, stel het dan buiten bedrijf en zorg ervoor dat niemand het per ongeluk kan gebruiken. Veilig gebruik kan niet langer worden gegarandeerd wanneer het product: - zichtbaar is beschadigd, - niet meer naar behoren werkt, - gedurende langere tijd onder ongunstige omstandigheden werd opgeslagen - tijdens het vervoer aan hoge belastingen onderhevig is geweest.
  • Page 63: Elektrische Veiligheid

    d) Elektrische veiligheid • Het apparaat is geconstrueerd volgens veiligheidsklasse II. Als spanningsbron mag alleen een normaal stopcontact (100 - 240 V/AC, 50 Hz) van het openbare stroomnet worden gebruikt. • Zorg dat elektrische apparaten niet met vloeistof in contact komen. Zet voorwerpen waar vloeistof in zit niet naast het apparaat.
  • Page 64: Personen En Product

    e) Personen en product • Dek de ventilatieopeningen (in- en uitlaat) van het product niet af. • Plaats het product niet te dicht bij apparaten die gevoelig zijn voor elektromagnetische interferentie. Er kunnen storingen optreden. f) Batterijen/accu's • Let op de juiste polariteit bij het plaatsen van de batterijen/accu's. •...
  • Page 65: Bedieningselementen

    7. Bedieningselementen 1 Lens 8 Knop volume + 2 Stelwiel Focus 9 Omlaag-knop 3 Stelwiel Keystone 10 Knop OK 4 Omhoog-knop 11 Knop signaalkeuze 5 LED 12 Menuknop 6 Aan/uit-knop 13 Infraroodsensor 7 Knop ESC 14 Knop volume -...
  • Page 66: Pinbezetting Vga-Connector

    8. Pinbezetting VGA-connector 1 R (rood) 2 G (groen) 3 B (blauw) 4 Monitor ID2 5 Aarde (horizontaal) 6 R (aarde rood) 7 G (aarde groen) 8 B (aarde blauw) 9 5 V 10 Aarde (verticaal) 11 Monitor ID0 12 DDC-gegevens 13 Horizontale synchronisatie.
  • Page 67 Zorg er bij elke montage voor dat de ventilatieopeningen van de projector niet worden afgedekt. De projector moet ten minste 10 cm van andere objecten worden geplaatst, zodat voldoende koeling door luchtcirculatie gegarandeerd is.
  • Page 68: Projectieafstand Bepalen

    b) Projectieafstand bepalen Let bij het opstellen op de juiste verhouding tussen de afstand van de projector van het projectieoppervlak (bijv. projectiescherm of iets dergelijks) en de beeldgrootte. Zie hiervoor de volgende afbeelding. Denk er ook aan dat de omgevingshelderheid een grote invloed heeft op de herkenbaarheid van het beeld.
  • Page 69: Montage En Aansluiting

    10. Montage en aansluiting a) Plafondmontage • Monteer de projector met een beamer-plafondhouder (niet meegeleverd met het product). • Zorg ervoor dat de draagsterkte van het plafond voldoende is en gebruik geschikte bevestigingsmiddelen zoals schroeven en pluggen. Bevestig de projector niet in de buurt van airco-, ventilatie- of verwarmingsinstallaties. Dit kan leiden tot oververhitting van het apparaat, waardoor het apparaat uitschakelt.
  • Page 70: Muurbevestiging

    b) Muurbevestiging Ophangopening • Bevestig de projector via de ophangopening aan een wand. • Zorg ervoor dat de draagsterkte van de montageondergrond voldoende is en gebruik geschikte bevestigingsmiddelen zoals schroeven en pluggen. c) Ventilatieopeningen Dek de openingen voor de luchtkoeling tijdens het gebruik niet af om oververhitting van het apparaat of zelfs het ontstaan van een brand te voorkomen.
  • Page 71: Trapeziumcorrectie (Keystone)

    d) Trapeziumcorrectie (keystone) Plaats de projector zo goed mogelijk haaks op het projectieoppervlak. Als de projector verticaal niet helemaal haaks op het projectieoppervlak staat, verschijnt het geprojecteerde beeld vervormd. Het beeld verschijnt aan één kant breder (of hoger) dan aan de andere kant. Om dit te compenseren gebruikt men de trapeziumcorrectie op het apparaat.
  • Page 72 VGA-signaalparameters voor het aanpassen van het uitgangssignaal van een computer Resolutie Frequentie (kHz) Halfbeeldfrequentie (Hz) VGA 640 x 480 31,5 34,7 37,9 37,5 SVGA 800 x 600 31,4 35,1 37,9 46,6 48,1 46,9 XGA 1024 x 768 40,3 48,4 56,5 Als de projector met een laptop wordt verbonden, kan het beeld mogelijk niet op beide apparaten tegelijk worden weergegeven.
  • Page 73 HDMI-bronsignalen Sluit de meegeleverde HDMI- kabel met een passende HDMI- signaalbron aan. Micro SD USB-aansluiting De USB-aansluiting op de projector dient voor het aansluiten van USB-geheugens. Audio-uitgangssignaal 3,5 mm jackbus Sluit hier analoge audioapparaten bijv. een hoofdtelefoon, luidspreker of versterker aan op de projector. Micro SD De afbeelding toont de aansluiting.
  • Page 74: Afstandsbediening

    Slot voor micro-SD-kaart Steek een passende microSD- kaart in. Houd rekening met de oriëntatie van de kaart en gebruik geen geweld bij het Micro SD inschuiven. De projector heeft dan toegang tot de op de microSD-kaart opgeslagen inhoud. Stroomvoorziening aansluiten Sluit het netsnoer aan op de netaansluitbus van het apparaat (een bijpassende netkabel wordt...
  • Page 75: Afstandsbediening Gebruiken

    • Om de batterij te vervangen, verwijdert u het batterijdeksel van de achterkant van de afstandsbediening. • Verwijder de gebruikte batterijen voordat u een nieuwe batterijen plaatst. Ga hierbij zoals boven beschreven te werk. b) Afstandsbediening gebruiken Mute-knop Aan/uit-knop Knop "Play/Pause" Knop vooruit Knop achteruit Knop OK...
  • Page 76: Ingebruikname

    12. Ingebruikname Neem de lenskap af voordat u uw beeld kunt projecteren. Plaats deze na het einde van de projectie weer terug. a) Projector in-/uitschakelen • Wacht na het aansluiten van het apparaat op de netspanning gedurende ca. 3 seconden. De led brandt rood.
  • Page 77: Projector Instellen

    b) Projector instellen • Draai het stelwiel Focus (2) om de beeldinstelling aan te passen. • Draai het stelwiel Keystone (3) om de trapeziumcorrectie van het beeld aan te passen. c) Volume handmatig veranderen • Druk op de knop volume + (plus) (8) of - (min) (14) om het volume te verhogen of te verlagen.
  • Page 78: Instellingen

    14. Instellingen a) Menu bedienen (algemeen) • Druk op de menuknop (12) op het apparaat of de afstandsbediening om het OSD-menu te openen. • Navigeer met de knoppen (8 en 14) en (4 en 9) in het menu door de menupunten. •...
  • Page 79: Beeldmodus Instellen

    d) Beeldmodus instellen Stel hier verschillende weergaveparameters van het beeld als volgt in: • Selecteer de in te stellen parameter met de knoppen • Druk op de knoppen om een instelling aan te passen. Verander de volgende beeldparameters naar uw behoeften: - Contrast (0 - 100) - Helderheid (0 - 100) - Kleur (0 - 100)
  • Page 80: Paginaformaat Instellen

    • Druk op de knoppen om een instelling van de kleurcomponenten te wijzigen. Hiervoor zijn de volgende waarden beschikbaar: - Rood (0 - 100) - Groen (0 - 100) - Blauw (0 - 100) • Bevestig uw instelling met de menuknop of breek af met de knop ESC.
  • Page 81: Projectiegrootte Wijzigen

    • Selecteer de instelling "beeldscherm" in het menu met de knoppen . Bevestig dit met knop OK. • Druk op de knoppen voor het instellen van - Automatische positionering - Horizontale positie (0 - 100) - Verticale positie (0 - 100) - Grootte (0 - 100) - Fase van het weergegeven beeld (0 - 100) •...
  • Page 82: Onderhoud En Reiniging

    15. Onderhoud en reiniging Gebruik in geen geval agressieve reinigingsmiddelen, reinigingsalcohol of andere chemische producten omdat de behuizing beschadigd of de werking zelfs belemmerd kan worden. • Demonteer het product niet. • Verbreek voor iedere reiniging de verbinding met de stroomvoorziening. •...
  • Page 83: Technische Gegevens

    U kunt verbruikte batterijen/accu’s gratis bij de verzamelpunten van uw gemeente, onze filialen of overal waar batterijen/accu’s worden verkocht, afgeven. U voldoet daarmee aan de wettelijke verplichtingen en draagt bij aan de bescherming van het milieu. 17. Technische gegevens Bedrijfsspanning ........100 - 240 V/AC, 50/60 Hz Opgenomen vermogen ......
  • Page 84 HDMI-ingangsresoluties ......480i, 480p, 576i, 720p, 1080i, 1080p Ondersteunde audio-formaten ....MPEG1, MPEG2, MPEG4, RM, AVI, RMVB, MOV, MKV, DIVX, VOB, M-JPEG Ondersteunde audioformaten ....MP3, M4A (AAC) Ondersteunde beeldformaten ....JPEG, BMP, PNG Geheugenkaart ........microSD, max. 64 GB Afmetingen (l x b x h) ......
  • Page 88 This is a publication by Conrad Electronic SE, Klaus-Conrad-Str. 1, D-92240 Hirschau (www.conrad.com). All rights including translation reserved. Reproduction by any method, e.g. photocopy, microfilming, or the capture in electronic data processing systems require the prior written approval by the editor. Reprinting, also in part, is prohibited. This publication represent the technical status at the time of printing.

Ce manuel est également adapté pour:

2301166

Table des Matières