Publicité
Les langues disponibles
Les langues disponibles
Liens rapides
Publicité

Sommaire des Matières pour KINZO BL-168DLR
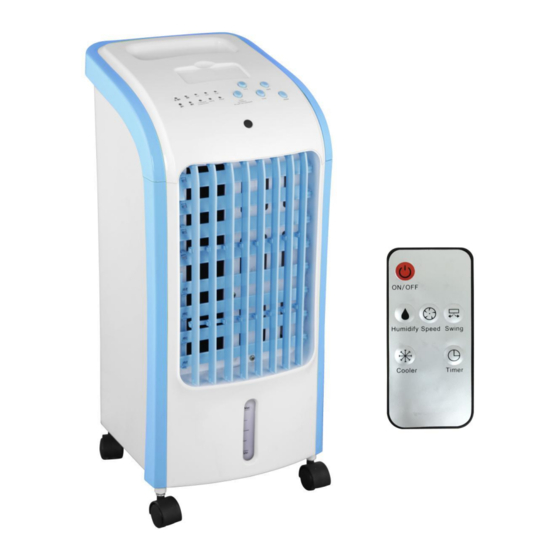
- Page 1 [UK] Instruction Manual Air Cooler MODEL NO.: BL-168DLR With Remote Control...
- Page 2 WARNING Do not position the air inlet too close to a wall, curtain etc., as this will block the air flow and affect the functioning of the air cooler. When using the appliance for the first time, please check that your mains voltage complies with the information on the nameplate of the air cooler.
- Page 3 1. On/Off/Speed button After the plug is inserted into the socket, a buzzer will sound. Press the button. The ‘low’ indicator on the control panel will light up, showing that air cooler is working at low speed. Press the button for a second time. The ‘Med’ indicator on the control panel will light up, ...
- Page 4 and ‘1H’ and ‘2H’ and ‘4H’ indicators will all be lit. The air cooler will stop working after seven and a half hours. Press the button for a sixteen time. The indicators will go out and the air cooler will no longer be using the timer function.
- Page 5 Cleaning Cleaning the air filter: Remove the plug from the mains socket, then pull on the holder of the air filter. When you have successfully removed the air filter, clean it with neutral cleaning fluid and a soft brush before rinsing it with clean water. You can then place the filter back in the air cooler.
- Page 6 Cleaning the wet curtain paper: Remove the plug from the mains socket and pull out the air filter, then take the wet curtain paper out of the air cooler too. Clean it with cleaning fluid and a soft brush before rinsing it with clean water.
- Page 7 [NL] Gebruikershandleiding Luchtkoeler MODEL NR.: BL-168DLR Met afstandsbediening...
- Page 8 WAARSCHUWING Plaats de luchtinlaat niet te dicht bij een muur, gordijn, enz. Dit blokkeert de luchtstroming wat de werking van de luchtkoeler nadelig kan beïnvloeden. Controleer voordat u het apparaat voor de eerste keer gebruikt of de netspanning overeenstemt met de informatie op het typeplaatje van de luchtkoeler.
- Page 9 On(aan)/Off(uit)/Speed(snelheid)-knop Zodra u de stekker in het stopcontact steekt, hoort u een zoemgeluid. Druk op de knop. De 'Low'-indicator op het bedieningspaneel gaat branden, wat aangeeft dat de luchtkoeler op lage snelheid werkt. Druk nogmaals op de knop. De 'Med'-indicator op het bedieningspaneel gaat branden, wat aangeeft dat de luchtkoeler op gemiddelde snelheid werkt.
- Page 10 zowel het ‘0.5H’-indicatorlampje als de ‘1H’ en ‘2H’ en ‘4H’-indicatorlampjes allemaal branden. De luchtkoeler schakelt automatisch uit na 7,5 uur. Druk voor de zestiende keer op de knop. Alle indicatorlampjes gaan uit en de luchtkoeler maakt niet langer gebruik van de timer-functie. Hoe water toe te voegen aan de watertank ...
- Page 11 Reiniging Het luchtfilter schoonmaken: Trek de stekker uit het stopcontact en trek dan de houder met het luchtfilter eruit. Als u het luchtfilter succesvol heeft kunnen verwijderen, reinigt u het filter met een neutraal schoonmaakmiddel en een zachte borstel alvorens u het afspoelt met schoon water. Daarna kunt u het filter weer terugplaatsen in de luchtkoeler.
- Page 12 Het natte gordijnpapier reinigen: Trek de stekker uit het stopcontact en verwijder het luchtfilter. Haal daarna het natte gordijnpapier uit de luchtkoeler. Reinig het met een vloeibaar schoonmaakmiddel en een zachte borstel voordat u het afspoelt met schoon water. Daarna kunt u het papier weer terugplaatsen in de luchtkoeler.
- Page 13 Het symbool hierboven en op het product betekent dat het product als Elektrisch of Elektronisch apparaat is ingedeeld en mag niet worden weggegooid met ander huishoudelijk of commercieel afval aan het einde van zijn levensduur. De Waste of Electrical and Electronic Equipment (WEEE) Richtlijn is vastgesteld om producten te recyclen met behulp van de beste beschikbare technieken voor terugwinning en recycling om de impact op het milieu te minimaliseren, het behandelen van gevaarlijke stoffen en het voorkomen van...
- Page 14 [FR] Manuel d’utilisation Refroidisseur d’air MODÈLE N° BL-168DLR avec télécommande...
- Page 15 AVERTISSEMENT Ne placez pas l’entrée d’air trop près du mur, des rideaux, etc. Cela risquerait d’obstruer l’écoulement de l’air et de nuire au bon fonctionnement du refroidisseur. Lors de la première utilisation, vérifiez que le niveau de tension de votre système électrique est conforme aux données indiquées sur la plaque signalétique du refroidisseur d’air.
- Page 16 Cher(e) client(e) Merci d’avoir choisi ce refroidisseur d’air. Veuillez lire attentivement ce manuel d’utilisation et le conserver pour pouvoir vous y référer ultérieurement. Fonctions du tableau de commande 1. Bouton On/Off/Speed (Marche / Arrêt / Vitesse) Après avoir branché la fiche dans la prise, un signal sonore retentit. ...
- Page 17 Appuyez une deuxième fois sur ce bouton lorsque le refroidisseur d’air est en marche. Le témoin « 0,5H » s’éteint et le témoin « 1H » s’allume. Le refroidisseur d’air s’éteindra après un délai d’une heure. Appuyez une troisième fois sur ce bouton lorsque le refroidisseur d’air est en marche. Le ...
- Page 18 Les accumulateurs de froid absorbent lentement la chaleur contenue dans l’eau pour rendre l’eau plus froide que l’environnement. Un refroidisseur d’air qui contient des accumulateurs de froid produit de l’air plus froid. Placez les accumulateurs de froid au congélateur. Lorsqu’ils sont congelés, sortez-les. ...
- Page 19 Débranchez la fiche de la prise secteur, puis tirez sur le filtre à air en l’empoignant à l’endroit prévu à cet effet. Après avoir retiré le filtre à air, nettoyez-le avec un produit de nettoyage liquide neutre et une brosse souple. Puis, rincez-le à l’eau claire. Replacez le filtre dans le refroidisseur d’air.
- Page 20 Le symbole ci-dessus signifie que le produit est classé comme équipement électrique ou électronique et ne doit pas être jeté avec les déchets ménagers ou commerciaux à la fin de sa durée de vie utile. La directive Déchets d'équipements électriques et électroniques (DEEE) a été mise en place pour le recyclage des produits en utilisant les meilleures techniques de collecte et de recyclage disponibles afin de l'impact sur l'environnement, traiter toutes les substances dangereuses et éviter au maximum la mise en décharge.
- Page 21 [DE] Bedienungsanleitung Kühllüfter MODELLNR.: BL-168DLR Mit Fernbedienung...
- Page 22 WARNUNG Positionieren Sie den Lufteinlass nicht zu nahe an einer Wand, einem Vorhang usw., da dies den Luftstrom blockieren und die Funktion des Kühllüfters beeinträchtigen kann. Wenn Sie das Gerät zum ersten Mal verwenden, überprüfen Sie, ob Ihre Netzspannung mit den Angaben auf dem Typenschild des Kühllüfters übereinstimmt.
- Page 23 Bedienfeld Taste Ein/Aus/Geschwindigkeit Wenn Sie den Stecker in die Steckdose stecken, ertönt ein Summer. Drücken Sie die Taste . Die „Low“-Anzeige (niedrig) auf dem Bedienfeld leuchtet auf und zeigt an, dass der Kühllüfter mit niedriger Geschwindigkeit arbeitet. Drücken Sie die Taste ein zweites Mal. Die „Med“-Anzeige (mittel) auf dem Bedienfeld ...
- Page 24 Drücken Sie die Taste ein drittes Mal, wenn der Kühllüfter eingeschaltet ist. Die Anzeige „0.5H“ leuchtet wieder auf und die Anzeige „1H“ bleibt eingeschaltet. Der Kühllüfter wird nach 1 1/2 Stunden ausgeschaltet. Drücken Sie die Taste ein viertes Mal, wenn der Kühllüfter eingeschaltet ist. Beide Anzeigen, „0.5H“...
- Page 25 Ziehen Sie den Wassertank heraus und legen Sie die gefrorenen Kühlakkus hinein. Für jeden Kühllüfter sind zwei Kühlakkus erforderlich, sodass Sie stets einen einfrieren können. Reinigung...
- Page 26 Reinigung des Luftfilters: Ziehen Sie den Netzstecker aus der Steckdose und ziehen Sie dann am Halter des Luftfilters. Nachdem Sie den Luftfilter entfernt haben, reinigen Sie diesen mit einem neutralen Reinigungsmittel und einer weichen Bürste. Spülen Sie den Filter anschließend mit sauberem Wasser.
- Page 27 Das Symbol oben und auf dem Produkt bedeutet, dass das Produkt als elektrisches oder elektronisches Gerät gilt und am Ende seiner Nutzungsdauer nicht mit anderem Haushalts- oder Gewerbeabfall entsorgt werden darf. Die Richtlinie für Elektro- und Elektronik-Altgeräte (Waste of Electrical and Electronic Equipment, WEEE) wurde eingerichtet, um Produkte mit den besten verfügbaren Verwertungs- und Recyclingtechniken wiederzuverwerten und so die Auswirkungen auf die Umwelt zu minimieren, Gefahrstoffe zu behandeln und die...
- Page 28 [CZ] Návod k použití Chladič vzduchu ČÍSLO MODELU: BL-168DLR s dálkovým ovladačem...
- Page 29 VAROVÁNÍ Sání vzduchu neumisťujte příliš blízko ke stěně, zácloně atd., protože tím by se zablokovalo proudění vzduchu a to by nepříznivě ovlivnilo funkci chladiče vzduchu. Při prvním použití přístroje zkontrolujte, zda napětí elektrické sítě odpovídá informacím na typovém štítku chladiče vzduchu. Před použitím zkontrolujte, zda jsou napájecí...
- Page 30 Funkční ovládací panel 1. Tlačítko Zapnout/Vypnout/Rychlost Po zapojení zástrčky do zásuvky zazní zvukový signál. Stiskněte tlačítko. Rozsvítí se indikátor ‚low‘ na ovládacím panelu a signalizuje, že chladič vzduchu pracuje pomalou rychlostí. Stiskněte toto tlačítko podruhé. Rozsvítí se indikátor ‚Med‘ na ovládacím panelu a ...
- Page 31 Stiskněte toto tlačítko počtvrté za chodu chladiče vzduchu. Zhasnou obě kontrolky – ‚0.5H‘ i ‚1H‘. Rozsvítí se kontrolka ‚2H‘. Chladič vzduchu se vypne po dvou hodinách. Stiskněte toto tlačítko popáté za chodu chladiče vzduchu. Znovu se rozsvítí kontrolka ‚0.5H‘.
- Page 32 č č Čištění Čištění vzduchového filtru: Vytáhněte zástrčku ze síťové zásuvky, poté zatáhněte za držák vzduchového filtru. Po úspěšném vynětí vzduchového filtru ho vyčistěte neutrální čisticí kapalinou a jemným kartáčkem, poté ho opláchněte čistou vodou. Pak lze filtr umístit zpět do chladiče vzduchu.
- Page 33 Čištění vlhkého jemného papíru: Vytáhněte zástrčku ze síťové zásuvky a vytáhněte vzduchový filtr, poté vyjměte z chladiče vzduchu také vlhký jemný papír. Vyčistěte ho čisticí kapalinou a jemným kartáčkem a poté ho opláchněte čistou vodou. Pak ho lze umístit zpět do chladiče vzduchu.
- Page 34 [SK] Návod na používanie Chladič vzduchu Modelové označenie: BL-168DLR S diaľkovým ovládaním...
- Page 35 UPOZORNENIE Nasávací otvor neumiestňujte príliš blízko k stene, závesom a pod., pretože by mohlo dôjsť k obmedzeniu prietoku vzduchu a fungovania chladiča. Pri prvom použití spotrebiča skontrolujte, či napätie v elektrickej sieti zodpovedá informáciám na štítku chladiča. Pred použitím skontrolujte, či napájací kábel alebo zástrčka nie sú poškodené. ...
- Page 36 Ovládací panel 1. Tlačidlo On/Off/Speed (Zap./vyp./rýchlosť) Po zapojení zástrčky do elektrickej zásuvky sa ozve zvukový signál. Stlačte tlačidlo. Na ovládacom paneli sa rozsvieti indikátor „low“, čo znamená, že chladič pracuje pri nízkych otáčkach. Stlačte tlačidlo druhý raz. Na ovládacom paneli sa rozsvieti indikátor „med“, čo znamená, ...
- Page 37 Stlačte štvrtý raz tlačidlo počas prevádzky chladiča. Indikátory „0.5H“ a „1H“ zhasnú. Rozsvieti sa indikátor „2H“. Chladič sa vypne po 2 hodinách. Stlačte tretí raz tlačidlo počas prevádzky chladiča. Znovu sa rozsvieti indikátor „0.5H“. Indikátor „1H“ zostane zhasnutý a indikátor „2H“ zostane svietiť. Chladič sa vypne po 2,5 hodiny.
- Page 38 č ť č č ľ ľ č Čistenie Čistenie vzduchového filtra: Odpojte zástrčku zo zásuvky a potiahnite držiak vzduchového filtra. Vzduchový filter po vybratí vyčistite pomocou neutrálneho čistiaceho prostriedku a mäkkej kefky. Potom ho opláchnite vodou. Filter môžete následne zasunúť do chladiča. Čistenie zvlhčovacieho papiera: Odpojte zástrčku z elektrickej zásuvky a vytiahnite vzduchový...
- Page 39 vyberte zvlhčovací papier. Vyčistite ho pomocou čistiaceho prostriedku a mäkkej kefky, potom ho opláchnite čistou vodou. Potom ho môžete zasunúť do chladiča. Dôležité upozornenie: Aby ste sa vyhli úniku vody, zvlhčovací papier musíte nainštalovať tak, aby zostal vyrovnaný. Čistenie nádržky na vodu: Odpojte zástrčku z elektrickej zásuvky a vyberte nádržku na vodu.
- Page 40 [ES] Manual de instrucciones Aire acondicionado portátil MODELO: BL-168DLR Con control remoto...
- Page 41 ADVERTENCIA No sitúe la entrada de aire demasiado cerca de una pared, una cortina o elementos similares, ya que esto impediría el flujo de aire y afectaría al funcionamiento del aparato. Cuando vaya a usar el aparato por primera vez, compruebe que la tensión de la red eléctrica coincida con la tensión indicada en la placa de características del equipo.
- Page 42 Le agradecemos que haya decidido adquirir este aparato portátil de aire acondicionado. Le rogamos que lea atentamente este manual de instrucciones y lo conserve por si necesita consultarlo más adelante. Panel de control de funciones 1. Botón “ON/OFF/Speed” (Encendido/apagado/velocidad) Al enchufar el aparato a la toma de corriente, oirá...
- Page 43 el aire acondicionado portátil se apagará al cabo de media hora. Si pulsa por segunda vez este botón mientras el aparato esté funcionando, el piloto “0.5H” se apagará y el piloto “1H” se iluminará. El aire acondicionado portátil se apagará al cabo de una hora.
- Page 44 Uso de bloques de hielo Los bloques de hielo pueden absorber lentamente el calor del agua y hacer que su temperatura sea inferior a la temperatura ambiente. Un aire acondicionado portátil con bloques de hielo generará aire más frío. ...
- Page 45 Limpieza del filtro de aire: Desenchufe el aparato de la toma de corriente; a continuación, tire del soporte del filtro de aire. Una vez que haya extraído el filtro de aire, límpielo con un líquido detergente neutro y un cepillo de cerdas blandas; después, aclárelo con agua limpia. Por último, vuelva a colocar el filtro en el aparato.
- Page 46 El símbolo que figura arriba y en el producto indica que este está clasificado como equipo eléctrico o electrónico y no debería desecharse junto a los demás residuos domésticos o comerciales al final de su vida útil. (2011/65/EU) La Directiva de Residuos de Aparatos Eléctricos y Electrónicos (WEEE, siglas en inglés) tiene como objeto reciclar los productos utilizando las mejores técnicas de recuperación y reciclado disponibles a fin de reducir el impacto sobre el medioambiente,...
-
Page 47: Pl Instrukcja Obsługi
[PL] Instrukcja obsługi Chłodnica powietrza MODEL NR: BL-168DLR Z pilotem zdalnego sterowania... - Page 48 OSTRZEŻENIE Nie wolno umieszczać wlotu powietrza zbyt blisko ścian, zasłon itp., ponieważ może to zablokować przepływ powietrza i wpłynąć na działanie chłodnicy powietrza. Podczas korzystania z urządzenia po raz pierwszy należy sprawdzić, czy napięcie w sieci jest zgodne z informacjami umieszczonymi na tabliczce znamionowej chłodnicy powietrza.
- Page 49 Szanowny Nabywco, dziękujemy za zakup chłodnicy powietrza. Uprzejmie prosimy o dokładne przeczytanie instrukcji obsługi i zachowanie jej do przyszłego użytku. Panel sterowania funkcji 1. Przycisk On/Off/Speed (Wł./Wył./Prędkość) Po włożeniu wtyczki do gniazdka rozlegnie się dźwięk brzęczyka. „ ” Nacisnąć przycisk. Zaświeci się wskaźnik (niska) na panelu sterowania wskazując, ...
- Page 50 „ ” „ ” Nacisnąć przycisk czwarty raz w czasie pracy chłodnicy. Wskaźniki zgasną. 0.5H „ ” Zaświeci się wskaźnik . Chłodnica powietrza przerwie pracę po dwóch godzinach. Nacisnąć przycisk piaty raz w czasie pracy chłodnicy. Ponownie zaświeci się wskaźnik ...
- Page 51 Czyszczenie Czyszczenie filtra powietrza Wyciągać wtyczkę z gniazdka sieciowego, a następnie wyciągnąć uchwyt filtra powietrza. Po wyciągnięciu filtra powietrza oczyścić go neutralnym płynem czyszczącym, a następnie miękką szczotką przed opłukaniem w czystej wodzie. Następnie filtr można ponownie umieścić w chłodnicy powietrza. Czyszczenie bibułki kurtyny mokrej Wyciągać...
- Page 52 Ważne: W celu uniknięcia przecieków bibułka kurtyny mokrej musi zostać zamontowana tak, aby była płaska. Czyszczenie zbiornika wody Wyciągać wtyczkę z gniazdka sieciowego, a następnie wyciągnąć zbiornik wody. Usunąć ze zbiornika wody jak najwięcej osadów za pomocą szmatki i odrobiny płynu czyszczącego, a następnie spłukać...
- Page 53 [DK] Brugervejledning Luftkøler MODEL NR.: BL-168DLR Med fjernbetjening...
- Page 54 ADVARSEL Placer ikke luftindtaget for tæt på en væg, gardiner osv. da dette vil blokere luftstrømmen og påvirke funktionen af luftkøleren. Når du bruger apparatet for første gang, skal du kontrollere, at strømspændingen overholder oplysningerne på typeskiltet af luftkøleren. ...
- Page 55 Funktion Kontrolpanel 1. On/Off/Speed knappen Når stikket er sat i stikkontakten, lyder en summer. Tryk på knappen. Når 'Low' indikatoren på betjeningspanelet lyser, indikerer det at luftkøler arbejder på lav hastighed. Tryk på knappen en gang til. Når 'Med' indikatoren på betjeningspanelet lyser, indikerer det at luftkøler arbejder på...
- Page 56 halvanden time. Tryk på knappen for fjer gang, når luftkøleren arbejder. '0.5H' indikatoren og '1H' indikatoren slukkes begge. '2H' indikatoren tændes. Luftkøleren stopper med at arbejde efter to time. Tryk på knappen for femte gang, når luftkøleren arbejder. '0.5H' indikatoren tændes. '1H' indikatoren slukker og '2H' indikatoren forbliver tændt.
- Page 57 Rengøring Rengøring af luftfilter: Tag stikket ud af stikkontakten, og træk på indehaveren af luftfilteret. Når du med succes har fjernet luftfilteret, rengør den med neutral rengøringsmiddel og en blød børste før skyller det med rent vand. Du kan derefter placere filteret tilbage i luftkøleren.
- Page 58 Tag stikket ud af stikkontakten og træk luftfilter ud, tag derefter også det våde gardin papir ud af luftkøleren. Rengør den med neutral rengøringsmiddel og en blød børste før skyller det med rent vand. Du kan derefter placere det tilbage i luftkøleren. Vigtig: ...
- Page 59 [IT] Manuale d ’ Raffrescatore d aria ’ N. MODELLO: BL-168DLR Con telecomando...
- Page 60 AVVERTENZA Non posizionare la presa d’aria a ridosso di pareti, tende, ecc. che potrebbero bloccare il flusso d’aria e compromettere il funzionamento del dispositivo. In caso di primo utilizzo dell’apparecchio, verificare che il valore della tensione di rete corrisponda al valore riportato sulla targhetta del prodotto.
- Page 61 1. Pulsante Accensione/Spegnimento/Velocità (ON/OFF/Speed): Dopo aver inserito la spina nella presa, il dispositivo emette un segnale acustico. Premere il pulsante. La spia “velocità bassa” (“low”) sul pannello di controllo si illumina per indicare che il dispositivo è impostato in modalità velocità bassa. Premere il pulsante per la seconda volta.
- Page 62 spia “2 ore” (“2H”) rimane accesa. Il funzionamento del dispositivo si arresta dopo due ore e mezza. Premere il pulsante per la sesta volta durante il funzionamento dell’apparecchio. La spia “0,5 ore” (“0.5H”) si spegne. La spia “1 ora” (“1H”) si accende nuovamente e la spia “2 ore”...
- Page 63 Pulizia 1° operazione 2° operazione 3° operazione 4° operazione Pulizia del filtro dell'aria: Staccare la spina dalla presa di corrente, quindi tirare il supporto del filtro dell'aria. Dopo averlo rimosso, pulire il filtro dell’aria con del detergente liquido neutro e una spazzola a setole morbide e sciacquare con acqua pulita.
- Page 64 Pulizia della cortina di protezione: Staccare la spina dalla presa di corrente e smontare il filtro dell'aria, quindi rimuovere anche la cortina di protezione dal dispositivo. Pulire con del detergente liquido e una spazzola a setole morbide e sciacquare con acqua pulita. Riposizionare questo componente nel raffreddatore.
- Page 65 a favorire il riciclo di prodotti attraverso l'adozione delle migliori tecnologie di recupero e riciclaggio, minimizzando così l'impatto ambientale, trattando qualsiasi sostanza pericolosa ed evitando la proliferazione di discariche. Contattare le autorità locali per maggiori informazioni sul corretto smaltimento di apparecchiature elettriche o elettroniche.