Table des Matières
Publicité
Les langues disponibles
Les langues disponibles
Liens rapides
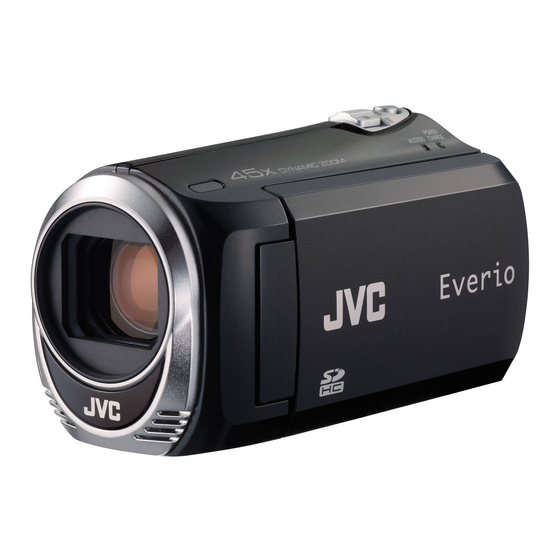
MEMORY CAMERA
GZ-MS110
Basic User Guide
Dear Customers
Thank you for purchasing this JVC product.
Before use, please read the Safety Precautions and Cautions on P.2 and P.24 to ensure safe
use of this product.
This product has a "Basic User Guide" (this manual) and a "Detailed User Guide"(Web).
Detailed User Guide
For Future Reference:
Enter the Model No. (located on the bottom of the camera) and Serial No.
(located on the battery pack mount of the camera) below.
Model No.
Serial No.
Explains the ways of shooting in various situations and the
useful features.
■
Access the following website on your PC
http://manual.jvc.co.jp/index.html/
Publicité
Chapitres
Table des Matières
Dépannage

Manuels Connexes pour JVC Everio GZ-MS110


Sommaire des Matières pour JVC Everio GZ-MS110
- Page 1 GZ-MS110 Basic User Guide Dear Customers Thank you for purchasing this JVC product. Before use, please read the Safety Precautions and Cautions on P.2 and P.24 to ensure safe use of this product. This product has a “Basic User Guide” (this manual) and a “Detailed User Guide”(Web).
-
Page 2: Safety Precautions
The battery pack, this unit with battery installed, and the remote control with battery installed should not be exposed to excessive heat such as direct sunlight, fire or the like. For more information, refer to the Detailed User Guide http://manual.jvc.co.jp/index.html/... - Page 3 Servicing is required when the apparatus has data to a DVD or other recording media for storage. JVC will not be responsible for any lost data. been damaged in any way, such as power-supply cord or plug is damaged, liquid has been spilled...
-
Page 4: Table Des Matières
Specifications ........26 ▶Learning About Advanced Operations Use the “Detailed User Guide” on your PC to find out more about the advanced operations. ■ Access the following address on your PC http://manual.jvc.co.jp/index.html/ Verifying the Accessories AC Adapter Battery Pack USB Cable... -
Page 5: Names Of Parts And Functions
Thumbnail : Displays file information. Playback : Decreases the volume with every press during volume adjustment. J MENU (menu) Button ( P.8) K AV Terminal ( P.14, P.16) For more information, refer to the Detailed User Guide http://manual.jvc.co.jp/index.html/... -
Page 6: Getting Started
Goes out CAUTION Be sure to use JVC battery packs. ● If you use any other battery packs besides JVC battery packs, safety and performance cannot be guaranteed. ● Charging time: Approx. 1 h 50 m (using supplied battery pack) * The charging time is when the unit is used at 25°C (77°F). -
Page 7: Grip Adjustment
Remove the strap and loop it around your wrist. While pressing A, pull B and remove the strap. Press and hold ● When attaching the hand strap, insert C until it clicks into place. For more information, refer to the Detailed User Guide http://manual.jvc.co.jp/index.html/... -
Page 8: Using The Menu
Insert a commercially available SD card before recording. Close the LCD monitor. Open the cover. (Base) Insert an SD card. Label Turn off the power of this unit before inserting or removing a card. For more information, refer to the Detailed User Guide http://manual.jvc.co.jp/index.html/... -
Page 9: Format Sd Card
Panasonic, TOSHIBA, SanDisk, ATP Video Class 4 or higher compatible SDHC card (4 GB to 32 GB) ● Using cards other than those specified above may result in recording failure or data loss. For more information, refer to the Detailed User Guide http://manual.jvc.co.jp/index.html/... -
Page 10: Clock Setting
● The city name and time difference is displayed. SET DATE/TIME! CLOCK/AREA SETTING ● Use the ZOOM(SELECT) lever to JAN. 1. 2010 10:00 AM select, then press OK to set. For more information, refer to the Detailed User Guide http://manual.jvc.co.jp/index.html/... - Page 11 DATE DISPLAY STYLE MONITOR BRIGHTNESS LCD BACKLIGHT ● The subsequent setting operations are the same as steps 3 - 5 on the ④ Select the desired language and previous page. press OK. For more information, refer to the Detailed User Guide http://manual.jvc.co.jp/index.html/...
-
Page 12: Recording
: Record-Standby Scene Counter : Recording in Progress Recording Media (SD CARD) Battery Indicator NOTE ● The estimated recording time of the supplied battery pack is approximately 50 minutes. ( P.20) For more information, refer to the Detailed User Guide http://manual.jvc.co.jp/index.html/... -
Page 13: Playback
Usable operation buttons during playback Operation button During playback During pause Pause Playback Forward/Reverse search Returns to thumbnail display SELECT Turns up the volume Turns down the volume Displays file information For more information, refer to the Detailed User Guide http://manual.jvc.co.jp/index.html/... -
Page 14: Playing Back On Tv
Images are projected horizontally on Adjust the TV's screen accordingly. the TV. NOTE ● Please contact the TV manufacturer on questions or problems with setting the TV to the correct mode. For more information, refer to the Detailed User Guide http://manual.jvc.co.jp/index.html/... -
Page 15: Copying
Connecting to a DVD Recorder or VCR P.16 Copying to PC P.17 * For details on how to create a disc using a computer, refer to the Detailed User Guide. For more information, refer to the Detailed User Guide http://manual.jvc.co.jp/index.html/... -
Page 16: Dubbing Files By Connecting To A Dvd Recorder Or Vcr
“ON”. Alternatively, set ON-SCREEN DISPLAY in the playback menu to DISPLAY DATE ONLY. Start recording. ● Start playback on the camcorder ( P.13) and press the record button on the recorder. ● After playback is complete, stop the recording. For more information, refer to the Detailed User Guide http://manual.jvc.co.jp/index.html/... -
Page 17: Copying To Computer
If your PC does not meet the above system requirements, the provided software cannot be used. ● For more information, contact your PC's manufacturer. ● Mac users may use the software provided with the Mac Computer. For more information, refer to the Detailed User Guide http://manual.jvc.co.jp/index.html/... - Page 18 ROM icon in “My Computer”. ● Connect to the internet and click “Read Detailed User Guide” Click “Finish”. Click “Quit”. ● Exits installation of Everio MediaBrowser and icons are created on the desktop. For more information, refer to the Detailed User Guide http://manual.jvc.co.jp/index.html/...
- Page 19 Select “BACK UP” and press OK. ● The provided software Everio MediaBrowser starts up on the PC. The subsequent operations are to be performed on the PC. Select the volume. Click Click For more information, refer to the Detailed User Guide http://manual.jvc.co.jp/index.html/...
-
Page 20: Further Information
● When the battery life is reached, the recording time becomes shorter even if the battery pack is fully charged. (Replace the battery pack with a new one.) For more information, refer to the Detailed User Guide http://manual.jvc.co.jp/index.html/... - Page 21 Use of this software is authorized according to the terms of the software license. (for inquires regarding this unit) When contacting the nearest JVC office or agency in your country (refer to the JVC Worldwide Service Network at http://www.jvc-victor.co.jp/english/worldmap/index-e.html) about this software, please have the following information ready.
-
Page 22: Troubleshooting
Before requesting service, consult the following chart or the "Troubleshooting" section in the Detailed User Guide. If the solutions indicated in the chart do not solve the problem, consult your nearest JVC dealer or JVC service center for instructions. Refer also to the FAQ of new products on JVC’s website. -
Page 23: Warning Indications
● If a video recording is stopped with the “DATA RECORDED IS actual recording time displayed at TOO LITTLE UNABLE TO “0:00:00:17” and below, the video cannot SAVE” be saved. For more information, refer to the Detailed User Guide http://manual.jvc.co.jp/index.html/... -
Page 24: Cautions
Recording Medium adapter, called a “Siemens Plug”, as shown. For this AC plug adapter, consult your nearest • Be sure to follow the guidelines below JVC dealer. to prevent corruption or damage to your recorded data. Plug Adapter • Do not bend or drop the recording medium, or subject it to strong pressure, jolts or vibrations. -
Page 25: Main Unit
... in places subject to excessive shock or vibration. Changes or modifications not approved by ... near a television set. JVC could void the user’s authority to operate ... near appliances generating strong magnetic the equipment. This equipment has been or electric fields (speakers, broadcasting tested and found to comply with the limits for antennas, etc.). -
Page 26: Specifications
* When using the AC adapter overseas, please prepare a commercially available converter plug for the country or region of visit. ● The specifications and appearance of this product are subject to changes for further improvement without prior notice. For more information, refer to the Detailed User Guide http://manual.jvc.co.jp/index.html/... - Page 27 MEMO For more information, refer to the Detailed User Guide http://manual.jvc.co.jp/index.html/...
- Page 28 Terms A AC Adapter ........6 M Menu Settings ........8 AV Connection ......14, 16 R Recordable Time ......20 Battery Pack ........6 SD Card ........8, 20 C Clock Adjust ........11 U USB Cable ........19 Copy (Back Up) ......
-
Page 29: Accéder Au Site Web Suivant Sur Votre Ordinateur
GZ-MS110 Guide de l’utilisateur Chers clients, Merci d’avoir acheté ce produit JVC. Avant toute utilisation, veuillez lire les précautions de sécurité et les mises en garde sur P.2 et P.24 pour pouvoir utiliser le produit en toute sécurité. Ce produit s’accompagne d’un “Guide de l’utilisateur” (ce manuel) et d’un “Manuel d’utilisation”... -
Page 30: Précautions De Sécurité
Éviter d’exposer la batterie, le caméscope avec la batterie insérée ou la télécommande avec la batterie insérée à une chaleur excessive, telle que celle des rayons directs du soleil, d’un feu ou autre source de chaleur. Pour plus d'informations, veuillez vous rapporter au Manuel d'utilisation http://manual.jvc.co.jp/index.html/... - Page 31 Il est recommandé de les copier sur un DVD ou un 12. Débrancher cet appareil pendant un orage ou autre support d'enregistrement pour stockage. JVC décline toute responsabilité pour toute perte quand il n’est pas utilisé pendant une longue de données.
-
Page 32: Vérification Des Accessoires
..........13 ▶En savoir plus sur les opérations avancées Utilisez le “Manuel d’utilisation” depuis votre ordinateur pour en savoir plus concernant les opérations avancées. ■ Accéder à l’adresse suivante depuis votre ordinateur http://manual.jvc.co.jp/index.html/ Vérification des accessoires Adaptateur secteur Batterie Câble USB Câble AV... -
Page 33: Noms Des Pièces Et Des Fonctions
V Commande de libération de la batterie Lecture : Diminue le volume avec ( P.6) chaque pression pendant le réglage du volume. J Touche MENU (menu) ( P.8) K Terminal AV ( P.14, P.16) Pour plus d'informations, veuillez vous rapporter au Manuel d'utilisation http://manual.jvc.co.jp/index.html/... -
Page 34: Démarrer
S’éteint ATTENTION Assurez-vous d’utiliser des batteries de JVC. ● Si vous utilisez des batteries d’autres fabricants JVC, les performances et la sécurité ne seront pas garanties. ● Durée de recharge: Environ 1 h 50 m (avec la batterie fournie) * Le temps de chargement est lorsque l’appareil est utilisé à 25°C (77°F). Si la batterie n’est pas chargée à... -
Page 35: Ajuster La Poignée
En appuyant sur A, tirez sur B et enlevez la dragonne. Appuyez sur et maintenez la touche enfoncée ● Lorsque vous attachez la dragonne, insérez C jusqu’à ce qu’il soit enclenché. Pour plus d'informations, veuillez vous rapporter au Manuel d'utilisation http://manual.jvc.co.jp/index.html/... -
Page 36: Via Le Menu
Insérez une carte SD disponible dans le commerce avant tout enregistrement. Fermez l'écran LCD. Ouvrez le volet de protection. (Basique) Insérez une carte SD. Étiquette Éteignez l'unité avant d'insérer ou de retirer une carte. Pour plus d'informations, veuillez vous rapporter au Manuel d'utilisation http://manual.jvc.co.jp/index.html/... -
Page 37: Formater La Carte Sd
Carte SDHC compatible Classe 4 ou supérieur (4 Go à 32 Go) ● Toute utilisation de cartes autres que celles indiquées ci-dessus risque de causer des problèmes lors de l’enregistrement ou la perte de données. Pour plus d'informations, veuillez vous rapporter au Manuel d'utilisation http://manual.jvc.co.jp/index.html/... -
Page 38: Réglage De L'horloge
Le nom de la ville et le décalage horaire s’affichent alors. REGLER DATE/HEURE ! REGLAGE HORLOGE/ZONE ● Utilisez la commande ZOOM(SELECT) JAN. 1. 2010 10:00 AM pour sélectionner, puis appuyez sur OK pour confirmer. Pour plus d'informations, veuillez vous rapporter au Manuel d'utilisation http://manual.jvc.co.jp/index.html/... -
Page 39: Pour Réinitialiser L'horloge
Les opérations de réglage suivantes ④ Sélectionnez la langue sont les mêmes que celles souhaitée, puis appuyez sur OK. mentionnées dans les étapes 3 à 5 de la page précédente. Pour plus d'informations, veuillez vous rapporter au Manuel d'utilisation http://manual.jvc.co.jp/index.html/... -
Page 40: Enregistrement
: Enregistrement en cours de scènes Supports d'enregistrement (Carte SD) Indicateur de la batterie REMARQUE ● La durée d’enregistrement restante de la batterie fournie est d’environ 50 minutes. ( P.20) Pour plus d'informations, veuillez vous rapporter au Manuel d'utilisation http://manual.jvc.co.jp/index.html/... -
Page 41: Lecture
Touches de fonctionnement utilisables lors de la lecture Touche de Pendant la lecture Pendant la pause fonctionnement Pause Lecture Recherche avant/arrière Retourne à l’affichage miniature SELECT Augmente le volume Baisse le volume Affiche les informations de fichier Pour plus d'informations, veuillez vous rapporter au Manuel d'utilisation http://manual.jvc.co.jp/index.html/... -
Page 42: Lecture Sur Poste Tv
TV. REMARQUE ● Pour toute question ou tout problème concernant les réglages de la TV dans le mode approprié, veuillez vous adresser au fabricant de la TV. Pour plus d'informations, veuillez vous rapporter au Manuel d'utilisation http://manual.jvc.co.jp/index.html/... -
Page 43: Copie
à un magnétoscope/ Magnétoscope P.16 enregistreur DVD Copier vers un P.17 ordinateur * Pour plus de détails concernant la création d’un disque via un ordinateur, veuillez vous référer au Manuel d’utilisation. Pour plus d'informations, veuillez vous rapporter au Manuel d'utilisation http://manual.jvc.co.jp/index.html/... -
Page 44: Copier Des Fichiers En Connectant L'appareil À Un Magnétoscope/Enregistreur Dvd
SUR ECRAN dans le menu de lecture sur AFFICHER SEUL. DATE. Lancez l’enregistrement. ● Lancez la lecture sur le camescope ( P.13), puis appuyez sur la touche d’enregistrement de l’enregistreur. ● Une fois la lecture terminée, arrêtez l’enregistrement. Pour plus d'informations, veuillez vous rapporter au Manuel d'utilisation http://manual.jvc.co.jp/index.html/... -
Page 45: Copie Vers L'ordinateur
être utilisé. ● Pour plus d’informations, veuillez contacter le fabricant de votre ordinateur. ● Les utilisateurs de Mac peuvent utiliser le logiciel fourni avec l’ordinateur Mac. Pour plus d'informations, veuillez vous rapporter au Manuel d'utilisation http://manual.jvc.co.jp/index.html/... -
Page 46: Ordinateur Mac
CD-ROM dans “Poste “Lire le manuel d'utilisation” de travail”. Cliquez sur “Terminer”. Cliquez sur “FIN”. ● Quitte l’installation de Everio MediaBrowser et les icônes sont créées sur le bureau. Pour plus d'informations, veuillez vous rapporter au Manuel d'utilisation http://manual.jvc.co.jp/index.html/... -
Page 47: Sauvegarder Tous Les Fichiers
OK. fermez l’écran LCD. ● Le logiciel fourni Everio MediaBrowser se lance sur votre ordinateur. Les opérations suivantes doivent être effectuées sur l’ordinateur. Sélectionnez le volume. Cliquez Cliquez Pour plus d'informations, veuillez vous rapporter au Manuel d'utilisation http://manual.jvc.co.jp/index.html/... -
Page 48: Informations Supplémentaires
● Lorsque la durée de vie de la batterie est atteinte, la durée d’enregistrement raccourcit, même si la batterie est entièrement chargée. (Remplacez la batterie par une nouvelle.) Pour plus d'informations, veuillez vous rapporter au Manuel d'utilisation http://manual.jvc.co.jp/index.html/... - Page 49 L’utilisation de ce logiciel est autorisée selon les termes de sa licence. (pour toutes questions concernant cette unité) Préparez les informations suivantes avant de contacter l’agence ou le bureau JVC local le plus proche à propos de ce logiciel (réseau de service après-vente mondial JVC : http://www.jvc-victor.co.jp/english/ worldmap/index-e.html).
-
Page 50: Dépannage
Si les solutions proposées dans le tableau ne résolvent pas votre problème, consultez votre revendeur JVC ou le centre de services JVC le plus proche pour plus d’instruction. Consultez également les FAQ sur les nouveaux produits, sur le site Internet de JVC. -
Page 51: Messages D'avertissement
Si un enregistrement vidéo est arrêté “TROP PEU DE DONNEES et que le temps actuel ENREGISTREES d’enregistrement affiché est de SAUVEGARDE “0:00:00:17” ou moins, la vidéo ne IMPOSSIBLE” pourra être enregistrée. Pour plus d'informations, veuillez vous rapporter au Manuel d'utilisation http://manual.jvc.co.jp/index.html/... -
Page 52: Mises En Garde
• Ne pas déformer ou laisser tomber le support Pour cet adaptateur de prise secteur, consulter d’enregistrement, ou le soumettre à une forte votre revendeur JVC le plus proche. pression, des secousses ou des vibrations. Adaptateur de prise • Ne pas éclabousser le support d’enregistrement avec de l’eau. - Page 53 Des changements ou modifications non magnétiques ou électriques intenses (haut- parleurs, antennes de diffusion, etc.). approuvés par JVC peuvent annuler le droit de ... dans des lieux exposés à des températures l’utilisateur de faire fonctionner l’appareil. Cet extrêmement élevées (au-delà de 40°C) ou appareil a été...
-
Page 54: Caractéristiques Techniques
* Pour utiliser un adaptateur secteur à l’étranger, pensez à préparer une prise convertisseur disponible dans le commerce pour le pays ou la région visité(e). ● Les caractéristiques et l’apparence de ce produit sont susceptibles d’être modifiées sans préavis pour d’éventuelles améliorations. Pour plus d'informations, veuillez vous rapporter au Manuel d'utilisation http://manual.jvc.co.jp/index.html/... - Page 55 MEMO Pour plus d'informations, veuillez vous rapporter au Manuel d'utilisation http://manual.jvc.co.jp/index.html/...
- Page 56 Termes A Adaptateur secteur ......6 Formater la carte SD ....... 9 R Régler l’horloge ......11 Batterie ..........6 Branchement secteur ....14, 16 Régler la date et l’heure ....10 Régler la langue ......11 C Câble USB ........19 Carte SD ........