Publicité

Les langues disponibles
  • FR

Les langues disponibles

  • FRANÇAIS, page 13

Liens rapides

Quickstart Guide
Guía de inicio rápido
Guide d'utilisation rapide
Guida rapida
Schnellstart-Anleitung
Snelstartgids
Appendix
English ( 3 – 7 )
Español ( 8 – 12 )
Français ( 13 – 17 )
Italiano ( 18 – 22 )
Deutsch ( 23 – 27 )
Nederlands ( 28 – 32 )
English ( 34 )

Publicité

Table des Matières
loading

Sommaire des Matières pour ION Raptor

  • Page 1 Quickstart Guide English ( 3 – 7 ) Guía de inicio rápido Español ( 8 – 12 ) Guide d’utilisation rapide Français ( 13 – 17 ) Guida rapida Italiano ( 18 – 22 ) Schnellstart-Anleitung Deutsch ( 23 – 27 ) Snelstartgids Nederlands ( 28 –...
  • Page 3: Rechargeable Batteries

    • When using long extension cords with Raptor, use a heavier cord with a larger wire size to reduce the voltage drop (the longer or thinner the cord, the greater the voltage drop). North America: Do not use Raptor with an IEC input cable rated for less than 15 A.
  • Page 4 Please do not place Raptor in standing water. • Please do not connect the power cable to Raptor in a wet environment. Make sure the power input, power cable, and power outlet are all completely dry before making any connections.
  • Page 5 Features Front Panel 1. Power Button: Turns Raptor on or off. Please note that while Raptor is connected to a power source, it does not need to be powered on to charge the battery. When the power is on, the display will show the power indicator.
  • Page 6 12. Link Output: Connect two or more Raptor speakers together using a 1/8” (3.5 mm) stereo aux cable from the Link Output of one Raptor to the Aux Input of the second Raptor. 13. USB Charging Ports: Connect your device’s charge cable here to charge it. USB charging only functions when the unit’s power is turned on.
  • Page 7: Pairing A Bluetooth Device

    5. Follow the pairing instructions that appear on your phone. If a passcode is required, enter “0000”. 6. To unpair, gently bump your device against the NFC logo located on Raptor’s top panel. Troubleshooting If the sound is distorted: Try lowering the volume control of your sound source, musical instrument, or microphone.
  • Page 8: Contenido De La Caja

    América del Norte: No use el Raptor con un cable de entrada IEC especificado para menos de 15A. UE: No use el Raptor con un cable de entrada IEC especificado para menos de 10A.
  • Page 9: Instalación Rápida

    No coloque el Raptor sobre agua estancada. • No conecte el adaptador de carga al Raptor en un ambiente húmedo. Asegúrese de que la entrada para la entrada de alimentación, el cable de alimentación y la toma de corriente estén completamente secos antes de realizar cualquier conexión.
  • Page 10: Características

    Características Panel frontal 1. Botón de encendido: Enciende y apaga el Raptor. Tenga en cuenta que mientras el Raptor está conectado a un suministro eléctrico, no es necesario encenderlo para que cargue la batería. Cuando el altavoz está encendido, la pantalla mostrará el indicador de encendido.
  • Page 11: Panel Trasero

    CD, MP3 u otra fuente de audio. 12. Salida enlace: Conecte dos o más altavoces Raptor entre sí mediante un cable auxiliar estéreo de 3,5 mm (1/8 pulg.) desde la salida Link (enlace) de un Raptor hasta la entrada Aux (auxiliar) del segundo Raptor.
  • Page 12: Solución De Problemas

    Cómo aparear un dispositivo Bluetooth 1. Encienda su dispositivo Bluetooth. 2. Encienda el Raptor. Si ya lo había conectado a otro dispositivo Bluetooth previamente, el Raptor se reconectará. Para desconectar el apareamiento si el icono de Bluetooth está encendido permanentemente, mantenga pulsado el botón de Bluetooth.
  • Page 13: Présentation

    (plus le câble est long, ou le fil est petit, plus la chute de tension est grande). Amérique du Nord: Ne pas utiliser le Raptor avec un câble d'entrée IEC d'une valeur nominale de moins de 15 A.
  • Page 14: Utilisation Extérieure Et Entretien

    Utilisation extérieure et entretien Bien que le Raptor soit résistant à l'eau et tolère les éclaboussures, les conseils ci-dessous qui vous permettront de tirer le maximum de votre Raptor : • L'enceinte Raptor doit être utilisée à l'extérieur uniquement avec une prise secteur ou un câble prolongateur qui sont conçus pour une utilisation extérieure.
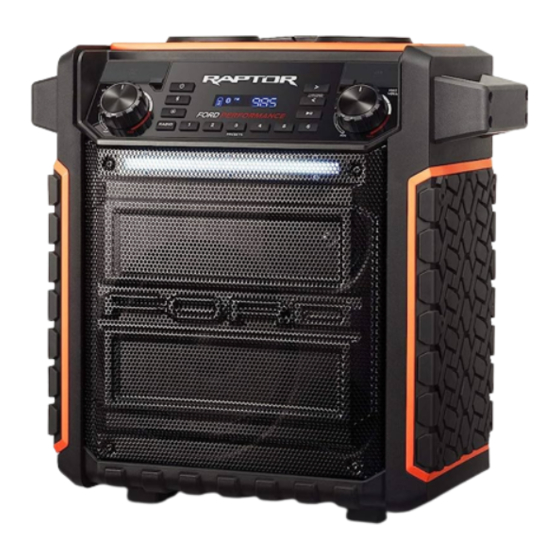
  • Page 15: Caractéristiques

    Caractéristiques Panneau avant 1. Touche d'alimentation : Permet de mettre le Raptor sous et hors tension Veuillez noter que lorsque le Raptor est branché à une source d'alimentation, il peut recharger la pile sans être sous tension. Lorsque l'appareil est sous tension, l'écran affiche l'indicateur d'alimentation.
  • Page 16: Panneau Arrière

    • Icône éclair : L'icône éclair s'allume lorsque le câble d'alimentation est branché à une prise secteur. • Icône Bluetooth : L'icône Bluetooth ne sera pas allumée lorsque l'enceinte Raptor est d'abord mise sous tension (à moins qu'elle n’ait été jumelée avec un périphérique auparavant).
  • Page 17: Jumelage D'un Périphérique Bluetooth

    Bluetooth, l'enceinte Raptor se reconnectera à cet appareil. Pour supprimer la connexion lorsque l'icône Bluetooth est allumée, enfoncez puis relâchez la touche Bluetooth. 3. Accédez à l'écran de configuration de votre périphérique Bluetooth, recherchez « Raptor » et lancez le jumelage.
  • Page 18: Contenuti Della Confezione

    America del Nord: Non utilizzare il Raptor con un cavo di ingresso IEC dal valore nominale inferiore a 15 A. UE: Non utilizzare il Raptor con un cavo di ingresso IEC dal valore nominale inferiore a 10 A.
  • Page 19: Utilizzo All'aperto E Cura

    Utilizzo all'aperto e cura Sebbene il Raptor sia impermeabile e in grado di sopportare eventuali schizzi d'acqua, leggere attentamente i consigli di cui sotto per ottenere le migliori prestazioni dal Raptor: • Il Raptor deve essere utilizzato unicamente all'aperto, con prese di alimentazione o prolunghe dalla tensione nominale specifica per un utilizzo all'aperto.
  • Page 20: Pannello Anteriore

    • Beat Sync: le luci reagiscono al battito della musica. • Off: le luci si spengono. Questa è la modalità predefinita nel momento in cui il Raptor viene acceso. 4. Selettore radio: questo interruttore imposta il sintonizzatore su FM, AM, o spegne la radio.
  • Page 21: Pannello Posteriore

    MP3 o altre sorgenti audio. 12. Uscita collegamento: Collegare due o più Raptor insieme servendosi di un cavo stereo aux da 3,5 mm (1/8”) per unire l'uscita Link di un Raptor all'ingresso Aux del secondo Raptor.
  • Page 22: Accoppiamento Di Un Dispositivo Bluetooth

    Accoppiamento di un dispositivo Bluetooth 1. Accendere il dispositivo Bluetooth. 2. Accendere il Raptor. Se in precedenza è stato collegato a un altro dispositivo Bluetooth, il Raptor vi si ricollegherà. Per annullare il collegamento, se l'icona Bluetooth è accesa in maniera fissa, premere e rilasciare il tasto Bluetooth.
  • Page 23: Lieferumfang

    Kabel ist, desto größer ist der Spannungsabfall). Nordamerika: Verwenden Sie den Raptor nie mit einem IEC-Eingangskabel, das auf weniger als 15 A ausgelegt ist. EU: Verwenden Sie den Raptor nie mit einem IEC-Eingangskabel, das auf weniger als 10 A ausgelegt ist.
  • Page 24 Bitte platzieren Sie den Raptor nie instehenden Gewässern. • In einer nassen Umgebung schließen Sie bitte das Netzkabel nicht an den Raptor an. Stellen Sie sicher, dass der Netzkabel-Eingang, der Netzkabel und die Steckdose komplett trocken sind, bevor Sie irgendwelche Verbindungen herstellen.
  • Page 25 Funktionen Vorderseite 1. Power-Taste: Schaltet den Raptor an oder aus. Beachten Sie bitte, dass beim Anschluss des Raptor an ein Stromnetz das Gerät nicht eingeschaltet werden muss, um die Batterie aufzuladen. Wenn das Gerät eingeschaltet ist, zeigt das Display das Netzanzeige an.
  • Page 26 11. AUX-Eingang: Dieser 3,5 mm (1/8") Stereo-Eingang kann dazu verwendet werden, einen Smartphone, einen MP3-Player oder eine andere Audio-Quelle anzuschließen. 12. Link-Ausgang: Verbinden Sie zwei oder mehr Raptor über ein 3,5 mm (1/8") Stereo-Aux-Kabel vom Link-Ausgang des ersten Raptor zum Aux-Eingang des zweiten Raptor.
  • Page 27 5. Folgen Sie den Anweisungen zum Koppeln, die auf Ihrem Telefon angezeigt werden. Wenn ein Passcode erforderlich ist, geben Sie 0000 ein. 6. Stoßen Sie Ihr Gerät leicht gegen das "N"-Logo am oberen Teil des Raptor, um die Verbindung zu trennen.
  • Page 28: Inhoud Van De Doos

    (hoe langer en dunner het snoer, hoe groter de spanningsval). Noord-Amerika: Gebruik de Raptor niet met een IEC-stroomkabel die voor minder dan 15 A geschikt is. EU: Gebruik de Raptor niet met een IEC-stroomkabel die voor minder dan 10 A geschikt is.
  • Page 29: Snelstart

    Gebruik buitenshuis en onderhoud Hoewel de Raptor waterbestendig is en bestand is tegen opspattend water, vragen wij u toch de tips hieronder te volgen voor optimale prestaties van uw Raptor: • Raptor mag buiten alleen worden gebruikt met stopcontacten of verlengsnoeren die zijn goedgekeurd voor gebruik buitenshuis.
  • Page 30 één kleur vast te zetten. • Beat Sync: De lichten reageren op het ritme van de muziek. • Uit: De lichten gaan uit. Dit is de standaardmodus wanneer de Raptor voor het eerst wordt ingeschakeld.
  • Page 31 12. Link-uitgang: Luidsprekerverbinding: Verbindt twee of meer Raptor met elkaar met een stereo aux-kabel van 3,5 mm (1/8") van de Link-uitgang van een Raptor naar de Aux-ingang van de tweede Raptor. 13. USB-poorten: Sluit hier de oplaadkabel van uw apparaat aan om het op te laden. Opladen met USB werkt alleen als het apparaat is ingeschakeld.
  • Page 32: Een Bluetooth-Apparaat Koppelen

    Een Bluetooth-apparaat koppelen 1. Zet uw Bluetooth-apparaat aan. 2. Zet de Raptor aan. Als u eerder verbinding hebt gemaakt met een ander Bluetooth-apparaat, zal de Raptor opnieuw verbinding maken. Houd de Bluetooth-knop ingedrukt om de koppeling te verbreken wanneer het Bluetooth-pictogram brandt.
  • Page 34: Appendix (English)

    ** Battery life may vary based on temperature, age, and volume usage of product. Trademarks & Licenses ION Audio is a trademark of ION Audio, LLC, registered in the U.S. and other countries. The Bluetooth word mark and logos are owned by the Bluetooth SIG, Inc. and any use of such marks by ION Audio is under license.
  • Page 36 ionaudio.com Manual Version 1.1...

Table des Matières