Honeywell Home T4 Pro Notice D'installation
Masquer les pouces
Voir aussi pour T4 Pro:
- Guide de l'utilisateur (33 pages) ,
- Instructions d'installation (36 pages)
Table des Matières
Publicité
Les langues disponibles
Les langues disponibles
Liens rapides
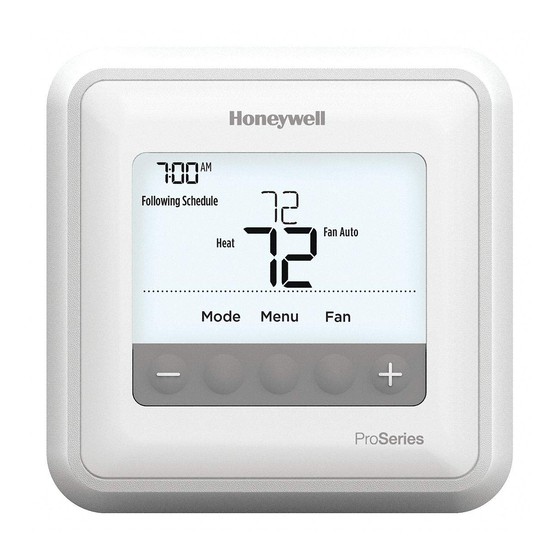
T4 Pro
Programmable Thermostat
Installation Instructions
Package Includes:
• T4 Pro Thermostat
• UWP™ Mounting System
• Standard Installation
Adapter (J-box adapter)
• Decorative Cover Plate – Small; size
4-49/64 in x 4-49/64 in x 11/32 in
(121 mm x 121 mm x 9 mm)
• Screws and anchors
• 2 AA Batteries
• Installation Instructions and User
Guide
Optional Cover Plate installation
NOTE: If Optional Cover Plate is not required,
see "UWP Mounting System installation" on
next page.
Use the Optional Cover Plate when:
• Mounting the thermostat to an electrical
junction box
• Or when you need to cover paint gap from
old thermostat.
1. Before starting, turn the power off at
the breaker box or switch. Separate the
Junction Box Adapter from the Cover
Plate. See Figure 1.
2. Mount the Junction Box Adapter to the
wall or an electrical box using any of the
eight screw holes. Insert and tighten
mounting screws supplied with Cover
Plate Kit. Do not overtighten. See Figure 2.
Make sure the Adapter Plate is level.
3. Attach the UWP by hanging it on the top
hook of the Junction Box Adapter and
then snapping the bottom of the UWP in
place. See Figure 3.
4. Snap the Cover Plate onto the Junction
Box Adapter. See Figure 4.
TH4110U2005,
TH4210U2002
Read before installing
1
2
Use 2x
supplied
screws #6
5/8"
4
M37844
3
Publicité
Table des Matières

Manuels Connexes pour Honeywell Home T4 Pro


Sommaire des Matières pour Honeywell Home T4 Pro
- Page 1 T4 Pro Programmable Thermostat Installation Instructions Package Includes: • T4 Pro Thermostat • UWP™ Mounting System • Standard Installation Adapter (J-box adapter) • Decorative Cover Plate – Small; size 4-49/64 in x 4-49/64 in x 11/32 in M37844 TH4110U2005, (121 mm x 121 mm x 9 mm) •...
-
Page 2: Power Options
UWP Mounting System installation 1. Before starting, turn the power off at the breaker box or switch. Open package to find the UWP. See Figure 5. 2. Position the UWP on wall. Level and mark hole positions. See Figure 6. Drill holes at marked positions, and then lightly tap supplied wall anchors into the wall using a hammer. - Page 3 Rc terminal, set the slider to the down position (2 wires). NOTE: Slider Tabs for U terminals should be left in place for T4 Pro models. R/Rc Slider Tab (built-in jumper) UWP Wiring terminal designations Not used for T4 thermostat.
- Page 4 Wiring conventional systems: forced air and hydronics 1H/1C System (1 transformer) 1H/1C System (2 transformers) Power [1] Power (heating transformer) [1] [R+Rc joined by Slider Tab] [2] Power (cooling transformer) [1] Compressor contactor Compressor contactor 24VAC common [3] 24VAC common [3, 4] Heat Heat Heat-only System...
-
Page 5: Thermostat Mounting
Thermostat mounting 1. Push excess wire back into the wall opening. 2. Close the UWP door. It should remain closed without bulging. 3. Align the UWP with the thermostat, and push gently until the thermostat snaps in place. 4. Turn the power on at the breaker box or switch. - Page 6 Installer setup (ISU) 1 Press and hold CENTER and buttons for approximately 3 seconds to enter advanced menu. 2 Press Select to enter ISU. 3 Press Select to cycle through menu setup options. 4 Press to change values or select from available options.
- Page 7 Advanced setup options (ISU) (continued) # ISU ISU Name ISU Options (factory default in bold) Heating Equipment Type Conventional Forced Air Heat: 1 = Standard Efficiency Gas Forced Air 2 = High Efficiency Gas Forced Air 3 = Oil Forced Air 4 = Electric Forced Air 5 = Hot Water Fan Coil Heat Pump:...
- Page 8 Advanced setup options (ISU) (continued) # ISU ISU Name ISU Options (factory default in bold) 0 = Off Upstage Timer for Backup 5 = 90 minutes Heat (TH4210U only) 1 = 30 minutes 6 = 2 hours 2 = 45 minutes 7 = 3 hours 3 = 60 minutes 8 = 4 hours...
- Page 9 Advanced setup options (ISU) (continued) # ISU ISU Name ISU Options (factory default in bold) Number of Air Filters 0 - 2 Note: This ISU refers to the number of air filters in the system. 0 = Off Air Filter 1 Replacement 10 = 45 Calendar Days Reminder 1 = 10 Run Time Days...
-
Page 10: System Test
Installer system test To perform a System Test: 1 Press and hold CENTER and buttons for approximately 3 seconds to enter advanced menu. to go to TEST. Press Select to enter 2 Use System Test. 3 Use to change between Heat, Cool, Fan, Em. - Page 11 Troubleshooting If you have difficulty with your thermostat, please try the following suggestions. Most problems can be corrected quickly and easily. Display is • Check circuit breaker and reset if necessary. blank • Make sure power switch for heating & cooling system is on. •...
-
Page 12: Customer Assistance
33-00187EFS—13 M.S. Rev. 09-19 | Printed in United States This product is manufactured by Resideo Technologies, Inc., Golden Valley, MN, 1-800-468-1502 © 2019 Resideo Technologies, Inc. The Honeywell Home trademark is used under license from Honeywell International Inc. All rights reserved. -
Page 13: Thermostat Programmable
T4 Pro Thermostat programmable Notice d’installation La boîte comprend : • Thermostat T4 Pro • Système de montage UWP • Adaptateur d’installation standard (adaptateur boîtier de raccordement) • Plaque de couvercle décorative – Petite; dimension 4-49/64 in x 4-49/64 in x 11/32 in (121 mm M37844 x 121 mm x 9 mm). -
Page 14: Installation Du Système De Montage Uwp
Installation du système de montage UWP 1. Avant le démarrage, éteindre l’alimentation au niveau du disjoncteur du circuit ou de l’interrupteur. Ouvrir l’emballage du UWP. Voir la Figure 5. 2. Placer le UWP sur le mur. Le mettre à niveau et marquer les positions des trous. Voir la Figure 6. -
Page 15: Réglages Des Curseurs (Cavalier Intégré)
à la borne Rc, régler le curseur sur la position basse (2 fils). REMARQUE : Les curseurs des bornes U doivent être laissés en position pour les modèles T4 Pro. Curseur R/Rc (cavalier intégré) Caractéristiques du terminal de câblage UWP Ne peut être utilisé... -
Page 16: Câblage Des Systèmes Conventionnels : Air Forcé Et Hydronique
Câblage des systèmes conventionnels : air forcé et hydronique Système à 1 étage de chauffage/1 étage de Système à 1 étage de chauffage/1 étage de refroidissement (1 transformateur) refroidissement (2 transformateurs) Alimentation [1] Alimentation (transformateur de chauffage) [1] [R+Rc liés par le curseur] [2] Alimentation (transformateur de Contacteur du compresseur refroidissement) [1]... -
Page 17: Montage Du Thermostat
Montage du thermostat 1. Repousser le fil en excès dans l’ouverture du mur. 2. Fermer le couvercle du UWP. Elle doit rester fermée sans renflement. 3. Aligner l’UWP sur le thermostat, et appuyer doucement jusqu’à ce que le thermostat s’enclenche en place. 4. -
Page 18: Configuration De L'installateur (Isu)
Configuration de l’installateur (ISU) 1 Appuyer sur CENTER (Centre) et sur les boutons pendant 3 secondes environ pour accéder au menu des réglages avancés. 2 Appuyer sur Select (Sélectionner) pour accéder à ISU (Configuration de l’installateur). 3 Appuyer sur Select (Sélectionner) pour faire défiler les options de configuration du menu. -
Page 19: Options De Configuration Avancées (Isu) (Suite)
Options de configuration avancées (ISU) (suite) N° ISU Nom ISU Options ISU (réglage d’usine en gras) Chauffage à air pulsé conventionnel : 1 = Air pulsé à gaz efficacité standard 2 = Air pulsé à gaz haute efficacité 3 = Air pulsé au mazout 4 = Air pulsé... - Page 20 Options de configuration avancées (ISU) (suite) N° ISU Nom ISU Options ISU (réglage d’usine en gras) 1 - 6 Remarque : Cette configuration installateur (ISU) ne s’affiche que lorsque la phase de refroidissement ou la phase du compresseur est réglée à la phase 1.
- Page 21 Options de configuration avancées (ISU) (suite) N° ISU Nom ISU Options ISU (réglage d’usine en gras) 0 - 2 Nombre de filtres à air Remarque : Cette configuration installateur indique le nombre de filtres à air du système. 0 = Arrêt 10 = 45 jours calendaires 1 = 10 jours de fonctionnement 11 = 60 jours calendaires...
-
Page 22: Test Du Système De L'installateur
Test du système de l’installateur Pour réaliser un test du système : 1 Appuyer sur CENTER (Centre) et sur les boutons pendant 3 secondes environ pour accéder au menu des réglages avancés. 2 Utiliser pour passer à TEST. Appuyer sur Select (Sélectionner) pour accéder au test du système. -
Page 23: Dépannage
Dépannage En cas de difficultés avec le thermostat, essayez les suggestions suivantes. La plupart des problèmes peuvent être réglés rapidement et facilement. Rien n’apparaît • Vérifiez le disjoncteur et réinitialisez-le si nécessaire. à l’écran • Assurez-vous que l’interrupteur de marche-arrêt du système de chauffage et de refroidissement est sur marche. -
Page 24: Service À La Clientèle
33-00187EFS—13 M.S. Rev. 09-19 | Imprimé aux États-Unis Ce produit est fabriqué par Resideo Technologies, Inc., Golden Valley, MN, 1 800 468-1502 © 2019 Resideo Technologies, Inc. La marque Honeywell Home est utilisée avec la permission de Honeywell International Inc. Tous droits réservés. -
Page 25: Instrucciones Para La Instalación
T4 Pro Termostato programable Instrucciones para la instalación El paquete incluye: • Termostato T4 Pro ™ • Sistema de montaje UWP • Adaptador de instalación estándar (adaptador para cajetín de empalmes) • Placa de cubierta decorativa – pequeña; tamaño 4-49/64 in x 4-49/64 in x 11/32 in... - Page 26 Instalación del sistema de montaje con UWP 1. Antes de comenzar, desconecte el suministro de electricidad en la caja de interruptores de circuito o el interruptor. Abra el paquete para encontrar la UWP. Consulte la Figura 1. 2. Coloque la UWP en la pared. Nivele y marque la posición de los tornillos.
- Page 27 NOTA: Las lengüetas de los controles deslizante deslizantes para terminales U deben dejarse R/Rc en su lugar en los modelos T4 Pro. (puente incorporado) Designaciones de los terminales del cableado del UWP No se utiliza para el L/A - A No se utiliza para el termostato T4.
- Page 28 Cableado de sistemas convencionales: aire forzado e hidrónico Sistema de 1 etapa de calefacción/1 etapa de Sistema de 1 etapa de calefacción/1 etapa de refrigeración (1 transformador) refrigeración (2 transformadores) Alimentación (transformador de Alimentación [1] calefacción) [1] [R+Rc unidos por la lengüeta del Alimentación (transformador de control deslizante] [2] refrigeración) [1]...
- Page 29 Montaje del termostato 1. Introduzca el excedente de cable en la abertura de la pared. 2. Cierre la tapa de la placa de la UWP. Debe permanecer cerrada sin quedar protuberante. 3. Alinee la UWP con el termostato y presione suavemente hasta que el termostato calce en su lugar.
- Page 30 Configuración por el instalador (ISU) 1 Presione y sostenga CENTER (centro) y los botones durante aproximadamente 3 segundos para ingresar al menú avanzado. 2 Presione Select (seleccionar) para ingresar al ISU. 3 Presione Select (seleccionar) para avanzar a través de las opciones del menú de configuración. 4 Presione para cambiar los valores o seleccionar las opciones disponibles.
- Page 31 Opciones avanzadas de configuración (ISU) (continuado) N.º del ISU Nombre del ISU Opciones del ISU (las configuraciones predeterminadas de fábrica están en negrita) Calefacción de aire forzado convencional: 1 = Aire forzado por gas de eficiencia estándar 2 = Aire forzado por gas de alta eficiencia 3 = Aire forzado por aceite 4 = Aire forzado por electricidad 5 = Serpentín del ventilador agua caliente...
- Page 32 Opciones avanzadas de configuración (ISU) (continuado) N.º del ISU Nombre del ISU Opciones del ISU (las configuraciones predeterminadas de fábrica están en negrita) 1 - 6 Nota: este ISU solo se muestra si se configuró la fase de compresión o de refrigeración como 1 fase.
- Page 33 Opciones avanzadas de configuración (ISU) (continuado) N.º del ISU Nombre del ISU Opciones del ISU (las configuraciones predeterminadas de fábrica están en negrita) 0 = Ninguno 1 = Parcial 2 = Lleno Nota: Desbloqueado: el usuario tiene acceso a todas las configuraciones del termostato.
-
Page 34: Prueba Del Sistema
Prueba del sistema por parte del instalador Para realizar una prueba del sistema: 1 Presione y sostenga CENTER (centro) y los botones durante aproximadamente 3 segundos para ingresar al menú avanzado. 2 Use para ir a TEST (prueba). Presione Select (seleccionar) para iniciar la prueba del sistema. -
Page 35: Localización Y Solución De Problemas
Localización y solución de problemas Si tiene dificultades con el termostato, intente seguir las sugerencias que se indican a continuación. La mayoría de los problemas pueden solucionarse de manera fácil y rápida. La pantalla está • Revise el interruptor de circuito y, si es necesario, reinícielo. en blanco •... -
Page 36: Asistencia Al Cliente
33-00187EFS—13 M.S. Rev. 09-19 | Impreso en los Estados Unidos Este producto es fabricado por Resideo Technologies, Inc., Golden Valley, MN, 1-800-468-1502 © 2019 Resideo Technologies, Inc. La marca registrada Honeywell Home se usa bajo licencia de Honeywell International Inc. Todos los derechos reservados.