Weidmüller THM Basic 300 Mode D'emploi
Table des Matières
Les langues disponibles
Les langues disponibles
Liens rapides
All manuals and user guides at all-guides.com
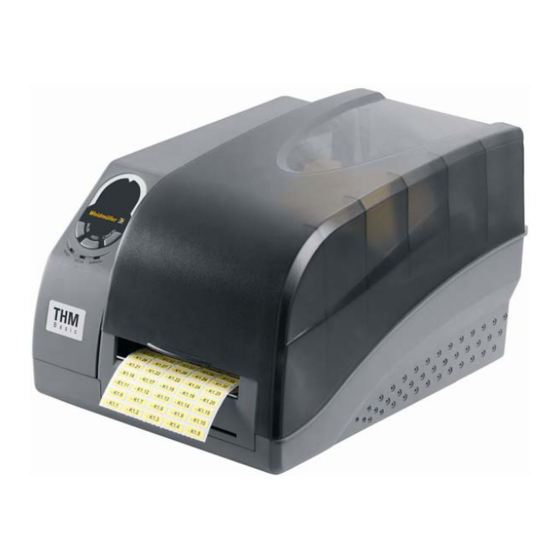
THM Basic 300
Bedienungsanleitung......................... 3
Operating instructions..................... 31
Mode d'emploi .................................. 59
Instrucciónes para el manejo.......... 87
Istruzioni per l'uso.......................... 115
Instrukcja obsługi........................... 143
Návod k použití............................... 171
Table des Matières

Manuels Connexes pour Weidmüller THM Basic 300


Sommaire des Matières pour Weidmüller THM Basic 300
-
Page 62: Consignes De Sécurité
All manuals and user guides at all-guides.com Introduction Introduction Consignes de sécurité Utilisation conforme L'appareil a été fabriqué selon les règles de l'art et les règles techniques reconnues en matière de sé- AVERTISSEMENT curité. Cependant, lors de l'utilisation peuvent appa- raître des dangers corporels ou mortels pour l'utilisa- Danger de mort : tension secteur ! teur ou une tierce personne ou bien des dommages... -
Page 63: Recyclage Selon La Deee
All manuals and user guides at all-guides.com Introduction Personnel spécialisé Recyclage selon la DEEE Elimination des déchets en commerce Ce mode d'emploi s'adresse au personnel qualifié connaissant les directives et normes en vigueur pour interentreprises le domaine d'application. En achetant notre produit, vous avez la possibilité de rendre l'appareil à... -
Page 64: Description Du Produit
All manuals and user guides at all-guides.com Description du produit Description du produit Aperçu de l'appareil Figure 1 Aperçu de l'appareil A Panneau de contrôle B Capot C Fond de l'imprimante D Sortie des étiquettes E Dérouleur du film de F Tête d'impression G Support de tête d'im- H Module d'impression... -
Page 65: Contenu De L'emballage
Câble USB D CD des pilotes d'imprimante et logiciel (avec ma- J 2 enrouleurs pour film de transfert ® nuel, logiciel M-Print PRO, pilotes...) K THM Basic 300 (non représenté) E Enrouleur d'étiquettes F Noyau du film de transfert vide 1168670000/02/08.11... -
Page 66: Mise En Service
All manuals and user guides at all-guides.com Mise en service Mise en service Raccorder l'imprimante Au déballage de l'appareil, vérifiez si la li- vraison est complète et ne comporte pas de dommages de transport. AVIS Risques de dommages matériels. AVIS L'imprimante doit être hors tension, Risques de dommages matériels. -
Page 67: Installation Du Pilote D'imprimante
Mise en service Installation du pilote Logiciel de marquage ® d'imprimante M-Print Le pilote de l'imprimante gère les systèmes d'exploi- Chaque THM Basic 300 est livrée avec le puissant ® ® ® tation Windows 2000/XP/Vista/Windows logiciel de marquage M-Print PRO. -
Page 68: Insertion Des Étiquettes
All manuals and user guides at all-guides.com Mise en service Insertion des étiquettes Figure 3 Insertion des étiquettes A Guides pour rouleaux d'étiquettes B Adaptateur de noyau des étiquettes C Enrouleur d'étiquettes D Rouleau d'étiquettes E Support d'étiquettes F Guide-étiquettes 1168670000/02/08.11... - Page 69 All manuals and user guides at all-guides.com Mise en service 1 Ouvrir le capot. 2 Pour les étiquettes avec diamètre du noyau de 40 à 75 mm : Pousser les deux adaptateurs de noyau (B) sur l'enrouleur d'étiquettes (C). 3 Enficher le rouleau d'étiquettes (D) sur l'enrouleur d'étiquettes (C) équipé des adaptateurs de noyau. 4 Pousser les guides pour rouleaux d'étiquettes (A) avec la surface lisse orientée vers les étiquettes des deux côtés sur l'enrouleur, jusqu'à...
-
Page 70: Positionnement Du Capteur D'étiquettes
All manuals and user guides at all-guides.com Mise en service Positionnement du capteur d'étiquettes Figure 4 Positionnement du capteur d'étiquettes A Capteur d'étiquettes B Capot du capteur d'étiquettes C Etiquettes D Interstices entre étiquettes 1 Déverrouiller le module de tête d'impression et le relever. 2 Enlever le capot (B) du capteur d'étiquettes (A). -
Page 71: Insertion Du Film De Transfert
All manuals and user guides at all-guides.com Mise en service Insertion du film de transfert AVIS Risques de dommages matériels. Lors de l'insertion du film de transfert, veiller à ce que le côté couché se trouve face aux étiquet- tes, sinon la tête d'impression risque d'être salie ! Respecter le sens d'enroulement représenté... - Page 72 All manuals and user guides at all-guides.com Mise en service 1 Ouvrir le capot. 2 Déverrouiller le module de tête d'impression et le relever. 3 Pousser le rouleau du film de transfert sur l'un des enrouleurs et le noyau vide sur l'autre enrouleur. Pour un film d'une largeur inférieure à...
-
Page 73: Fonctionnement
All manuals and user guides at all-guides.com Fonctionnement Fonctionnement Eléments de service 4.1.1 Interrupteur secteur L'interrupteur secteur se trouve sur le côté gauche de l'imprimante. Position 0 : Arrêt Figure 6 Commutateur DIP Position I : Marche Après le positionnement du DIP switch 5 Commutateur DIP faire l'étalonnage de l'imprimante. - Page 74 All manuals and user guides at all-guides.com Fonctionnement Panneau de contrôle Le panneau de contrôle se compose de trois LED et de trois touches multifonctions. Elles indiquent l'état de l'imprimante. READY allumée Etat d'imprimante normal MEDIA allumée Etat d'imprimante normal clignote en même temps que Fin du rouleau d'étiquettes READY...
-
Page 75: Fonctions De Service
All manuals and user guides at all-guides.com Fonctionnement Fonctions de service Equilibrage du capteur d'étiquettes 4.2.1 Mode normal Après avoir inséré un nouveau type d'étiquettes, vous devez effectuer un équilibrage du capteur FEED Une étiquette est avancée. d'étiquettes. PAUSE La demande d'impression en cours est 1 Appuyez sur la touche FEED en mode système. -
Page 76: Nettoyage De La Tête D'impression
All manuals and user guides at all-guides.com Nettoyage Nettoyage ATTENTION ATTENTION Danger de choc électrique ! Danger ! Tête d'impression brûlante ! Avant tous travaux d'entretien, mettre En service, la tête d'impression peut de- l'imprimante hors tension et débrancher venir très chaude, laissez-la refroidir a- la fiche secteur. -
Page 77: Elimination Des Erreurs
All manuals and user guides at all-guides.com Elimination des erreurs Elimination des erreurs Messages d'erreur Une panne est affichée par le clignotement d'une ou de deux des trois LED. Cause possible Propositions de solution Remarques READY et MEDIA Etiquette manquante ou re- Vérifier le guide-étiquettes En cas d'utilisation de clignotent en même... -
Page 78: Autres Erreurs
All manuals and user guides at all-guides.com Elimination des erreurs Autres erreurs Problèmes de qualité d'impression 1 Contrôler les réglages d'énergie de chauffe. Zone verticale non imprimée (ligne blanche ver- ticale) 2 Régler la vitesse d'impression. 3 Nettoyer la tête et le rouleau d'impression. Des lignes blanches continues, verticales dans l'i- mage imprimée indiquent une tête d'impression sale 4 S'assurer d'avoir inséré... -
Page 79: Interfaces
All manuals and user guides at all-guides.com Interfaces Interfaces Interface série RS 232 Vitesse de transmission : 9600, 19200, 38400, 57600 (réglage par commutateur DIP 7 - 8) Format de données : toujours 8 bits de données, 1 bit de démarrage et 1 bit d'arrêt Parité... - Page 80 All manuals and user guides at all-guides.com Interfaces Interface parallèle Centronics L'interface parallèle est une prise femelle Centronics à 36 broches dont le brochage est le suivant : Broche Direction Définition Broche Direction Définition Entrée /STROBE Sortie SELECT Entrée Données 1 14,15 Entrée Données 2...
-
Page 81: Interface Ethernet
"New gateway", merci de confirmer et transmettre la nouvelle IP à l'imprimante THM Basic 300 avec "Updater". 5 Un test avec le THM Basic 300 vous montre si le transfère de données à bien fonctionné ou si vous de- vez réitérer l'opération. Sur l'impression vous pouvez voir l'actuelle, "IP adress", "New subnet mask" et "new gateway"... - Page 82 "New gateway", merci de confirmer et transmettre la nouvelle IP à l'imprimante THM Basic 300 avec "Updater". 9 Un test avec le THM Basic 300 vous montre si le transfère de données à bien fonctionné ou si vous de- vez réitérer l'opération. Sur l'impression vous pouvez voir l'actuelle, "IP adress", "New subnet mask" et "new gateway"...
- Page 83 Installation du pilote d'imprimante 1 Dans le système d'exploitation, rendez-vous sous "Démarrage" -> "Panneau de configuration" -> "Impri- mantes et télécopieurs", sélectionner le pilote d'impression THM Basic 300 et ajouter une nouvelle connexion TCP/IP standard dans les caractéristiques d'impression, dans la rubrique "Connexions".
- Page 84 All manuals and user guides at all-guides.com Interfaces 2 Dans l'assistant d'ajout de connexion TCP/IP, indiquer l'adresse IP de l'imprimante. Figure 11 3 Sous "type d'appareil" saisir Standard et suivre les autres instructions de l'assistant. Figure 12 1168670000/02/08.11...
- Page 85 All manuals and user guides at all-guides.com Interfaces Tableau ASCII ´ “ XOFF & ‘ < > Tableau 7 Tableau ASCII 1168670000/02/08.11...
-
Page 86: Caractéristiques Techniques
200 x 329 x 256 Masse 3,5 kg Contenu de l'emballage THM Basic 300, adaptateur secteur, câble secteur, 2 guides pour rou- leaux d'étiquettes, CD pilotes d'imprimante et logiciel (avec manuel, lo- ® giciel M-Print PRO , pilotes...), enrouleur d'étiquettes, noyau de film de transfert vide, ruban encreur HiRes, rouleau d'étiquettes, 2 adaptateurs...