
Manuels Connexes pour ReVent RVM80

Sommaire des Matières pour ReVent RVM80
- Page 1 English model RVM80 Installation Guide Read and Save These Instructions Need Help? Watch the installation video at: reventfans.com/install Questions? Call 1-877-543-8698 (English) or 1-800-615-5439 (French)
-
Page 2: Table Des Matières
Make or Take a Call and Text page 23 ..... Pairing a Second Wall Mounted Control page 24-25 ..Frequently Asked Questions ..... page 26 3-Year Limited Warranty Specifications RVM80 performance at 4" ducting Static Pressure Air ow Sound Energy Duct (in wg) (cfm) (watts) Size... -
Page 3: What's Inside The Box
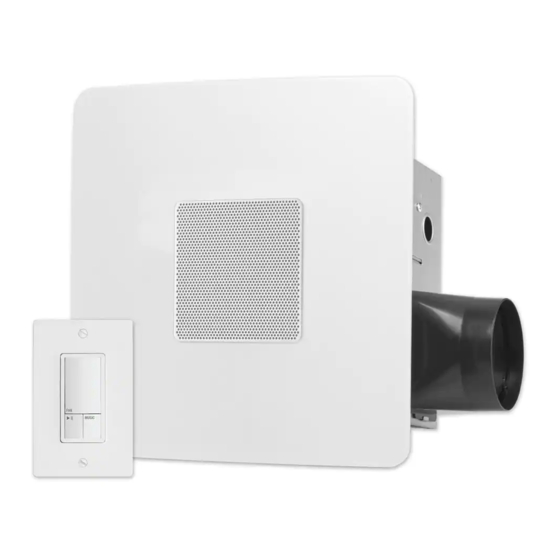
What’s Inside The Box SHIELD 4” DAMPER Qty:1 Qty:1 Qty:1 English model RVM80 Installation Guide Read and Save These Instructions Need Help? Watch the installation video at: reventfans.com/install Questions? Call 1-877-543-8698 (English) or 1-800-615-5439 (French) TRIM RING MANUAL Qty:1 Qty:1... -
Page 4: Safety Information
Safety Information 1.) WARNING - TO REDUCE THE RISK OF FIRE, ELECTRIC SHOCK, OR INJURY TO PERSONS, OBSERVE THE FOLLOWING: a) Installation work and electrical wiring must be done by qualified person(s) in accordance with all applicable codes and standards, including fire-rated construction. -
Page 5: Planning Your Installation
Planning Your Installation When installing the ventilation fan in a new construction site, install the main body of the FAN and duct work during the rough-in construction of the building. The SHIELD should be installed after the finished ceiling is in place. When installing in existing construction, use the provided cutout TEMPLATE for the ceiling. -
Page 6: Connecting The Duct
Connecting the Duct ● Install a circular duct to outlet and secure it with duct tape or clamps. ● Install the duct to the outlet with a gradient 1°~2° to the outside as shown. ● The ducting from this FAN to the outside of the building has a strong effect on ●... -
Page 7: Removing Your Old Fan
Removing Your Old Fan Watch the video: reventfans.com/how-to-remove-an-old-bath-fan 1.) Disconnect the electrical power supply and lock out the service panel for the existing fan. 2.) Remove the grille from the existing fan. Pull the grille down to expose it’s two springs. -
Page 8: Easy Roomside Installation
SheetLock Easy Roomside ® Installation Watch the video: reventfans.com/install WARNING: Disconnect all AC Power Breakers or Fuses before attempting to cut into your ceiling. 1.) Place the provided sheetrock cutout TEMPLATE on ceiling where you wish the FAN to be (DAMPER and electrical positions shown on TEMPLATE). We suggest using painter’s masking tape to hold the template in place while cutting. - Page 9 3.) Attach DAMPER to ducting. Tape DAMPER to ducting with duct tape. Set the connected DAMPER and ducting in the ceiling opening, then set the FAN in the ceiling opening as well. Connect DAMPER and ducting with duct tape ducting DAMPER Place FAN and DAMPER ceiling...
- Page 10 WARNING: Disconnect the AC power before any work is done to any part of the circuit ReVent is connected to. If you do not understand this warning, ® seek the services of a qualified licensed electrician.
- Page 11 GTR Technologies Inc. USA and international patents pending. Electrical Input: 120 volts @ 60Hz Maximum Fan Load: 6 Amps This switch is only to be used with ReVent fan model RVM80 Must Be Mounted Inside A Code ground white black...
- Page 12 11.) Once connected, reattach the electrical enclosure. slide plug in fan connector reattach set screw 12.) Press and bend the final securing tabs flat against ceiling to lock the FAN in place. final securing tabs apply even sheetrock pressure to (ceiling) each side of securing tab...
-
Page 13: Installation For New Construction Framing
Construction Framing NOTE: Even with new construction, you can use the SheetLock installation ® method; however, ReVent can still be installed using a method home ® builders would be more familiar with, as outlined in this section. WARNING: Disconnect all AC Power Breakers or Fuses before attempting to cut into your ceiling. - Page 14 3.) Attach FAN to ceiling joists with BRACKETS using ROUNDHEAD WOOD SCREWS, then install the sheetrock for your ceiling. conduit ducting SHORT BRACKET (can be cut down) framing joist framing joist SHORT LONG BRACKET BRACKET ROUNDHEAD WOOD SCREW #8 x "...
- Page 15 WARNING: Disconnect the AC power before any work is done to any part of the circuit ReVent is connected to. If you do not understand this warning, ® seek the services of a qualified licensed electrician. WARNING: Copper to copper only. Do not use aluminum wire.
- Page 16 GTR Technologies Inc. USA and international patents pending. Electrical Input: 120 volts @ 60Hz Maximum Fan Load: 6 Amps This switch is only to be used with ReVent fan model RVM80 Must Be Mounted Inside A Code ground white black...
- Page 17 9.) P ress and bend the final securing tabs flat against ceiling to lock the FAN in place. final securing tabs apply even sheetrock pressure to (ceiling) each side of securing tab 10.) Align TRIM RING notch to vent (DAMPER) position. Attach TRIM RING to FAN.
-
Page 18: Care And Cleaning
11.) Connect music wire to music plug. Attach the SHIELD by squeezing the mounting springs together and inserting the springs into the spring guides in the FAN. spring guide music plug mounting springs music wire Care and Cleaning WARNING: To reduce the risk of electric shock, fire, or injury to persons, disconnect or turn off the breaker and lock the power supply at the panel to prevent the power from being turned on before servicing or cleaning the unit. -
Page 19: Installing The Control
Test the power is off before you begin wiring. FCC ID: 2AHXP-RVM80 Canada IC : 21435-RVM80 This device complies with Part 15 of the FCC Rules and RSS-210 of Canada. Operation is subject to the following two conditions: (1) this device may not cause harmful interference, and (2) this device must accept any interference received, including interference that may cause undesired operation. - Page 20 USA and international patents pending. Electrical Input: 120 volts @ 60Hz Maximum Fan Load: 6 Amps This switch is only to be used with ReVent fan model RVM80 Must Be Mounted Inside A Code Approved Electrical Outlet Box wall enclosure...
- Page 21 5.) Attach a wall plate. Wall plates that fit this control can be purchased at any hardware store. This control can be used with any decora style wall plate (examples below).
-
Page 22: Using The Control
Pairing Mode. 3.) When speaker is in Bluetooth Pairing Mode, go to phone’s Bluetooth settings and select “ReVent Music Fan”. 4.) Connected chime will play. The status light will be solid blue indicating that the phone is connected. -
Page 23: Using Phone's Assistant
Using Phone’s Assistant 1.) When phone is connected via Bluetooth, you can talk to your phone’s virtual assistant directly through the fan’s microphones even when your phone isn’t in the room. 2.) Activate the phone’s assistant by saying “Hey Siri” or “OK Google”. If the fan is ON when a conversation with the assistant starts, it will turn OFF for the duration of the conversation. -
Page 24: Make Or Take A Call And Text
Make or Take a Call and Text MAKE A CALL: 1.) To make a call through ReVent Music Fan, make sure your phone is connected via Bluetooth. 2.) Start the call by: • Using the phone assistant to make the call. Try saying “Hey Siri, call Chris”... -
Page 25: Frequently Asked Questions
Q: Can I install my bathroom ventilation FAN directly over a bathtub or shower? A: Yes, but your FAN must be rated for over a shower/bath installation (all ReVent models are) and must be on a GFCI protected circuit. Consult a qualified licensed electrician about ground fault protected safety circuits. - Page 26 (Control) Q: My existing switch only has two wires. How do I properly connect the CONTROL to the FAN? A: You will need to test these wires with a voltage tester to determine which one is power and which one goes to the fan. The black wire on the CONTROL connects to the wire that is tested to be the incoming power.
-
Page 27: 3-Year Limited Warranty
GTR Technologies Inc. www.reventfans.com Need Help? Watch the installation video at: reventfans.com/install Questions? Call 1-877-543-8698 (English) or 1-800-615-5439 (French) info@reventfans.com ReVent is a product of GTR Technologies Inc. All rights reserved. ® USA and international patents pending. PART# RVP-123-WH-01 092421... -
Page 29: Rvm80
Français Modèles n RVM80 Guide d’installation Veuillez lire ces instructions et les conserver. Avez-vous besoin d’aide? Regardez la vidéo d’installation à : reventfans.com/install Avez-vous des questions? Téléphonez au 1 800 615-5439 (français) ou au 1 877 543-8698 (anglais). -
Page 30: 60 Hz
Couplage d’une deuxième commande murale page 24-25 ..Foire aux questions ..... Garantie limitée de 3 ans page 26 Fiche technique RVM80 performances avec conduits de 4 po Pression statique Débit d’air Niveau de Consommation Format du (po d’eau) d’énergie (watts) -
Page 31: Contenu De La Boîte
Contenu de la boîte DÉFLECTEUR VENTILATEUR 4 PO REGISTRE Qté : 1 Qté : 1 Qté : 1 English model RVM80 Installation Guide Read and Save These Instructions Need Help? Watch the installation video at: reventfans.com/install Questions? Call 1-877-543-8698 (English) or 1-800-615-5439 (French) -
Page 32: Consignes De Sécurité
Consignes de sécurité 1) AVERTISSEMENT : AFIN DE RÉDUIRE LES RISQUES D’INCENDIE, DE DÉCHARGE ÉLECTRIQUE OU DE BLESSURES, VEUILLEZ RESPECTER CES CONSIGNES : a) Les travaux d’installation et de câblage électrique doivent être réalisés par une personne qualifiée selon tous les codes et les normes applicables, y compris pour la résistance au feu. -
Page 33: Planification De L'installation
IMPORTANT : Il pourrait être approprié de consulter un électricien qualifié à propos du câblage du ventilateur d’aération. AVERTISSEMENT : Afin de réduire les risques de décharge électrique, débranchez l’alimentation électrique avant de faire l’entretien. ATTENTION : Cet article doit être mis à la terre adéquatement. Allez à... -
Page 34: Branchement Du Conduit
Plusieurs configurations d’installation sont possibles pour ce ventilateur d’aération. Ces configurations ne sont pas toutes illustrées. Si la configuration requise diffère de celles qui sont illustrées, consultez un entrepreneur qualifié pour déterminer le type d’installation qui convient le mieux à votre projet. Si vous remplacez un ventilateur existant, assurez-vous que le nouveau VENTILATEUR couvrira adéquatement l’ouverture existante. -
Page 35: Retrait Du Ventilateur Existant
Retrait du ventilateur existant Watch the video: reventfans.com/how-to-remove-an-old-bath-fan 1) Coupez le courant et verrouillez le panneau de service du ventilateur existant. 2) Enlevez la grille du ventilateur existant. Abaissez la grille pour exposer ses deux ressorts. Comprimez les deux ressorts et abaissez-les pour les dégager de leur logement. -
Page 36: Installation Facile À Même La Pièce Sheetlockmc
Installation facile à même la pièce SheetLock Regardez la vidéo : reventfans.com/install AVERTISSEMENT : Débranchez tout disjoncteur ou fusible de l’alimenta- tion CA avant d’entreprendre le découpage du plafond. 1) Placez le GABARIT de découpage de la plaque de plâtre fourni sur le plafond à l’emplacement choisi pour le VENTILATEUR (la position du REGISTRE et du câblage électrique figure sur le GABARIT). - Page 37 3) Fixez le REGISTRE au conduit avec du ruban à conduits. Placez le REGISTRE fixé au conduit dans l’ouverture au plafond, puis placez le VENTILATEUR dans l’ouverture au plafond. Fixer le REGISTRE et le conduit avec du ruban à conduits. VENTILATEUR conduit REGISTRE...
- Page 38 AVERTISSEMENT : Débranchez l’alimentation électrique CA avant d’entreprendre toute procédure au circuit sur lequel le ventilateur ReVent est relié. Si vous ne comprenez pas bien cet avertissement, consultez un électricien qualifié. AVERTISSEMENT : Effectuez des branchements cuivre sur cuivre seulement.
- Page 39 GTR Technologies Inc. USA and international patents pending. Electrical Input: 120 volts @ 60Hz Maximum Fan Load: 6 Amps This switch is only to be used with ReVent fan model RVM80 Must Be Mounted Inside A Code mise à la blanc noir...
- Page 40 11) Une fois les branchements effectués, remettez le compartiment de câblage. faire glisser brancher le ventilateur raccord remettre la vis de serrage 12) Appuyez les languettes de fixation finale au plafond pour assujettir le VENTILATEUR. languettes de fixation finale Appliquer une pression plaque de égale de chaque côté...
-
Page 41: Installation Sur La Charpente D'une Nouvelle Construction
REMARQUE : Même dans le cas d’une nouvelle construction, vous pouvez utiliser la méthode d’installation SheetLock . Le ventilateur ReVent peut néanmoins être installé en utilisant une méthode plus connue des constructeurs de résidences, comme le montre cette section. - Page 42 3) Fixez le VENTILATEUR aux solives du plafond avec les SUPPORTS en utilisant les VIS À BOIS À TÊTE RONDE, puis installez la plaque de plâtre au plafond. conduit conduit électrique SUPPORT COURT VENTILATEUR (peut être découpé) solive de charpente solive de charpente SUPPORT...
- Page 43 AVERTISSEMENT : Débranchez l’alimentation électrique CA avant d’entreprendre toute procédure au circuit sur lequel le ventilateur ReVent est relié. Si vous ne comprenez pas bien cet avertissement, consultez un électricien qualifié. AVERTISSEMENT : Effectuez des branchements cuivre sur cuivre seulement. N’utilisez pas de fil en aluminium.
- Page 44 GTR Technologies Inc. USA and international patents pending. Electrical Input: 120 volts @ 60Hz Maximum Fan Load: 6 Amps This switch is only to be used with ReVent fan model RVM80 Must Be Mounted Inside A Code mise à la blanc noir...
- Page 45 9) Appuyez les languettes de fixation finale au plafond pour assujettir le VENTILATEUR. languettes de fixation finale Appliquer une pression plaque de égale de chaque côté plâtre (plafond) de la languette de fixation. 10) Alignez l’encoche de la GARNITURE DÉCORATIVE à la position d’évent (REGISTRE).
-
Page 46: Entretien Et Nettoyage
11) Branchez le fil pour la musique à la prise pour la musique. Fixez le DÉFLECTEUR en pressant les ressorts de montage et en les insérant dans les guides pratiqués dans le VENTILATEUR. guide de ressort prise pour la ressorts de montage musique fil pour la musique... -
Page 47: Installation De La Commande
Assurez-vous que le courant est coupé avant d’entreprendre le câblage. FCC ID: 2AHXP-RVM80 Canada IC : 21435-RVM80 Cet appareil est conforme aux normes énonées à la section 15 des réglements de la FCC et RSS-210 du Canada. Son fonctionnement est assujetti aux conditions suivantes : (1) l’appareil ne doit pas provoquer d’interférences gênantes, et (2) il... - Page 48 USA and international patents pending. Electrical Input: 120 volts @ 60Hz Maximum Fan Load: 6 Amps This switch is only to be used with ReVent fan model RVM80 Must Be Mounted Inside A Code Approved Electrical Outlet Box boîte de...
-
Page 49: Utilisation De La Commande
5) Fixez la plaque murale. On peut trouver une plaque murale pour cette commande dans toute quincaillerie. Cette commande convient à toute plaque murale de type Decora (voir les exemples ci-dessous). Utilisation de la commande MISE EN/HORS FONCTION DU VENTILATEUR : 1) Appuyez sur le bouton MISE EN/HORS FONCTION DU VENTILATEUR pour mettre le ventilateur en fonction. -
Page 50: Connexion Au Haut-Parleur Bluetooth
3) Lorsque le haut-parleur est en mode de couplage Bluetooth, accédez aux réglages Bluetooth du téléphone et sélectionnez « ReVent Music Fan ». 4) Un carillon de connexion se fera entendre. Le voyant deviendra bleu pour indiquer que le téléphone est connecté. -
Page 51: Utilisation De L'assistant Du Téléphone
2) Lorsque vous recevez un appel, vous pouvez le refuser en disant « hang up ». Faire ou recevoir un appel/texto FAIRE UN APPEL : 1) Pour faire un appel à l’aide du ventilateur musical ReVent, assurez-vous que le téléphone est connecté avec Bluetooth. -
Page 52: Couplage D'une Deuxième Commande Murale
2) Pour faire un appel : • Servez-vous de l’assistant du téléphone. Essayez de dire « Hey Siri! 1.) • Appelle Claudia. » ou « OK Google! Appelle Claudia. » • Servez-vous du téléphone pour faire l’appel manuellement. 3) Si le ventilateur est en fonction au début d’un appel téléphonique, il se mettra hors fonction pour optimiser la clarté... -
Page 53: Foire Aux Questions
R : Oui, mais le VENTILATEUR doit être homologué comme tel (tous les modèles ReVent le sont) et raccordé à un DDFT (disjoncteur différentiel de fuite à la terre). Vous devez également faire appel à un électricien qualifié. - Page 54 Q : Pourquoi le ventilateur s’est-il éteint après 30 minutes? R : Le ventilateur comprend une minuterie intégrée de 30 minutes qui met automatiquement le ventilateur hors fonction. Q : Pourquoi le ventilateur se met-il hors fonction lorsqu’on parle au téléphone ou à l’assistant virtuel? R : Le ventilateur se met automatiquement hors fonction lors d’un appel télépho- nique ou d’une conversation avec l’assistant virtuel pour faire en sorte que les...
-
Page 55: Garantie Limitée De 3 Ans
Regardez la vidéo d’installation à : reventfans.com/install Avez-vous des questions? Téléphonez au 1 800 615-5439 (français) ou au 1 877 543-8698 (anglais). info@reventfans.com ReVent est un produit de GTR Technologies Inc. Tous droits réservés. Brevets américains et internationaux en instance. PART# RVP-123-WH-01 092421... - Page 57 Español N.º de modelos RVM80 Guía de instalación Lea y guarde estas instrucciones ¿Necesita ayuda? Mire el video de instalación en: reventfans.com/install ¿Tiene alguna pregunta? Llame al 1-877-543-8698 (inglés) o al 1-800-615-5439 (francés)
-
Page 58: 60 Hz
Emparejamiento de un segundo control montado en la pared Página 24-25 ..Preguntas frecuentes ..Página 26 Garantía limitada de 3 años Especificaciones RVM80 rendimiento en conductos de 4" Presión estática Flujo de Sonido Energía Tamaño del (en wg) (vatios) - Page 59 Qué hay dentro de la caja ESCUDO EXTRACTOR 4” REGULADOR Cantidad: 1 Cantidad: 1 Cantidad: 1 English model RVM80 Installation Guide Read and Save These Instructions Need Help? Watch the installation video at: reventfans.com/install Questions? Call 1-877-543-8698 (English) or 1-800-615-5439 (French)
- Page 60 Información de seguridad 1) ADVERTENCIA: PARA REDUCIR EL RIESGO DE INCENDIO, DES- CARGA ELÉCTRICA O LESIONES, CUMPLA CON LO SIGUIENTE: a) El trabajo de instalación y el cableado eléctrico deben ser realizados por personas calificadas de acuerdo con todos los códigos y normas aplicables, incluida la construcción a prueba de incendios.
- Page 61 ADVERTENCIA: para reducir el riesgo de descarga eléctrica, desconecte el circuito de suministro eléctrico antes de realizar tareas de mantenimiento. PRECAUCIÓN: este producto debe estar correctamente conectado a tierra. Vaya a reventfans.com para obtener una copia de este manual. Planificación de la instalación Cuando instale el ventilador en un sitio de construcción nuevo, instale el cuerpo principal del ventilador y los conductos durante la construcción gruesa del edificio.
- Page 62 Conexión del conducto ● Coloque un conducto circular en la salida y asegúrelo con cinta para ductos o ● abrazaderas. ● Instale el conducto a la salida con un gradiente de 1° ~ 2° hacia el exterior, ● como se muestra en la imagen. ●...
- Page 63 Cómo quitar su viejo ventilador Mire el video: reventfans.com/how-to-remove-an-old-bath-fan 1) Desconecte la fuente de alimentación eléctrica y bloquee el panel de servicio del ventilador existente. 2) Retire la rejilla del ventilador existente. Jale de la rejilla hacia abajo para exponer sus dos resortes. Apriete cada resorte y jale otra vez hacia abajo para liberar los resortes de las ranuras de la placa del motor.
- Page 64 Instalación sencilla de SheetLock en el interior de ® la habitación Mire el video: reventfans.com/install ADVERTENCIA: desconecte todos los disyuntores o fusibles de alimentación de corriente alterna antes de intentar cortar el techo. 1) Coloque la PLANTILLA recortada de cartón yeso proporcionada en el techo donde desea que esté...
- Page 65 3) Sujete el REGULADOR al conducto. Fije el REGULADOR al conducto con cinta para ductos. Coloque el REGULADOR y los conductos conectados en la abertura del techo, y luego coloque el VENTILADOR en la abertura del techo también. Conecte el REGULADOR y los conductos con cinta para ductos.
- Page 66 ADVERTENCIA: desconecte la alimentación de corriente alterna antes de realizar cualquier trabajo en cualquier parte del circuito al que está conectado el ventilador ReVent . Si no comprende esta advertencia, solicite ® los servicios de un electricista calificado y con licencia.
- Page 67 GTR Technologies Inc. USA and international patents pending. Electrical Input: 120 volts @ 60Hz Maximum Fan Load: 6 Amps This switch is only to be used with ReVent fan model RVM80 Must Be Mounted Inside A Code puesta a tierra blanco negro...
- Page 68 11) Una vez conectado, vuelva a cerrar la caja eléctrica. enchufe los diapositiva ventilador conectores vuelva a colocar el tornillo de fijación 12) Presione y doble las presillas de fijación definitiva contra el techo, de manera que queden planas, para bloquear el VENTILADOR en su lugar. presillas de fijación definitiva aplique una presión cartón yeso...
- Page 69 Instalación para armazón de nueva construcción NOTA: incluso en una nueva construcción, puede utilizar el método de instalación SheetLock ; sin embargo, ReVent puede instalarse por un ® ® método con el que los constructores estarán más familiarizados, como se describe en esta sección.
- Page 70 3) Fije el VENTILADOR a las vigas del techo con los SOPORTES y TORNILLOS PARA MADERA DE CABEZA REDONDA; luego instale el cartón yeso para su techo. conducto conductos SOPORTE CORTO (se VENTILADOR puede cortar) viga de armazón viga de armazón SOPORTE SOPORTE...
- Page 71 ADVERTENCIA: desconecte la alimentación de corriente alterna antes de realizar cualquier trabajo en cualquier parte del circuito al que está conectado el ventilador ReVent . Si no comprende esta advertencia, solicite ® los servicios de un electricista calificado y con licencia.
- Page 72 GTR Technologies Inc. USA and international patents pending. Electrical Input: 120 volts @ 60Hz Maximum Fan Load: 6 Amps This switch is only to be used with ReVent fan model RVM80 Must Be Mounted Inside A Code puesta a tierra blanco negro...
- Page 73 9) De manera que queden planas, para bloquear el VENTILADOR en su lugar. presillas de fijación definitiva aplique una presión cartón yeso uniforme a cada lado (techo) de la presilla de seguridad 10) Cuando el cartón yeso esté en su lugar, presione y doble las presillas de fijación definitiva contra el techo, de manera que queden planas, para bloquear el ventilador en su lugar.
- Page 74 11) Conecte el cable de música al enchufe de música. Fije el ESCUDO; para ello, apriete los resortes de sujeción e insértelos en las guías para resortes del VENTILADOR. guía para resorte enchufe resortes de montaje de música cable de música Cuidado y limpieza ADVERTENCIA: con el fin de reducir el riesgo de descarga eléctrica,...
- Page 75 Compruebe que la alimentación esté apagada antes de comenzar a tender el cableado. FCC ID: 2AHXP-RVM80 Canada IC : 21435-RVM80 Este dispositivo cumple con la parte 15 de las Reglas de la FCC y RSS-210 de Industry Canada. El funcionamiento está sujeto a las dos condiciones siguientes:...
- Page 76 USA and international patents pending. Electrical Input: 120 volts @ 60Hz Maximum Fan Load: 6 Amps This switch is only to be used with ReVent fan model RVM80 Must Be Mounted Inside A Code Approved Electrical Outlet Box caja de...
- Page 77 5) Sujete la placa de pared. Las placas de pared aptas para este control se pueden comprar en cualquier ferretería. Este control puede usarse con cualquier placa de pared de estilo decorativo (vea ejemplos abajo). Uso del control ENCENDER/APAGAR VENTILADOR: 1) Presione el botón ENCENDER/APAGAR VENTILADOR para ENCENDER el ventilador.
- Page 78 3) Cuando el altavoz esté en el modo de emparejamiento de Bluetooth, vaya a la configuración de Bluetooth del teléfono y seleccione “ReVent Music Fan”. 4) Se reproducirá un tono para indicar que está conectado. La luz de estado será...
- Page 79 Uso del asistente del teléfono 1) Cuando el teléfono está conectado a través de Bluetooth, puede hablar con el asistente virtual de su teléfono directamente a través de los micrófonos del ventilador, incluso si su teléfono no está en la habitación. 2) Active el asistente del teléfono diciendo “Hey Siri”...
- Page 80 Hacer o recibir una llamada y un mensaje de texto HACER UNA LLAMADA: 1) Para hacer una llamada a través del ventilador con música ReVent, asegúrese de que su teléfono esté conectado a través de Bluetooth. 2) Comience la llamada de la siguiente forma: •...
- Page 81 R: Sí, pero su VENTILADOR debe estar calificado para una instalación de ducha / baño (todos los modelos ReVent lo están) y debe estar en un circuito protegido por GFCI. Consulte a un electricista calificado con licencia, sobre los circuitos de seguridad protegidos contra fallas a tierra.
- Page 82 P: ¿Por qué gotea agua de mi VENTILADOR? R: El agua que gotea es típicamente condensación de una tubería de ventilación fría. Aislar el conducto y la carcasa del VENTILADOR puede ayudar a resolver los problemas de condensación. Hacer funcionar el VENTILADOR durante más tiempo garantizará...
- Page 83 Mire el video de instalación en: reventfans.com/install ¿Tiene alguna pregunta? Llame al 1-877-543-8698 (inglés) o al 1-800-615-5439 (francés) info@reventfans.com ReVent es un producto de GTR Technologies Inc. Todos los derechos ® reservados. Patentes de los EE. UU. e internacionales pendientes. PART# RVP-123-WH-01 092421...