Yakima OverHaul HD Instructions
Liens rapides
tower A (2x)
pied A (x 2)
torre A (2x)
10mm wrench (1x)
lock (2x)
clé de 10 mm (x 1)
serrure (x 2)
llave de 10 mm (1x)
cerradura (2x)
key (2x)
clé (x 2)
llave (2x)
On-road: 500 lbs (227 kg)
Off-road 300 lbs (136 kg)
Static load 800 lbs (363 kg)
SideBar Short Bed
#8001153
Ladder Roller
#8001163
Instruction #1035915B - Page 1 of 10
6mm wrench (1x)
clé de 6 mm (x 1)
llave de 6 mm (1x)
tower B (2x)
pied B (x 2)
torre B (2x)
plate (4x)
plaque (x 4)
placa (4x)
Sur route : 227 kg (500 lb)
Hors route : 136 kg (300 lb)
Charge statique : 363 kg (800 lb)
SideBar Long Bed
#8001154
HD Hook Straps
#8001165
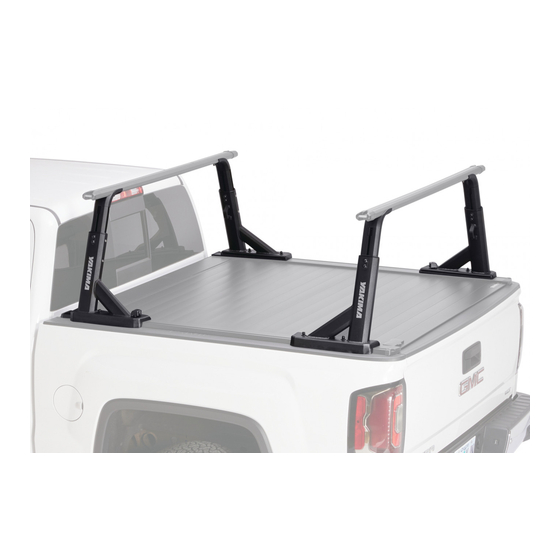
OverHaul HD
4mm wrench (1x)
M8 lock washer (8x)
clé de 4 mm (x 1)
rondelle de sécurité M8 (x 8)
llave de 4 mm (1x)
arandela de cierre M8 (8x)
clamp (8x)
pince (x 8)
abrazadera (8x)
base (2x)
locking base (2x)
base (x 2)
base verrouillable (x 2)
base (2x)
base con bloqueo (2x)
En la carretera: 500 lb (227 kg)
Fuera de la carretera: 300 lb (136 kg)
Carga estática: 800 libras (363 kg)
Recovery Track Mount
#8001164
Rotopax Mounting Kit
#8001167
M8 washer (8x)
rondelle M8 (x 8)
arandela M8 (8x)
M8x18 screw (8x)
vis M8x18 (x 8)
tornillo M8x18 (8x)
M12 square washer (8x)
rondelle carrée M12 (x 8)
arandela cuadrada M12 (8x)
M12x65 screw (8x)
vis M12x65 (x 8)
tornillo M12x65 (8x)
Eye Bolts
#8001162
HD Bar

Manuels Connexes pour Yakima OverHaul HD


Sommaire des Matières pour Yakima OverHaul HD
- Page 1 OverHaul HD 4mm wrench (1x) 6mm wrench (1x) M8 lock washer (8x) M8 washer (8x) clé de 4 mm (x 1) clé de 6 mm (x 1) rondelle de sécurité M8 (x 8) rondelle M8 (x 8) llave de 4 mm (1x)
- Page 2 À l’aide de la clé hexagonale de 4 mm, retirer un capuchon d’extrémité des barres HD. Remove one end cap from your HD Bars with Retire el capuchón del extremo de las the 4 mm hex wrench. barras HD con la llave hexagonal de 4 mm. Slide 2 plates into the bottom of each crossbar (the side where the scale is imprinted).
- Page 3 18 Nm Position the bases by measuring an equal distance on each side of the truck from the cab to the base. Space the clamps as wide as possible in each slot. Use the 10 mm hex wrench to tighten the clamp to your truck rails. Positionner les bases en mesurant une distance identique entre la cabine et la base de chaque côté...
- Page 4 Set one tower A, and one tower B onto the bases. Orient the long part of the tower bases toward the rear of the truck as shown. Partially tighten the receivers to hold the towers in place. Déposer un pied A et un pied B sur les bases. Orienter la partie longue des pieds vers l’arrière du camion, tel qu’illustré.
- Page 5 Use the 4mm and 6mm wrench to fully tighten the front assembly to 10 Nm Employer les clés de 4 mm et de 6 mm pour serrer l’assemblage avant complètement dans les bases à 10 Nm. 10 Nm Utilice las llaves de 4 mm y de 6 mm para apretar completamente el conjunto delantero con una fuerza de 10 Nm.
- Page 6 Use the 4 mm and 6 mm hex wrenches to loosen Set one tower A, and one tower B onto the bases. the spring loaded receivers. Orient the long part of the tower bases towards the front of the truck as shown. Partially tighten the receivers to hold the towers in place.
- Page 7 Utilice la llave para trabar las cerraduras. 1. Déverrouiller le porte- 1. Unlock OverHaul HD. 1. Abra el OverHaul HD. bagage OverHaul HD. 2. Loosen all four spring 2. Afloje los cuatro receptores 2. Desserrer les quatre loaded receivers.
- Page 8 A. Loosen and remove the HD bar from the towers. B. Using the scale on the upright loosen and reset the height of each tower. C. Tighten the tower hardware to 18 Nm. D. Reinstall and center the HD bar. Tighten bar hardware to 10 Nm.
- Page 9 Afin de pouvoir remplacer des clés perdues ou défectueuses, prendre note du numéro de la serrure et des clés ci-dessous et les enregistrer à www.yakima.com. Record Your Key Number: Noter le numéro des clés :...
- Page 10 Para reemplazar una llave perdida o defectuosa, anote más abajo los números de la cerradura y de la llave y regístrelos en www.yakima.com. Anote el número de su llave: Instruction #1035915B - Page 10 of 10...