Table des Matières
Publicité
Les langues disponibles
Les langues disponibles
Liens rapides
IT
CLIMATIZZATORE PORTATILE (LOCALE)
ISIDE
ISTRUZIONI PER L'USO
Leggere attentamente le istruzioni prima di attivare l'apparecchio oppure fare manutenzione.
Osservare tutte le istruzioni di sicurezza; la mancata osservanza delle istruzioni può portare a incidenti e/o
danni. Conservare queste istruzioni per futuro riferimento.
V 12/20
1
Publicité
Table des Matières

Manuels Connexes pour Argo ISIDE


Sommaire des Matières pour Argo ISIDE
- Page 1 CLIMATIZZATORE PORTATILE (LOCALE) ISIDE ISTRUZIONI PER L’USO Leggere attentamente le istruzioni prima di attivare l’apparecchio oppure fare manutenzione. Osservare tutte le istruzioni di sicurezza; la mancata osservanza delle istruzioni può portare a incidenti e/o danni. Conservare queste istruzioni per futuro riferimento.
- Page 2 L’unità contiene gas infiammabile R290. Prima di installare e utilizzare l’unità, leggere le istruzioni. Prima di installare l’unità, leggere il manuale di installazione. Per eventuali riparazioni, rivolgersi sempre ad un Centro Assistenza e attenersi rigorosamente a quanto contenuto nel service manual. IL REFRIGERANTE R290 Per poter svolgere le sue funzioni, il climatizzatore ha al suo interno un circuito frigorifero in cui circola un refrigerante ecologico: R290 = GWP (Potenziale di...
- Page 3 INFORMAZIONI GENERALI DI FUNZIONAMENTO E SICUREZZA Quest’apparecchio è un climatizzatore locale, progettato per uso domestico. Utilizzare questo climatizzatore solo come descritto nel presente manuale. Assicurarsi che il tipo di alimentazione elettrica sia conforme al voltaggio richiesto (220-240V/50Hz). ...
- Page 4 Assicurarsi che la spina sia inserita in modo saldo. Non utilizzare una spina multipla. Non toccare la spina con le mani bagnate. Assicurarsi che la spina sia pulita. Non usare la spina come mezzo per avviare/arrestare il climatizzatore: usare il tasto ON/OFF sul telecomando oppure sul pannello di controllo.
- Page 5 Se si utilizza un tubo di scarico, la temperatura dell’ambiente non deve essere inferiore a 0°C. Ciò può causare perdite d'acqua al condizionatore. Non spruzzare o versare acqua sul condizionatore. PRECAUZIONE! Non inserire oggetti nel climatizzatore: è molto pericoloso perché...
- Page 6 surriscaldamento dell’apparecchio potrebbe attivarne meccanismo di protezione e quindi causarne lo spegnimento. Non usare insetticidi, oli, detergenti o vernici a spruzzo attorno all’apparecchio; non utilizzare detergenti chimici aggressivi per la pulizia dell’involucro: questo potrebbe danneggiarne la finitura e il colore. ...
-
Page 7: Descrizione Dell'apparecchio
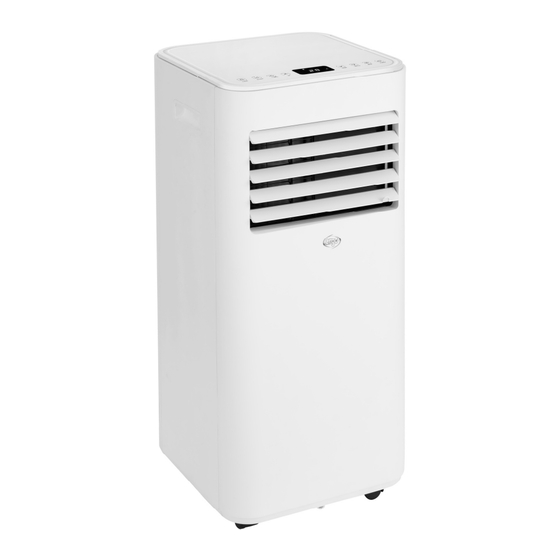
DESCRIZIONE DELL’APPARECCHIO VISTA FRONTALE VISTA POSTERIORE PANNELLO DI CONTROLLO 5) RUOTE MANDATA DELL’ARIA 6) FORO DRENAGGIO DELLA CONDENSA (MODALITA’ RAFFRESCAMENTO) MANIGLIA 7) ATTACCO DEL TUBO DI ESPLUSIONE DELL’ARIA INGRESSO ARIA CON FILTRO Limiti di funzionamento min/max (temp. interna) Raffrescamento: 7°C B.S. / 35°C B.S. Deumidificazione: 17°C B.S. -
Page 8: Messa In Funzione Dell'apparecchio
OPERAZIONI E CONTROLLI PRIMA DELLA MESSA IN FUNZIONE I seguenti spazi devono essere mantenuti per assicurare l’efficienza operativa del condizionatore portatile. MESSA IN FUNZIONE DELL’APPARECCHIO Aprire l’imballo e sfilare il cartone. Estrarre il prodotto e gli altri elementi a corredo (illustrati nel box sottostante). Telecomando a infrarossi Batterie per telecomando tipo AAA –... - Page 9 UTILIZZO CON RACCORDO TERMINALE PER FINESTRA 1. Estendere il flessibile quanto basta per raggiungere 2. Aprire la finestra e bloccare uno dei battenti con la l’esterno (max 1,5 m) e agganciarlo alla parte maniglia. posteriore del climatizzatore. Appoggiare il raccordo terminale al battente fisso, accostare l’altro battente della finestra.
- Page 10 Collegare il cavo di alimentazione ad una presa di corrente appropriata (220-240V). Inserire le batterie a corredo nel telecomando, rispettandone le polarità. Selezionare dal telecomando la modalità di funzionamento desiderata. Evitare curve troppo strette o pieghe del tubo flessibile. Durante i periodi di non utilizzo scollegare il tubo e chiudere l’oblò con il tappo. MODALITA’...
-
Page 11: Modalita' Di Funzionamento
MODALITA’ DI FUNZIONAMENTO 1. MODALITA’ RAFFRESCAMENTO (COOLING) Il LED “Cool” sul pannello di controllo si accende. L’intervallo di regolazione della temperatura va da 16°C a 32°C. In questa modalità, ogni volta che premendo il tasto ON/OFF, l’unità si spegne, l’apparecchio memorizza la temperatura impostata e alla riaccensione manterrà... -
Page 12: Funzionamento Con Il Telecomando
Drenaggio continuo Deumidificazione ATTENZIONE! Quando si utilizza il climatizzatore in Deumidificazione, è consigliabile predisporre sempre il drenaggio continuo per garantire la massima efficienza di deumidificazione. Collegare un’estremità di un tubetto in PVC (non fornito) al foro di scarico superiore e l’altra estremità sopra a uno scolo. FUNZIONAMENTO CON IL TELECOMANDO Scorrere per aprire la cover seguendo la direzione indicata dalla freccia. - Page 13 PER UN FUNZIONAMENTO OTTIMALE DEL TELECOMANDO, INDIRIZZARE LA TESTINA DEL TRASMETTITORE VERSO IL RICEVITORE POSIZIONATO SUL CLIMATIZZATORE TASTO POWER TASTO TIMER TASTO DOWN TASTO COOL (raffrescamento) TASTO DRY (deumidificazione) TASTO FAN (ventilazione) TASTO UP TASTO SLEEP TASTO LOW (bassa velocità di ventilazione) 10.
- Page 14 PANNELLO DI CONTROLLO TASTI SUL PANNELLO DI CONTROLLO 1) TASTO POWER 5) TASTO UP 2) TASTO MODE 6) TASTO TIMER 3) TASTO SPEED 7) TASTO SLEEP 4) TASTO DOWN 8) TASTO BLOCCO BIMBI DETTAGLIO DEL DISPLAY SUL PANNELLO DI CONTROLLO LED modalità...
- Page 15 Nella modalità deumidificazione non è possibile selezionare la velocità di ventilazione, quindi il ventilatore sceglierà forzatamente la velocità di ventilazione bassa. (4) TASTO DOWN Premere questo tasto per regolare la temperatura e impostare il tempo. (5) TASTO UP Premere questo tasto per regolare la temperatura e impostare il tempo. (6) TASTO TIMER a.
-
Page 16: Manutenzione E Cura
MANUTENZIONE E CURA ATTENZIONE! Prima di procedere a operazioni di pulizia e manutenzione, togliere la spina dalla presa di corrente. 1. Pulizia dei filtri d'aria I filtri dell’aria devono essere controllati almeno una volta ogni due settimane di funzionamento. Il funzionamento con filtri sporchi o intasati causa sempre una diminuzione dell’efficienza del climatizzatore e può... - Page 17 CONSIGLI PER IL MASSIMO COMFORT ED IL MINIMO CONSUMO VERIFICARE che: le griglie di mandata e aspirazione dell’unità siano sempre libere; i filtri aria siano sempre puliti; un filtro sporco diminuisce il passaggio dell’aria e riduce la resa dell’unità; ...
- Page 18 PORTABLE AIR CONDITIONER (LOCAL) ISIDE OPERATING INSTRUCTIONS Read the instructions carefully before operating the appliance or carrying out maintenance work. Observe all the safety instructions; failure to do so may lead to accidents and/or damage. Store these instructions in a safe place for future reference.
- Page 19 Appliance is filled with flammable gas R290. Before installing and using the appliance, read the owner manual. Before installing the appliance, read the installation manual. Any repairs you need, contact the nearest authorized Service Centre and strictly follow manufacturer’s Service Manual. The Refrigerant R290 ...
- Page 20 GENERAL OPERATING AND SAFETY INSTRUCTIONS This appliance is a local air conditioner designed for domestic use. Only use this air-conditioner as described in this manual. Ensure that the required voltage and frequency (220-240V/50 Hz) match the available power source. ...
- Page 21 Do not use the plug as a means by which to start/stop the air conditioner: use the ON/OFF button on the remote control or on the control panel. Do not install the air conditioner in rooms where it may receive water splashes (e.g.
- Page 22 PRECAUTION! Do not insert any objects into the air conditioner: this is very dangerous as the fan turns at high speed. Ensure that air circulates freely around the unit. Do not cover the air intake and delivery grilles with drapes or any other means.
-
Page 23: Description Of The Appliance
Close all open windows to maximise air conditioning efficiency. The manufacturer will not be held liable if safety and accident prevention rules are not observed. DESCRIPTION OF THE APPLIANCE FRONT VIEW REAR VIEW CONTROL PANEL 5) CASTER AIR OUTLET WITH ADJUSTABLE LOUVER 6) HOLE FOR CONTINUOUS CONDENSATE HANDLE DRAINAGE (IN COOLING MODE) -
Page 24: Appliance Start-Up
PRE-OPERATING CHECKS AND OPERATIONS The following space must be maintained to ensure the operating efficiency of the portable air conditioner. 50 cm 50 cm APPLIANCE START-UP Open the packaging and pull out the box. Remove the product and the other elements supplied (illustrated in the box below). - Page 25 USE WITH END FITTING FOR WINDOW 1. Stretch the flexible hose sufficiently so that it 2. Open the window and lock one of the two leaves reaches the outside (max 1.5 m) and hook it to the rear with the handle. part of the air conditioner.
-
Page 26: How To Use The Appliance
Connect the power cord to a suitable electric socket (220–240 V). Insert the supplied batteries into the remote control and make sure the poles match. Select the desired operating mode from the remote control. Avoid tight bends or folds in the hose. If the air conditioner is not used for prolonged periods, disconnect the pipe and plug the window unit. -
Page 27: Operating Modes
OPERATING MODES 1. COOLING MODE (COOL) The “Cool” LED on the control panel will turn on. The temperature can be adjusted to between 16 °C and 32 °C. In this mode, each time the ON/OFF button is pressed the unit switches off, the appliance saves the temperature setting and retains this setting when it is switched on again. -
Page 28: Remote Control Operation
Continuous drainage Dehumidification WARNING! When using the air conditioner in dehumidification mode, it is advisable to always arrange for continuous drainage, so as to maximise dehumidification efficiency. Connect one end of the PVC pipe (not provided) to the upper discharge hole and place the other end above a drain. - Page 29 FOR OPTIMAL REMOTE CONTROL OPERATION, POINT THE TRANSMITTER HEAD TOWARDS THE RECEIVER ON THE AIR CONDITIONER. POWER BUTTON TIMER BUTTON DOWN BUTTON COOL BUTTON DRY BUTTON FAN BUTTON UP BUTTON SLEEP BUTTON LOW FAN SPEED BUTTON 10. HIGH SFAN SPEED BUTTON 11.
- Page 30 BUTTONS ON CONTROL PANEL 1) POWER BUTTON 5) UP BUTTON 2) MODE BUTTON 6) TIMER BUTTON 3) SPEED BUTTON 7) SLEEP BUTTON 4) DOWN BUTTON 8) CHILD LOCK BUTTON DETAIL OF DISPLAY ON CONTROL PANEL LED fan mode LED cool mode LED Sleep mode LED Dry mode LED child lock...
-
Page 31: Care And Maintenance
(8) CHILD LOCK BUTTON Press this key to turn the control panel lock function on or off. TEMPERATURE AND ERROR DISPLAY The display will show the temperature set in cooling mode, while if the unit is operating in dehumidification, the display will show the room temperature. - Page 32 4. Transport. Transport the air conditioner in the vertical position. Should this not be possible, rest it on its right-hand side; when the appliance reaches its final destination, place it immediately in the vertical position and wait at least 4 hours before operating it in cooling mode.
- Page 33 REGULATION (EU) No. 517/2014 – F-GAS The unit contains R290, a natural greenhouse gas with global warming potential (GWP) = 3 - Kg. 0,17 = 0,00051 Tons CO equiv. Do not release R290 into the atmosphere. INFORMATION FOR THE CORRECT DISPOSAL OF THE PRODUCT IN ACCORDANCE WITH EUROPEAN DIRECTIVE 2012/19/EU This appliance may not be scrapped with domestic waste at the end of its life cycle.
-
Page 34: Climatiseur Mobile (Local)
CLIMATISEUR MOBILE (LOCAL) ISIDE INSTRUCTIONS D’UTILISATION Lire attentivement ces instructions avant de mettre en marche l’appareil ou avant toute opération d’entretien. Se conformer aux consignes de sécurité. Le non-respect de ces instructions peut causer des accidents et/ou des dommages. Conserver ces instructions pour toute consultation ultérieure. -
Page 35: Compte Tenu De L'inflammabilité De Ce Réfrigérant, Il Est Recommandé De Suivre
L'appareil est chargé d’un gaz inflammable R290. Avant d'installer et utiliser l'appareil, lisez le manuel de l’operateur. Avant d'installer l'appareil, lisez manuel d’installation. Pour toute réparation, contacter toujours un centre d'assistance et suivre à la lettre à ce qui est contenu dans le manuel de service. -
Page 36: Informations Générales Sur Le Fonctionnement Et Sur La Sécurité
INFORMATIONS GÉNÉRALES SUR LE FONCTIONNEMENT ET SUR LA SÉCURITÉ Cet appareil est un climatiseur local, conçu pour un usage exclusivement domestique ! Utiliser ce climatiseur uniquement comme décrit dans cette notice d’utilisation. S’assurer que le type d’alimentation électrique est conforme à la tension requise (220-240 V / 50 Hz). -
Page 37: Ne Pas Utiliser L'appareil Si Le Câble Ou La Fiche Sont
La prise de l'installation doit toujours être équipée d’une mise à la terre efficace. S'assurer que la fiche est bien insérée à fond dans la prise. Ne pas utiliser de prise multiple. Ne pas toucher la fiche avec les mains mouillées. - Page 38 Tenez l'unité loin du feu, des sources de feu possibles, des objets inflammables ou explosifs. Ne laissent pas l'unité sans surveillance tandis qu'il fonctionne, éteindre l'unité et le déconnecter. Si le tuyau de drainage est utilisé, la température ambiante ne doit pas être inférieure à...
- Page 39 ATTENTION ! En cas d'anomalie, éteindre l'appareil et débrancher la fiche de la prise de courant. Ne pas démonter ni essayer de réparer ou de modifier le produit. En cas de dysfonctionnement, contacter directement le service d'assistance technique. ATTENTION ! ...
-
Page 40: Description De L'appareil
DESCRIPTION DE L’APPAREIL VUE DE FACE VUE DE DOS PANNEAU DE CONTROL 5) ROUES AILETTES ET ADMISSION D’AIR 6) ORIFICE DE DRAINAGE (EN RAFRAICHISSEMENT) POIGNEE 7) FIXATION DU TUYAU D'EXPLUSION D'AIR ENTREE D’AIR AVEC FILTRE Limites de fonctionnement mini/maxi (température intérieure) Rafraîchissement : 7 °C B.S. -
Page 41: Mise En Service De L'appareil
MISE EN SERVICE DE L'APPAREIL Ouvrir l'emballage et extraire le carton. Sortir le produit et les autres éléments fournis (illustrés ci-dessous). Télécommande à infrarouges Piles type AAA – LR03 – 1,5 V pour la télécommande (pas fourni) Raccord circulaire pour kit hublot à... -
Page 42: Utilisation Avec Kit Hublot
UTILISATION AVEC KIT HUBLOT 1. Pour réaliser le trou dans le verre, il est conseillé 2. Introduire le hublot dans la fenêtre. de prendre également l’accessoire pour kit de hublots du vitrier. 3. Insérer le raccord circulaire pour kit hublot dans 4. -
Page 43: Modalités D'utilisation De L'appareil
MODALITÉS D'UTILISATION DE L’APPAREIL Cet appareil peut être utilisé pour le Rafraîchissement, la Déshumidification et la Ventilation. Avant d'utiliser l'appareil, le laisser en position debout pendant au moins deux heures. Lors du passage d'un mode de fonctionnement à un autre, le ventilateur continue de fonctionner mais le compresseur s'arrête : ce dernier redémarre au bout de 3 minutes. -
Page 44: Mode Ventilation (Fan)
Le tuyau flexible ne doit pas être relié à l'appareil lorsque celui-ci est utilisé en tant que déshumidificateur. Pour obtenir une efficacité maximale du processus de déshumidification, laisser le raccord arrière d'évacuation libre pour une évacuation directe dans l'atmosphère. Le mode Déshumidification est recommandé durant l'automne et l'hiver. En cas d'utilisation en été, il est recommandé... -
Page 45: Utilisation Avec La Télécommande
UTILISATION AVEC LA TÉLÉCOMMANDE Faire coulisser le couvercle dans le sens de la flèche afin de l'ouvrir. Insérer les piles alcalines (modèle AAA, LR03/1,5 V – pas fourni) conformes à la Directive 2006/66/CE et modification Directive 2013/56/CE dans la télécommande, en respectant les polarités indiquées. -
Page 46: Panneau Du Control
POUR UN FONCTIONNEMENT OPTIMAL DE LA TÉLÉCOMMANDE, DIRIGER L'EXTRÉMITÉ DE L'ÉMETTEUR VERS LE RÉCEPTEUR SITUÉ SUR LE CLIMATISEUR TOUCHE POWER TOUCHE TIMER TOUCHE DOWN TOUCHE COOL (refroidissement) TOUCHE DRY (déshumidification) TOUCHE FAN (ventilation) TOUCHE UP TOUCHE SLEEP TOUCHE LOW (baisse vitesse de ventilation) 10. -
Page 47: Boutons Sur Le Panneau De Control
BOUTONS SUR LE PANNEAU DE CONTROL 1) BOUTON POWER 5) BOUTON UP 2) BOUTON MODE 6) BOUTON TIMER 3) BOUTON SPEED 7) BOUTON SLEEP 4) BOUTON DOWN 8) BOUTON VERROUILLAGE DU PANNEAU POUR LES ENFANTS DÉTAIL DE L'AFFICHAGE SUR LE PANNEAU DE COMMANDE LED de mode de refroidissement LED de mode de ventilation LED de mode de... -
Page 48: Affichage De La Température Et Des Erreurs
(8) BOUTON VERROUILLAGE DU PANNEAU POUR LES ENFANTS Appuyez sur cette touche pour activer ou désactiver la fonction de verrouillage du panneau de commande. AFFICHAGE DE LA TEMPÉRATURE ET DES ERREURS Problème Cause Solution Capteur de température ambiante Contacter un centre d’assistance. cassé. -
Page 49: Conseils Pour Un Confort Maximum Et Une Consommation Minimum
4. Transport. Transporter le climatiseur en position verticale. En cas d'impossibilité de maintenir l'appareil en position verticale, le remettre immédiatement dans cette position au terme du transport et attendre au moins 4 heures avant de l'utiliser en mode rafraîchissement. 5. Pour un maximum de sécurité, vérifier périodiquement l'état du câble d'alimentation ;... - Page 50 RÈGLEMENT (UE) N. 517/2014 - GAZ À EFFET DE SERRE L’appareil contient du R290, un gaz naturel présentant un potentiel de réchauffement global (PRG) = 3 - 0,17 kg = 0,00051 Tonne éq. CO . Ne pas rejeter de R290 dans l'environnement. INFORMATION POUR L'ÉLIMINATION CORRECTE DU PRODUIT CONFORMÉMENT À...
- Page 51 MOBILES KLIMAGERÄT (RAUMKLIMAGERÄT) ISIDE GEBRAUCHSANLEITUNG Lesen Sie die vorliegende Gebrauchsanleitung aufmerksam durch, bevor Sie das Gerät in Betrieb nehmen oder warten. Halten Sie alle Sicherheitshinweise sorgfältig ein: Eine Nichtbeachtung kann zu Unfällen und/oder Schäden führen. Bewahren Sie diese Anleitung für zukünftiges Nachschlagen gut auf.
- Page 52 Das Innengerät ist mit brennbaren Gas R290 eingefüllt Lesen die Anweisungen vor der Installation und Verwendung des Geräts Lesen Sie vor der Installation des Geräts das Installationshandbuch. Lesen die Serviceanleitung, bevor das Gerät zu reparieren. DAS KÄLTEMITTEL R290 Um korrekt zu funktionieren, besitzt das Klimagerät in seinem Inneren einen Kühlkreislauf, in dem ein umweltfreundliches Kühlmittel zirkuliert: R290 = GWP (Treibhauspotential: 3) Dabei handelt es sich um ein nur leicht entflammbares und geruchloses Kühlmittel mit...
- Page 53 ALLGEMEINE BETRIEBS- UND SICHERHEITSINFORMATIONEN Dieses Gerät ist ein lokal Klimagerät für den häuslichen Gebrauch. Verwenden Sie dieses Klimagerät nur im Rahmen der in diesem Handbuch beschriebenen Anweisungen. Vergewissern Sie sich, dass die Stromversorgung der erforderlichen Spannung entspricht (220-240V/50Hz). ...
- Page 54 Prüfen Sie, ob der Stecker fest eingesteckt ist. Verwenden Sie keine Mehrfachstecker. Berühren Sie den Stecker nicht mit nassen Händen. Vergewissern Sie sich, dass der Stecker sauber ist. Verwenden Sie den Stecker nicht zum Ein- und Ausschalten des Klimageräts: Betätigen ON/OFF-Taste...
- Page 55 Das Gerät während des Betriebs nicht unbewacht lassen. Das ausschalten und abtrennen. Bei Verwendung einer Ablaufleitung soll die Umgebungstemperatur nicht unter 0°C liegen. Dies kann zu Wasserlecks in der Klimaanlage führen. Kein Wasser auf dem Klimagerät spritzen oder gießen. SICHERHEITSHINWEIS! ...
- Page 56 auseinanderzubauen oder zu verändern. Wenden Sie sich bei einer Fehlfunktion direkt an den Kundendienst. ACHTUNG! Setzen Sie das Klimagerät nicht direktem Sonnenlicht aus: Die Farbe der Bauteile könnte verblassen oder sich verändern. Zudem könnte eine eventuelle Überhitzung des Gerätes den Schutzmechanismus aktivieren und zum Ausschalten des Gerätes führen.
-
Page 57: Beschreibung Des Geräts
BESCHREIBUNG DES GERÄTS VORDERANSICHT HINTERANSICHT SCHALTTAFEL 5) RÄDER LUFTENLEISS 6) KONDENSAT-ABLASSLÖCHER (KÜHLMODUS) GRIFF 7) BEFESTIGUNG DES LUFTEXPLUSIONSROHRES LUFTENLEISS MIT FILTER Zulässige Mindest- und Höchsttemperaturen (Innentemp.) Kühlen: 7°C TK / 35 °C TK Entfeuchten: 17°C TK / 35 °C TK Möglichkeit der Raumtemperaturregelung bei Kaltbetrieb: 16 °C TK / 32°C TK V 12/20... - Page 58 KONTROLLEN VOR DER INBETRIEBNAHME Die folgenden Abstände müssen eingehalten werden, um die Funktionstüchtigkeit des mobiles klimagerät zu garantieren. INBETRIEBNAHME DES GERÄTES Öffnen Sie die Verpackung und nehmen Sie den Karton heraus. Packen Sie das Gerät und alle mitgelieferten Teile aus (siehe nachstehende Zeichnung).
- Page 59 3. Öffnen Sie das Fenster und sperren Sie einen der beiden Fensterflügel mit dem Griff. Setzen Sie den Endanschluss am feststehenden Flügel auf und lehnen Sie den anderen Flügel an. GEBRAUCH DES GERÄTES MIT FENSTERADAPTER 1. Um das Loch in das Glas zu bohren, ist es 2.
- Page 60 Vermeiden Sie enge Biegungen oder Falten im Schlauch. Bei Nichtgebrauch den Schlauch abklemmen und die Tür mit der Kappe verschließen. BETRIEBSMODI DES GERÄTS Dieses Gerät kann zum Kühlen, Entfeuchten und Lüften verwendet werden. Bevor Sie das Gerät benutzen, lassen Sie es mindestens zwei Stunden aufrecht stehen. Beim Übergang von einem Betriebsmodus zum anderen bleibt das Gebläse in Betrieb, doch der Verdichter schaltet sich aus: Er läuft nach 3 Minuten wieder an.
- Page 61 BETRIEBSMODI 1. MODUS KÜHLEN (COOL) Die LED „Cool“ auf dem Bedienfeld schaltet sich ein. Das Intervall zur Temperatureinstellung reicht von 16°C bis 32°C. In diesem Betriebsmodus speichert das Gerät, wenn man es über die ON/OFF-Taste ausschaltet, jedes Mal die eingegebene Temperatur und behält sie beim erneuten Einschalten bei.
-
Page 62: Betrieb Per Fernbedienung
Kontinuierlicher Kondenswasserablass Entfeuchten ACHTUNG! Bei einer Nutzung des Klimagerätes im Modus Entfeuchten empfiehlt es sich immer, den Dauerabfluss anzuschließen, um so maximale Effizienz bei der Entfeuchtung zu gewährleisten. Ein Ende eines PVC-Schlauches (nicht im Lieferumfang enthalten) an den oberen Kondenswasserablass anschließen und das andere Schlauchende über einem Wasserabfluss positionieren. - Page 63 RICHTEN SIE FÜR EINEN OPTIMALEN BETRIEB DER FERNBEDIENUNG DEN KOPF DES SENDERS ZU DEM AUF DEM KLIMAGERÄT POSITIONIERTEN EMPFÄNGER POWER TASTE TASTE TIMER TASTE DOWN TASTE COOL (Kühlung) TASTE DRY (Entfeuchtung) TASTE FAN (Belüftung) TASTE UP TASTE SLEEP TASTE LOW (niedrige Lüftergeschwindigkeit) 10.
- Page 64 TASTEN AUF DER BEDIENFELD 1) TASTE POWER 5) TASTE UP 2) TASTE MODE 6) TASTE TIMER 3) TASTE SPEED 7) TASTE SLEEP 4) TASTE DOWN 8) TASTE PANEL LOCK FÜR KINDER DETAIL DER ANZEIGE AUF DER BEDIENFELD Kühlmodus-LED Lüftungsmodus LED Schlafmodus-LED Entfeuchtungs-LED Kindersicherung LED...
-
Page 65: Wartung Und Pflege
(8) PANEL LOCK KEY FÜR KINDER Drücken Sie diese Taste, um die Sperrfunktion des Bedienfelds ein- oder auszuschalten. TEMPERATURDISPLAY UND FEHLER Störung Ursache Abhilfe Temperaturfühler defekt. Sich mit dem Kundendienst in Verbindung setzen. Temperaturfühler auf dem Verdampfer Sich mit dem Kundendienst in Verbindung setzen. defect. - Page 66 4. Transport. Das Klimagerät sollte möglichst in senkrechter Position transportiert werden. Falls dies nicht möglich ist, es auf die rechte Seite legen; bei Ankunft am Bestimmungsort das Gerät unverzüglich wieder senkrecht aufstellen und mindestens 4 Stunden warten, bevor es im Kühlmodus benutzt wird. 5.
- Page 67 VERORDNUNG (EU) Nr. 517/2014 - F-GAS Das Gerät enthält R290, ein Erdgas mit dem Treibhauspotential (GWP) = 3 - 0,17 kg = 0,00051 Tonnen CO Äquivalent. Das Kältemittel R290 darf nicht in die Umwelt gelangen. INFORMATIONEN BEZÜGLICH DER KORREKTEN ENTSORGUNG DES PRODUKTES GEMÄSS DER EU- RICHTLINIE 2012/19/EU Am Ende seiner Lebensdauer darf dieses Gerät nicht im Haushaltsmüll entsorgt werden.
- Page 68 CLIMATIZADOR PORTÁTIL (LOCAL) ISIDE INSTRUCCIONES DE USO Leer las instrucciones detenidamente antes de encender el aparato o de hacer mantenimiento. Observar todas las instrucciones de seguridad; la inobservancia de las instrucciones puede ser fuente de accidentes y/o daños. Conservar estas instrucciones para consultas futuras.
- Page 69 Aparato lleno de gas inflamable R290. Antes de instalar y usar el aparato, lea el manual del propietario. Antes de instalar el aparato, lea el manual de instalación. Para cualquier reparación, póngase siempre en contacto con un centro de servicio y siga estrictamente el contenido del manual de servicio.
- Page 70 INFORMACIÓN GENERAL SOBRE EL FUNCIONAMIENTO Y LA SEGURIDAD Este aparato es un climatizador local, diseñado sólo para el uso doméstico. Atenerse exclusivamente a las indicaciones de uso de este manual. Cerciorarse de que el tipo de suministro eléctrico coincida con el valor de tensión indicado (220-240V/50Hz).
- Page 71 Asegurarse de que la clavija esté conectada firmemente. No utilizar clavijas múltiples. No tocar la clavija con las manos mojadas. Cerciorarse de que la clavija esté limpia. No utilizar la clavija como medio para encender y apagar el climatizador: utilizar la tecla ON/OFF del mando a distancia o del panel de control.
- Page 72 ¡PRECAUCIÓN! No introducir objetos en el climatizador: es muy peligroso porque el ventilador gira a alta velocidad. Asegurar la libre circulación del aire en la unidad. No obstruir con cortinas ni de ningún otro modo las rejillas de salida y entrada del aire.
-
Page 73: Descripción Del Aparato
agresivos para la limpieza del revestimiento: el acabado y el color podrían arruinarse. Cerrar todas las ventanas para lograr la máxima eficiencia de climatización posible. El fabricante no asume responsabilidad alguna en caso de incumplimiento de las normas de seguridad y prevención de accidentes. -
Page 74: Puesta En Funcionamiento Del Aparato
OPERACIONES Y CONTROLES ANTES DE FUNCIONAR Se deben mantener los siguientes espacios para asegurar la eficiencia operativa del climatizador portátil. 50 cm 50 cm PUESTA EN FUNCIONAMIENTO DEL APARATO Abrir el embalaje y sacar el cartón. Extraer el producto y los elementos en dotación (ilustrados más abajo). Baterías para mando a Mando a distancia infrarrojo distancia tipo AAA - LR03 -... - Page 75 USO CON EMPALME TERMINAL PARA VENTANA 1. Extender el tubo flexible lo necesario para llegar al 2. Abrir la ventana y bloquear uno de los batientes exterior (máx. 1,5 m) y engancharlo en la pared con el tirador. posterior del climatizador. Apoyar el empalme terminal en el batiente fijo y acercar el otro batiente de la ventana.
- Page 76 5. Colocar en la parte posterior del climatizador el tubo flexible montado. Para los períodos en que no se utilice, desconectar el tubo y cerrar el ojo de buey con el tapón. Conectar el cable de alimentación a una toma de corriente con las características apropiadas (220-240 V). Introducir las baterías en el mando a distancia respetando las polaridades.
-
Page 77: Modos De Funcionamiento
EL TUBO DE SALIDA SIEMPRE DEBE ESTAR CONECTADO al aparato, salvo cuando el aparato se utilice en Deshumidificación, en cuyo caso se recomienda la salida directa al ambiente para asegurar la máxima eficiencia (ver el apartado Modo Deshumidificación). Limpiar periódicamente los filtros del aire situados debajo de la rejilla posterior, fácilmente amovible, para mantener la eficiencia del climatizador. -
Page 78: Funcionamiento Con El Mando A Distancia
MODO DE ELIMINACIÓN DEL CONDENSADO Drenaje manual Refrigeración Este aparato vaporiza automáticamente el condensado en Refrigeración. Cuando la unidad funciona en Refrigeración, comprobar que los tapones de goma de los orificios de desagüe posteriores estén bien puestos. Cuando el climatizador funciona en Refrigeración, no es necesario utilizar el drenaje continuo del condensado;... - Page 79 10. Quitar la batería del mando a distancia cuando no se vaya a utilizar durante mucho tiempo. 11. Si no se advierte ningún sonido y el símbolo de transmisión en pantalla no parpadea, la batería se debe sustituir. 12. Si al pulsar la tecla del mando a distancia se produce un reset, la electricidad es carente y la batería se debe sustituir.
- Page 80 PARA UN FUNCIONAMIENTO ÓPTIMO DEL MANDO A DISTANCIA, DIRIGIR EL CABEZAL DEL TRANSMISOR HACIA EL RECEPTOR SITUADO EN EL CLIMATIZADOR TECLA POWER TECLA TIMER TECLA DOWN TECLA COOL (enfriamiento) TECLA DRY (deshumidificación) TECLA FAN (ventilación) TECLA UP TECLA SLEEP TECLA LOW (baja velocidad del ventilador) 10.
-
Page 81: Tecla Mode
PANEL DE CONTROL TECLAS EN EL PANEL DE CONTROL 1) TECLA POWER 5) TECLA UP 2) TECLA MODE 6) TECLA TIMER 3) TECLA SPEED 7) TECLA SLEEP 4) TECLA DOWN 8) TECLAS DE BLOQUEO DE PANEL PARA NIÑOS DETALLE DE LA PANTALLA EN EL PANEL DE CONTROL LED de modo de refrigeración LED de modo de ventilación LED de modo de Sleep... -
Page 82: Mantenimiento Y Cuidado
(3) TECLA SPEED En los modos de enfriamiento, presione este botón para ajustar la velocidad del ventilador, baja o alta. En el modo de deshumidificación no es posible seleccionar la velocidad del ventilador, por lo que el ventilador elegirá a la fuerza la velocidad baja del ventilador. - Page 83 Los filtros están integrados en sus respectivas rejillas. Utilice una aspiradora para eliminar el polvo de los filtros. Si esto no es suficiente, lave los filtros con agua tibia y posiblemente un detergente neutro, enjuáguelos con agua fría y déjelos secar naturalmente antes de volver a colocarlos en su lugar.
- Page 84 REGLAMENTO (UE) N. 517/2014 - F-GAS La unidad contiene R290, un gas fluorado de efecto invernadero, con un potencial de calentamiento global (GWP) de 3 - kg. 0,17= 0,00051 TCO equiv. No dispersar R290 en la atmósfera. INFORMACIÓN PARA LA CORRECTA ELIMINACIÓN DEL PRODUCTO EN VIRTUD DE LA DIRECTIVA EUROPEA 2012/19/UE Al final de su vida útil, este aparato no debe eliminarse junto a los desechos domésticos.