Télécharger Imprimer la page

Argo SWAN EVO Instructions D'utilisation

Masquer les pouces Voir aussi pour SWAN EVO:

Publicité

Les langues disponibles
  • FR

Les langues disponibles

Liens rapides

IT
CLIMATIZZATORE PORTATILE (LOCALE)
SWAN EVO
ISTRUZIONI PER L'USO
Leggere attentamente le istruzioni prima di attivare l'apparecchio oppure fare manutenzione.
Osservare tutte le istruzioni di sicurezza; la mancata osservanza delle istruzioni può portare a incidenti e/o
danni. Conservare queste istruzioni per futuro riferimento.
V 02/20
1

Publicité

loading

Sommaire des Matières pour Argo SWAN EVO

  • Page 1 CLIMATIZZATORE PORTATILE (LOCALE) SWAN EVO ISTRUZIONI PER L’USO Leggere attentamente le istruzioni prima di attivare l’apparecchio oppure fare manutenzione. Osservare tutte le istruzioni di sicurezza; la mancata osservanza delle istruzioni può portare a incidenti e/o danni. Conservare queste istruzioni per futuro riferimento.
  • Page 2 L’unità contiene gas infiammabile R290. Prima di installare e utilizzare l’unità, leggere le istruzioni. Prima di riparare l'apparecchio, leggere il manuale di assistenza. IL REFRIGERANTE R290 Per poter svolgere le sue funzioni, il climatizzatore ha al suo interno un circuito frigorifero in cui circola un refrigerante ecologico: R290 = GWP (Potenziale di riscaldamento globale: 3) E’...
  • Page 3 INFORMAZIONI GENERALI DI FUNZIONAMENTO E SICUREZZA  Quest’apparecchio è un climatizzatore locale, progettato per uso domestico.  Utilizzare questo climatizzatore solo come descritto nel presente manuale.  Assicurarsi che il tipo di alimentazione elettrica sia conforme al voltaggio richiesto (220-240V/50Hz). ...
  • Page 4  Assicurarsi che la spina sia inserita in modo saldo. Non utilizzare una spina multipla. Non toccare la spina con le mani bagnate. Assicurarsi che la spina sia pulita.  Non usare la spina come mezzo per avviare/arrestare il climatizzatore: usare il tasto ON/OFF sul telecomando oppure sul pannello di controllo.
  • Page 5  Se si utilizza un tubo di scarico, la temperatura dell’ambiente non deve essere inferiore a 0°C. Ciò può causare perdite d'acqua al condizionatore.  Non spruzzare o versare acqua sul condizionatore. PRECAUZIONE!  Non inserire oggetti nel climatizzatore: è molto pericoloso perché...
  • Page 6 ATTENZIONE!  Non esporre il climatizzatore alla luce diretta del sole, perché il colore dei materiali potrebbe subire alterazioni e l’eventuale surriscaldamento dell’apparecchio potrebbe attivarne meccanismo di protezione e quindi causarne lo spegnimento.  Non usare insetticidi, oli, detergenti o vernici a spruzzo attorno all’apparecchio;...
  • Page 7 DESCRIZIONE DELL’APPARECCHIO VISTA FRONTALE VISTA POSTERIORE FORO DRENAGGIO FUNZIONE PANNELLO SUPERIORE DEUMIDIFICAZIONE MANIGLIA USCITA ARIA E RACCORDO 10) STRUTTURA POSTERIORE INGRESSO ARIA 11) RUOTE PLURIDIREZIONALI FORO DRENAGGIO FUNZIONE RAFFRESCAMENTO 12) PANNELLO DI CONTROLLO STRUTTURA FRONTALE 13) ALETTE E MANDATA ARIA MANIGLIA 14) STRUTTURA FRONTALE STRUTTURA POSTERIORE...
  • Page 8 OPERAZIONI E CONTROLLI PRIMA DELLA MESSA IN FUNZIONE I seguenti spazi devono essere mantenuti per assicurare l’efficienza operativa del condizionatore portatile. 50 cm 50 cm MESSA IN FUNZIONE DELL’APPARECCHIO Aprire l’imballo e sfilare il cartone. Estrarre il prodotto e gli altri elementi a corredo (illustrati nel box sottostante). Telecomando a infrarossi Batterie per telecomando tipo AAA –...
  • Page 9 UTILIZZO CON RACCORDO TERMINALE PER FINESTRA 1. Estendere il flessibile quanto basta per raggiungere 2. Aprire la finestra e bloccare uno dei battenti con la l’esterno (max 1,5 m) e agganciarlo alla parte maniglia. posteriore del climatizzatore. Appoggiare il raccordo terminale al battente fisso, accostare l’altro battente della finestra.
  • Page 10 Evitare curve troppo strette o pieghe del tubo flessibile. Durante i periodi di non utilizzo scollegare il tubo e chiudere l’ oblò con il tappo. Collegare il cavo di alimentazione ad una presa di corrente appropriata (220-240V). Inserire le batterie a corredo nel telecomando, rispettandone le polarità.
  • Page 11 MODALITA’ DI FUNZIONAMENTO 1. MODALITA’ RAFFRESCAMENTO (COOLING)  Il LED “Cool” sul pannello di controllo si accende.  L’intervallo di regolazione della temperatura va da 16°C a 31°C.  In questa modalità, ogni volta che premendo il tasto ON/OFF, l’unità si spegne, l’apparecchio memorizza la temperature impostata e alla riaccensione manterrà...
  • Page 12 Drenaggio continuo Deumidificazione ATTENZIONE! Quando si utilizza il climatizzatore in Deumidificazione, è consigliabile predisporre sempre il drenaggio continuo per garantire la massima efficienza di deumidificazione. Collegare un’estremità di un tubetto in PVC (non fornito) al foro di scarico superiore e l’altra estremità sopra a uno scolo. FUNZIONAMENTO CON IL TELECOMANDO Scorrere per aprire la cover seguendo la direzione indicata dalla freccia.
  • Page 13 PER UN FUNZIONAMENTO OTTIMALE DEL TELECOMANDO, INDIRIZZARE LA TESTINA DEL TRASMETTITORE VERSO IL RICEVITORE POSIZIONATO SUL CLIMATIZZATORE TASTO ON/OFF TASTO TIMER TASTO DOWN TASTO MODE TASTO UP TASTO FAN TASTO SLEEP (1) TASTO ON/OFF Premere questo tasto per accendere o spegnere l’unità. (2) TASTO TIMER a.
  • Page 14 Nella modalità deumidificazione non è possibile premere questo tasto, quindi il ventilatore sceglierà forzatamente la velocità di ventilazione bassa. (7) TASTO SLEEP Nella modalità raffrescamento, premere il tasto UP e il tasto FAN per attivare la modalità Sleep, quindi l’unità funzionerà...
  • Page 15 4. Trasporto. Trasportare il climatizzatore possibilmente in posizione verticale. Qualora ciò non fosse possibile, coricarlo sul fianco destro; quando si arriva a destinazione rimettere subito l’apparecchio in posizione verticale e attendere almeno 4 ore prima di utilizzarlo in raffreddamento. 5. Per la massima sicurezza verificare periodicamente lo stato del cavo di alimentazione;...
  • Page 16 REGOLAMENTO (UE) N. 517/2014 - F-GAS L’unità contiene R290, un gas naturale con potenziale di riscaldamento globale (GWP) = 3 - Kg. 0,13 = 0,00039 Tonn CO equiv.. Non disperdere R290 nell’ambiente. INFORMAZIONE PER IL CORRETTO SMALTIMENTO DELPRODOTTO ai sensi dell’art. 26 D.Lgs 14/03/14, no.
  • Page 17 PORTABLE AIR CONDITIONER (LOCAL) SWAN EVO OPERATING INSTRUCTIONS Read the instructions carefully before operating the appliance or carrying out maintenance work. Observe all the safety instructions; failure to do so may lead to accidents and/or damage. Store these instructions in a safe place for future reference.
  • Page 18 Appliance filled with flammable gas R290. Before installing and using the appliance, read the owner’s manual. Before repairing the appliance, read the service manual. The Refrigerant R290  To realize the function of the air conditioner unit, a special refrigerant circulates in the system.
  • Page 19 GENERAL OPERATING AND SAFETY INSTRUCTIONS  This appliance is a local air conditioner designed for domestic use.  Only use this air-conditioner as described in this manual.  Ensure that the required voltage and frequency (220-240V/50 Hz) match the available power source. ...
  • Page 20  Do not use the plug as a means by which to start/stop the air conditioner: use the ON/OFF button on the remote control or on the control panel.  Do not install the air conditioner in rooms where it may receive water splashes (e.g.
  • Page 21 PRECAUTION!  Do not insert any objects into the air conditioner: this is very dangerous as the fan turns at high speed.  Ensure that air circulates freely around the unit. Do not cover the air intake and delivery grilles with drapes or any other means.
  • Page 22  Close all open windows to maximise air conditioning efficiency. The manufacturer will not be held liable if safety and accident prevention rules are not observed. V 02/20...
  • Page 23 DESCRIPTION OF THE APPLIANCE FRONT VIEW UPPER PANEL HANDLE REAR STRUCTURE SWIVEL CASTERS CONTROL PANEL – BUTTONS FOR OPERATION WITHOUT REMOTE CONTROL REAR VIEW FINS AND AIR FLOW OUTLET FRONT STRUCTURE AIR INTAKE DRAINAGE HOLE FOR DEHUMIDIFICATION FUNCTION 10) AIR OUTLET AND FITTING 11) AIR INTAKE 12) DRAINAGE HOLE FOR COOLING FUNCTION 13) FRONT STRUCTURE...
  • Page 24 PRE-OPERATING CHECKS AND OPERATIONS The following space must be maintained to ensure the operating efficiency of the portable air conditioner. 50 cm 50 cm APPLIANCE START-UP Open the packaging and pull out the box. Remove the product and the other elements supplied (illustrated in the box below).
  • Page 25 USE WITH END FITTING FOR WINDOW 1. Stretch the flexible hose sufficiently so that it 2. Open the window and lock one of the two leaves reaches the outside (max 1.5 m) and hook it to the rear with the handle. part of the air conditioner.
  • Page 26 USE WITH WINDOW UNIT KIT 1. To make the hole in the glass it is advisable to 2. Insert the window unit into the window. take the porthole kit accessory to the glazier. 3. Insert the round fitting into the retractable flexible 4.
  • Page 27 HOW TO USE THE APPLIANCE This appliance can be used for cooling, dehumidifying and ventilation purposes. Before using the appliance, leave it standing erect for at least two hours. When switching between modes, the fan continues to turn but the compressor stops: the compressor will re-start after 3 minutes.
  • Page 28 If used during summer, it is best to leave the flexible pipe attached so that the hot air is discharged towards the outside rather than into the room. During dehumidification, continuous drainage should be implemented (see the next chapter, “HOW TO ELIMINATE CONDENSATE”).
  • Page 29 REMOTE CONTROL OPERATION Slide the cover open in the direction indicated by the arrow. Insert alkaline batteries (type AAA, LR03/1.5 V - not provided) compliant with Battery Directive no.2006/66/EC and amendments Directive 2013/56/EC into the remote control and make sure the poles match. Put the cover back on.
  • Page 30 FOR OPTIMAL REMOTE CONTROL OPERATION, POINT THE TRANSMITTER HEAD TOWARDS THE RECEIVER ON THE AIR CONDITIONER. ON/OFF BUTTON TIMER BUTTON DOWN BUTTON MODE BUTTON UP BUTTON FAN BUTTON SLEEP BUTTON (1) ON/OFF BUTTON Press this button to switch the unit on or off. (2) TIMER BUTTON a.
  • Page 31 (7) SLEEP BUTTON In cooling mode, press the UP and FAN buttons to activate the Sleep mode, after which the unit will return to the silent mode and save energy. N.B.: The Sleep function is not available in the dehumidifying or fan modes. (8) TEMPERATURE AND ERROR DISPLAY Problem Cause...
  • Page 32 5. For complete safety, regularly check the condition of the power cord; should it be damaged as a result of wear, contact the Service Centre to replace it. TIPS FOR MAXIMISING COMFORT AND MINIMISING CONSUMPTION CHECK that:  the unit intake and delivery grilles are always free; ...
  • Page 33 CLIMATISEUR MOBILE (LOCAL) SWAN EVO INSTRUCTIONS D’UTILISATION Lire attentivement ces instructions avant de mettre en marche l’appareil ou avant toute opération d’entretien. Se conformer aux consignes de sécurité. Le non-respect de ces instructions peut causer des accidents et/ou V 02/20...
  • Page 34 des dommages. Conserver ces instructions pour toute consultation ultérieure. L'appareil est rempli de gaz inflammable R290. Avant d'installer et utiliser l'appareil, lisez le manuel du propriétaire. Avant de réparer l'appareil, lisez le manuel d'entretien. LE RÉFRIGÉRANT R290 RÉFRIGÉRANT Afin de remplir ses fonctions, le climatiseur a un circuit de refroidissement interne où circule un liquide réfrigérant écologique : R290 = 3 GWP (Potentiel de réchauffement de la planète).
  • Page 35 INFORMATIONS GÉNÉRALES SUR LE FONCTIONNEMENT ET SUR LA SÉCURITÉ  Cet appareil est un climatiseur local, conçu pour un usage exclusivement domestique !  Utiliser ce climatiseur uniquement comme décrit dans cette notice d’utilisation.  S’assurer que le type d’alimentation électrique est conforme à la tension requise (220-240 V / 50 Hz).
  • Page 36  La prise de l'installation doit toujours être équipée d’une mise à la terre efficace.  S'assurer que la fiche est bien insérée à fond dans la prise. Ne pas utiliser de prise multiple. Ne pas toucher la fiche avec les mains mouillées.
  • Page 37  Tenez l'unité loin du feu, des sources de feu possibles, des objets inflammables ou explosifs.  Ne laissent pas l'unité sans surveillance tandis qu'il fonctionne, éteindre l'unité et le déconnecter.  Si le tuyau de drainage est utilisé, la température ambiante ne doit pas être inférieure à...
  • Page 38 de modifier le produit. En cas de dysfonctionnement, contacter directement le service d'assistance technique. ATTENTION !  Ne pas exposer directement le climatiseur à la lumière du soleil afin d'éviter toute altération de la couleur des matériaux ainsi que la surchauffe éventuelle de l'appareil qui pourrait entraîner l'activation du mécanisme de protection et l'extinction du climatiseur.
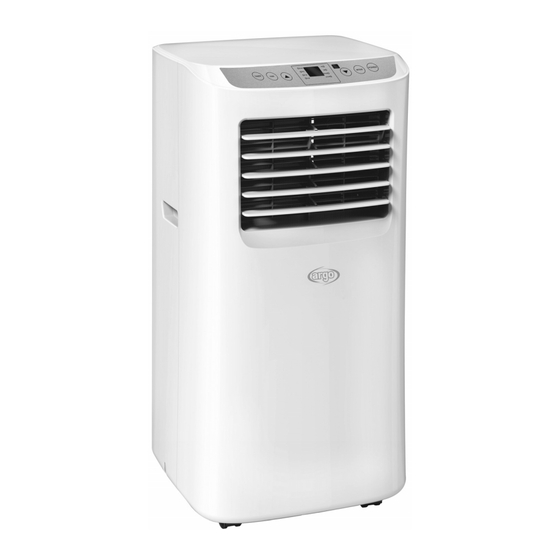
  • Page 39 DESCRIPTION DE L’APPAREIL VUE DE FACE PANNEAU SUPÉRIEUR POIGNÉE STRUCTURE ARRIÈRE ROUES MULTIDIRECTIONNELLES PANNEAU DE COMMANDE – TOUCHES DESTINÉES À L'UTILISATION SANS TÉLÉCOMMANDE AILETTES ET ADMISSION D'AIR STRUCTURE AVANT VUE DE DOS ENTRÉE D'AIR ORIFICE DE DRAINAGE DE LA FONCTION DÉSHUMIDIFICATION 10) SORTIE D'AIR ET RACCORD 11) ENTRÉE D'AIR...
  • Page 40 OPÉRATIONS ET CONTRÔLES AVANT LE DÉMARRAGE Les distances suivantes doivent être respectées pour assurer le bon fonctionnement du climatiseur mobile. 50 cm 50 cm MISE EN SERVICE DE L'APPAREIL Ouvrir l'emballage et extraire le carton. Sortir le produit et les autres éléments fournis (illustrés ci-dessous). Piles type AAA –...
  • Page 41 UTILISATION AVEC RACCORD TERMINAL POUR FENÊTRE 1. Allonger suffisamment le flexible pour atteindre 2. Ouvrir la fenêtre et bloquer l'un des battants à l'aide l'extérieur (maxi 1,5 m) et le fixer à la partie arrière du de la poignée. climatiseur. Poser le raccord terminal sur le battant fixe et approcher l'autre battant de la fenêtre.
  • Page 42 UTILISATION AVEC KIT HUBLOT 1. Pour réaliser le trou dans le verre, il est conseillé 2. Introduire le hublot dans la fenêtre. de prendre également l’accessoire pour kit de hublots du vitrier. 3. Insérer le raccord circulaire pour kit hublot dans 4.
  • Page 43 MODALITÉS D'UTILISATION DE L’APPAREIL Cet appareil peut être utilisé pour le Rafraîchissement, la Déshumidification et la Ventilation. Avant d'utiliser l'appareil, le laisser en position debout pendant au moins deux heures. Lors du passage d'un mode de fonctionnement à un autre, le ventilateur continue de fonctionner mais le compresseur s'arrête : ce dernier redémarre au bout de 3 minutes.
  • Page 44 Pour obtenir une efficacité maximale du processus de déshumidification, laisser le raccord arrière d'évacuation libre pour une évacuation directe dans l'atmosphère. Le mode Déshumidification est recommandé durant l'automne et l'hiver. En cas d'utilisation en été, il est recommandé de laisser le tuyau flexible branché à l'appareil afin que l'air chaud soit acheminé...
  • Page 45 UTILISATION AVEC LA TÉLÉCOMMANDE Faire coulisser le couvercle dans le sens de la flèche afin de l'ouvrir. Insérer les piles alcalines (modèle AAA, LR03/1,5 V – pas fourni) conformes à la Directive 2006/66/CE et modification Directive 2013/56/CE dans la télécommande, en respectant les polarités indiquées.
  • Page 46 POUR UN FONCTIONNEMENT OPTIMAL DE LA TÉLÉCOMMANDE, DIRIGER L'EXTRÉMITÉ DE L'ÉMETTEUR VERS LE RÉCEPTEUR SITUÉ SUR LE CLIMATISEUR TOUCHE MARCHE/ARRÊT TOUCHE MINUTERIE TOUCHE BAS TOUCHE MODE TOUCHE HAUT TOUCHE FAN TOUCHE SLEEP (1) TOUCHE MARCHE/ARRÊT Appuyer sur cette touche pour allumer ou éteindre l’appareil. (2) TOUCHE TIMER a.
  • Page 47 Dans les modes rafraîchissement et ventilation, appuyer sur cette touche pour régler la vitesse de ventilation : basse (Low) ou haute (High). Dans certaines conditions, la vitesse de ventilation réelle pourrait ne pas correspondre à celle qui a été réglée. En mode déshumidification, il n'est pas possible d'appuyer sur cette touche et le ventilateur choisit forcément la vitesse de ventilation basse.
  • Page 48 4. Transport. Transporter de préférence le climatiseur en position verticale. En cas d'impossibilité de maintenir l'appareil en position verticale, le remettre immédiatement dans cette position au terme du transport et attendre au moins 4 heures avant de l'utiliser en mode rafraîchissement. 5.
  • Page 49 MOBILES KLIMAGERÄT (RAUMKLIMAGERÄT) SWAN EVO GEBRAUCHSANLEITUNG Lesen Sie die vorliegende Gebrauchsanleitung aufmerksam durch, bevor Sie das Gerät in Betrieb nehmen oder warten. Halten Sie alle Sicherheitshinweise sorgfältig ein: Eine Nichtbeachtung kann zu Unfällen und/oder Schäden führen. Bewahren Sie diese Anleitung für zukünftiges Nachschlagen gut auf.
  • Page 50 Das Innengerät ist mit brennbaren Gas R290 eingefüllt Lesen die Anweisungen vor der Installation und Verwendung des Geräts Lesen die Serviceanleitung, bevor das Gerät zu reparieren. DAS KÄLTEMITTEL R290 Um korrekt zu funktionieren, besitzt das Klimagerät in seinem Inneren einen Kühlkreislauf, in dem ein umweltfreundliches Kühlmittel zirkuliert: R290 = GWP (Treibhauspotential: 3) Dabei handelt es sich um ein nur leicht entflammbares und geruchloses Kühlmittel mit...
  • Page 51 ALLGEMEINE BETRIEBS- UND SICHERHEITSINFORMATIONEN  Dieses Gerät ist ein lokal Klimagerät für den häuslichen Gebrauch.  Verwenden Sie dieses Klimagerät nur im Rahmen der in diesem Handbuch beschriebenen Anweisungen.  Vergewissern Sie sich, dass die Stromversorgung der erforderlichen Spannung entspricht (220-240V/50Hz). ...
  • Page 52  Prüfen Sie, ob der Stecker fest eingesteckt ist. Verwenden Sie keine Mehrfachstecker. Berühren Sie den Stecker nicht mit nassen Händen. Vergewissern Sie sich, dass der Stecker sauber ist.  Verwenden Sie den Stecker nicht zum Ein- und Ausschalten des Klimageräts: Betätigen ON/OFF-Taste...
  • Page 53  Das Gerät während des Betriebs nicht unbewacht lassen. Das ausschalten und abtrennen.  Bei Verwendung einer Ablaufleitung soll die Umgebungstemperatur nicht unter 0°C liegen. Dies kann zu Wasserlecks in der Klimaanlage führen.  Kein Wasser auf dem Klimagerät spritzen oder gießen. SICHERHEITSHINWEIS! ...
  • Page 54 auseinanderzubauen oder zu verändern. Wenden Sie sich bei einer Fehlfunktion direkt an den Kundendienst. ACHTUNG!  Setzen Sie das Klimagerät nicht direktem Sonnenlicht aus: Die Farbe der Bauteile könnte verblassen oder sich verändern. Zudem könnte eine eventuelle Überhitzung des Gerätes den Schutzmechanismus aktivieren und zum Ausschalten des Gerätes führen.
  • Page 55 BESCHREIBUNG DES GERÄTS VORDERANSICHT OBERES GEHÄUSETEIL GRIFF RÜCKWAND MULTIDIREKTIONALE RÄDER BEDIENFELD – TASTEN FÜR DEN BETRIEB OHNE FERNBEDIENUNG KLAPPEN UND LUFTZUFUHR VORDERTEIL LUFTEINLASS ÖFFNUNG KONDENSWASSERABLASS (FUNKTION ENTFEUCHTEN) 10) LUFTAUSLASS UND ANSCHLUSS 11) LUFTEINLASS HINTERANSICHT 12) ÖFFNUNG KONDENSWASSERABLASS (FUNKTION KÜHLEN) 13) VORDERTEIL 14) GRIFF 15) RÜCKWAND Zulässige Mindest- und Höchsttemperaturen (Innentemp.)
  • Page 56 KONTROLLEN VOR DER INBETRIEBNAHME Die folgenden Abstände müssen eingehalten werden, um die Funktionstüchtigkeit des mobiles klimagerät zu garantieren. 50 cm 50 cm INBETRIEBNAHME DES GERÄTES Öffnen Sie die Verpackung und nehmen Sie den Karton heraus. Packen Sie das Gerät und alle mitgelieferten Teile aus (siehe nachstehende Zeichnung).
  • Page 57 GEBRAUCH DES GERÄTES MIT ENDANSCHLUSS FÜR FENSTER 1. Um das Loch in das Glas zu bohren, ist es ratsam, 2. Öffnen Sie das Fenster und sperren Sie einen der das Zubehör für das Verglasungsfenster zu beiden Fensterflügel mit dem Griff. verwenden.
  • Page 58 GEBRAUCH DES GERÄTES MIT FENSTERADAPTER 1. Um das Loch in das Glas zu bohren, ist es 2. Setzen Sie den Adapter in das Fenster ein. ratsam, das Zubehör für das Verglasungsfenster zu verwenden. 3. Setzen Sie den runden Anschluss für das 4.
  • Page 59 BETRIEBSMODI DES GERÄTS Dieses Gerät kann zum Kühlen, Entfeuchten und Lüften verwendet werden. Bevor Sie das Gerät benutzen, lassen Sie es mindestens zwei Stunden aufrecht stehen. Beim Übergang von einem Betriebsmodus zum anderen bleibt das Gebläse in Betrieb, doch der Verdichter schaltet sich aus: Er läuft nach 3 Minuten wieder an.
  • Page 60 Beim Gebrauch dieser Funktion im Sommer sollte der Abluftschlauch angeschlossen sein, damit die warme Luft nach außen und nicht in den Raum abgeführt wird. Während der Entfeuchtung sollte der Dauerabfluss gewählt werden (siehe nachstehendes Kapitel ENTFERNEN DES KONDENSWASSERS). 3. MODUS LÜFTEN (FAN) ...
  • Page 61 BETRIEB PER FERNBEDIENUNG Die Batterieabdeckung in Pfeilrichtung aufschieben. Legen Sie die Alkaline-Batterien (AAA, LR03/1,5V - (nicht vorgesehen) konform mit der Batterierichtlinie 2006/66 / EU und Änderungen der Richtlinie 56/2013 / EU in die Fernbedienung ein und achten Sie dabei auf die Polarität. Setzen Sie die Abdeckung wieder auf.
  • Page 62 RICHTEN SIE FÜR EINEN OPTIMALEN BETRIEB DER FERNBEDIENUNG DEN KOPF DES SENDERS ZU DEM AUF DEM KLIMAGERÄT POSITIONIERTEN EMPFÄNGER ON/OFF-TASTE TASTE TIMER TASTE DOWN MODE-TASTE TASTE UP TASTE FAN TASTE SLEEP (1) TASTE ON/OFF Drücken Sie diese Taste zum Ein- oder Ausschalten des Klimageräts. (2) TASTE TIMER a.
  • Page 63 (7) TASTE SLEEP Im Kühlmodus die Tasten UP und FAN drücken, um den Sleep-Modus zu aktivieren, in dem das Gerät leiser und energiesparender läuft. Hinweis: Die Funktion Sleep steht im Modus Lüften und Entfeuchten nicht zur Verfügung. (8) TEMPERATURDISPLAY UND FEHLER Störung Ursache Abhilfe...
  • Page 64 4. Transport. Das Klimagerät sollte möglichst in senkrechter Position transportiert werden. Falls dies nicht möglich ist, es auf die rechte Seite legen; bei Ankunft am Bestimmungsort das Gerät unverzüglich wieder senkrecht aufstellen und mindestens 4 Stunden warten, bevor es im Kühlmodus benutzt wird. 5.
  • Page 65 CLIMATIZADOR PORTÁTIL (LOCAL) SWAN EVO INSTRUCCIONES DE USO Leer las instrucciones detenidamente antes de encender el aparato o de hacer mantenimiento. Observar todas las instrucciones de seguridad; la inobservancia de las instrucciones puede ser fuente de accidentes y/o daños. Conservar estas instrucciones para consultas futuras.
  • Page 66 Aparato lleno de gas inflamable R290. Antes de instalar y usar el aparato, lea el manual del propietario. Antes de reparar el aparato, lea el manual de servicio. El refrigerante  Para realizar la función de la unidad de aire acondicionado, circula un refrigerante especial en el sistema.
  • Page 67 INFORMACIÓN GENERAL SOBRE EL FUNCIONAMIENTO Y LA SEGURIDAD  Este aparato es un climatizador local, diseñado sólo para el uso doméstico.  Atenerse exclusivamente a las indicaciones de uso de este manual.  Cerciorarse de que el tipo de suministro eléctrico coincida con el valor de tensión indicado (220-240V/50Hz).
  • Page 68  Asegurarse de que la clavija esté conectada firmemente. No utilizar clavijas múltiples. No tocar la clavija con las manos mojadas. Cerciorarse de que la clavija esté limpia.  No utilizar la clavija como medio para encender y apagar el climatizador: utilizar la tecla ON/OFF del mando a distancia o del panel de control.
  • Page 69 ¡PRECAUCIÓN!  No introducir objetos en el climatizador: es muy peligroso porque el ventilador gira a alta velocidad.  Asegurar la libre circulación del aire en la unidad. No obstruir con cortinas ni de ningún otro modo las rejillas de salida y entrada del aire.
  • Page 70 agresivos para la limpieza del revestimiento: el acabado y el color podrían arruinarse.  Cerrar todas las ventanas para lograr la máxima eficiencia de climatización posible. El fabricante no asume responsabilidad alguna en caso de incumplimiento de las normas de seguridad y prevención de accidentes.
  • Page 71 DESCRIPCIÓN DEL APARATO VISTA FRONTAL PANEL SUPERIOR TIRADOR ESTRUCTURA POSTERIOR RUEDAS MULTIDIRECCIÓN PANEL DE CONTROL - TECLAS PARA EL FUNCIONAMIENTO SIN MANDO A DISTANCIA ALETAS Y SALIDA DE AIRE ESTRUCTURA FRONTAL VISTA POSTERIOR ENTRADA AIRE ORIFICIO DE DRENAJE FUNCIÓN DESHUMIDIFICACIÓN 10) SALIDA AIRE Y EMPALME 11) ENTRADA AIRE 12) ORIFICIO DE DRENAJE FUNCIÓN...
  • Page 72 OPERACIONES Y CONTROLES ANTES DE FUNCIONAR Se deben mantener los siguientes espacios para asegurar la eficiencia operativa del climatizador portátil. 50 cm 50 cm PUESTA EN FUNCIONAMIENTO DEL APARATO Abrir el embalaje y sacar el cartón. Extraer el producto y los elementos en dotación (ilustrados más abajo). Baterías para mando a Mando a distancia infrarrojo distancia tipo AAA - LR03 -...
  • Page 73 USO CON EMPALME TERMINAL PARA VENTANA 1. Extender el tubo flexible lo necesario para llegar al 2. Abrir la ventana y bloquear uno de los batientes exterior (máx. 1,5 m) y engancharlo en la pared con el tirador. posterior del climatizador. Apoyar el empalme terminal en el batiente fijo y acercar el otro batiente de la ventana.
  • Page 74 USO CON KIT OJO DE BUEY 1. Para hacer el orificio en el vidrio, es aconsejable 2. Poner el ojo de buey en la ventana. llevar también el accesorio del kit de ojo de buey de esmaltado. 3. Colocar el empalme circular para kit ojo de buey 4.
  • Page 75 MODOS DE USO DEL APARATO Este aparato se puede utilizar para Refrigeración, Deshumidificación y Ventilación. Antes de utilizar el aparato, hacerlo funcionar en posición vertical al menos dos horas. Al pasar de un modo a otro, el ventilador sigue funcionando pero el compresor se para, y vuelve a ponerse en funcionamiento a los 3 minutos.
  • Page 76 Si se utiliza en verano, conviene dejar conectado el tubo flexible para hacer salir el aire caliente al exterior en vez de introducirlo en el ambiente. Durante la deshumidificación conviene utilizar el drenaje continuo (ver el apartado “MODO DE ELIMINACIÓN DEL CONDENSADO”).
  • Page 77 FUNCIONAMIENTO CON EL MANDO A DISTANCIA Desplazar para abrir la tapa siguiendo la dirección de la flecha. Introducir las baterías alcalinas (AAA, LR03/1,5V – no presentes) cumple con la Directiva de baterías no 2006/66 / CE y las enmiendas de la Directiva 56/2013 / CE en el mando a distancia respetando las polaridades indicadas.
  • Page 78 PARA UN FUNCIONAMIENTO ÓPTIMO DEL MANDO A DISTANCIA, DIRIGIR EL CABEZAL DEL TRANSMISOR HACIA EL RECEPTOR SITUADO EN EL CLIMATIZADOR TECLA ON/OFF TECLA TIMER TECLA DOWN TECLA MODE TECLA UP TECLA FAN TECLA SLEEP (1) TECLA ON/OFF Pulsar esta tecla para encender o apagar el aparato. (2) TECLA TIMER a.
  • Page 79 (7) TECLA SLEEP En modo Refrigeración pulsar la tecla UP y la tecla FAN para activar el modo Sleep; la unidad funcionará de manera silenciosa y ahorrando energía. Nota: La función Sleep no está disponible en modo Deshumidificación o Ventilación. (8)DISPLAY TEMPERATURA Y ERRORES Problema Causa...
  • Page 80 Si esto no fuera posible, acostarlo sobre el lado derecho, y ponerlo de pie en cuanto llegue a destino. Esperar al menos 4 horas antes de utilizarlo en modo refrigeración. 5. Para la máxima seguridad, verificar periódicamente el estado del cable de alimentación; si está dañado, para sustituirlo es necesario acudir al Centro de Asistencia.