Electrolux EDC2086PDW Notice D'utilisation
Masquer les pouces
Voir aussi pour EDC2086PDW:
- Notice d'utilisation (64 pages) ,
- Manuel (64 pages) ,
- Notice d'utilisation (20 pages)
Table des Matières
Les langues disponibles
Les langues disponibles
Chapitres
Table des Matières

Manuels Connexes pour Electrolux EDC2086PDW


Sommaire des Matières pour Electrolux EDC2086PDW
- Page 1 EDC2086PDW Tumble Dryer User Manual Sèche-linge Notice d'utilisation...
-
Page 19: Service Après-Vente
13. CARACTÉRISTIQUES TECHNIQUES............35 NOUS PENSONS À VOUS Merci d'avoir choisi ce produit Electrolux. Avec ce produit, vous bénéficiez de dizaines d'années d'expérience professionnelle et d'innovation. Ingénieux et élégant, il a été conçu sur mesure pour vous. Grâce à cet appareil, vous savez que chaque utilisation vous apportera satisfaction. -
Page 20: Consignes De Sécurité
CONSIGNES DE SÉCURITÉ Avant d'installer et d'utiliser cet appareil, lisez soigneusement les instructions fournies. Le fabricant ne peut être tenu pour responsable des dommages et blessures liés à une mauvaise installation ou utilisation. Conservez toujours cette notice avec votre appareil pour vous y référer ultérieurement. - Page 21 FRANÇAIS Si le sèche-linge est placé au-dessus d'un lave-linge, • utilisez le kit de superposition. Le kit de superposition, disponible auprès d'un revendeur agréé, ne peut être utilisé qu'avec l'appareil indiqué dans les instructions (fournies avec l'accessoire). Lisez attentivement les instructions avant de procéder à...
-
Page 22: Instructions De Sécurité
N'utilisez pas l'appareil sans filtre. Nettoyez le filtre à • peluches avant ou après chaque utilisation. N'introduisez dans le sèche-linge que du linge propre. • Il convient que les articles qui ont été salis avec des • substances telles que l'huile de cuisson, l'acétone, l'alcool, l'essence, le kérosène, les détachants, la... -
Page 23: Connexion Électrique
FRANÇAIS • Assurez-vous que le sol sur lequel • Utilisez cet appareil uniquement dans vous installez l'appareil est plat, un environnement domestique. stable, résistant à la chaleur et • Ne séchez pas d'articles propre. endommagés contenant un • Assurez-vous que de l'air circule entre rembourrage ou un garnissage. -
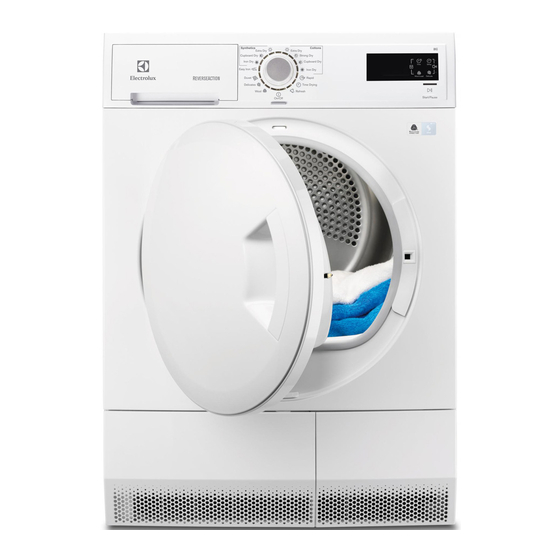
Page 24: Description De L'appareil
3. DESCRIPTION DE L'APPAREIL Bac d'eau de condensation Panneau de commande Hublot de l'appareil Filtre principal Bouton du volet du condenseur Fentes de circulation d'air Pied réglable Volet du condenseur Couvercle du condenseur Verrous du volet du condenseur Plaque de calibrage... -
Page 25: Tableau Des Programmes
FRANÇAIS Appuyez sur les touches, dans la zone portant le symbole ou le nom de l'option. Ne portez pas de gants lorsque vous utilisez le bandeau de commande. Assurez-vous que le bandeau de commande est toujours propre et sec. 4.1 Voyants Voyants Description du Phase de séchage... - Page 26 Charge (max.) Programmes Type de vaisselle Étiquette d'entre‐ tien des textiles 2) 3) D egré de séchage : prêt à ranger. Prêt à Ranger 8 kg/ Degré de séchage : prêt à repasser. Prêt à Repasser 8 kg/ Synthétiques Degré...
-
Page 27: Options
FRANÇAIS Charge (max.) Programmes Type de vaisselle Étiquette d'entre‐ tien des textiles Séchage à basse température de textiles Court 2 kg/ en coton et synthétiques. 1) Poids maximal des articles secs. 2) Uniquement pour les instituts de test : Les programmes de test standard sont indi‐ qués dans le document EN 61121. -
Page 28: Réglages
Programmes ■ Très Sec ■ Prêt à Ranger ■ Prêt à Repasser Synthétiques ■ Très Sec ■ Prêt à Ranger ■ Prêt à Repasser Repassage ■ Facile ■ Couette ■ Délicats ■ ■ ■ Laine Rafraîchir ■ ■ Minuterie Court 1) Conjointement au programme, vous pouvez régler 1 ou plusieurs options. -
Page 29: Réglage Du Degré D'humidité Résiduelle Dans Le Linge
FRANÇAIS 7.3 Réglage du degré Activation de l'option Sécurité d'humidité résiduelle dans le enfants : linge 1. Appuyez sur la touche Marche/Arrêt Pour modifier le degré d'humidité pour allumer l'appareil. résiduelle dans le linge par défaut : 2. Attendez environ 8 secondes. 3. -
Page 30: Démarrage Du Programme Avec Départ Différé
• Un signal sonore intermittent retentit. Le temps de séchage qui s'affiche s'applique à une • Le voyant clignote. charge de 5 kg pour les • Le voyant clignote. programmes coton et jeans. • Le voyant Départ/Pause est allumé. -
Page 31: Entretien Et Nettoyage
FRANÇAIS • Si un article dispose d'une doublure • Utilisez un programme adapté pour en coton, retournez-le. Assurez-vous les lainages et la bonneterie pour que la doublure en coton est toujours éviter qu'ils ne rétrécissent. tournée vers l'extérieur. • Assurez-vous que la charge de linge •... -
Page 32: Vidange Du Bac D'eau De Condensation
5. 1) 1) si nécessaire, nettoyez le filtre à l'eau chaude. 11.2 Vidange du bac d'eau de condensation Vous pouvez utiliser l'eau du bac d'eau de condensation comme eau distillée (par exemple pour les fers à vapeur). Avant d'utiliser l'eau, éliminez les résidus... -
Page 33: Nettoyage Du Tambour
FRANÇAIS 11.4 Nettoyage du tambour Nettoyez-les à l'aide d'un chiffon humide. Séchez les surfaces nettoyées avec un AVERTISSEMENT! chiffon doux. Débranchez l'appareil avant ATTENTION! de le nettoyer. Ne nettoyez pas l'appareil à l'aide de produits de Utilisez un détergent savonneux neutre nettoyage pour meubles ou standard pour nettoyer la surface interne autres pouvant entraîner une... -
Page 34: En Cas D'anomalie De Fonctionnement
12. EN CAS D'ANOMALIE DE FONCTIONNEMENT Problème Solution possible L'appareil ne s'allume pas. Assurez-vous que la fiche du câble d'ali‐ mentation est bien insérée dans la prise de courant. Vérifiez le fusible dans la boîte à fusibles (installation domestique). -
Page 35: Caractéristiques Techniques
FRANÇAIS • Mauvais réglage du capteur de • Les fentes de circulation d'air sont conductivité. obstruées. 13. CARACTÉRISTIQUES TECHNIQUES Hauteur x Largeur x Profondeur 850 x 600 x 600 mm (maximum 640 mm) Profondeur max. avec le hublot de l'ap‐ 1090 mm pareil ouvert Largeur max. -
Page 36: Données De Consommation
13.1 Données de consommation Consom‐ Vitesse d'essorage / humidité Temps de mation Programme résiduelle séchage énergé‐ tique Coton 8 kg Prêt à Ranger 1400 tours/min / 50% 118 min. 4,20 kWh 1000 tours/min / 60% 134 min. 4,79 kWh Prêt à... - Page 37 FRANÇAIS...
- Page 38 www.electrolux.com...
- Page 39 FRANÇAIS...
- Page 40 www.electrolux.com/shop...