JVC RC-ST3SL Mode D'emploi
Table des Matières
Les langues disponibles
Les langues disponibles
Chapitres
Table des Matières
Dépannage

Manuels Connexes pour JVC RC-ST3SL


Sommaire des Matières pour JVC RC-ST3SL
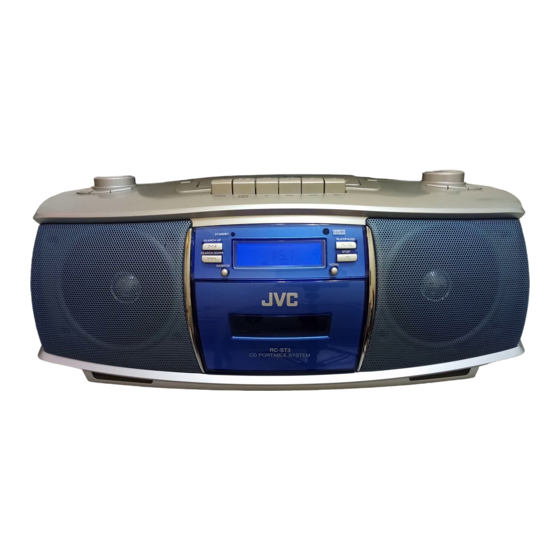
- Page 1 CD PORTABLE SYSTEM CHAINE CD PORTABLE RC-ST3SL TUNER TAPE PRESET/ REPEAT PROGRAM INTRO FM MODE RANDOM STANDBY REMOTE SENSOR SEARCH UP PLAY/PAUSE SEARCH DOWN STOP RANDOM INTRO RC-ST3 CD PORTABLE SYSTEM INSTRUCTIONS MODE D’EMPLOI 601-610000-020 LVT1000-003A...
- Page 22 TABLE DES MATIÈRES PRÉCAUTIONS POUR LA MANIPULATION ..1 AJUSTEMENT DU SON ........... 7 ALIMENTATION ............2 LECTURE DE DISQUES COMPACTS ....8 NOMENCLATURE ET COMMANDES ....3 RÉCEPTION DE LA RADIO ........12 TÉLÉCOMMANDE ........... 4 OPERATIONS SUR LES CASSETTES ....14 MISE SOUS ET HORS TENSION DE ENTRETIEN .............
-
Page 23: Alimentation
éviter Attention toute défaillance. • Utilisez uniquement le cordon secteur JVC fourni avec • Pour éviter toute mise sous tension accidentelle, retirez cet appareil pour éviter tout mauvais fonctionnement les piles quand vous transportez l’appareil en le portant ou dommage de l’appareil. -
Page 24: Nomenclature Et Commandes
NOMENCLATURE ET COMMANDES Panneau supérieur 6 7 8 101112 1 Commande JOG VOLUME 9 Touche d’opération de cassette Touche 8 PAUSE 2 Logement disque Touche § STOP/EJECT (arrêt/éjection) 3 0 PUSH (appuyer) Touche 1 FF (avance rapide) 4 Touche PROGRAM (programmation) Touche ¡... -
Page 25: Télécommande
Panneau arrière PHONES RESET AC IN~ 22 Bouton RESET (réinitialisation) 25 Logement piles 26 Prise AC IN Ó (alimentation) 23 Antenne télescopique FM 24 Prise PHONES (écouteurs) TÉLÉCOMMANDE 1 Touche 2 Touche TUNER (syntoniseur) 3 Touches 4 et ¢ 4 Touche PRESET/REPEAT (préréglage/ TUNER TAPE répétition) - Page 26 Insertion des piles Remarques sur l’emploi de la télécommande 1 Retirez le couvercle du logement piles. • Pointez l’avant de la télécommande vers la section REMOTE SENSOR aussi directement que possible. La distance de fonctionnement à partir de l’appareil diminue si la télécommande n’est pas pointée directement.
-
Page 27: Mise Sous Et Hors Tension De L'appareil
MISE SOUS ET HORS TENSION DE L’APPAREIL STANDBY/ON TUNER TAPE PRESET/ REPEAT PROGRAM INTRO FM MODE RANDOM Pour mettre sous tension Mise hors tension Appuyez sur STANDBY/ON sur la Appuyez à nouveau sur STANDBY/ON télécommande). sur la télécommande). Le témoin STANDBY s’éteint. L’appareil est prêt à lire Le témoin STANDBY s’allume en rouge et l’appareil la source sélectionnée à... -
Page 28: Ajustement Du Son
AJUSTEMENT DU SON JOG VOLUME PHONES VOL / TUNER TAPE PRESET/ PROGRAM INTRO REPEAT FM MODE RANDOM PRESET EQ HYPER-BASS SOUND Ajustement du volume Changement du réglage EQ (égaliseur) Pour augmenter le volume Cet appareil a plusieurs préglérages EQ (égaliseur), ce qui vous permet de choisir celui correspondant le mieux Tournez JOG VOLUME dans le sens horaire (ou appuyez sur VOL 5 sur la télécommande). -
Page 29: Lecture De Disques Compacts
LECTURE DE DISQUES COMPACTS Disques lisibles Remarques sur la manipulation des disques Cet appareil peut lire des CD audio de 8 cm et 12 cm portant la marque suivante. Les précautions suivantes doivent être prises pour maintenir les disques en bon état, parce que des disques sales, endommagés ou voilés pourraient entraîner une détérioration du son et endommager l’appareil. - Page 30 Opérations de base 7 STOP ¢ CD 6 4 ¢ TUNER TAPE PRESET/ REPEAT PROGRAM INTRO FM MODE RANDOM STANDBY REMOTE SENSOR SEARCH UP PLAY/PAUSE SEARCH DOWN STOP RANDOM INTRO RC-ST3 CD PORTABLE SYSTEM 1 Appuyez sur 0 PUSH pour ouvrir le Pour faire une pause de lecture couvercle du logement disque.
- Page 31 Opérations de lecture diverses PRESET/ PRESET/ RANDOM INTRO REPEAT REPEAT RANDOM INTRO TUNER TAPE PRESET/ PROGRAM INTRO REPEAT FM MODE RANDOM STANDBY REMOTE SENSOR SEARCH UP PLAY/PAUSE SEARCH DOWN STOP RANDOM INTRO RC-ST3 CD PORTABLE SYSTEM Lecture répétée Lecture des introductions Vous pouvez lire successivement la partie introduction Appuyez sur PRESET/REPEAT avant ou (10 secondes) de chaque plage.
- Page 32 Lecture programmée Vous pouvez programmer jusqu’à 16 plages pour les lire dans l’ordre de votre choix. 7 STOP TUNER TAPE PRESET/ REPEAT PROGRAM INTRO FM MODE RANDOM STANDBY REMOTE SENSOR SEARCH UP PLAY/PAUSE SEARCH DOWN STOP RANDOM INTRO RC-ST3 CD PORTABLE SYSTEM 1 Appuyez sur PROGRAM en mode d’arrêt Pour contrôler l’ordre des plages du programme...
-
Page 33: Réception De La Radio
RÉCEPTION DE LA RADIO Accord d’une station FM MODE/ BEAT CUT RESET FM MODE TUNER TAPE PRESET/ REPEAT PROGRAM INTRO FM MODE RANDOM 1 Appuyez sur TUNER pour régler au mode Changement du mode de réception FM syntoniseur. Quand la réception des émissions FM stéréo est difficile ou parasitée, elle peut être améliorée en passant au mode 2 Appuyez sur TUNER pour sélectionner la de réception monaural. - Page 34 Préréglage de stations Vous pouvez prérégler 20 stations FM et 12 stations AM. TUNER TAPE PRESET/ REPEAT PROGRAM INTRO FM MODE RANDOM 1 Appuyez sur TUNER pour sélectionner la 5 Appuyez sur PROGRAM. bande, FM ou AM. La station à numéro préréglé sera mémorisée. 2 Accordez la station à...
-
Page 35: Operations Sur Les Cassettes
OPERATIONS SUR LES CASSETTES Lecture d’une cassette 2 1 FF ¡ REW STANDBY REMOTE SENSOR SEARCH UP PLAY/PAUSE SEARCH DOWN STOP RANDOM INTRO RC-ST3 CD PORTABLE SYSTEM 1 Appuyez sur TAPE pour régler au mode Pour arrêter la lecture cassette. Appuyez sur §... - Page 36 Enregistrement sur une cassette FM MODE/ 4/¢ PAUSE BEAT CUT STANDBY REMOTE SENSOR SEARCH UP PLAY/PAUSE SEARCH DOWN STOP RANDOM INTRO RC-ST3 CD PORTABLE SYSTEM Pour démarrer l’enregistrement à un Les marques suivantes sont utilisées pour faire la moment précis distinction entre les deux sources d’enregistrement dans la procédure ci-dessous.
-
Page 37: Entretien
ENTRETIEN Nettoyage du coffret Nettoyage de la lentille de lecture de Essuyez avec un chiffon doux et sec. N’utilisez jamais de benzène ou de diluant, ils pourraient abîmer la finition. Si la lentille de lecture de CD est sale, nettoyez-la pour éviter toute détérioration du son. -
Page 38: Dépannage
DÉPANNAGE La touche ¶ REC ne fonctionne pas. Ce qui semble être un problème n’est pas toujours grave. = Avez-vous chargé une cassette? Consultez les points ci-dessous pour vérifier si votre = Les ergots anti-effacement de la cassette sont-ils problème peut être résolu par une opération simple. brisés? L’appareil ne peut pas être mis sous tension. -
Page 39: Spécifications
SPÉCIFICATIONS Lecteur de disque compact Généralités : 10 cm × 2 Système de détection Enceintes du signal : Lecture optique sans contact Puissance de sortie : 2 W par canal, RMS min. à 8 Ω de 400 Hz à 10 kHz avec (laser semi-conducteur) Nombre de canaux : 2 canaux (stéréo) - Page 40 EN, FR 0203NYMBICMTS © 2003 VICTOR COMPANY OF JAPAN, LIMITED...