
Manuels Connexes pour Monacor SR-138X


Sommaire des Matières pour Monacor SR-138X
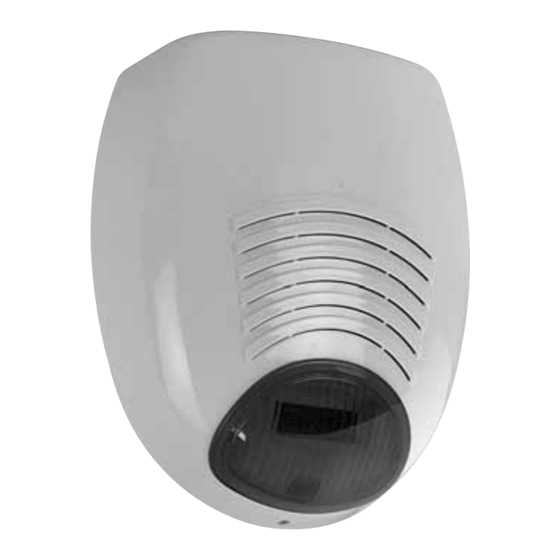
- Page 1 ALARMEINHEIT ALARM UNIT SR-138X Best.-Nr. 04.3200 INSTALLATIONSANLEITUNG INSTALLATION INSTRUCTIONS NOTICE D’INSTALLATION ISTRUZIONI PER L’INSTALLAZIONE...
- Page 2 1 2 3 4 5 6 7 8 9 Œ Alarm, wenn Betriebsspannung anliegt GB Alarm if operating voltage is applied Alarme si une tension de fonctionnement est appliquée Allarme se è presente la tensione dʼesercizio Alarmeingänge auf negative Polarität eingestellt: Alarm, wenn 0 V (Masse) anliegt GB Alarm inputs set to negative polarity: Alarm if 0 V (ground) is applied...
- Page 3 Vor der Installation … Prior to the installation … Bitte lesen Sie diese Anleitung vor der Instal- Please read these instructions carefully prior lation gründlich durch. Nur so lernen Sie alle to the installation. Thus, you will get to know Funk tions- und Anschlussmöglichkeiten ken- all functional and connecting facilities, errors nen, ver meiden Fehler und schützen sich...
- Page 4 1 Übersicht der Bauteile auf der Platine 2 Hinweise für den sicheren Gebrauch (→ Abb. 1, Seite 2) Das Gerät entspricht allen erforderlichen Richt linien der EU und ist deshalb mit ge kennzeichnet. 1 – 9 Brücken zum Durchführen der Einstellungen WARNUNG Die Blitzlampe (17) arbeitet mit Hoch- Kurzübersicht der Grundfunktionen spannung.
-
Page 5: Montage
4 Montage 5.2 Betriebsmodus 2 Betrieb ohne Akku, Alarmauslösung über die zwei Um Zugriffe auf die Alarm einheit zu verhindern, sollte Alarmeingänge S und F sie in einer schwer erreichbaren Höhe (min. 3 m über dem Boden) montiert werden. Die Einstellungen für diesen Betriebsmodus sind: Steckbrücke (1) aufgesetzt 1) Erst die Schraube am Kunststoff-Gehäusedeckel Drahtbrücke (9) geschlossen... - Page 6 6 Blockierfunktion/LED-Anzeigen 7 Einstellung der Alarmeingänge Die Blockierfunktion verhindert eine unerwünschte Alarmauslösung bei der ersten Inbetriebnahme oder 7.1 Polarität der Alarmeingänge nach einer Einstellungsänderung. Mit den Steckbrücken (2) und (3) lässt sich für die Alar- A Im Betriebsmodus 1 (Kapitel 5.1) ist die Blockier- m eingänge S (15) und F (14) ge trennt einstel len, ob funktion aktiv, wenn die Betriebsspannung zum eine Aktivierung bei einem Wechsel der Steu er -...
-
Page 7: Technische Daten
7.2.3 Zusatzfunktion 3: Statusanzeige über LEDs 1) Um den Toneinstellmodus zu aktivieren, die Steck - brü cke (8) entfernen. Ist diese Funktion aktiv, leuchten die LEDs (18) per- manent, wenn der Eingang F ak tiviert ist. 2) Die entsprechenden Steckbrücken (1) bis (7) je Diese Funktion kann genutzt werden, um den Sta - nach gewünschter Einstellung entweder entfernen tus der Alarmanlage op tisch anzuzeigen: Der Eingang... -
Page 8: Safety Notes
1 Operating Elements on the PCB 2 Safety Notes (→ fig. 1, page 2) The unit corresponds to all required directives of the EU and is therefore marked with 1 – 9 PCB links for making the settings WARNING Short overview of the basic functions The flashtube (17) uses high voltage. - Page 9 4 Mounting 5.2 Operating mode 2 operation without rechargeable battery, To prevent access to the alarm unit, mount it at a height alarm trigger ed via the two alarm inputs S and F that is hard to reach (minimum height 3 m above the ground).
- Page 10 6 Blocking Function/LED Indications 7 Adjustment of the Alarm Inputs The blocking function will prevent undesired alarm trig- gering in case of initial operation or change of the set- 7.1 Polarity of the alarm inputs tings. The jumpers (2) and (3) allow to separately adjust for A In the operating mode 1 (chapter 5.1), the blocking the alarm inputs S (15) and F (14) whether they will be function will be activated when the operating volt -...
- Page 11 Note: As the alarm tone selected is only audible when an alarm is triggered, it is recommended to make the tone adjustment prior to installation when the siren All rights reserved by MONACOR ® INTERNATIONAL should be connected to the terminals SPEAKER (10) GmbH &...
-
Page 12: Conseils Dʼutilisation Et De Sécurité
1 Composants sur la platine 2 Conseils dʼutilisation et de sécurité (voir schéma 1, page 2) Lʼappareil répond à toutes les directives nécessaires de lʼUnion européenne et porte donc le symbole 1 – 9 Cavaliers pour effectuer les réglages AVERTISSEMENT La lampe à éclairs (17) fonc- Présentation des fonctions de base tionne avec une tension élévée. -
Page 13: Branchement/Sélection Du Mode De Fonctionnement
4 Montage 5.2 Mode de fonctionnement 2 fonctionnement sans accumulateur, déclenchement Pour éviter tout accès à lʼunité dʼalarme, il convient de d’alarme via les deux entrées d’alarme S et F lʼinstaller à une hauteur difficilement atteignable (3 m minimum au-dessus du sol). Les réglages pour ce mode de fonctionnement sont : 1) Tout dʼabord, retirez la vis sur le couvercle plastique cavalier (1) placé... -
Page 14: Fonction Blocage/Affichage Par Leds
6 Fonction blocage/affichage par LEDs 7 Réglage des entrées dʼalarme La fonction blocage empêche tout déclenchement dʼalarme non souhaité lors de la première mise en ser- 7.1 Polarité des entrées dʼalarme vice ou après une modification de réglage. Avec les cavaliers (2) et (3), on peut régler séparé- A En mode de fonctionnement 1 (chapitre 5.1), la ment, pour les entrées dʼalarme S (15) et F (14) sʼils fonction de blocage est active si la tension de fonc-... -
Page 15: Fonction Supplémentaire 3 : Affichage D'état Via Les Leds
Notice dʼutilisation protégée par le copyright de son avant le montage : la sirène doit être reliée via une MONACOR ® INTERNATIONAL GmbH & Co. KG. résistance (10 kΩ environ) aux bornes SPEAKER (10) Toute reproduction même partielle à... -
Page 16: Avvertenze Di Sicurezza
1 Panoramica dei componenti sulla 2 Avvertenze di sicurezza scheda (→ fig. 1, pagina 2) Questʼapparecchio è conforme a tutte le direttive richieste dellʼUE e pertanto porta la sigla 1 – 9 Ponticelli per eseguire le impostazioni AVVERTIMENTO Il lampeggiatore (17) funziona con Descrizione breve delle funzioni di base alta tensione. - Page 17 4 Montaggio 5.2 Modo di funzionamento 2 Funzionamento senza batteria, allarme tramite i due Per escludere lʼaccesso allʼunità dʼallarme, essa ingressi d’allarme S e F dovrebbe essere montata in unʼaltezza difficilmente raggiungibile (min. 3 m dal terreno). Le impostazioni per questo modo sono: Jumper (1) messo 1) Per prima cosa togliere la vite sul coperchio di pla- Ponte a filo (9) chiuso...
- Page 18 6 Funzione di blocco/Indicazioni con LED 7 Impostazione degli ingressi dʼallarme La funzione di blocco impedisce che lʼallarme scatti accidentalmente in occasione della prima messa in 7.1 Polarità degli ingressi dʼallarme funzione o dopo una modifica delle impostazioni. Con i jumper (2) e (3) è possibile determinare sepa- A Nel modo di funzionamento 1 (Capitolo 5.1), la ratamente per gli ingressi dʼallarme S (15) e F (14) se funzione di blocco è...
-
Page 19: Dati Tecnici
Con riserva di modifiche tecniche. Un consiglio: Dato che il suono scelto dellʼallarme si sente solo se scatta un allarme, è consigliabile ese- La MONACOR ® INTERNATIONAL GmbH & Co. KG guire lʼimpostazione dei suoni prima del montaggio, si riserva ogni diritto di elaborazione in qualsiasi collegando la sirena –... - Page 20 ® MONACOR INTERNATIONAL GmbH & Co. KG • Zum Falsch 36 • 28307 Bremen • Germany Copyright © by MONACOR INTERNATIONAL. All rights reserved. A-0776.99.03.01.2012...