Table des Matières

Manuels Connexes pour Unold 86880


Sommaire des Matières pour Unold 86880
- Page 1 STANDVENTILATOR Bedienungsanleitung Instructions for use Notice d´utilisation Gebruiksaanwijzing Istruzioni per l’uso Instrucciones de uso Návod k obsluze Modell 86880/86885/86886...
- Page 2 Impressum: Bedienungsanleitung Modell 86880/86885/86886 Stand: Jan 2015 /nr Copyright © Mannheimer Straße 4 68766 Hockenheim Telefon +49 (0) 62 05/94 18-0 Telefax +49 (0) 62 05/94 18-12 E-Mail info@unold.de Internet www.unold.de 86880/86885/86886_06...
-
Page 4: Table Des Matières
Reinigen und Pflegen ......................13 Garantiebestimmungen ......................13 Entsorgung / Umweltschutz ....................13 Informationen für den Fachhandel ..................13 Service-Adressen .........................14 Instructions for use Model 86880/86885/86886 Technical Specifications .......................15 Explanation of the symbols ....................15 For your safety ........................15 Assembly ..........................18 Remote control unit ......................19 Operation ..........................20... - Page 5 INHALTSVERZEICHNIS Istruzioni per l’uso Modello 86880/86885/86886 Dati tecnici ........................39 Significato dei simboli ......................39 Per la vostra sicurezza ......................39 Montaggio ...........................42 Telecomando ........................43 Uso ............................44 Pulizia e cura ........................46 Norme die garanzia ......................46 Smaltimento / Tutela dell’ambiente ..................46 Service ..........................14 Manual de instrucciones Modelo 86880/86885/86886 Datos técnicos ........................47...
-
Page 6: Bedienungsanleitung Modell 86880/86885/86886 Technische Daten
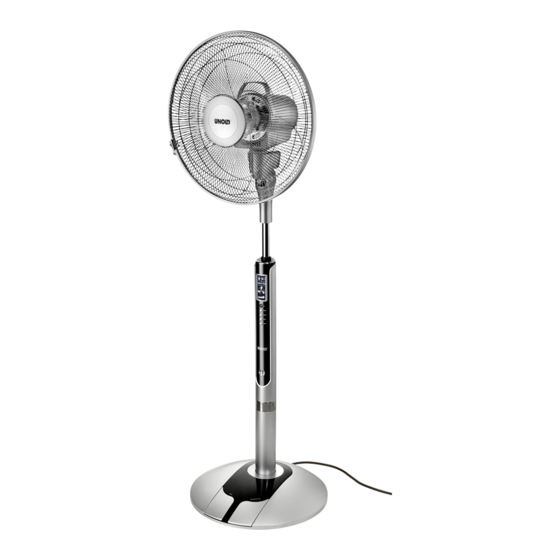
Luftdurchsatz: > 3480 m Kabellänge: Ca. 180 cm Farbe: 86880 weiß, 86885 schwarz, 86886 silber Ausstattung: 3 Oszillation-Varianten (horizontal, vertikal, 3D), Fuß- schalter am Sockel Zeitvorwahl (0,5 bis 7,5 Stunden), Fernbedienung, Halterung für Fernbedienung am Ge- rät, Display am Gerät, 3 Geschwindigkeitsstufen Zubehör:... - Page 7 Sicherheitshinweise zum Aufstel- tigen Beherbergungsbetrie- len und Betrieb des Gerätes ben, 4. Schalten Sie das Gerät nur Privatpensionen oder ein, wenn es ordnungsgemäß Ferienhäusern. montiert wurde. 12. Achten Sie darauf, dass die 5. Achten Sie auf ausreichend Zuleitung so verlegt wird, Platz am Standort des Gerä- dass ein Stolpern über die tes.
- Page 8 19. Vermeiden Sie starke Son- 23. Wenn die Zuleitung beschä- neneinstrahlung digt ist, darf diese ausschließ- Gerät. lich durch den Hersteller 20. Es dürfen niemals Gegen- bzw. dessen Kundenservice stände wie Finger, Nadeln, oder einer anderen, entspre- Stifte etc. durch das Korbgit- chend fachlich qualifizierten ter in das Innere des Gerätes Person ausgetauscht werden,...
-
Page 9: Montieren
MONTIEREN Feststellmutter Hintere Korbabdeckung Mutter Sockel Flügelrad Zuleitung Befestigungsring Fußschalter mit Standrohr Vordere Korbabdeckung Schraube Motorgehäuse mit Bedienelement Achse Stellen sie vor der Montage sicher, Ziehen Sie die Zuleitung (3) durch dass Sie das Gerät auf einem ebe- den Sockel (2). Achten Sie dar- nen, trockenen Untergrund mon- auf, dass das Ende der Zuleitung, tieren. -
Page 10: Fernbedienung
Setzen Sie das Standrohr (4) ein. Flügelrad mit dem Befesti- passgenau auf den Sockel (2). gungsring (11) fixieren. Achten Sie darauf, dass der Fuß- 10. Verbinden Sie die vordere Korb- schalter des Sockels genau in die abdeckung mit der hinteren Korb- dafür vorgesehene Aussparung im abdeckung. -
Page 11: Bedienen
BEDIENEN Vergewissern Sie sich, dass das Sie die Taste „Modus“ so oft hin- Gerät auf einem geeigneten, ebe- tereinander, bis die gewünschte nen Untergrund steht und sicher Einstellung im Display angezeigt und stabil aufgestellt wurde. wird. Stecken Sie den Stecker in eine Normaler Modus Steckdose. - Page 12 Funktion nutzen, müssen Sie Zeitwahl- und Schlaf-Modus kön- diese einschalten, indem Sie die nen nicht gespeichert werden. Sicherheitsfunktion Taste „ANION“ drücken. Die nun erzeugten Negativ-Ionen reinigen 11. Achtung: Sobald der Korb des die Raumluft, Staubteilchen wer- Gerätes berührt wird, schaltet sich den bekämpft.
-
Page 13: Reinigen Und Pflegen
Sammelstelle. INFORMATIONEN FÜR DEN FACHHANDEL Hiermit erklärt die UNOLD A G, dass sich der Ventilator 86880/86885/86886 in Übereinstimmung mit den grundlegenden A nforderungen der europäischen Richtlinie für elektromagnetische UNOLD A G, Mannheimer Straße 4, 68766 Hockenheim... -
Page 14: Service-Adressen
TSCHECHIEN „Quadra-net“ Sp. z o.o. befree.cz s.r.o. Skadowa 5 Škroupova 150 61-888 Poznan Skadowa 5 537 01 Chrudim Internet www.quadra-net.pl Telefon +42 0 46 46 01 881 E-Mail obchod@befree.cz Diese Anleitung kann im Internet unter www.unold.de als pdf-Datei heruntergeladen werden. -
Page 15: Instructions For Use Model 86880/86885/86886 Technical Specifications
> 3480 m Cable length: Approx. 180 cm Color: 86880 white, 86885 black, 86886 silver Features: 3 oscillation variants (horizontal, vertical, 3D), footswitch on the base, time preselect (0.5 to 7.5 hours), remote control unit, holder for the remote control unit on the appliance, display on... - Page 16 ance is located. A minimum plug from the electrical out- distance of 50 cm must be let by grasping the plug, maintained between never pull the power cord to appliance and other objects. unplug the appliance. 6. Do not use the appliance 15.
- Page 17 23. If the supply cord is dama- 25. Pull the mains plug out of ged, it must be replaced by the socket after use, as well the manuafacture, its service as before cleaning. Never leave the appliance unat- agent or similarly qualified persons to avoid a hazard.
-
Page 18: Assembly
ASSEMBLY Fixing nut Rear basket cover Base Impeller Power cord Fastening ring Foot switch with stand tube Front basket cover Screw Motor housing with operating element Axle Before assembling, ensure that Pull the power cord (3) through you are assembling the appliance the base (2). -
Page 19: Remote Control Unit
Precisely fit the stand tube (4) the impeller in place with the fas- onto the base (2). Ensure that tening ring (11). the foot switch on the base fits 10. Connect the front basket cover to precisely into the aperture on the the rear basket cover. -
Page 20: Operation
OPERATION Ensure that the appliance is Standard mode standing on a suitable, level Symbol substrate, and has been set up so that it is safe and stable. Near Natural mode Plug the power cord into an Symbol electrical outlet. Press the „On/Speed“ button (foot button on the base, or via The appliance works with alter- the remote control unit). - Page 21 now generated, clean the room Safety function air, dust particles are reduced. 11. Caution: When the basket of the To switch off the function, press appliance is touched, the appli- the „ANION“ button again. This ance will switch off immediately setting can only be made directly for safety reasons.
-
Page 22: Cleaning And Care
Do not dispose of used batteries as household waste. Dispose of this product via your appliance dealer or take it to the municipal collection point. The instruction booklet is also available for download: www.unold.de... -
Page 23: Notice D´utilisation Modèle 86880/86885/86886 Spécification Technique
Env. 8,2 kg Débit d‘air : > 3 480 m Couleur : 86880 blanc, 86885 noir, 86886 argent Équipement : 3 variantes d‘oscillation (horizontale, verticale, 3D), interrupteur à pédale sur le socle, pré-sélection de durée (0,5 à 7,5 heures), télécommande, support pour télécommande sur l‘appareil, écran sur l‘appareil, 3 niveaux de vitesse... - Page 24 Remarques de sécurité relatives à dans des pensions privées ou l‘installation et au fonctionnement des résidences de vacances. de l‘appareil 12. Veiller à ce que le cordon 4. Allumer l‘appareil d‘alimentation ne puisse pas uniquement s‘il a été monté être source de trébuchement. correctement.
- Page 25 21. Attention à ne pas coincer de service ou toute autre des cheveux longs dans personne professionnel l‘hélice. qualifié afin d‘éviter 22. Vérifiez régulièrement danger. l’usure et la détérioration 24. L’appareil ne doit pas être de l’appareil, de la prise et utilisé...
-
Page 26: Montage
MONTAGE Écrou de fixation Capot de cage arrière Écrou Socle Hélice Câble d’alimentation Anneau de fixation Interrupteur à pédale avec Capot de cage avant tube Carter moteur avec élément de commande Avant le montage, s‘assurer que Vérifier toutes pièces l‘appareil sera installé sur un nécessaires sont présentes. -
Page 27: Télécommande
d‘alimentation. Attention l‘hélice avec l‘anneau de fixation appuyer sur le cordon pour le (11). coincer dans cet évidement afin 10. Relier le capot de cage avant avec que l‘appareil soit stable. le capot de cage arrière. Vérifier Installer le tube (4) précisément si l‘anneau noir est dans la bonne sur le socle (2). -
Page 28: Utilisation
UTILISATION S‘assurer que l‘appareil est placé « Mode » plusieurs fois successi- sur une surface plate et approp- vement jusqu‘à ce que le réglage riée, et qu‘il est parfaitement sta- souhaité s‘affiche à l‘écran. ble et immobile. Mode normal Brancher la prise sur le secteur. Le symbole Appuyer sur la touche «... - Page 29 che « ANION ». Les ions néga- Fonction de sécurité tifs désormais générés purifient 11. Attention : dès que quelqu‘un l‘air ambiant et les particules de / quelque chose touche la cage, poussière sont éliminées. Afin l‘appareil s‘arrête immédiatement de désactiver la fonction, pres- pour des raisons de sécurité.
-
Page 30: Nettoyage Et Entretien
NETTOYAGE ET ENTRETIEN Éteindre l‘appareil en appu- de détergent chaud ou de désin- yant sur la touche « OFF » et fectant. débrancher la prise. Attention : ne jamais plonger Essuyer le tube et la grille du ven- l‘appareil dans l‘eau. Le moteur tilateur avec un chiffon légère- ou les éléments électriques de ment humidifié. -
Page 31: Gebruiksaanwijzing Model 86880/86885/86886 Technische Gegevens
Luchtstroom: > 3480 m Geluidsniveau: < 65 dB Kleur: 86880 wit, 86885 zwart, 86886 zilver Uitvoering: 3 oscillatie-varianten (horizontaal, verticaal, 3D) voetschakelaar aan de sokkel, timer (0,5 tot 7,5 uur), afstandsbediening, houder voor de afstandsbediening aan het apparaat, display aan... - Page 32 Veiligheidsinstructies voor voor gebruik door gasten opstellen en gebruik van het ap- van hotels, motels of andere paraat overnachtingsbedrijven, 4. Schakel het apparaat pas in, in particuliere pensions of als het volgens de voorschrif- vakantiehuisjes. ten gemonteerd werd. 12. Let op dat de aansluitkabel 5.
- Page 33 19. Stel het apparaat niet bloot hebben uitsluiting van de aan sterk zonlicht. garantie tot gevolg. 20. Er mogen nooit voorwerpen 23. Als de kabel is beschadigd, door het rooster heen in het moet deze alleen worden binnenste van de ventilator vervangen door de fabrikant worden gestoken, zoals vin- of zijn vertegenwoordiger of...
-
Page 34: Monteren
MONTEREN Vastzetmoer Achterste roosterafdekking Moer Sokkel Schoepenwiel Aansluitkabel Bevestigingsring Voetschakelaar met Voorste roosterafdekking standbuis Schroef Motorbehuizing met bedieningselement Controleer vóór de montage of Controleer alle benodigde de ondergrond voor het apparaat onderdelen compleet voorhanden effen en droog is. zijn. Verwijder alle verpakkingsmate- Trek de aansluitkabel (3) door de rialen en transportbeveiligingen. -
Page 35: Afstandsbediening
Aan de sokkel bevindt zich een Plaats het schoepenwiel (10) op kleine uitsparing voor de aanslu- de as (7) van de motorbehuizing. itkabel. Let erop dat u de aans- Het schoepenwiel bevestigen met luitkabel in deze uitsparing drukt, de bevestigingsring (11). zodat het apparaat stabiel kan 10. -
Page 36: Bedienen
BEDIENEN Controleer of het apparaat op een gewenste instelling in het display geschikte, effen ondergrond staat weergegeven wordt. en veilig en stabiel neergezet Normale modus werd. Symbool Steek de stekker in een stopcon- tact. Modus dicht bij de natuur Druk op de knop „ON/Speed“ Symbool (voetschakelaar aan de sokkel of m.b.v. - Page 37 nen-functie gebruik wilt maken, apparaat uit te schakelen. Trek moet u deze inschakelen door op de stekker uit het stopcontact, de knop „ANION“ te drukken. De wanneer u het apparaat niet meer negatieve ionen die nu gegenere- gebruikt. erd worden, reinigen de kamer- lucht en gaan stofdeeltjes tegen.
-
Page 38: Reiniging En Onderhoud
REINIGING EN ONDERHOUD Schakel het apparaat uit door pen, hete schoonmaakmiddelen op de knop „OFF“ te drukken of desinfecterende middelen. en trek dan de stekker uit het Veeg de standbuis en het rooster stopcontact. van de ventilator met een licht Denk eraan dat u het apparaat nooit vochtige doek af. -
Page 39: Istruzioni Per L'uso Modello 86880/86885/86886 Dati Tecnici
Peso: Circa 8,2 kg Portata d‘aria: > 3480 m Colore: 86880 bianco, 86885 nero, 86886 argento Dotazioni: 3 varianti di oscillazione (orizzontale, verticale, 3D), pedale della base, preselezione tempo (0,5 - 7,5 ore), telecomando, sostegno telecomando dell‘apparecchio, display dell‘apparecchio, 3 livelli di velocità... - Page 40 5. Fare attenzione 13. Per evitare danni al cavo, posto in cui l‘apparecchio non avvolgere mai il cavo è installato sia disponibile alimentazione attorno uno spazio sufficiente. Tra all‘apparecchio. l‘apparecchio e altri oggetti 14. Per evitare danni al cavo, deve essere mantenuta una staccare la spina di rete distanza di almeno 50 cm.
- Page 41 e il cavo di alimentazi- altra persona professionista one non presentino tracce qualificato al fine di evitare di usura o danni. Qualora situazioni pericolose. l‘apparecchio è danneggiato 24. Per evitare danni, inviare l‘apparecchio alla l‘apparecchio deve nostra assistenza clienti per essere utilizzato con acces- la verifica e la riparazione.
-
Page 42: Montaggio
MONTAGGIO Dado di arresto Ruota a pale Anello di fissaggio Base Copertura anteriore della Cavo di alimentazione griglia Pedale con colonna montante Vite Scocca del motore con elemento di comando Asse Copertura posteriore della griglia Dado Prima del montaggio accertarsi portata dei bambini –... -
Page 43: Telecomando
one a cui è fissata la spina di rete motore (6), fissando la copertura fuoriesca dal lato inferiore della con il dado (9). base. Posizionare la ruota a pale (10) Sulla base è presente una pic- sull‘asse (7) della scocca del cola feritoia per il cavo di ali- motore. -
Page 44: Uso
Assicurarsi l‘apparecchio Modo Normale sia posizionato su un sottofondo Il simbolo piano idoneo e che sia stato ins- tallato in maniera stabile e sicura. Modo Naturale Inserire la spina in una presa elet- Il simbolo trica. Premere il tasto „ON/Speed“ (pedale della base oppure tramite L‘apparecchio lavora a velocità... - Page 45 disattivare la funzione premere lampeggiano, il ventilatore non nuovamente il tasto „ANION“. gira più. Dopo qualche secondo Questa impostazione può essere l‘apparecchio si riaccende auto- eseguita soltanto direttamente maticamente. sull‘apparecchio e non tramite il Spegnimento telecomando. 12. Per spegnere l‘apparecchio pre- Temporizzazione mere il pedale „OFF“...
-
Page 46: Pulizia E Cura
PULIZIA E CURA Spegnere l‘apparecchio pre- d’acciaio, oggetti metallici, disin- mendo il tasto „OFF“ e staccare fettanti o detergenti caldi. la spina dalla presa elettrica. Strofinare la colonna montante e Prestare attenzione a non immer- la griglia del ventilatore con un gere l‘apparecchio in acqua. -
Page 47: Manual De Instrucciones Modelo 86880/86885/86886
Aprox. 8,2 kg Paso de aire: > 3480 m Color: 86880 blanco, 86885 negro, 86886 plata Equipamiento: 3 variantes de oscilación (horizontal, vertical, 3D), conmutador de pedal en la base, preselección de tiempo (de 0,5 a 7,5 horas), control remoto, soporte... - Page 48 lugar de emplazamiento del 13. No enrolle nunca el cable de aparato. Como mínimo debe alimentación alrededor del haber 50 cm entre el aparato aparato para evitar daños en y otros objetos. el mismo. 6. No utilice el aparato en 14.
- Page 49 21. Asegúrese de que el cabello 23. Si el cable está dañado, largo no pueda enredarse en debe ser sustituido por el la rueda de aletas. fabricante o su agente de 22. Controle periódicamente servicio o cualquier otro si el aparato, el enchufe y profesional cualificado con el cable de alimentación el fin de evitar situaciones...
-
Page 50: Montar
MONTAR Tuerca de bloqueo Rejilla trasera Tuerca Base Rueda de aletas Cable de alimentación Anillo de fijación Conmutador de pedal con Rejilla delantera tubo vertical Tornillo Carcasa del motor con elemento de mando Antes del montaje, asegúrese de Introduzca el cable de alimenta- montar el aparato sobre una base ción (3) a través de la base (2). -
Page 51: Control Remoto
hueco para que el aparato esté motor. Fije la rueda de aletas con colocado de forma estable. el anillo de fijación (11). Coloque el tubo vertical (4) con 10. Una la rejilla delantera con la precisión sobre la base (2). Preste rejilla trasera. -
Page 52: Manejo
MANEJO Asegúrese de que el aparato esté se indique el ajuste deseado en la sobre una base adecuada y plana pantalla. y de que se haya colocado de Modo normal forma segura y estable. el símbolo Inserte el enchufe en una toma de corriente. - Page 53 Función de seguridad Los iones negativos ahora gene- 11. Atención: En cuanto se toque la rados limpian al aire ambiente rejilla, el aparato se desconecta eliminando partículas de polvo. de inmediato por razones de segu- Para desconectar la función pulse ridad.
-
Page 54: Limpieza Y Cuidado
LIMPIEZA Y CUIDADO Desconecte el aparato pul- limpieza calientes ni desinfectan- sando la tecla „OFF“ y retire tes. el enchufe de la toma de cor- Limpie el tubo vertical y la rejilla riente. del ventilador con un paño ligera- Procure no sumergir nunca el apa- mente húmedo. -
Page 55: Návod K Obsluze Modelu 86880/86885/86886 Technické Údaje
NÁVOD K OBSLUZE MODELU 86880/86885/86886 TECHNICKÉ ÚDAJE Výkon: 65 W, 220–240 V~, 50 Hz Hmotnost: Cca 8,2 kg pouze pod dohledem. Osoby v domácnosti lovými nebo duševními scho- pnostmi nebo s nedostatkem zkušeností a/nebo nedostat- kem znalostí, pokud jsou pod dohledem nebo pokud ven. - Page 56 zásuvka byla snadno látek. rychle vytáhnout. podle typového štítku. nami nebo se systémem pro dálkové ovládání. a dbejte na mezní výkon do vody nebo do jiné kapa- daného kabelu. mokrých/sychravých nebo vlhkých prostorech – proudem! 19. Vyvarujte silného ných pracovištích, 21.
- Page 57 výrobcem nebo jeho servis- ním zástupcem nebo jiným kvalifikovaným odborníkem, zásuvky. Nikdy nenechávejte aby nedošlo k úrazu.
- Page 58 Zadní kryt ventilátoru Matice Podstavec Lopatkové kolo Šroub prvkem podstavcem (2). Dbejte na to, suchém podkladu. aby konec kabelu, na kterém je a transportní pojistky. Materiál spodní strany podstavce. Na podstavci se nachází malé vybrání pro kabel. Dbejte na to, udušení! Zkontrolujte, zda jsou všechny...
-
Page 59: Dálkové Ovládání
zadním krytem ventilátoru. Zkon- rání v podstavci. Trubka stojanu maticí (1). zašroubujete malý šroub. 11. Zkontrolujte, zda jsou všechny šroubem (5). kryt ventilátoru zajistíte maticí (9). DÁLKOVÉ OVLÁDÁNÍ vém ovládání jsou nou polaritu. Pro orientaci jsou poškození, vyvarujte se pádu dálkového ovládání... -
Page 60: Obsluha
OBSLUHA vhodném, rovném podkladu a byl Symbol pomocí dálkového ovládání). Nastavení úhlu sklonu Symbol Nastavení rychlosti Symbol se rozsvítí a pohybuje Oscilace vypnuta: Symbol Vodorovná oscilace: Symbol Svislá oscilace: Symbol zobrazuje na displeji. Nízká rychlost: 3D oscilace: Symbol Svítí všechny symboly oscilace. Iontová... - Page 61 11. Pozor: Jakmile dojde k doteku vypne. Všechna zobrazení na dis- Vypnutí „OFF“ na dálkovém ovládání. vlhkem.
-
Page 63: Dane Techniczne
DANE TECHNICZNE Moc: 65 W, 220-240 V~, 50 Hz Wydatek powietrza: > 3480 m tylko pod nadzorem. gospodarstwie domowym fizycznej, sensorycznej kolone w zakresie bezpieczn-... - Page 64 miejsca w miejscu ustawi- o niego. dmiotami zachowany musi bardzo zakurzonych pomies- stancji palnych. tabliczce znamionowej. programatorem czasowym lub systemem zdalnego ste- rowania. przewodu w wodzie lub w nym! gospodarstwie domowym mokrych / mokrych i zimnych lub w podobnych zastosowa- lub wilgotnych pomieszcze- niach, np.
- Page 65 lub jego przedstawiciela ser- wisu lub jakiejkolwiek innej osoby wykwalifikowanej lub uszkodzenia. Gdy usz- kodzony jest kabel lub inne akcesoriami innych produ- centów lub marek. i naprawy do naszego ser- gniazdka sieciowego.
- Page 66 Podstawa Wirnik Obudowa silnika z elementem opakowaniowy zabezpiecze- podstawy. plastykowe worki styro-...
-
Page 67: Pilot
otwór w podstawie. Rura moco- odpowiedni otwór. pasuje do odpowiednich otworów. i przymocowane. (11). PILOT Oznaczenia przy- cisków na pilocie oznaczeniami odpowiednie oznaczenia. tyle elementu typu AAA. uchwyt, w którym pilota zawsze w kierunku wen- tylatora. pilota. - Page 68 Tryb naturalny Symbol i jest ustawione w sposób pewny i stabilny. ego ruchu powietrza. pilocie). Tryb nocny Symbol Funkcja obracania/oscylacji w kierunku zgodnym z ruchem cania. wskazówek zegara. Przez pierwsze Symbol Oscylacja pozioma: Symbol Oscylacja pionowa: Symbol Odpowiednie aktualne ustawienie Oscylacja 3D: oscylacji.
- Page 69 pilota. Wybór czasu lub przycisk „OFF“ na pilo- ustawienie zostaje zapisane, a samym trybie. Tylko tryb wyboru...
-
Page 70: Warunki Gwarancji
dka. suchym i bezpiecznym miejscu, zabezpieczonym przed kurzem, lowej, przedmiotów metalowych, WARUNKI GWARANCJI... - Page 72 Aus dem Hause Aus dem Hause...