Keter MANOR 6x8DD Mode D'emploi
Masquer les pouces
Voir aussi pour MANOR 6x8DD:
- Mode d'emploi (44 pages) ,
- Consignes de montage (40 pages)
Publicité
Liens rapides
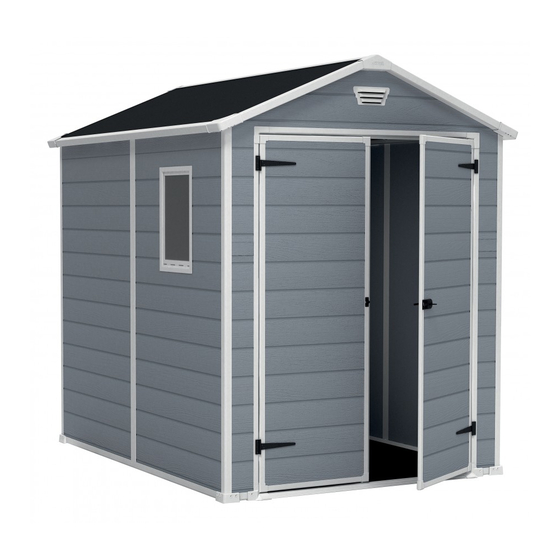
MANOR 6x8DD
USER MANUAL | MODE D'EMPLOI | MANUAL DEL USUARIO | GEBRAUCHSANLEITUNG |
GEBRUIKSHANDLEIDING | MANUALE PER L'UTENTE | MANUAL DO UTILIZADOR
WARRANTY ACTIVATION
US:
Tel: 1-(888)-374-4262, Fax: 317-575-4502
Canada: Tel: 1-(800)-661-6721
UK:
Tel: 0121-5060008, Fax: 0121-4220808
Spain:
Tlf: +34.949 27 74 21, Fax: +34.949 34 89 76
Other European Countries:
Tel: 31-1612-28301, Fax: 31-1612-28322
Thank you for your purchase of the Keter shed. In order to activate your warranty,
please log onto our website and fill in the form under warranty activation.
SKU: 17196659 | 17197129
WWW.KETER.COM
Publicité

Manuels Connexes pour Keter MANOR 6x8DD


Sommaire des Matières pour Keter MANOR 6x8DD
- Page 1 Tlf: +34.949 27 74 21, Fax: +34.949 34 89 76 Other European Countries: Tel: 31-1612-28301, Fax: 31-1612-28322 Thank you for your purchase of the Keter shed. In order to activate your warranty, WARRANTY ACTIVATION please log onto our website and fill in the form under warranty activation.
- Page 2 SITE PREPARATION | PRÉPARATION DU SITE | PREPARACIÓN DEL LUGAR | VORBEREITUNG DES AUFSTELLUNGSORTES BEFORE STARTING ASSEMBLY | AVANT DE COMMENCER LE MONTAGE | ANTES DE EMPEZAR EL ARMADO | VOR | VOORBEREIDING VAN HET TERREIN | PREPARAZIONE DEL LUOGO DI MONTAGGIO | PREPARAÇÃO DO LOCAL MONTAGEBEGINN | VOORDAT U BEGINT TE MONTEREN | PRIMA DI INIZIARE IL MONTAGGIO | ANTES DE INICIAR A MONTAGEM Level the ground surface | Égalisez la surface du sol | Nivele la superficie del suelo | Ebnen Sie die Bodenoberfläche | Read the care and safety guidelines at the end of this manual | Review all assembly instructions | Assemble all the parts...
- Page 3 DOOR PARTS | PIÈCES DE LA PORTE | TÜRELEMENTE | PARTES DE LA PUERTA | DEURONDERDELEN | PARTI SHED PARTS | PIÈCES DE L’ABRI | PARTES DEL COBERTIZO | TEILE DES SCHUPPENS | ONDERDELEN VAN DELLA PORTA | PEÇAS DAS PORTAS HET SCHUURTJE | COMPONENTI DEL DEPOSITO ATTREZZI | PEÇAS DO ABRIGO Remove all parts from the package(s) and spread them out on a clean work surface | Code letters are imprinted on each part for easy identification | Retirez toutes les pièces du/des paquet(s) et étalez-les sur une surface de travail propre | Des lettres sont...
- Page 4 FLOOR ASSEMBLY | MONTAGE DU SOL | ARMADO DEL PISO | MONTAGE DER BODENPLATTE | VLOERMONTAGE | SCREWS | VIS | TORNILLOS | SCHRAUBEN | SCHROEVEN | VITI | PARAFUSOS MONTAGGIO DEL PAVIMENTO | MONTAGEM DO PISO f1d(x1) • Please refer to the screw index below to find the actual screw size. •...
- Page 5 c1a (x1) c1g(x2) t (x4) dsl (x1) dsr (x1) 64.5"/164 cm 85.4"/ 217cm Front Avant Delante Vorderseite Voorkant Anteriore Frente c1d (x1) sc15 (X4) 5.5" / 14cm 0.63" / 16mm sc15 0.63"/16mm...
- Page 6 s26b (x16) 1"/26mm • Turn over the floor panel • Retournez le panneau du sol • Dé la vuelta al panel del suelo • Drehen Sie die Bodenplatte um • Draai het vloerpaneel om s26b • Capovolgi il pannello del pavimento •...
- Page 7 WALL ASSEMBLY | MONTAGE DU MUR | ARMADO DE PAREDES | MONTAGE DER WÄNDE | MONTAGE VAN DE MUREN | ASSEMBLAGGIO DELLE PARETI | MONTAGEM DA PAREDE w1c (x1) 39.8"x73.6" 101 x 187cm • Choose where do you want to locate the window •...
- Page 8 h1b (x1) s26b (x7) 65"/165cm 1"/26mm Outside Xtérieure • Fully fit the panel inside the profile Xterior • Fixez entièrement le panneau dans la Ussenseite découpe Buitenkant • Coloque completamente el panel Esterno dentro del perfil Exterior • Passen Sie das Panel genau und akkurat in das Profil ein •...
- Page 9 s1c (x1) c1b (x1) w1c (x1) s26b (x5) 39.8"x73.6" 73.2"/186cm 39.8"x73.6" 1"/26mm 101 x 187cm 101 x 187cm • Fully fit the panel inside the profile • Fixez entièrement le panneau dans la découpe • Coloque completamente el panel dentro del perfil •...
- Page 10 c1b (x1) sc15 (x2) s26b (x5) lm (x1) rm (x1) 73.2"/186cm 0.63"/16mm 1"/26mm sc15 Left Right Gauche Droit Izquierdo Derecho Verließ Richtig Links Rechts Sinistra Destra esquerdo Direito • Wall section must be aligned • La partie murale doit être alignée •...
- Page 11 ds2b* (x2) dfl (x1) dfr (x1) s10b * (x8) 70.5"/179cm 70.5"/179cm 0.39"/10mm 0.39"/10mm • Self-drilling screw • Vis auto-foreuse • Tornillo de auto-atornillado • Selbstbohrende schraube • Zelf tappende schroef • Vite autofilettante • Parafuso autorroscante • Use a powerful electric screwdriver. The screw should drill itself to a metal profile •...
- Page 12 ROOF ASSEMBLY | MONTAGE DU TOIT | ARMADO DEL TECHO | DACHMONTAGE | DAKMONTAGE | MONTAGGIO DEL TETTO | MONTAGEM DO TELHADO s26b (x18) s26b (x4) b1a (x1) 1"/26mm 1"/26mm 90.5"/230cm r1h(x1) E1e(x2) e1g(x4) rc (x4) s26b (x12) 76.7"x91.3" 85"/216cm 33"/84cm 1"/26mm 195 x 232cm...
- Page 13 s26b (x8) s26b (x24) 1"/26mm 1"/26mm • Fully fit the panel inside the profile • Fully fit the panel inside the profile • Fixez entièrement le panneau dans la • Fixez entièrement le panneau dans la découpe découpe • Coloque completamente el panel •...
- Page 14 Roof Support Assembly Montage du support de toit s23b * (x4) Pieza de Soporte del Tejado 0.98" / 25mm Montage der Dachstützung Montage Daksteun Assemblaggio del Supporto del Tetto Montagem do Suporte do Telhado • Rotate the Roof Support into the Proper Orientation •...
- Page 15 s26b (x16) dl1a(x1) dr1a (x1) dh (x 4) s13b (x16) 1"/26mm 0.39"/10mm s26b s13b dl1a dlr1 • Screwe on the mark line • Vissez sur la ligne dessinée • Atornillar en la línea de la marca • Auf der Markierungslinie festschrauben •...
- Page 16 THRESHOLD ASSEMBLY | MONTAGE DU SEUIL | MONTAJE DEL UMBRAL | EINSETZEN DER TURSCHWELLE | MONTAGE DREMPEL | ASSEMBLAGGIO DELL’USCIO | MONTAGEM DA ENTRADA s13b (x8) pvc (x1) dpt (x2) dp1 (x2) 0.47"/12 mm Left Door Porte Gauche Puerta Izquierda Linke Tür Linker Deur Porta Sinistra...
- Page 17 WINDOW ASSEMBLY | MONTAGE DE LA FENÊTRE | VENTANA DEL TECHO | FENSTERHMONTAGE | RAAMMONTAGE | MONTAGGIO DE LA FINESTRA | MONTAGEM DO JANELA acw (x1) f - out (x1) pls (x1) f - in (x1) sc15 (x7) 0.63" /16mm f - out (x1) sc15 f - in...
- Page 18 kc (x2) s26b (x4) OPTION | OPCIÓN | OPTIE | OPZION | OPÇÃOE 1"/26mm • It is highly recommended to secure the shed to an immovable object or to the ground by drilling holes in the floor at the pre-marked locations and inserting proper screws into the ground (size: 1.9’’-3’’...
- Page 19 • Tragen Sie eine Schutzbrille und befolgen Sie bei Verwendung von Elektrowerkzeugen immer die Anweisungen des Herstellers. • Tragen Sie eine Schutzbrille und befolgen Sie bei Verwendung von Elektrowerkzeugen immer die Anweisungen des Herstellers. CARE AND SAFETY GUIDELINES FETY GUIDELINES •...
- Page 20 Keter, a su discreción, reemplazará Al entregar el ticket o factura de compra y prueba del presunto fallo del producto, y sujeto a informar del fallo de manera puntual, Keter, a su discreción, reemplazará...
- Page 21 5120 AE Rijen, the Netherlands Tel: 1-(888)-374-4262 B32 - 3DB, United Kingdom de Henares - Guadalajara, Spain Tel: 31-1612-28301, Fax: 317-575-4502 Tel: 0121-5060008 Tlf. +34.949 27 74 21 Fax: 31-1612-28322 Canada: Tel: 1-(800)-661-6721 Fax: 0121-4220808 Fax +34.949 34 89 76 WWW.KETER.COM...