Table des Matières
Publicité
Les langues disponibles
Les langues disponibles
Liens rapides
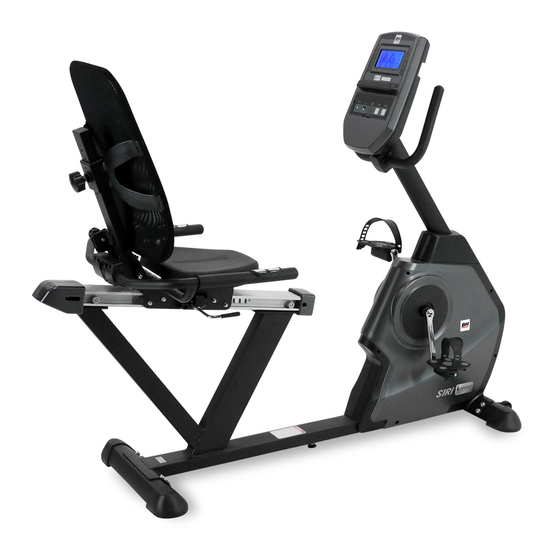
S1RiB
OWNER'S MANUAL
Important: Read all instructions carefully before using this product. Retain this owner's manual for future reference.
FOR SERVICE PLEASE CONTACT BH FITNESS
TOLL FREE: 866-325-2339
BH Fitness | 20155 Ellipse, Foothill Ranch, California 92610 | p.949.206.0330 | f.949.206.0013 | www.BHFitnessusa.com
S1RiB_Manual_Bilingual.indd 1
11/1/2016 10:59:02 AM
Publicité
Chapitres
Table des Matières

Manuels Connexes pour BH FITNESS S1RiB


Sommaire des Matières pour BH FITNESS S1RiB
- Page 1 Important: Read all instructions carefully before using this product. Retain this owner’s manual for future reference. FOR SERVICE PLEASE CONTACT BH FITNESS TOLL FREE: 866-325-2339 BH Fitness | 20155 Ellipse, Foothill Ranch, California 92610 | p.949.206.0330 | f.949.206.0013 | www.BHFitnessusa.com S1RiB_Manual_Bilingual.indd 1 11/1/2016 10:59:02 AM...
-
Page 2: Table Des Matières
Introduction Congratulations on your purchase of BH Fitness equipment. We hope you appreciate the style, quality, and value that exercisers around the world have come to expect from BH Fitness. If you have any questions, concerns or product issues please call our Customer Service Team at 1-866-325-2339 or email us at CustomerSupport@BHNorthAmerica.com. -
Page 3: Safety Information
Use of the machine offers various benefits; it can improve fitness, muscle tone and when are not recommended by BH Fitness. Read manual prior to use and follow all warnings and instructions. used in conjunction with a calorie controlled diet, it can help you lose weight. -
Page 4: Training Guidelines
OXYGEN UPTAKE TRAINING GUIDELINES The effort that you can exert over a prolonged period of time is limited by your ability to deliver oxygen to the working muscles. Regular vigorous exercise produces a training effect that can increase Exercise is one of the most important factors in the overall health of an individual. your aerobic capacity by as much as 20 to 30%. - Page 5 HEART RATE MUSCLE SORENESS As you exercise, your heart beat increases. This is often used as a measure of the required intensity of For the first week or so, muscle soreness may be the only indication you have that you are on an an exercise.
-
Page 6: Suggested Stretches
SUGGESTED STRETCHES SUGGESTED STRETCHES Head Rolls Inner Thigh Stretch Rotate your head to the right for one count while feeling the stretch Sit with the soles of your feet together with your knees pointing up the left side of your neck. Next, rotate your head back for one outward. -
Page 7: Assembly Instructions
ASSEMBLY INSTRUCTIONS AND STEP 1 WARNING LABELS 1) Securely fasten the Front Stabilizer (P-1) to the Main Frame (E) by using 4 Flat Washers (T-2), 4 Carriage Screws (T-1). 2) Securely fasten the Rear Stabilizer (Q-1) to the Main Frame (E) by using 4 Flat Washers (T-2), 4 Carriage Screws (T-1). - Page 8 STEP 2 STEP 3 1) Remove the pre-installed Cover for Handlebar Post (R-2) and slide it up Post (B-1). 1) Secure the Handlebar (C-1) to the bracket which is welded on the handlebar post by using the 2) Connect the Heart Rate Cable (upper) (B-3) to the Heart Rate Cable (lower) (E-11) Mounting Clamp (T-3), 2 Flat Washer (T-4), 2 Spring Washer (T-5) and 2 Screws (T-6).
- Page 9 STEP 5 STEP 4 1) Attach the Seat (R-1) to the Seat Slider (K-1) with 4 Screws (T-8) and 4 Flat Washers (T-7). 1) Tighten the Release Handle (K-23) to the Seat Slider (K-1) with the wrench provided. 2) Attach the Seat Handlebar (O-1) to rear mounting plate of Seat Slider using 2 Screws (T-9), 2 Flat Washers (T-7), and 2 Screws (T-10).
-
Page 10: Moving The Machine
STEP 6 STEP 7 1) Slide the Back Rest (N-1) down on to Back Rest Post (M-1). Make sure the knob that tightens the back 1) Connect Cable Connector (upper) (B-2) to rest is loosened. Pull out the knob to slide the back rest onto the Back Rest Post (M-1). Secure the back rest (A-3) Computer Cable and then connect Heart by seating the back rest adjustment knob into one of the pre-drilled settings and tighten the knob. -
Page 11: Exploded View Drawing
EXPLODED VIEW DRAWING EXPLODED VIEW DRAWING O- 1 S1RiB_Manual_Bilingual.indd 20-21 11/1/2016 10:59:07 AM... -
Page 12: Parts List
PARTS LIST CONTINUED To order replacement parts: provide your customer service representative with the product model number and the part number located on the Parts List below, along with the quantity you require. Description Description S1RiB-F-7 Bearing S1RiB-O-4 Screw Description... -
Page 13: Console Operations
Modes CONSOLE OPERATIONS 1. Power Mode – When initially plug in the machine it will beep and the full display will appear for 2 seconds (Fig-1). The screen then will transition into the User Mode – U0 will be displayed. 2. - Page 14 PULSE: Displays pulse reading via pulse hand grips or wireless pulse chest strap 1. MANUAL MODE USER: Displays the current user (U0-U4) In MANUAL MODE press the UP/DOWN arrows to set the resistance level (1-24). Press ENTER to confirm. (Default resistance level is 1) Values/goals can be set for TIME, DISTANCE and CALORIES.
- Page 15 6. H.R.C. PROGRAM (Heart Rate Control) 3. FITNESS TEST This program will increase or decrease the resistance to keep you near your heart rate goal. Once in the Fitness test program, press START to begin the test. The Fitness test is an 8 minute test that Once in the H.R.C.
- Page 16 DOWNLOADING APPS AND 8. FUNCTION STATISTICS AND RANGES PAIRING YOUR DEVICE WITH YOUR EQUIPMENT Item Windows Display Range Default Stored DOWNLOADING THE SOFTWARE MALE/ FEM Male Connect the Apple device with the App Store (iTunes) or your Android Device with Google Play, search 10 - 100 for "Pafers", then read the APP introductions and Download the APPs with bicycle/elliptical machine WEIGHT...
-
Page 17: Compatible Devices
Start from APP interface using a variety of modes to control the exercise BH Fitness i.Concept Bluetooth products are compatible with Apple devices with iOS 5.1 or later. It is equipment. Pay attention to the APP instructions and function introduction. If you need help with recommended to update iOS to latest version to obtain the best user experience. -
Page 18: Maintenance And Cleaning
It is not recommended that the user attempt service on the internal BH Fitness will repair or replace, free of charge, at its option, parts that are defective as components. Instead, seek service from an authorized service center. However, you may a result of material or workmanship. -
Page 19: Pour Le Service, Veuillez Prendre Contact Avec Bh Fitness
Conservez le présent Guide d’utilisation aux fins de consultation ultérieure. POUR LE SERVICE, VEUILLEZ PRENDRE CONTACT AVEC BH FITNESS SANS FRAIS : 866 325-2339 BH Fitness | 20155 Ellipse, Foothill Ranch, Californie 92610 | tél. : 949 206-0330 | téléc. : 949 206-0013 | www.BHFitnessUSA.com S1RiB_Manual_Bilingual.indd 36-37 11/1/2016 10:59:12 AM... -
Page 20: Introduction
Cet appareil est conçu et construit de manière à offrir une sécurité maximale. L’utilisation apprécierez le style, la qualité et la valeur auxquels BH Fitness a habitué les adeptes de d’appareils d'exercice exige néanmoins certaines précautions. Lisez bien tout le manuel l'exercice physique de partout au monde. -
Page 21: Instructions Relatives À L'exercice
LIGNES DIRECTRICES SUR L'ENTRAÎNEMENT Remarque: Cet appareil a été teste et a été trouver conformant aux limites de la Class B appareil numérique, conformément a la partie 15 des règlements de FCC. Ces limites sont conçues pour L'exercice est l'un des principaux facteurs contribuant à la santé globale d'une personne. fournir une protection raisonnable contre les interférences nuisible dans une installation résidentielle. - Page 22 CONSOMMATION D'OXYGÈNE L'effort que vous pouvez déployer au cours d'une période prolongée est limité par votre FRÉQUENCE CARDIAQUE capacité d'approvisionner en oxygène les muscles au travail. L'exercice intense régulier a un effet Votre fréquence cardiaque augmente durant l'exercice. Elle sert d'ailleurs souvent de mesure de d'entraînement qui augmente votre capacité...
-
Page 23: Douleurs Musculaires
ÉTIREMENTS SUGGÉRÉS Ne vous poussez pas trop en tentant d'atteindre les chiffres suggérés par ce tableau. Un exercice Rotations de la tête excessif risquerait de vous causer un malaise important. Laissez la fréquence cardiaque évoluer Tournez la tête vers la droite sur un temps et sentez l'étirement du naturellement à... -
Page 24: Instructions D'assemblage
ÉTIREMENTS SUGGÉRÉS INSTRUCTIONS D'ASSEMBLAGE ÉTIQUETTE D'AVERTISSEMENT Étirement de l'intérieur de la cuisse Assoyez-vous en ramenant les plantes des pieds l'une contre l'autre, les genoux pointés vers l'extérieur. Rapprochez le plus possible les pieds des aines. Poussez délicatement les genoux vers le sol. Comptez 15 temps. - Page 25 ÉTAPE 2 ÉTAPE 1 1) Retirez le protecteur préinstallé pour la tige avant (R-2) et glissez-la le long de la tige (B-1). 1) Fixez bien le stabilisateur avant (P-1) au châssis principal (E) à l'aide de 2 rondelles plates (T-2) et de 2) Branchez le câble de la fréquence cardiaque (supérieur) (B-3) au câble de la fréquence cardiaque (inférieur) 2 boulons ordinaires (T-1).
- Page 26 ÉTAPE 3 ÉTAPE 4 1) Fixez le guidon (C-1) au support qui est soudé sur la tige avant en utilisant la pince de fixation (T-3), 1) Serrez la poignée de déverrouillage (K-23) à la glissière de siège (K-1) avec la clé. 2 rondelle plage (T-4), 2 rondelle à ressort (T-5) et 2 vis (T-6). 2) Placez le protecteur du guidon (R-3) sur le guidon.
- Page 27 ÉTAPE 5 1) Fixez le siège (R-1) à la glissière de siège (K-1) avec 4 vis (T-8) et 4 rondelles plates (T-7). ÉTAPE 6 2) Fixez le guidon du siège (O-1) à la plaque de montage arrière de la glissière de siège en utilisant 2 vis 1) Glissez le dossier (N-1) vers le bas sur la tige du dossier (M-1).
-
Page 28: Mouvement De La Machine
ÉTAPE 7 CROQUIS EN VUE ÉCLATÉE 1) Branchez le connecteur de câble (supérieur) (B-2) et le câble de la fréquence cardiaque (supérieur) (B-3) à l'arrière de l'ordinateur (A-1). 2) Installez l'ordinateur (A-1) sur le support de l'ordinateur qui est soudé sur la partie supérieure de la tige avant. -
Page 29: Liste Des Pièces
Pour commander des pièces de rechange, précisez au représentant du service à la clientèle le numéro de modèle du produit et le numéro de la pièce inscrite dans le tableau qui suit, ainsi que la quantité désirée. Description Qté Description Qté S1RiB-A-1 Ordinateur S1RiB-F-11 Palier S1RiB-A-2 S1RiB-F-12... -
Page 30: Liste Des Pièces (Suite)
LISTE DES PIÈCES (SUITE) FONCTIONNEMENT DE LA CONSOLE Description Qté Description Qté S1RiB-K-8 Ordinateur S1RiB-P-6 Rondelle Fiat S1RiB-K-9 S1RiB-P-7 Capuchon du pied avant – R (droit) S1RiB-K-10 Câble d'ordinateur S1RiB-P-8 S1RiB-K-11 Tige de guidon S1RiB-Q-1 Stabilisateur arrière S1RiB-K-12 Câble métalique (supérieur) S1RiB-Q-2 Capuchon du pied arrière –... -
Page 31: Pour Commencer
MODES POUR COMMENCER Quand vous démarrez la machine en la branchant ou bien en pédalant, le U0 clognotera, pour signifier l’utilisateur 1. Démarrage – Quand la console est branchée à la machine, celle-ci va émettre un son avant 0. Il peut y avoir 5 différents utilisateurs, soit U0-U4. d’afficher l’écran pendant 2 secondes. - Page 32 3. TEST DE FITNESS (APTITUDE) 1. MANUAL MODE (MODE MANUEL) Dans le programme du test d’aptitude, appuyez sur START pour commencer le test. Le test Dans MANUAL MODE, appuyez sur les touches UP/DOWN pour entrer le niveau de résistance (1-24). d’aptitude dure 8 minutes et permet d’évaluer vos performances physiques.
-
Page 33: Programme Random (Aléatoire)
configurer les valeurs TIME (TEMPS), DISTANCE et CALORIES. Pour régler les valeurs, appuyez Ensuite, vous pourriez configurer les valeurs TIME (TEMPS), DISTANCE et CALORIES pour votre sur les touches UP/DOWN, et appuyez sur ENTER pour les confirmer. Voir Configurer objectifs/ programme personnalisé. - Page 34 TÉLÉCHARGEMENT D'APPLICATIONS ET ASSOCIATION DE L'ÉQUIPEMENT BH DUAL KIT CLASSIQUE ET D'UN APPAREIL APPLE ASSOCIATION DE VOTRE APPAREIL ET DE L'ÉQUIPEMENT 1. Placez l'appareil Apple devant l'écran à cristaux liquides. 2. Accédez aux paramètres et activez la fonction Bluetooth. TÉLÉCHARGEMENT DU LOGICIEL 3.
-
Page 35: Association De L'équipement Dualkit À Un Appareil
Mini iPad iPad iPad 2 Les produits BH Fitness i.Concept Bluetooth sont compatibles avec les appareils Apple iOS 5.1 ou version ultérieure. Pour une expérience utilisateur optimale, il est recommandé d'installer la version d'iOS la plus récente. iPad, iPhone, iPod, iPod classic, iPod nano, iPod shuffle et iPod touch sont des marques de commerce d'Apple Inc. -
Page 36: Garantie
Enregistrez la garantie de votre produit en ligne à : http://www.bhnorthamerica.com/BHFH/support/warranty/registration.php POUR FAIRE EFFECTUER DES RÉPARATIONS COUVERTES PAR LA GARANTIE, NE RAPPORTEZ PAS L’APPAREIL AU DÉTAILLANT. COMMUNIQUEZ PLUTÔT AVEC BH Fitness. BH Fitness/BH North America Corporation 20155 Ellipse Foothill Ranch, CA 92610, États-Unis Téléphone : 949.206.0330;...