Table des Matières
Publicité
Les langues disponibles
Les langues disponibles
Liens rapides
Publicité
Table des Matières

Manuels Connexes pour Bushnell IMAGEVIEW 78-7351


Sommaire des Matières pour Bushnell IMAGEVIEW 78-7351
- Page 1 2.1MP Digital Image Spotting Scope Model: 78-7351 LIT. #: 98-0625/07-05...
-
Page 2: Table Des Matières
QUICK GUIDE: BUSHNELL IMAGEVIEW 78-7351 INSTALL BATTERIES AND (OPTIONAL) SD CARD • Insert 2 AAA alkaline batteries in the compartment (labeled “OPEN” at the back of the Imageview). If you will be taking a large number of photos at high quality settings, you may want to install an SD (Secure Digital) memory card with 32 MB or greater capacity (not included). -
Page 3: Bottom View
CAMERA CONTROLS TAKE A PHOTO Description • With the Imageview mounted on its tripod, confirm that the image appears sharp on the LCD display. (If not, you are probably too close. Unlike the spotting scope optics, the camera focus is preset and is designed only for distant subjects that are 325 feet or more away Power Switch from the camera). - Page 4 Press “MENU” to confirm and return to the settings menu. as indicated by the red power indicator light. The LCD screen will turn on and display the Bushnell logo, then turn off to conserve The following settings are provided: battery life.
- Page 5 7. EXIT returns you to the Capture mode, ready to take a new photo. 4. METER allows you to set what part of the frame (image) the light meter analyzes to determine exposure. TO USE SPECIAL CAPTURE MODES • Settings: Average (exposure based on entire frame), Weight (overall scene, but weighted to favor exposure of a centered With the camera on and displaying the “live”...
- Page 6 PROTECTED and UNPROTECTED. Once protected, a photo must be unprotected using this menu item before it can be To see thumbnails of multiple pictures stored in the memory while in Review mode, push the “Display” Button. You may see up to 9 deleted.
- Page 7 SOFTWARE INSTALLATION: LED/SOUND INDICATIONS A. DRIVER SOFTWARE INSTALLATION LED (Red) 1) Power On indication: steady light (ONLY NECESSARY FOR WINDOWS 98/98SE) 2) Operation indication: blinks to confirm image capture after “Snap”. LED goes out while photo is being stored in memory, comes If the CD-ROM does not automatically launch the install screen, double click “...
- Page 8 B. PHOTO SUITE 5 INSTALLATION B. OPENING PHOTO FILES DIRECTLY IN PHOTOSUITE FROM THE CONNECTED CAMERA (OPTIONAL) From the opening CD-ROM screen, select “Photo Suite 5.0”, then follow the on-screen directions, beginning with selecting your With the Imageview plugged in to your computer’s USB port, start PhotoSuite. From the File menu, select “Open Photo”. Using the preferred language for the installation dialogue boxes that follow.
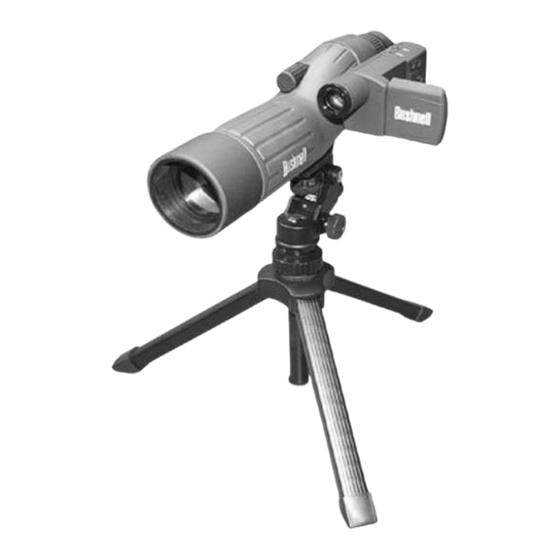
- Page 9 SPOTTING SCOPE INSTRUCTIONS Remote Shutter Release Note MOUNTING Whenever possible, using the included remote shutter release cable is recommended to avoid accidentally jarring the camera Remove the spotting scope from the packaging. Attach the tripod with the provided screw to the tripod mount hole located on the base of the spotting scope. Spread when the SNAP button is pressed.
-
Page 10: Fcc Note
TWO-YEAR LIMITED WARRANTY Your Bushnell® product is warranted to be free of defects in materials and workmanship for two years after the date of purchase. In the event of a defect under this warranty, we will, at our option, repair or replace the product, provided that you return the product postage prepaid. -
Page 11: Français
GUIDE RAPIDE : IMAGEVIEW BUSHNELL 78-7351 INSTALLATION DES PILES ET DE LA CARTE SD (OPTIONNELLE) Insérez 2 piles alcalines AAA dans le compartiment (marqué « OUVREZ », à l’arrière de la lunette Imageview) Si vous comptez prendre un grand nombre de photos sur des réglages haute qualité, vous pouvez opter pour une carte mémoire SD d’une capacité de 32 mégaoctets ou plus (non incluse). -
Page 12: Vue Du Haut
GUIDE RAPIDE : IMAGEVIEW BUSHNELL 78-7351 BOUTONS DE PRISE D’UNE PHOTO RÉGLAGE DE L’Imageview étant monté sur son trépied, confirmez que l’image est nette sur l’écran LCD. (Si ce n’est pas le cas, vous êtes probablement trop près. Contrairement à l’optique de la lunette d’observation, la mise au point de l’appareil photo est préréglée et conçue seulement L’APPAREIL PHOTO... - Page 13 Si vous revoyez une photo juste prise et si elle paraît trop sombre ou trop claire, essayez de régler la valeur d’exposition et reprenez la LCD s’activera et affichera le logo Bushnell, puis il s’éteindra pour économiser les piles. Si vous avez installé des piles neuves, vous verrez photo.
- Page 14 à 5 positions pour utiliser ces fonctions indiquées par une icône (symbole) dans le coin supérieur droit de l’écran : 5. La QUALITÉ DE L’IMAGE affecte la qualité d’ensemble des photos et le nombre maximum de photos pouvant être enregistrées dans la Retardateur : (icône d’horloge) Diffère de 10 secondes la prise de la photo après une pression sur SNAP (Déclencheur).
- Page 15 autre. Appuyez de nouveau sur « Display » pour voir un onglet sélectionné (en surbrillance) en photo grand format. SYMBOLES DE L’ÉCRAN LCD (ICÔNES VISIBLES AUX MODES PRÉVISUALISATION OU LECTURE, COMME INDIQUÉ) Pour sortir du mode de lecture, appuyez de nouveau sur le bouton « View » (visualisation). Vous êtes alors de retour au mode prévisualisation. PREVIEW (PRÉVISUALISATION) EFFACEMENT/PROTECTION DE PHOTOS ET FORMATAGE D’UNE CARTE SD NEUVE : Full...
-
Page 16: Installation Du Logiciel Pilote
INSTALLATION DU LOGICIEL : INDICATIONS PAR DEL/SON DEL (rouge) A. INSTALLATION DU LOGICIEL PILOTE Indication de la mise sous tension : éclairage constant (NÉCESSAIRE SEULEMENT POUR WINDOWS 98/98SE) Indication de fonctionnement : clignote pour confirmer la saisie d’image après une pression sur SNAP (DÉCLENCHEUR). La DEL s’éteint Si le CD-ROM ne lance pas automatiquement l’écran d’installation, faites pendant l’enregistrement de la photo en mémoire puis se rallume lorsque l’enregistrement est terminé. -
Page 17: Téléchargement Des Photos
Utilisez “Edit>Select All” (éditer - sélectionner toutes) ou cliquez sur une seule photo et copiez puis collez B. INSTALLATION DE PHOTO SUITE 5 SOFTWARE INSTALLATION: ou traînez simplement vers le dossier de votre choix (par exemple, “Mes photos”) sur le disque dur local. Sur l’écran d’ouverture du CD-ROM, sélectionnez “Photo Suite 5.0”... - Page 18 CÂBLE D’OBTURATEUR À DISTANCE INSTRUCTIONS POUR D'UNE LUNETTE TERRESTRE Chaque fois que possible, il est recommandé d’utiliser le câble de commande d’obturateur à distance inclus, afin d’éviter de MONTAGE faire bouger l’appareil photo par mégarde en appuyant sur le bouton SNAP (déclencheur). En raison du fort grossissement Remarque : Certaines lunettes terrestres particulières n’utilisent pas de trépied.
-
Page 19: Garantie Limitée De Deux Ans
GARANTIE LIMITÉE DE DEUX ANS Votre produit Bushnell® est garanti exempt de défauts de matériaux et de fabrication pendant deux ans après la date d’achat. Au cas où un défaut apparaîtrait sous cette garantie, nous nous réservons l’option de réparer ou de remplacer le produit, à condition de nous le renvoyer en port payé. La présente garantie ne couvre pas les dommages causés par une utilisation, une manipulation, une installation incorrecte(s) ou un entretien incorrect... -
Page 20: Español
GUÍA RÁPIDA DEL IMAGEVIEW 78-7351 DE BUSHNELL INSTALACIÓN DE LAS PILAS Y DE LA TARJETA SD (OPCIONAL) • Inserte 2 pilas AAA alcalinas en el compartimiento (que aparece como “OPEN” en la parte posterior del Imageview). Si va a sacar un gran número de fotografías en configuraciones de alta calidad, es mejor que instale una tarjeta de memoria SD (Secure Digital, en inglés) con una capacidad de 32 MB o superior (no incluida). -
Page 21: Vista Inferior
GUÍA RÁPIDA DEL IMAGEVIEW 78-7351 DE BUSHNELL SACAR UNA FOTOGRAFÍA • Después de montar el Imageview en el trípode, confirme si la imagen se ve con nitidez en la pantalla LCD. (En caso CONTROLES contrario, es probable que esté demasiado cerca. A diferencia de la óptica del telescopio de localización, el enfoque de la cámara viene preseleccionado y está... -
Page 22: Instalar Las Pilas
Felicidades por haber comprado un telescopio de localización ImageView de Bushnell. Antes de utilizar este producto, lea estas CAMBIAR LA CONFIGURACIÓN DE LA CÁMARA instrucciones y tómese el tiempo necesario para familiarizarse con las diferentes piezas y funciones del mismo. - Page 23 trípode. También puede usar el disparador remoto proporcionado para evitar que se mueva la cámara. Se conecta cerca del puerto USB (en el jack en la memoria interna, cambiando la cantidad de compresión del archivo. La capacidad real de fotografías variará en función del contenido de “Snap Line”), y no requiere que se use el disparador automático (no hay retraso).
- Page 24 SÍMBOLOS DE LA PANTALLA LCD (ICONOS VISIBLES EN LAS MODALIDADES PREVIEW (use el interruptor de 5 posiciones y el botón de menú, como se indicó anteriormente, para elegir las opciones de este menú, seleccionar o cambiar [VISTA PREVIA] O PLAY [REPRODUCIR], SEGÚN SE INDICA) configuraciones y volver al menú...
-
Page 25: Instalación Del Software
PLAY (REPRODUCIR) 1) Nº de Foto / Total de Fotos: Indica el número de la foto que se está viendo / Total de fotografías INSTALACIÓN DEL SOFTWARE : guardadas actualmente 2) Resolución de Imagen: Indica la resolución de las fotos que se está viendo A. - Page 26 B. INSTALACIÓN DE PHOTO SUITE 5 Una vez transferidas, las fotos pueden abrirse, verse, editarse y volver a guardarse usando el software PhotoSuite Desde la apertura de la pantalla del CD-ROM, seleccione “Photo Suite 5.0”, luego siga las instrucciones de la incluido o cualquier programa compatible de edición de fotografías.
- Page 27 INSTRUCCIONES PARA LOS TELESCOPIO DE LOCALIZACION CABLE REMOTO DEL DISPARADOR MONTAJE Nota: Hay algunos telescopios de localización para usos especiales que no incluyen el trípode. Sin embargo, estas instrucciones se pueden Siempre que sea posible, se recomienda el uso del cable remoto del disparador para no mover sin querer la cámara aplicar a la mayoría de los trípodes.
-
Page 28: Garantía Limitada De Dos Años
GARANTÍA LIMITADA DE DOS AÑOS Su producto Bushnell® está garantizado contra defectos de material y fabricación durante dos años a partir de la fecha de compra. En caso de defectos bajo esta garantía, nosotros, a nuestra opción, repararemos o sustituiremos el producto siempre que lo devuelva con portes pagados. -
Page 29: Deutsch
KURZER LEITFADEN: BUSHNELL IMAGEVIEW 78-7351 BATTERIEN UND (OPTION) DIE SD-KARTE EINLEGEN • In das Batteriefach (mit Beschriftung „OPEN“) an der Rückseite des Imageview 2 AAA Alkalibatterien einlegen. Wenn eine größere Anzahl Fotos mit hohen Qualitätseinstellungen aufgenommen werden soll, kann eine SD (Secure Digital) Speicherkarte mit 32 MB oder größerer Kapazität (nicht mitgeliefert) installiert werden. -
Page 30: Ansicht Von Oben
KURZER LEITFADEN: BUSHNELL IMAGEVIEW 78-7351 EIN FOTO AUFNEHMEN • Mit dem auf sein Stativ montierten Imageview bestätigen, daß das Bild auf dem LCD Display scharf erscheint. (Andernfalls ist man K A M E R A E I N - wahrscheinlich zu nahe. Anders als die Spektivoptiken, ist der Kamerafokus voreingestellt und nur für entfernte Objekte ausgelegt, STELLUNGEN die sich in 325 Fuß... -
Page 31: Batterien Einlegen
Wege-Schalter benutzen. Für das Ändern einer Einstellung erneut „MENU“ drücken, (der aktuelle Wert wird Strom einschaltet, was von der roten Lampe der Leistungsanzeige angegeben wird. Das LCD Display geht an und zeigt das Bushnell Logo an, hervorgehoben), dann mit den Pfeiltasten rechts/links den Wert nach Wunsch ändern. Zur Bestätigung „MENU“... - Page 32 2. AUTO OFF (Automatische Abschaltung): Abschaltung, 1 Minute, 2 Minuten, oder 3 Minuten • Einstellungen (Pixel) (Bildpunkte): 2.048 × 1.536, 1.600 × 1.200, 1.280 ×1.024, 800 × 600 3. CLOCK SET Uhrzeiteinstellung): Für die Änderung des Datums und der Uhrzeit (nach Zugriff 3.
- Page 33 LÖSCHEN/SCHÜTZEN VON FOTOS UND FORMATIEREN EINER NEUEN SD KARTE: KONTROLLE VON FOTOS IM SPEICHER Wenn die Kamera im Abspielmodus ist (bei Bedarf den „View“ Knopf drücken), den „MENU“ Knopf in der Mitte Den „View“ (Ansicht) Knopf drücken (bei Bedarf das Display einschalten). Dies versetzt die Kamera in den des 5-Wege-Schalters drücken.
- Page 34 LCD DISPLAY SYMBOLE (IM KONTROLL- ODER ABSPIELMODUS WIE ANGEGEBEN PLAY (ABSPIELEN) SICHTBARE ICONS) 1) Fotonummer / Fotoanzahl: Zeigt die Nummer des kontrollierten Fotos / von insgesamt im Moment gespeicherten Fotos 2) Bildauflösung: Gibt die Auflösung des Kontrollfotos an KONTROLLE LED/TON-ANGABEN Full 1) Batteriemeßgerät: Zeigt den Füllstand der Batterie an LED (Rot)
-
Page 35: Anschluss An Den Computer
EINE INSTALLATION DER SOFTWARE MIT TREIBER ERFORDERLICHES SYSTEM (FÜR DIE MITGELIEFERTE PHOTOSUITE SOFTWARE): (NUR BEI WINDOWS 98/98SE ERFORDERLICH) Minimum: Empfohlen: WenndieCD-ROMdenInstallationsbildschirmnichtautomatischstartet,auf„SETUP . • Pentium® III 500 MHz • 128 MB RAM EXE“imDateiverzeichnisderCD-ROMdoppelklicken,damitdieInstallationbeginnt. • Windows® 98SE / Me / 2000 / XP •... - Page 36 B. INSTALLATION VON PHOTO SUITE 5 B. FOTODATEIEN DIREKT UNTER PHOTOSUITE VON DER ANGESCHLOSSENEN KAMERA Im offenen CD-ROM Bildschirm „Photo Suite 5.0“ wählen, dann die Anleitungen am Bildschirm befolgen, die mit ÖFFNEN (OPTION) der Wahl Ihrer bevorzugten Sprache für die nachfolgenden Dialogfenster zur Installation beginnen. Sichergehen, PhotoSuite starten, wenn die Imageview an den USB Port Ihres Computers angeschlossen ist.
- Page 37 BEDIENERHINWEISE ZUM SPEKTIV KABEL FÜR FERNAUFNAHMEN MONTAGE Falls möglich, empfehlen wir den Gebrauch des beigefügten Kabels für Fernaufnahmen, um zu vermeiden, dass Anmerkung: Einige spezielle Spektive beinhalten keine Stative, aber die folgenden Instruktionen dürften für fast alle Stativarten gelten. die Kamera versehentlich bei gedrücktem AUSLÖSER gestört wird. Aufgrund der starken Vergrößerung der Entnehmen Sie das Spektiv aus der Verpackung.
-
Page 38: Zweijährige Beschränkte Garantie
ZWEIJÄHRIGE BESCHRÄNKTE GARANTIE Anmerkung bezüglich FCC-Vorschriften: Sie erhalten für Ihr Bushnell®-Produkt eine Garantie für einen Zeitraum von zwei Jahren ab dem Kaufdatum. Die Garantie erstreckt sich auf Dieses Gerät wurde getestet und es entspricht den Vorgaben für ein Digitalgerät der Kategorie Material- und Herstellungsfehler. -
Page 39: Italiano
GUIDA DI CONSULTAZIONE RAPIDA: BUSHNELL IMAGEVIEW 78-7351 INSERIRE LE PILE E LA SCHEDA SD (OPTIONAL) • Inserire 2 pile alcaline AAA nell’apposito scomparto (marcato “OPEN”, APRI, sul retro dell’Imageview). Se si prevede di fare molte fotografie d’alta qualità si consiglia di installare una scheda SD (Secure Digital) con una memoria di almeno 32 MB (non in dotazione ). - Page 40 GUIDA DI CONSULTAZIONE RAPIDA: BUSHNELL IMAGEVIEW 78-7351 Setup: impostate il tempo di spegnimento automatico (“Auto Off”), il segnale acustico (“Sound”, attivato o disattivato [on/off]) e la marcatura temporale (“Date Stamp”) secondo le vostre preferenze. L’impostazione scelta per queste tre voci non ha effetto sulla qualità...
-
Page 41: Installazione Delle Pile
MENU (il valore attuale viene evidenziato) e con i tasti freccia “su/giù” /OFF ” fino all’accensione della fotocamera – la spia rossa si illumina. Lo schermo LCD si accende, visualizza il logo Bushnell e poi si selezionate un altro valore;... - Page 42 genere “Auto” dà risultati soddisfacenti, ma se i colori appaiono artificiali provate a regolare questa impostazione per 4. SOUND (segnale acustico): per attivare/disattivare (On/Off) i bip di conferma/avvertimento. adattare la fotocamera alla sorgente luminosa. 5. DATE STAMP (marcatura temporale): Off, YY/MM/DD (sulle foto viene stampato anno/mese/giorno), MM/DD/ •...
- Page 43 alternativamente PROTECTED e UNPROTECTED. Una volta protetta una foto, per cancellarla occorre prima annullare la Una volta ingrandita un’immagine, potete panoramicare su di essa premendo il pulsante Display. Nell’angolo del display, accanto protezione selezionando UNPROTECTED. al numero corrispondente all’ingrandimento, compare un simbolo giallo che indica quattro direzioni: adoperate i tasti freccia sul SETUP: offre le stesse opzioni di SETUP nel precedente menu della modalità...
- Page 44 INSTALLAZIONE DEL SOFTWARE MODALITÀ RIPRODUZIONE (PLAY) 1) N. di foto / Totale foto: indica il numero di foto in modalità Revisione / il numero complessivo di foto memorizzate. 2) Risoluzione dell’immagine: indica la risoluzione della foto sotto esame. A. INSTALLAZIONE DEL DRIVER SPIE/SEGNALI ACUSTICI (NECESSARIA SOLO PER WINDOWS 98/98SE) LED (rosso)
- Page 45 B. INSTALLAZIONE DI PHOTO SUITE 5 mediante l’accluso software PhotoSuite o un qualunque programma compatibile per l’elaborazione di immagini. Dalla schermata iniziale del CD selezionate “Photo Suite 5.0” e poi seguite le istruzioni sullo schermo, cominciando con la Oppure potete semplicemente inviare una foto per e-mail o inserirla come file .jpg in qualsiasi documento senza selezione della lingua preferita per le finestre di dialogo che seguiranno.
- Page 46 ISTRUZIONI PER L’USO DEL SPOTTING SCOPE CAVO PER LO SCATTO REMOTO MONTAGGIO Si raccomanda di utilizzare il cavo per lo scatto remoto, in dotazione, ogniqualvolta possibile per evitare di muovere la Nota: alcuni spotting scope per uso speciale non comprendono i treppiedi. In ogni caso, queste istruzioni si riferiscono alla maggior parte dei fotocamera quando si preme il pulsante SNAP.
- Page 47 GARANZIA LIMITATA PER DUE ANNI Si garantisce che questo prodotto Bushnell® sarà esente da difetti di materiale e fabbricazione per due anni a decorrere dalla data di acquisto. In caso di difetto durante il periodo di garanzia, a nostra discrezione ripareremo o sostituiremo il prodotto purché sia restituito franco destinatario.
-
Page 48: Português
GUIA DE CONSULTA RÁPIDA: BUSHNELL IMAGEVIEW 78-7351 INSTALAR PILHAS E CARTÃO DE MEMÓRIA SD (OPCIONAL) • Insira 2 pilhas AAA alcalinas no respectivo compartimento (com a indicação “OPEN” [Abrir] na parte traseira da Imageview). Se pretende tirar um grande número de fotografias na definição de alta qualidade, é aconselhável instalar um cartão de memória SD (Secure Digital) de capacidade igual ou superior a 32 MB (não incluído). - Page 49 GUIA DE CONSULTA RÁPIDA: BUSHNELL IMAGEVIEW 78-7351 CONTROLOS DA TIRE UMA FOTOGRAFIA CÂMARA • Com a Imageview montada no respectivo tripé, confirme que a imagem aparece nítida no visor LCD. (Se isso não acontecer é porque, provavelmente, se encontra demasiado perto do objecto a fotografar. Ao contrário da óptica das miras telescópicas, a focagem da Descrição...
- Page 50 As seguintes configurações são fornecidas: aparelho ligar, conforme indicado pelo LED vermelho. O visor LCD acende-se e mostra o logotipo da Bushnell, apagando-se de imediato para 1. EV (Exposure Value) (Valor de exposição) permite configurar a exposição desejada (+ ou -) a fim de cancelar a exposição automática. Ao poupar as pilhas.
- Page 51 4. METER (MEDIDOR) permite configurar aquela parte do quadro (imagem) que será analisada pelo medidor de luz para estabelecer a PARA USAR OS MODOS ESPECIAIS AO TIRAR FOTOGRAFIAS exposição. Com a câmara ligada e exibindo as imagens “ao vivo” (pronta para tirar uma nova fotografia), pressione o lado direito do botão prata de 5 posições •...
- Page 52 Para sair do modo Play, pressione novamente o botão “View”. Isso retornará a câmara ao modo Preview. SÍMBOLOS DE DISPLAY DO LCD (ÍCONES VISÍVEIS NO MODO PREVIEW OU PLAY, CONFORME INDICADO) REMOÇÃO/PROTEÇÃO DAS FOTOS E FORMATAÇÃO DE UM NOVO CARTÃO SD: PREVIEW (VISUALIZAÇÃO) Com a câmara no modo Preview (pressione o botão View, se necessário), pressione o botão “MENU”...
-
Page 53: Instalação Do Software
INSTALAÇÃO DO SOFTWARE: LED (vermelho) 1) Indicação de ligada: luz estável 2) Indicação da operação: pisca para confirmar a captura de imagem após pressionar o botão “Snap”. O LED se A. INSTALAÇÃO DO SOFTWARE DO DRIVER apaga enquanto a fotografia está sendo armazenada na memória e acende novamente quando esta operação estiver (NECESSÁRIO APENAS PARA OS SISTEMAS OPERACIONAIS WINDOWS concluída. - Page 54 B. INSTALAÇÃO DO PHOTO SUITE 5 qualquer outro programa de edição de fotografias compatível. Ou, você pode simplesmente enviar a fotografia por Selecione “Photo Suite 5.0” na tela de abertura do CD-ROM e após siga as instruções da tela, começando pela e-mail ou inseri-la como um arquivo .jpg em qualquer documento, exatamente “como está”.
- Page 55 INSTRUÇÕES PARA O TELESCÓPIO DE LOCALIZAÇÃO CABO DO OBTURADOR REMOTO MONTAGEM Sempre que possível, recomenda-se usar o cabo do obturador remoto para evitar que a câmara acidentalmente sacuda quando o botão Observação: Alguns telescópios de localização de uso especial não incluem tripés. Entretanto, essas instruções se aplicam à maioria dos tripés. SNAP for pressionado.
- Page 56 Este equipamento foi testado e verificou-se que cumpre com os limites para um dispositivo digital Classe B, de acordo com a Parte 15 das re- Garantimos que seu produto Bushnell® estará isento de defeitos materiais e de fabricação. por dois anos após a data de aquisição. Caso tenha gras da FCC.
- Page 57 ©2005 Bushnell Performance Optics...