Publicité

Les langues disponibles

Les langues disponibles

Liens rapides

1

Publicité

Table des Matières
loading

Sommaire des Matières pour Atlantis A02-RA3+

  • Page 2: Table Des Matières

    MULTILANGUAGE QUICK START GUIDE ITALIANO 1.1 Contenuto della confezione........5 1.2 I LED frontali............5 1.3 Le porte posteriori........... 6 1.4 Cablaggio ..............7 1.5 Settaggi di Default ..........7 1.6 Configurazione di IE..........8 1.7 Configurazione del PC ..........8 1.8 Configurazione Router..........
  • Page 3: Multilanguage Quick Start Guide

    FAST SWAP WARRANTY CERTIFICATE ..113 DEMAND OF ASSISTANCE FORM ..... 117 GARANZIA CERTIFICATO DI GARANZIA FAST SWAP..119 MODULO RICHIESTA ASSISTENZA ....123 GARANTIE CERTIFICAT DE GARANTIE FAST SWAP..125 FICHE DE DEMANDE D’ASSISTANCE ....129 A02-RA3+_GX01(V1.01 March 2004)
  • Page 4 MULTILANGUAGE QUICK START GUIDE...
  • Page 5: Contenuto Della Confezione

    1.1 Contenuto della confezione Atlantis Land I-Storm Lan Router ADSL, CD-ROM contenente il manuale, Guida di Quick Start, cavo RJ-11 ADSL, cavo CAT-5 LAN , Cavo RS232-PS2 , Alimentatore (12V, 1A).
  • Page 6: Le Porte Posteriori

    ITALIANO Lampeggiante quando c’è mail nall’account configurato. 1.3 Le porte posteriori Porte Utilizzo Connettere il cavo RJ-11 a questa porta per Line(RJ11) effettuare l’allacciamento all’ADSL. Connettere il cavo RS232 fornito alla porta seriale (9 pin) del PC. Tale connessione è opzionale.
  • Page 7: Cablaggio

    Lasciando questi settaggi e impostando i PC come client DHCP (come da istruzioni seguenti) ed infine configurando la connessione all’ISP (che avrà comunicato tutti i parametri del caso) è possibile utilizzare l’Atlantis I-Storm Lan Router ADSL in pochissimo tempo. Per una configurazione più dettagliata fare...
  • Page 8: Configurazione Di Ie

    ITALIANO riferimento manuale presente Le configurazioni di Default dell’Atlantis I-Storm Lan Router ADSL sono: • Password:admin • Username: atlantis • Indirizzo IP: (192.168.1.254), Subnet Mask (255.255.255.0) • DHCP Server abilitato 1.6 Configurazione di IE A questo punto è necessario lanciare IE, andare nel menù...
  • Page 9 ITALIANO 4. Selezionare l’opzione Obtain an IP address automatically (dopo aver scelto IP Address). 5. Andare su DNS Configuration. 6. Selezionare l’opzione Disable DNS e premere su OK per terminare la configurazione.
  • Page 10 ITALIANO Riavviare il PC affinché i cambiamenti abbiano effetto.
  • Page 11 ITALIANO Configurazione del PC in Windows NT4.0 1. Andare su Start/Settings/ Control Panel. Cliccare per due volte su Network e poi cliccare su Protocols . 2. Selezionare TCP/IP Protocol e poi cliccare su Properties. 3. Selezionare l’opzione Obtain an IP address from a DHCP server e premere OK.
  • Page 12 ITALIANO...
  • Page 13: Configurazione Del Pc In Windows 2000

    ITALIANO Configurazione del PC in Windows 2000 1. Andare su Start/Settings/Control Panel. Cliccare due volte su Network and Dial-up Connections. 2. Cliccare due volte su Local Area Connection. 3. In Local Area Connection Status cliccare Properties.
  • Page 14 ITALIANO 4. Selezionare Internet Protocol (TCP/IP) e cliccare su Properties. 5. Selezionare l’opzione Obtain an IP address automatically e successivamente Obtain DNS server address automatically. 6. Premere su OK per terminare la configurazione.
  • Page 15 ITALIANO...
  • Page 16: Configurazione Del Pc In Windows Xp

    ITALIANO Configurazione del PC in Windows XP Andare su Start e poi Control Panel. Cliccare due volte su Network (in Classic View) Connections. Cliccare due volte su Local Area Connection. In Local Area Connection Status cliccare Properties.
  • Page 17 ITALIANO Selezionare Internet Protocol (TCP/IP) e cliccare su Properties.
  • Page 18 ITALIANO Selezionare l’opzione Obtain an IP address automatically successivamente Obtain server address automatically. Premere su OK per terminare la configurazione.
  • Page 19 ITALIANO...
  • Page 20: Configurazione Router

    Accedere col browser web al seguente indirizzo IP che di default è: 192.168.1.254, e premere il tasto invio. Utilizzare admin (come nome utente) e atlantis (come password). Premere OK per continuare. Apparirà a questo punto il Menù Principale, nella cui parte sinistra è...
  • Page 21 ITALIANO Cliccando sulla sezione desiderata, nello spazio della homepage appariranno tutti i settaggi relativi alla configurazione della sezione scelta, oppure si apriranno tutta una serie di sottosezioni tra cui scegliere prima di avere accesso alle configurazione vere e proprie. Seguendo i successivi passi è possibile rendere operativo l’I-Storm ADSL Lan Router in pochissimo tempo a patto di usare le macchine della Lan configurate come client DHCP.
  • Page 22: Quick Start

    ITALIANO Scegliere il protocollo opportuno o premere su Quick Start per effettuare una configurazione automatica. Quick Start Cliccare su Quick Start, apparirà la procedura automatica per selezionare la connessione. Cliccare su AUTO SCAN (e poi su Start) per ottenere le informazioni sul tipo di protocollo ed i valori di VCI/VPI (se esiste già...
  • Page 23 ITALIANO Configuration-WAN-ISP e poi premendo delete). Se tali parametri sono stati già comunicati dall’ISP (o altrimenti noti) è possibile inserirli immediatamente, passando alla sezione opportuna. Dopo aver premuto il tasto AutoSCAN è possibile ottenere i parametri caratteristici della linea ADSL. A questo punto evidenziare (qualora siano state rilevate più...
  • Page 24: Pppoe Routed/Pppoa Routed

    ITALIANO PPPoE routed/PPPoA routed PPPoE/PPPoA sono connessioni ADSL conosciute come dial-up DSL. Sono state concepite per integrare servizi a banda larga con un’attenzione particolare alla facilità di configurazione. L’utente può beneficiare di una grande velocità di accesso senza cambiare l’idea di funzionamento, condividere lo stesso account con l’ISP. Vediamo i parametri da configurare: •...
  • Page 25 ITALIANO determinati servizi) tale funzionalità dovrebbe essere disabilitata. • Username: Introdurre l’username fornita dal vostro ISP(case sensitive). • Password: Introdurre la password fornita dal vostro ISP (case sensitive). • Service Name:Utilizzare solo se espressamente richiesto dall’ISP (solo col PPPoE) • IP Address: lasciare tale parametro con il valore 0.0.0.0 •...
  • Page 26 ITALIANO RFC1483 routed / IpoA routed Vediamo i parametri da configurare: • VPI:8 • VCI:35 • ATM Class= è possibile scegliere la classe di servizio per il layer ATM. Il valore di default è UBR. • NAT: Il NAT consente a più utenti di accedere ad Internet al costo di un singolo account IP.
  • Page 27 ITALIANO Sono disponibili:LLC Bridged, VCMux Bridged, VCMux Routed, LLC Routed ed LLC MER. • Non resta che selezionare la voce Use the following IP address ed introdurre: • IP Address:Introdurre l’IP pubblico. • Netmask:Introdurre la Netmask fornita dall’ISP. • Gateway: Introdurre il Default Gateway del Router. Qualora invece questi dati siano forniti dal server dall’ISP in maniera automatica, spuntare la voce Obtain an IP address automatically via DHCP client.
  • Page 28 ITALIANO Premere Apply per rendere operativa la nuova configurazione. Terminata la configurazione premere su Save Config to FLASH (e poi su Save) per rendere i settaggi permanenti. A questo punto accedendo alla sezione Status è possibile controllare l’avvenuta connessione e quindi cominciare la navigazione.
  • Page 29 ITALIANO...
  • Page 30 ENGLISH For more detailed instructions on configuring and using the I-Storm Router ADSL, please refer to the online manual. And' besides available on CDRom (D:\\Multimedia Guide) a multimedia guide. Before beginning the configuration of the Router you have to know the parameters of your subscription ADSL. There are five ways ─...
  • Page 31: Package Contents

    IPoA IP address Subnet mask Default Gateway (IP address) IP address (DNS) 1.1 Package contents Atlantis Land I-Storm Lan Router ADSL, CD-ROM with manual, Quick Start Guide, cable RJ-11 ADSL, cable CAT-5 LAN, RS232-PS2 cable, Power Adapter AC-DC (12V, 1A).
  • Page 32: The Front Panel Leds

    ENGLISH 1.2 The Front Panel LEDs Meaning Power Lit when power ON Lit when system is ready Lit when connected to Ethernet device Green for 100Mbps; Orange for 10Mbps 8-11 Blinking when data transmit/received ADSL Lit when successfully connected to an ADSL DSLAM Lit when there is a PPPoA/PPPoE connection PPP/ MAIL...
  • Page 33: The Rear Ports

    ENGLISH 1.3 The Rear Ports Port Meaning Connect the supplied RJ-11 cable to this port Line (RJ11) when connecting to the ADSL/telephone network. Connect a RS-232 cable to this port when connecting to a PC’s RS-232 port (9-pin serial port). Connect an UTP Ethernet cable to one of the four LAN ports when connecting to a PC or (4 * RJ-45)
  • Page 34: Cabling

    ENGLISH 1.4 Cabling The most common problem associated with Ethernet is bad cabling or ADSL line. Make sure that all connected devices are turned on. On the front of the product is a bank of LEDs. As a first check, to verify that the LAN Link and ADSL line LEDs are lit.
  • Page 35: Ie Configuration

    ENGLISH Before you configure this I-Storm ADSL Router, you need to know the following default settings: • Password:admin • Userneme:atlantis • IP address (192.168.1.254), Subnet Mask (255.255.255.0) • DHCP Server enable 1.6 IE Configuration Now open IE, go to Instruments menu, select the Connections tab and select one of the following options: •...
  • Page 36: Tcp/Ip Configuration

    ENGLISH 1.7 TCP/IP Configuration Configuring PC (Windows 95/98/ME) Go to Start / Settings / Control Panel. In the Control Panel, double-click Network choose Configuration tab. Select TCP / IP -> NE2000 Compatible, or the name of any Network Interface Card (NIC) in your PC. Click Properties.
  • Page 37 ENGLISH Then select the DNS Configuration tab. Select the Disable DNS radio button and click “OK” to finish the configuration.
  • Page 38 ENGLISH...
  • Page 39 ENGLISH Configuring PC (Windows NT4.0) Go to Start / Settings / Control Panel. In the Control Panel, double-click on Network and choose the Protocols tab. Select TCP/IP Protocol and click Properties. Select the Obtain an IP address from a DHCP server radio button and click OK.
  • Page 40 ENGLISH...
  • Page 41 ENGLISH Configuring PC (Windows 2000) Go to Start / Settings / Control Panel. In the Control Panel, double-click on Network and Dial-up Connections. Double-click LAN Area Connection. In the LAN Area Connection Status window, click Properties.
  • Page 42 ENGLISH Select Internet Protocol (TCP/IP) and click Properties.
  • Page 43 ENGLISH Select the Obtain an IP address automatically and the Obtain DNS server address automatically radio buttons.
  • Page 44 ENGLISH Click OK to finish the configuration.
  • Page 45 ENGLISH Configuring PC (WindowsXP) Go to Start / Control Panel (in Classic View). In the Control Panel, double-click on Network Connections. Double-click Local Area Connection. In the LAN Area Connection Status window, click Properties.
  • Page 46 ENGLISH Select Internet Protocol (TCP/IP) and click Properties.
  • Page 47 ENGLISH Select the Obtain an IP address automatically and the Obtain DNS server address automatically radio buttons.
  • Page 48 ENGLISH Click OK to finish the configuration...
  • Page 49: Browser Configuration

    Open the web browser, enter the local port IP address of this I-Storm Lan Router ADSL, which default at 192.168.1.254, and click “Go” to get the login page. The default username is admin, password atlantis and click “OK” to continue. At the configuration homepage, the left navigation pane where...
  • Page 50 ENGLISH Click on the desired item to expand the page with all settings in the main navigation pane. Following next steps you can make operating I-Storm Lan Router ADSL in short time using PCs in DHCP mode. Refer to manual on Installation CD if you need personalized configuration.
  • Page 51: Quick Start

    ENGLISH Select protocol provided by your IPS or click on Quick Start to perform an automatic protocol selection. Quick Start Clicking on Quick Start, will appear the automatic procedure in order to select type of connection.
  • Page 52 ENGLISH Click on AUTO SCAN (and then on Start) in order to obtain the information on the type of protocol and the values of VCI/VPI (if a connection exists already, cancels it going in Configuration- WAN-ISP and pressing delete). In case you know already these values you will be able to proceed immediately inserting them, passing to the opportune section.
  • Page 53: Pppoe Routed/Pppoa Routed

    ENGLISH PPPoE routed/PPPoA routed PPPoA/PPPoE is known as a dial-up DSL or cable service. It is designed to integrate the broadband services into the current widely deployed, easy-to-use, and low-cost dial-up-access networking infrastructure. Therefore, users can get greater access speed without changing the operation concept, sharing the same ISP account and paying for one access account These are configuration parameters: •...
  • Page 54 ENGLISH addresses and can access Internet directly, the NAT function can be disabled. • Username: Enter the username provided by your ISP(case sensitive). • Password: Enter the password provided by your ISP (case sensitive). • Service Name (only for PPPoE): This item is for identification purpose.
  • Page 55: Rfc1483 Routed / Ipoa Routed

    ENGLISH RFC1483 routed / IpoA routed These are configuration parameters: • VPI: 0 or 1 (Consult the ISP) • VCI: 38 or 50 (Consult the ISP) • ATM Class: UBR • NAT: The NAT feature allows multiple users to access Internet through a single IP account, sharing the single IP address from ISP.
  • Page 56 ENGLISH • Now select Use the following IP address and insert the following values: • IP Address: Insert your Public IP • Netmask: Insert Netmask provided by ISP • Gateway: Insert router Default Gateway If these data will be supplied automatically from ISP server select Obtain an IP address automatically via DHCP client.
  • Page 57 ENGLISH To this point approaching the section Status you will be able to check if connection is up, now you can begin navigation. For every other problem refer to manual on attached cd-rom).
  • Page 58 FRANCAIS Ce guide d’installation rapide vous permet d’installer et de configurer l’I-Storm Router ADSL suivant paramètres standards. Pour plus de précisions, tant sur les méthodes de configuration que sur le paramétrage avancé, reportez-vous au manuel sous format électronique (PDF) disponible sur le CD Rom fourni. Avant d’installer votre I-Storm Lan Router ADSL, vous devez savoir de quel type d'accès vous disposez et vous munir d'informations précises concernant votre compte internet.
  • Page 59: Contenu De La Boîte

    FRANCAIS RFC1483 VPI/VCI Bridged VC-based ou LLC-based multiplexing RFC1483 VPI/VCI Routed VC-based ou LLC-based multiplexing Adresse IP Masque de sous-réseau Adresse IP du Default Gateway Adresses IP des serveurs DNS VPI/VCI IPoA VC-based ou LLC-based multiplexing Adresse IP Masque de sous-réseau Adresse IP du Default Gateway Adresses IP des serveur DNS 1.1 Contenu de la boîte...
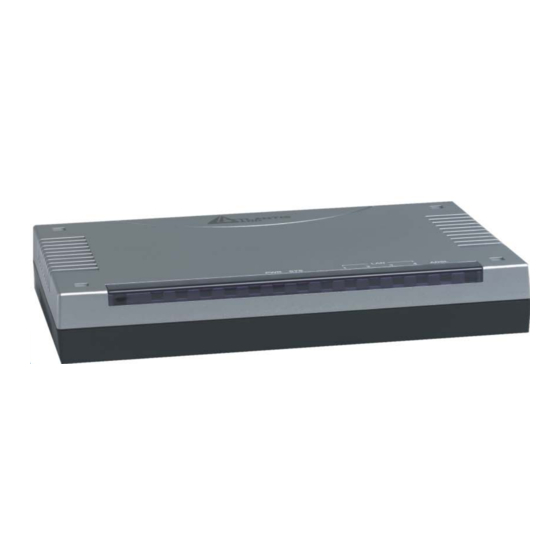
  • Page 60: Face Avant

    FRANCAIS 1.2 Face avant Signification Power Allumé quand l’I-Storm Router est sous tension Allumé pour indiquer que le système est actif Allumé quand le LAN (réseau) est connecté Vert= connexion à 100Mbps 8-11 Orange= connexion à 10Mbps Clignote lors des transferts de données Si allumé...
  • Page 61 FRANCAIS Port Usage Connectez le câble (fourni) RJ11 au filtre Line(RJ11) ADSL (optionnel) et enfin à la prise téléphonique Connectez le câble RS 232 à ce port Relier directement avec un câble Ethernet standard ou croisé aux PC ou à un port (4 * RJ-45) uplink (Hub/Switch).
  • Page 62: Câblage

    FAI). Pour une configuration plus détaillée faire référence au manuel complet sur le CD-Rom. La configuration initiale (paramètres par défaut) est: • User : admin • Password : atlantis • Adresse IP (192.168.1.254), Subnet Mask (Masque de sous réseau)=255.255.255.0 • DHCP (Fonction serveur DHCP) Activée...
  • Page 63: Configuration Du Tcp/Ip

    FRANCAIS 1.6 Configuration du TCP/IP Configuration sous Windows 95/98/ME Allez dans Panneau de Configuration. Double-cliquez sur Réseau.et enfin affichez l’onglet Configuration. Sélectionnez protocole TCP/IP -> NIC carte, ou quelconque carte réseau Ethernet dans le Cliquez sur Propriétés Dans l’onglet Adresse IP Sélectionnez l’option « obtenir automatiquement une adresse IP ».
  • Page 64 FRANCAIS...
  • Page 65 FRANCAIS Sélectionnez l’onglet DNS. Sélectionnez l’option Désactiver DNS et cliquez sur OK pour terminer la configuration. Vous devez redémarrer l’ordinateur pour que les changements prennent effet.
  • Page 66 FRANCAIS Configuration sous Windows NT4.0 Allez au Panneau de Configuration. Double-cliquez sur Réseau et enfin sélectionnez l’onglet Protocole . Sélectionnez TCP/IP Protocol et après cliquez sur Propriétés. Sélectionnez (votre carte Réseau) l’onglet Obtenir une adresse IP par un serveur DHCP et après cliquez sur OK pour terminer la configuration.
  • Page 67 FRANCAIS...
  • Page 68 FRANCAIS Configuration sous Windows 2000 Allez au Panneau de Configuration. Double-cliquez sur Connexions Réseau et accès à distance.. Double-cliquez sur connexion au réseau local.
  • Page 69 FRANCAIS Dans Connexion au réseau local cliquez sur Propriétés.
  • Page 70 FRANCAIS Sélectionnez Internet Protocol (TCP/IP) et cliquez sur Propriétés.
  • Page 71 FRANCAIS Sous l’onglet Général, sélectionnez l’onglet Obtenir une adresse IP automatiquement et après Obtenir les adresses des serveurs DNS automatiquement Cliquez sur OK pour terminer la configuration...
  • Page 72 FRANCAIS Configuration sous Windows XP Allez sur Panneau de Configuration. Double-cliquez sur Accès Réseau Double-cliquez sur Connexion au Réseau local. Cliquez Propriétés.
  • Page 73 FRANCAIS...
  • Page 74 FRANCAIS Sélectionnez Internet Protocol (TCP/IP) et cliquez sur Properties.
  • Page 75 FRANCAIS Sélectionnez Obtenir une adresse IP automatiquement et après Obtenir les adresses des serveurs automatiquement. Cliquez sur OK pour terminer la configuration.
  • Page 76: Vérification

    FRANCAIS 1.7 Vérification Pour vérifier le succès de la configuration (après avoir redémarré le PC, opération nécessaire sous Win98, SE, ME) utiliser le PING. Dans la fenêtre Dos écrivez: PING 192.168.1.254 Si le message suivant apparaît: Pinging 192.168.1.254 with 32 bytes of date: Reply from 192.168.1.254: bytes=32 times <10ms TTL=64 Reply from 192.168.1.254: bytes=32 times <10ms TTL=64 Reply from 192.168.1.254: bytes=32 times <10ms TTL=64...
  • Page 77: Configuration Avec Le Browser

    Un mot de passe vous est demandé, pour la première connexion. User = admin Password = atlantis et appuyez sur OK pour aller dans la configuration. Il apparaîtra à ce point le Menu Principal, dans la partie gauche on pourra accéder, à...
  • Page 78 FRANCAIS En suivant les indications ci-dessous il est possible de rendre opérationnel le I-Storm Lan Router ADSL 2 en peu de temps à condition d'utiliser les PC du réseau comme client DHCP. Pour une configuration personnalisée du réseau et du Router faire référence au manuel complet dans le CD Rom.
  • Page 79: Quick Start

    FRANCAIS vérifier). En cas de doutes demandez confirmation à votre fournisseur d’accès. (FAI) En choisissant la section Configuration et puis la sous-section WAN et enfin ISP vous pouvez introduire les modèles de la configuration pour la liaison avec le FAI. Choisir le protocole ou presser sur Quick Start pour effectuer une configuration automatique.
  • Page 80 FRANCAIS Cliquer sur SCAN (et puis sur Start), pour obtenir les renseignements sur le type de protocole et les valeurs de VCI/VPI. Si vous connaissez déjà ces valeurs vous pourrez procéder en les insérant immédiatement en passant à la section opportune. Après avoir pressé...
  • Page 81: Pppoe Routed /Pppoa Routed

    FRANCAIS À ce stade choisir la configuration et presser sur Apply. Insérez Username et Password (dans le cas de PPPoA/PPPoE) ou adresse IP/Subnet/Default Gateway (dans le cas de RFC1483/1577). Enfin presser sur Save config. to FLASH (et enfin Save) pour terminer. PPPoE Routed /PPPoA Routed Le protocole PPPoE (Point to Point Protocol over Ethernet) est l’une des méthodes utilisées en France.
  • Page 82 FRANCAIS • VPI:8 ou 8 ou 2 (contacter le FAI) • VCI:67 ou 35 ou 32 (contacter le FAI) • ATM Class: laisser UBR • NAT: (Network Address Translation) Permet de convertir une adresse IP interne en adresse IP externe. Cette fonction doit être activée si vous voulez pouvoir partager votre accès Internet.
  • Page 83: Rfc1483 Routed / Ipoa Routed

    FRANCAIS RFC1483 routed / IpoA routed • VPI:8 ou 8 ou 2 (contacter le FAI) • VCI:67 ou 35 ou 32 (contacter le FAI) • ATM Class: laisser UBR • NAT: (Network Address Translation) Permet de convertir une adresse IP interne en adresse IP externe. Cette fonction doit être activée si vous voulez pouvoir partager votre accès Internet.
  • Page 84 FRANCAIS • Gateway: remplissez dans les champs suivant les caractéristiques de votre abonnement ADSL Choisir par contre la voix Obtain an IP address automatically via DHCP client. En pressant APPLY, l’I-Storm Router ADSL fera un « reboot » automatique [le Led ADSL doit être Allumé fixe] et selon les différents PC vous serez déjà...
  • Page 85: Inhalt Der Verpackung

    Einzelheiten uber Konfiguration brauchen. 1.1 Inhalt der Verpackung Atlantis Land I-Storm Lan Router ADSL, CD-ROM,der das Handbuch enthalt, Quick Start Anleitung, Kabel RJ-11 ADSL, Kabel CAT-5 LAN , KabelRS232-PS2 , Speiseleitung (12V, 1A). 1.2 Die frontalen LED Information Fest eingeschaltet,wenn es zum Elektrizitatsnetz...
  • Page 86: Die Hinterturen

    DEUTSCH 1.3 Die Hinterturen Turen Benutzung Verbinden Sie den RJ-11 Kabel zu diesem Line(RJ11) Tur,um Anschluss ADSL durchzufuhren. Verbinden Sie den gegebenen Kabel RS232 zur (9 pin) Tur des PC. Diese Verbindung ist freigestellt. LAN (4 *RJ-45) Verbinden Sie mit einem UTP Kabel. Nachdem die Vorrichtung eingeschaltet Reset ist,drucken Sie auf die Taste,um der reset...
  • Page 87: Verdrahtung

    Verdrahtung).Um die Vorrichtung zu verbinden, konnen Sie jeder Kabel (recht oder gekreuzt) benutzen. 1.5 Einstellung des Default Bevor Sie die Konfiguration des Atlantis I-Storm Lan Router ADSL beginnen,ist es notwendig,dass sie die Einstellung des Default kennen. Indem Sie diese Einstellung aufheben und die PC als client DHCP...
  • Page 88: Die Ie Konfiguration

    DEUTSCH 1.6 Die IE Konfiguration Jeztz ist es notwendig,IE einzufuhren, in Menu Instrument zu gehen, dann der tab Verbindungen wahlen und eine der folgende Stimmen zu wahlen: • Benutzen Sie nie remote Verbindung • Benutzen Sie remote Verbindung, wenn es keine netz Verbindung disponibel ist.
  • Page 89 DEUTSCH Wahlen Option Obtain address automatically (nachdem Sie IP Address gewahlt haben). Gehen Sie auf DNS Configuration. Wahlen Sie die Option Disable DNS und drucken Sie auf OK, um die Konfiguration zu enden.
  • Page 90 DEUTSCH...
  • Page 91 DEUTSCH Leiten Sie wieder den PC,damit die Anderung geschehen.
  • Page 92 DEUTSCH Konfiguration des PC in Windows NT4.0 Gehen Sie auf Start/Settings/ Control Panel. Drucken Sie zweimal auf Network und dann auf Protocols . Wahlen Sie TCP/IP Protocol dann drucken Sie auf Properties. Wahlen Sie den Option Obtain an IP address from a DHCP server und drucken Sie auf OK.
  • Page 93 DEUTSCH...
  • Page 94: Konfiguration Des Pc In Windows 2000

    DEUTSCH Konfiguration des PC in Windows 2000 Gehen Sie auf Start/Settings/Control Panel. Drucken Sie zweimal auf Network and Dial-up Connections. Drucken Sie zweimal auf Local Area Connection. In Local Area Connection Status drucken Sie auf Properties.
  • Page 95 DEUTSCH Wahlen Sie Internet Protocol (TCP/IP) und drucken Sie auf Properties.
  • Page 96 DEUTSCH Wahlen Sie die Option Obtain an IP address automaticall und spater Obtain DNS server address automatically. Drucken Sie auf OK,um die Konfiguration zu enden.
  • Page 97 DEUTSCH...
  • Page 98: Konfiguration Des Pc In Windows Xp

    DEUTSCH Konfiguration des PC in Windows XP Gehen Sie auf Start dann auf Control Panel. Drucken Sie zweimal auf Network (in Classic View) Connections. Drucken Sie zweimal auf Local Area Connection. In Local Area Connection Status drucken Sie auf Properties.
  • Page 99 DEUTSCH Wahlen Sie Internet Protocol (TCP/IP) und drucken Sie auf Properties.
  • Page 100 DEUTSCH Wahlen Sie die Option Obtain an IP address automatically und spater Obtain DNS server address automatically . Drucken Sie auf OK,um die Konfiguration zu enden..
  • Page 101 DEUTSCH...
  • Page 102: Konfiguration Des Router

    Mit dem browser web, kommen Sie in den folgenden IP Adresse (wo man den URL steckt)dessen default ist: 192.168.1.254,und drucken Sie die Taste Ubersendung. Benutzen Sie admin (als user name) und atlantis (als password). Drucken Sie OK, um weiter zu gehen. Jeztz wird den Hauptmenu erscheinen,links wird man in alle...
  • Page 103 DEUTSCH Wenn man auf die gewunschte Abschnitt druckt,wird man im Raum Homepage alle Einstellung gewahlten Konfiguration sehen,oder eine Reihe von Abschnitte wird offnen,und Sie kann unter sie wahlen,bevor Sie in den wahre Konfigurationen kommen. Wenn Sie die nachste Schnitten folgen,konnen Sie in kurze Zeit den I-Storm ADSL Lan Router operativ machen,unter der Bedingung,dass Sie die als client DHCP eingestellten Lan Maschinen benutzen.Wie ublich,nehmen Sie Bezug auf den...
  • Page 104 DEUTSCH Wahlen Sie den passende Protokoll oder drucken Sie auf Quick Start, um eine automatische Konfiguration zu machen. Quick Start Drucken Sie auf Quick Start, Die automatische Prozedur,um die Verbindung zu wahlen, erscheinen wird. Drucken Sie auf AUTO SCAN (und dann auf Start),um Die Informationen uber den Typ des Protokoll und die VCI/VPI Werten haben.
  • Page 105 DEUTSCH gibt,verwischen Sie sie,indem in Configuration-WAN-ISP gehen und dann auf die Taste delete drucken).Wenn Sie diese Werten schon kennen, konnen Sie sofort sie stecken und zu dem passenden Abschnitt gehen. Nachdem Taste AUTO SCAN gedruckt haben,bekommen Sie die charakteristischen Parameter Ihrer ADSL Leitung.
  • Page 106 DEUTSCH PPPoE routed/PPPoA routed PPPoE/PPPoA sind ADSL Verbindungen,und sie sind als dial-up DSL bekannt.Sie sind ausgedacht werden,um Weitstreifen Verbindungen zu erganzen,.mit einer besonders Aufmerksamkeit der Leichtigkeit des Konfiguration. Der Benutzer kann eine grosse Zugriffschnelligkeit geniessen, ohne Arbeitsweise andern,und derselbe account mit ISP teilen. Sehen wir den Parameter,die man darstellen muss: •...
  • Page 107 DEUTSCH Verbindungen fungieren),sollte diese Zweckdienlichkeit unfahig werden. • Username: Stecken Sie den von Ihren ISP gegebenen username (case sensitive). • Password: Stecken Sie den von Ihren ISP gegebenen Password (case sensitive). • Service Name (nur in PPPoE): Eigene ISP geben diesen Parameter.Wenn Sie Zweifeln hegen, lassen Sie das Feld leer.
  • Page 108 DEUTSCH RFC1483 routed / IpoA routed Sehen wir den Paremeter, die man darstellen muss: • VPI: 8 (ISP) • VCI: 35 (ISP) • ATM Class: UBR • NAT: Der NAT erlaubt vielen Benutzern in Internet zu kommen,mit dem Kost eines einzelen account IP. Wenn die LAN Benutzer offentliche IP Adresse haben,und direkt in Internet kommen...
  • Page 109 DEUTSCH • IP Address: Stecken Sie Ihren offentlich IP. • Netmask:Stecken Sie die von ISP gegebene Netmask. • Gateway: Stecken Sie den Default Gateway des Router. Falls diesen Daten vom ISP server automatisch gegeben werden, konnen Sie die Stimme Obtain an IP address automatically via DHCP client wahlen.
  • Page 110 DEUTSCH machen. Wenn Sie die Konfiguration beendet haben,drucken Sie auf Save Config to FLASH (dann auf Save)um die Einstellung dauernd zu machen. Jetzt,wenn Sie in die Sektion Status kommen, konnen Sie die geschehene Verbindung kontrollieren und die Schutzstand zu beginnen.Fur jederen anderen Problemen,befragen Sie das vollstandige Handbuch,das sich anliegend im CDRom befindet.
  • Page 111 DEUTSCH...
  • Page 112 WARRANTY/GARANZIA/GARANTIE WARRANTY CERTIFICATE CONDIZIONI DI GARANZIA CERTIFICAT DE GARANTIE...
  • Page 113: Fast Swap Warranty Certificate

    WARRANTY/GARANZIA/GARANTIE FAST SWAP WARRANTY CERTIFICATE We thank you for your decision to have bought an ATLANTIS LAND® product . This product has got a particular form of Facilitated Guarantee which lasts for 36 months. ATLANTIS LAND® believes that those products are absolutely necessary for company production and for that they must have a very fast and reliable assistance .This service will...
  • Page 114 , and ATLANTIS LAND® doesn’t assume any kind of responsibility about eventual damages even in case of a transport by ATLANTIS LAND® itself . 9. Every ATLANTIS LAND® product is identified by a serial number (S/N) , the cancellation, even partial, of it bring to the cancellation of the Guarantee.

Table des Matières