
Manuels Connexes pour Teac SL-D950


Sommaire des Matières pour Teac SL-D950
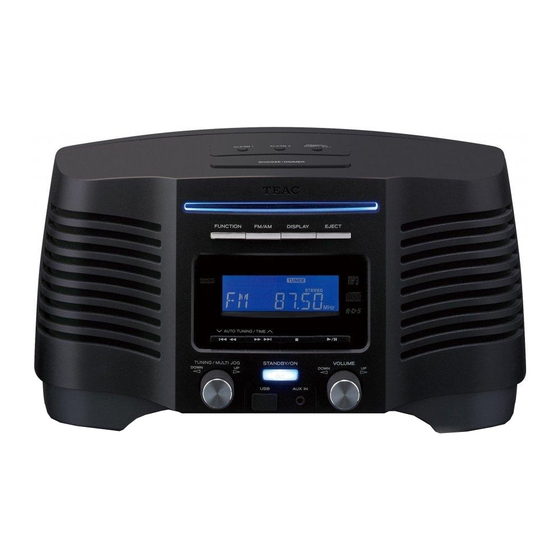
- Page 1 5100-950000E400 SL-D950 CD Clock Radio OWNER’S MANUAL MANUEL DU PROPRIÉTAIRE MANUAL DEL USUARIO BEDIENUNGSANLEITUNG MANUALE DI ISTRUZIONI GEBRUIKSAANWIJZING...
-
Page 2: Important Safety Instructions
IMPORTANT SAFETY INSTRUCTIONS 1) Read these instructions. 2) Keep these instructions. CAUTION: TO REDUCE THE RISK OF ELECTRIC 3) Heed all warnings. SHOCK, DO NOT REMOVE COVER (OR BACK). NO USER-SERVICEABLE PARTS INSIDE. REFER 4) Follow all instructions. SERVICING TO QUALIFIED SERVICE PERSONNEL. 5) Do not use this apparatus near water. - Page 3 < Do not install this apparatus in a confined space < IF YOU ARE EXPERIENCING PROBLEMS WITH THIS such as a book case or similar unit. PRODUCT, CONTACT TEAC FOR A SERVICE REFERRAL. DO NOT USE THE PRODUCT UNTIL IT < The apparatus draws nominal non-operating HAS BEEN REPAIRED.
-
Page 4: Table Des Matières
Contents Before Using the Unit Thank you for choosing TEAC. Read this manual Read this before attempting any operations. carefully to get the best performance from this < As the unit may become warm during operation, unit. always leave sufficient space around the unit for ventilation. -
Page 5: Beware Of Condensation
Maintenance Information for Users on Collection and If the surface of the unit gets dirty, wipe with a soft Disposal of Old Equipment and used Batteries cloth or use diluted neutral cleaning liquid. Be sure to remove any fluid completely. Do not use thinner, These symbols on the products, packaging, benzine or alcohol as they may damage the surface and/or accompanying documents mean that... -
Page 6: Discs
CDs. It is If you use such discs in this unit, TEAC Corporation important that they are not stored in a location and its subsidiaries cannot be responsible for any... -
Page 7: Emergency Switch
Emergency Switch MP3 compatibility < This unit can play MP3 files recorded on a CD-R, CD-RW or USB memory. < File names of MP3 should be alphanumeric characters. This unit cannot display symbols and full-size or 2 bytes-wide characters (such as Japanese, Chinese, etc.) correctly. -
Page 8: Connections
Connections CAUTION: < Switch off (standby) the power before making connections. < Read the instructions of each component you intend to use with this unit. < Be sure to insert each plug securely. To prevent hum and noise, do not bundle the connection cords. CAUTION Danger of explosion if battery is incorrectly replaced. -
Page 9: Bass Control
< Securely insert the plug until a slight “click” is heard. Compatible iPod Software In case your iPod will not work with the SL-D950 or with the remote control unit, software update may solve the problem. Visit the Apple website and download the latest iPod Software. -
Page 10: Unit Functions
Unit Functions Speakers (Stereo) FUNCTION Use these buttons to select the source you want to listen to. FM/AM In TUNER mode, press this button to select FM or Disc slot ALARM 1, ALARM 2 Hold down these buttons for more than 2 seconds to enter the timer setting mode. - Page 11 DISPLAY SLEEP In standby mode, use this button to check the timer Use this button to set sleep timer. on/off time. INTRO/PTY In CD, USB or TUNER mode, if the clock is In CD or USB mode, use this button for intro displayed, use this button to check the current playback.
-
Page 12: Display
Display Remote Control Unit The provided remote control unit allows the unit to be operated from a distance. When operating the remote control unit, point it towards the remote sensor on the front panel of the unit. < Even if the remote control unit is operated within the effective range (5 m), remote control operation may be impossible if there are any obstacles between the unit and the remote control unit. -
Page 13: Setting The Clock
Setting the Clock Press the CLOCK ADJ button. The “minute” value blinks. TIME MULTI JOG CLOCK ADJ Press the TIME button (‡/°) or turn the MULTI JOG knob, to set the current minute. Press the CLOCK ADJ button. “12 HR” or “24 HR” blinks on the display. If you want to change the hour mode, press the ‡... -
Page 14: Basic Operation
Muting iPod. To mute the sound temporarily, press the MUTING < If you insert the disc in standby mode, the SL-D950 button. Press the MUTING button again to restore will automatically turn on and start disc playback. the sound. -
Page 15: Sleep Timer
Adjusting the bass sound Sleep timer Turn the BASS CONTROL knob on the rear panel. Each press of the SLEEP button permits setting an interval (from 90 down to 10 minutes). The unit will automatically turn off and then into Standby mode. Each press of the SLEEP button changes the time indication by 10 minutes. -
Page 16: Listening To Cd/Mp3 (Disc)
Listening to CD/MP3 (disc) < It takes a few seconds for the unit to load the disc. No buttons will work during loading. Wait until the total number of the tracks and the total playing time of the disc are displayed. <... -
Page 17: Listening To Mp3 (Usb)
Listening to MP3 (USB) < Do NOT use a high-capacity USB hard disc with this Press the play/pause button (y/J) to start unit. playback. Playback starts from the first track on the USB Press the FUNCTION button to select “USB”. memory. -
Page 18: To Stop Playback
Listening to CD/MP3 (disc/USB) To skip to the next or a previous track During playback, press the skip button MULTI JOG (.or/) repeatedly until the desired track is found. The selected track will be played from the beginning. In the stop mode, press the skip button To suspend playback temporarily (.or/) repeatedly or turn the MULTI JOG (pause mode) - Page 19 To display the MP3 information Intro Playback While in stop mode, press the INTRO button. The unit plays 10 seconds at the beginning of each track sequentially. During playback of MP3 disc/USB memory, press the MP3 button. The information about the current track is displayed as follows: Press the INTRO button again to cancel the intro folder name/file name (scrolling)
-
Page 20: Programmed Playback
Programmed Playback To play MP3 files, press the skip button (. or /) repeatedly or turn the MULTI JOG knob, to select a file on an MP3 disc or USB memory, then press the MEMORY button. < MP3 tracks recorded out of folders are in the “01” (ROOT) folder. - Page 21 To add a track to the end of the programme In the stop mode, press the MEMORY button repeatedly until “00” or “000” appears on the display. Select a track number using the skip button (.or/) or the MULTI JOG knob, and then press the MEMORY button.
-
Page 22: Repeat/Shuffle Playback
Repeat/Shuffle Playback Repeat one track Press the PLAY MODE button once during playback. “REPEAT” lights. The track being played back will be played back repeatedly. If you press the skip button (.or/) and select another track, the track you selected will be played back repeatedly. It is also possible to select a track to be repeated in the stop mode. -
Page 23: Listening To Ipod (Using Ipod Dock Ds-22 Sold Separately)
When no iPod is docked, the iPod indicator on the < The battery of the iPod is recharged to the full display blinks. whenever the iPod is docked and the SL-D950 is Docking an iPod to this system iPod video output <... -
Page 24: Operating Ipod
Operating iPod To go back to the previous menu Press the MENU button. This button works with the To suspend playback temporarily (pause same functions as its iPod counterpart. mode) Select the menu item Press the play/pause button (G /J ) during playback. -
Page 25: Listening To An External Source
SL-D950. < Turning the volume of the mini player up too high may cause the sound from your SL-D950 to be Connect the PHONES jack (audio output jack) distorted. In this case, reduce the volume of the... -
Page 26: Listening To The Radio
Listening to the Radio Checking the tuner frequency If the clock is displayed, press the DISPLAY button to display the current band and frequency for 20 seconds. TUNING Select “TUNER” using the FUNCTION button. If the reception is poor Select FM or AM using the FM/AM button. For the best reception, rotate the FM or the AM antenna until you get stations clearly. -
Page 27: Preset Tuning
Preset Tuning You can programme 20 FM and 20 AM channel How to select a preset station presets. To select FM or AM, press the FM/AM button. Tune in a station you want to listen to (see page 26). < If the clock is displayed, press the DISPLAY button to display the current band and frequercy. -
Page 28: Rds
The Radio Data System (RDS) is a broadcasting service RDS Clock Time (CT) which allows stations to send additional information The clock setting will be automatically adjusted along with the regular radio programme signal. according to the CT data. If you tune in an RDS station broadcasting incorrect RDS works on the FM waveband in Europe only. -
Page 29: Rds (Pty Search)
RDS (PTY Search) PTY (Programme Type) NEWS: brief announcements, events, public opinion, reports, actual situations. AFFAIRS: a kind of suggestion including practical announcements other than news, documents, discussion, analysis and so on. INFO: daily information or reference such as weather forecast, consumer guide, medical assistance and so on. -
Page 30: Setting The Timer
Timer 1 Press the TIME button (‡/°) or turn the MULTI JOG knob, to set the hour, and then press the ALARM 1 or ALARM 2 button. Press the TIME button (‡/°) or turn the ALARM 1, ALARM 2 TIME MULTI JOG MULTI JOG knob, to set the minute, and then press the ALARM 1 or ALARM 2 button. - Page 31 < When the source is set to “CD” but no disc is loaded, and when the source is set to “USB” but no USB memory is connected, the timer will work in TUNER mode. < If the source is set to “iPod” but no iPod is set, the unit will turn on into TUNER mode.
-
Page 32: Specifications
< During timer playback and snoozing, all the function cannot work except the DISPLAY button. < If TIMER OFF mode is set the time within the snooze function range, the snooze function is automatically cancelled and the SL-D950 remains in standby mode. -
Page 33: Cd-Player
Sound skips. this chart and see if you can solve the problem e Place the unit on a stable place to avoid vibration yourself before calling your dealer or TEAC service and shock. center. e If the disc is dirty, clean the surface of the disc. -
Page 34: Avant Utilisation
Avant utilisation Nous vous remercions pour l’achat d’un appareil Lisez ce qui suit avant d’utiliser l’appareil TEAC. Lisez ce manuel avec attention pour obtenir les meilleures performances possibles de cet appareil. < L’appareil pouvant dégager de la chaleur lorsqu’il fonctionne, laissez un dégagement suffisant autour de l’appareil afin de permettre une ventilation... -
Page 35: Condensation D'humidité
Entretien Information pour les utilisateurs sur le Si la surface de l’appareil devient sale, essuyez-la ramassage et la mise au rebut des vieux avec un chiffon doux ou utilisez un liquide de appareils et des piles usées nettoyage neutre dilué. Assurez-vous de retirez complètement toute l’humidité. -
Page 36: Disque Compact
< Les disques CD-R/CD-RW sont plus sensibles aux par ce lecteur. effets de la chaleur et aux rayons ultraviolets que TEAC Corporation et ses filiales ne peuvent être les disques compacts ordinaires. Il est donc tenus responsable en cas de dommages provoqués particulièrement important de les ranger dans un... -
Page 37: Interrupteur D'urgence
Interrupteur d'urgence < N’utilisez pas de CD ayant une forme irrégulière (octogonale, en forme de coeur, etc.), ceux-ci risquant d'endommager l'appareil. < En cas de doute quant à la manipulation des CD-R/CD-RW, lisez les instructions fournies avec le disque ou contactez directement le fabricant du disque. -
Page 38: Raccordement
Raccordement ATTENTION: < Coupez l’alimentation avant d’effectuer les raccordements. < Lisez les instructions qui accompagnent chaque appareil que vous avez l’intention d’utiliser en association avec cet appareil-ci. < Assurez-vous d’insérer chaque prise jusqu’au fond. Afin d’éviter le bruit, ne liez pas les fils électriques. ATTENTION Danger d’explosion si la pile n’est pas correctement remplacée. -
Page 39: Bass Control
Logiciel iPod compatible Voir page 45 pour des détails. Au cas où votre iPod ne fonctionnerait pas avec le SL-D950 ou sa télécommande, une mise à jour du logiciel peut résoudre le problème. Visitez le site web Apple et téléchargez le dernier logiciel pour iPod. -
Page 40: Fonctions De L'appareil
Fonctions de l’appareil Haut-parleurs (stéréo) FUNCTION Utilisez cette touche pour sélectionner une source (CD, USB, iPod, TUNER ou AUX). FM/AM En mode TUNER, appuyez sur cette touche pour sélectionner FM ou AM. Logement du disque ALARM 1, ALARM 2 Maintenez ces touches enfoncées pendant plus de 2 secondes pour passer en mode de réglage de réveil. - Page 41 DISPLAY Capteur de télécommande En mode de veille, utilisez cette touche pour vérifier Pointez la télécommande vers ce capteur lorsque l’heure d’activation/désactivation du réveil. vous l’utilisez. En mode CD, USB ou TUNER, si l'horloge est affichée, utilisez cette touche pour contrôler la SLEEP plage actuelle/le temps de lecture écoulé...
-
Page 42: Afficheur
Afficheur Boîtier de télécommande Le boîtier de télécommande fourni permet la commande à distance de l’appareil. Pour l’utilisation du boîtier de télécommande, dirigez-le vers le capteur de télécommande du panneau avant de l’appareil. < Même si le boîtier de télécommande est activé dans la zone de fonctionnement (5 m), la commande à... -
Page 43: Réglage De L'horloge
Réglage de l’horloge Appuyez sur la touche CLOCK ADJ. La valeur des “minutes” clignote. TIME MULTI JOG CLOCK ADJ Appuyez sur la touche TIME (‡ ou °) ou tournez la molette MULTI JOG pour régler les Appuyez sur la touche CLOCK ADJ. minutes. -
Page 44: Fonctionnement De Base
< L’appareil s’allume avec la dernière source sélectionnée. Si l’iPod qui est en mode lecture est inséré dans le dock DS-22, le SL-D950 se mettra automatiquement sous tension et entamera la lecture de l’iPod. < Si vous insérez le disque en mode de veille, le SL- D950 s'allumera automatiquement et commencera Vous pouvez modifier la luminosité... -
Page 45: Réglage Du Son Des Basses
Réglage du son des basses Minuterie d’arrêt différé Tournez la molette BASS CONTROL en face arrière. À chaque fois que vous appuyez sur la touche SLEEP, cela vous permet de spécifier l’intervalle (de 90 à 10 minutes) au terme duquel l’appareil s’éteindra automatiquement et commutera en mode de veille. -
Page 46: Lecture Des Cd/Disques Mp3
Lorsque vous insérez le disque alors que le SL-D950 est réglé sur une fonction, il passera à la fonction “CD” et commencera la lecture. Appuyez sur la touche Lecture/Pause (y/J) pour lancer la lecture. -
Page 47: Lecture D'une Clé Mp3 (Usb)
Lecture d’une clé MP3 (USB) < N’employez PAS de disque dur USB à grande Appuyez sur la touche Lecture/Pause (y/J) capacité avec cet appareil. pour lancer la lecture. La lecture commence à la première plage de la mémoire USB. Appuyez sur la touche FUNCTION pour sélectionner “USB”. -
Page 48: Lecture Des Cd/Mp3 (Disques/Usb)
Lecture des CD/MP3 (disques/USB) Pour sauter à la plage suivante ou précédente Pendant la lecture, appuyez répétitivement sur la MULTI JOG touche de saut (. ou /) jusqu’à ce que vous trouviez la plage désirée. La plage sélectionnée est lue depuis le début. Pour interrompre lecture... -
Page 49: Pour Afficher Les Informations Mp3
Pour afficher les informations MP3 Lecture d’intro En mode d’arrêt, appuyez sur la touche INTRO. L’appareil lit 10 secondes au début de chaque plage. Pendant la lecture de disque MP3/mémoire USB, appuyez sur la touche MP3. Les informations sur la plage actuelle s’affichent comme suit: Appuyez à... -
Page 50: Lecture Programmée
Lecture programmée < Ignorez cette étape si vous faites la lecture d’un CD. Vous pouvez programmer jusqu’à 60 plages dans l’ordre désiré. Les fonctions de lecture aléatoire sont inopérantes Appuyez répétitivement sur la touche de saut pendant la lecture programmée. (. -
Page 51: Pour Ajouter Une Plage À La Fin De La Programmation
Pour ajouter une plage à la fin de la programmation En mode d’arrêt, appuyez de manière répétée sur la touche MEMORY jusqu’à ce que “00” ou “000” apparaisse sur l’afficheur. Sélectionnez un numéro de plage avec la touche de saut (. ou /) ou la molette MULTI JOG puis appuyez sur la touche MEMORY. -
Page 52: Lecture Répétée/Aléatoire
Lecture répétée/aléatoire Répétition d’une plage Appuyez une fois sur la touche PLAY MODE pendant la lecture. “REPEAT” s’allume. La plage en cours de lecture est lue de manière répétée. Si vous appuyez sur la touche de saut (. ou /) et sélectionnez une autre plage, la plage sélectionnée est lue en boucle. -
Page 53: Écoute De L'ipod (À L'aide Du Dock Ipod Externe Ds-22 Vendu Séparément)
Connexion d’un iPod au système < La batterie de l’iPod est rechargée au maximum Sortie vidéo du iPod quand l’iPod est mis sur le dock et que le SL-D950 Réalisez le réglage suivant sur le menu de votre est activé. -
Page 54: Contrôle De L'ipod
Contrôle de l’iPod Pour revenir au menu précédent Appuyez sur la touche MENU. Cette touche a les Suspendre temporairement la lecture (mode même fonctions que celle de l’iPod. pause). Pour sélectionner un élément dans le menu Appuyez sur la touche Lecture/Pause (G/J) durant la lecture. -
Page 55: Écoute D'une Source Externe
SL-D950. d’un lecteur audio portable à la prise d’entrée Si c’est le cas, réduisez le volume du mini-lecteur auxiliaire AUX IN du SL-D950 à l’aide du câble jusqu’à la disparition de la distorsion puis réglez le à mini-fiche stéréo fourni. -
Page 56: Écoute De La Radio
Écoute de la radio Vérification de la fréquence du syntoniseur Si l'horloge est affichée, appuyez sur la touche DISPLAY pour afficher la bande et la fréquence actuelles pendant 20 secondes. TUNING Sélectionnez “TUNER” avec la touche FUNCTION. Si la réception est faible Sélectionnez FM ou AM avec la touche FM/AM. -
Page 57: Préréglage De Stations
Préréglage de stations Vous pouvez prérégler (“programmer”) 20 stations FM Comment rappeler des stations et 20 stations AM. préréglées Pour sélectionner FM ou AM, appuyez sur la touche FM/AM. Réglez l’appareil sur une station que vous voulez écouter (voir les étapes pour cela en page 56). -
Page 58: Rds
Le Radio Data System (système de données radio RDS) Heure de l’horloge RDS (CT) est un service de diffusion qui permet aux stations Les paramètres de l’horloge s’ajusteront d’émettre des informations supplémentaires en même automatiquement selon les données CT. temps que le signal normal du programme radio. Si vous syntonisez une station RDS qui diffuse des données CT incorrectes, l’horloge risque d’être mal Le RDS ne fonctionne que sur la bande FM en... -
Page 59: Rds (Recherche De Type De Programme Pty)
RDS (recherche de type de programme PTY) PTY (Type de programme) NEWS: annonces brèves, événements, opinion publique, enquêtes, situations réelles AFFAIRS: genre de conseils incluant des annonces pratiques autres que des actualités, des documents, discussions, analyses etc. INFO: informations quotidiennes ou de référence telles que bulletin météo, guide de consommation, aide médicale etc. -
Page 60: Réglage Du Réveil
Réveil 1 L’heure d’activation est maintenant réglée. “OFF TIME” et l’heure de désactivation clignotent. Appuyez sur la touche TIME (‡ ou °) ou tournez la molette MULTI JOG pour régler les heures, puis appuyez sur la touche ALARM 1 ou ALARM 2. ALARM 1, ALARM 2 TIME MULTI JOG... -
Page 61: Pour Activer Le Réveil
< Lors de l’allumage par le réveil, le volume de lecture monte progressivement jusqu’au niveau de volume que vous avez réglé. < Lorsque la source est réglée sur “CD” mais qu'aucun disque n'est chargé, et lorsque la source est réglée sur “USB” mais qu'aucune mémoire USB n'est connectée, le réveil fonctionne en mode TUNER. -
Page 62: Comment Utiliser La Fonction Sommeil
< Pendant l’activation du réveil et de la répétition d’alarme, seule la touche DISPLAY. < En mode TIMER OFF, si l'heure est réglée dans la plage de la fonction sommeil, la fonction sommeil est automatiquement annulée et le SL-D950 reste en mode de veille. -
Page 63: Dépannage
Placez l’appareil sur un support stable de façon à problême vous-même avant de consulter votre éviter les vibrations et les chocs. dépositaire ou un centre de service TEAC. e Si le disque est sale, nettoyez sa surface. e Évitez d’utiliser des disques rayés, abîmés ou voilés. - Page 64 Índice Antes de utilizar la unidad Gracias por confiar en TEAC. Lea atentamente Lea estas instrucciones antes de intentar este manual para obtener el mejor rendimiento cualquier operación de la unidad. < La unidad puede calentarse durante su funcionamiento, por lo que habrá que dejar espacio Antes de utilizar la unidad .
- Page 65 Mantenimiento Información para los usuarios sobre la recogida y desecho de equipos antiguos y pilas usadas Si se ensucia la superficie de la unidad, pase un paño suave o utilice jabón líquido normal diluido. La presencia de estos símbolos en los productos, Limpie cualquier resto líquido que pueda quedar en embalajes y/o documentos incluidos significa que la unidad.
-
Page 66: Discos
< Los discos CD-R/CD-RW son más sensibles a los reproductor. efectos del calor y los rayos ultravioleta que los CD Si usa dichos discos en esta unidad, TEAC ordinarios. Es importante que no se almacenen en Corporation y sus filiales no se responsabilizarán de una ubicación donde la luz directa del sol caiga... -
Page 67: Interruptor De Emergencia
Interruptor de emergencia Compatibilidad MP3 < Con esta unidad se puede reproducir la música MP3 grabada en un disco CD-R/CD-RW o almacenada en una memoria USB. < Los nombres de los archivos MP3 sólo utilizan caracteres alfanuméricos. Esta unidad no puede mostrar correctamente ni símbolos ni caracteres de tamaño completo o 2 bytes de anchura (japonés, chino, etc.). -
Page 68: Conexión
Conexión PRECAUCIÓN: < Apague la energía de todos los equipos antes de realizar las conexiones. < Lea las instrucciones de cada componente que pretenda usar con esta unidad. < Asegúrese de insertar el conector de manera segura. Para evitar los ruidos y vibraciones, no junte los cables de conexión. -
Page 69: Bass Control
< Introduzca bien el enchufe hasta que se oiga un ligero ”clic”. Software de iPod compatible Si el iPod no funciona con el SL-D950 o con el mando a distancia, una actualización de software puede resolver el problema. Visite el sitio web de Apple y descárguese el software de iPod más reciente. -
Page 70: Funciones
Funciones Altavoces (estereo) FUNCTION Use este botón para seleccionar una fuente (CD, USB, iPod, TUNER, AUX). FM/AM En modo TUNER, use este botón para seleccionar AM o FM. Bandeja del disco ALARM 1, ALARM 2 Mantenga presionados estos botones más de 2 segundos para entrar en el modo de ajuste del temporizador. - Page 71 DISPLAY Sensor remoto Cuando el equipo está en modo de espera, use este Cuando se maneja el mando a distancia, apunte botón para comprobar hora hacia aquí. activación/desactivación del temporizador. SLEEP En modo CD, USB o TUNER, si aparece el reloj, Use este botón para programar la desconexión utilice este botón para comprobar la pista actual, el automática.
-
Page 72: Pantalla
Pantalla Mando a distancia El mando a distancia suministrado le permite controlar el aparato a distancia. Cuando utilice el mando a distancia, diríjalo hacia el sensor remoto en el panel frontal del aparato. < Aunque se utilice la unidad dentro del margen de funcionamiento efectivo (5 m), es imposible controlarla a distancia si hay obstáculos entre el reproductor y el mando a distancia. -
Page 73: Ajuste Del Reloj
Ajuste del reloj Pulse el botón CLOCK ADJ. Parpadea el valor de “minuto”. TIME MULTI JOG CLOCK ADJ Pulse el botón TIME (‡ o °) o gire la rueda MULTI JOG para ajustar el minuto actual. Pulse el botón CLOCK ADJ. Parpadea ”12 HR”... -
Page 74: Funcionamiento Básico
STANDBY/ON ( D950 se apagará automáticamente y comenzará a reproducir del iPod. Silenciamiento < Si inserta el disco en modo de espera, el SL-D950 se encenderá automáticamente y comenzará la Para silenciar el sonido momentáneamente, pulse el reproducción del disco. - Page 75 Ajuste de graves (bass) Temporizador Gire la rueda BASS CONTROL del panel posterior. Al pulsar repetidamente el botón SLEEP se puede ajustar un intervalo (de 90 a 10 minutos), después de lo cual se apagará la unidad automáticamente y cambiará a modo Standby (en espera). Cada vez que pulse el botón SLEEP cambia la indicación de hora en 10 minutos.
-
Page 76: Cómo Escuchar Los Cd/Mp3 (En Discos)
Cómo escuchar los CD/MP3 (en discos) < La unidad tarda unos segundos en cargar el disco. Ningún botón funcionará durante la carga. Espere hasta que aparezca el número total de pistas y el tiempo total de reproducción del disco. < Cuando no se coloca ningún disco en el reproductor, en la pantalla aparece “NO DISC”... -
Page 77: Reproducción Mp3 (Usb)
Reproducción MP3 (USB) < NO puede utilizar un disco duro USB de gran Pulse el botón reproducir/pausa (y/J) para capacidad con este aparato. comenzar la reproducción. La reproducción comienza desde la primera pista de la memoria USB. Pulse el botón FUNCTION para seleccionar “USB”. -
Page 78: Cómo Escuchar Los Cd/Mp3 (En Discos/Usb)
Cómo escuchar los CD/MP3 (en discos/USB) Para saltar a la pista siguiente o a la anterior Durante la reproducción, pulse el botón saltar (.o/) de manera repetida hasta que se MULTI JOG encuentre la pista deseada. La pista seleccionada se reproducirá desde el inicio. Para suspender la reproducción En modo de paro, pulse el botón saltar temporalmente (modo de pausa) - Page 79 Para visualizar la información de Reproducción de la parte inicial Cuando está en el modo de parada, pulse el botón INTRO. La unidad reproduce 10 segundos al principio de cada pista secuencialmente. Durante la reproducción del disco MP3 o de la memoria USB, pulse el botón MP3.
-
Page 80: Reproducción Programada
Reproducción programada Pulse de manera repetida el botón saltar (. o / ) o gire la rueda MULTI JOG para seleccionar una carpeta en un disco MP3 o memoria USB y, a continuación, pulse el botón MEMORY. < Las pistas MP3 grabadas fuera de carpetas irán a la carpeta “01”... - Page 81 Adición de una pista al final del programa En el modo de parada, pulse de manera repetida el botón MEMORY hasta que aparezca “00” ó “000” en la pantalla. Seleccione un número de pista utilizando el botón saltar (. o /) o la rueda MULTI JOG, y después pulse el botón MEMORY.
-
Page 82: Reproducción Repetida/Aleatoria
Reproducción repetida/aleatoria Repetir una pista Pulse el botón PLAY MODE una vez durante la reproducción. Se enciende “REPEAT”. La pista que se está reproduciendo se volverá a reproducir de manera repetida. Si se pulsa el botón saltar (. o /) y se selecciona otra pista, la pista que seleccionó... -
Page 83: Escucha De Ipod (Utilización De La Plataforma Ipod Ds-22 Se Vende Por Separado)
Si no hay un iPod en la base, el botón y el indicador iPod de la pantalla aparecerán intermitentes. < La batería del iPod se recarga al máximo siempre que el iPod está conectado a la base y el SL-D950 al Conexión de un iPod a este sistema suministro de alimentación. -
Page 84: Control Del Ipod
Control del iPod Para retroceder al menú anterior Pulse el botón MENU. Este botón tiene las mismas Para interrumpir momentáneamente la funciones que el mismo botón del iPod. reproducción (pausa) Para elegir una opción de menú Pulse el botón reproducir/pausa (G/J) durante la reproducción. -
Page 85: Audición De Una Fuente Externa
AUX < Si eleva demasiado el volumen del minirreproductor, IN del SL-D950 utilizando el cable con es posible que distorsione el sonido del SL-D950. En miniconector estéreo suministrado. tal caso, reduzca el nivel hasta que desaparezca la distorsión, y después seleccione un volumen... -
Page 86: Escucha De La Radio
Escucha de la radio Compruebe la frecuencia del sintonizador Si aparece el reloj, pulse el botón DISPLAY para visualizar la banda y frecuencia actuales durante 20 segundos. TUNING Seleccione “TUNER” con el botón FUNCTION. Si la recepción de baja calidad Seleccione FM o AM con el botón FM/AM. -
Page 87: Presintonías
Presintonías Puede almacenar emisoras de FM y AM en los canales Cómo seleccionar presintonías del 1 al 20. Pulse el botón FM/AM para seleccionar FM o Sintonice una emisora (véase la página 86). < Si aparece el reloj, pulse el botón DISPLAY para visualizar la banda y frecuencia. -
Page 88: Rds
El sistema RDS es un servicio que permite a las Señal horaria (CT) de RDS emisoras enviar información adicional junto con la configuración reloj ajustará señal habitual de la programación de radio. automáticamente con los datos CT. Si sintoniza una emisora RDS que emita datos CT RDS funciona en la banda FM únicamente en incorrectos, es posible que el reloj se ajuste Europa. -
Page 89: Rds (Búsqueda Pty)
RDS (búsqueda PTY) PTY (tipo de programa) NEWS: noticias, convocatorias, opinión pública, informes, actualidad. AFFAIRS: oferta variada, temas de actualidad, debates, análisis, etc. INFO: información o referencias cotidianas, previsión meteorológica, guía de consumo, temas sanitarios, etc. SPORT: programas relacionados con el mundo Esta función permite buscar emisoras por tipo de del deporte. -
Page 90: Ajuste Del Temporizador
Temporizador 1 La hora de activación ha sido ajustada. Parpadean “OFF TIME” y el valor de la hora de desactivación. Pulse el botón TIME (‡ o °) o gire la rueda MULTI JOG para ajustar la hora y, a continuación, pulse los botones ALARM 1 o ALARM 2. - Page 91 < Cuando la fuente esté ajustada a “CD“ pero no se ha cargado ningún disco y también si se selecciona la fuente “USB“ pero no se ha conectado ninguna memoria USB, el temporizador funcionará en modo TUNER. < Si se ha seleccionado “iPod” como fuente pero no hay un iPod conectado, la unidad cambiará...
-
Page 92: Especificaciones
DISPLAY. < Si se ajusta el modo TIMER OFF a una hora incluida en el rango de función de repetición, dicha función se cancela automáticamente y el SL-D950 permanece en modo de espera. -
Page 93: Solución De Problemas
Coloque la unidad en un lugar estable para evitar antes de llamar a su distribuidor o al centro de servicio la vibración y los golpes. de TEAC. e Si el disco está sucio, limpie la superficie de éste. e No use discos rayados, dañados u ondulados. - Page 94 Inhaltsverzeichnis Vor der Inbetriebnahme Danke, dass Sie sich für TEAC entschieden haben. Beachten Sie bitte die folgenden Hinweise vor Lesen Sie diese Bedienungsanleitung bitte der Inbetriebnahme aufmerksam durch, damit alle < Lassen Sie stets ausreichenden Platz zur Belüftung Leistungsmerkmale dieses Geräts...
- Page 95 Möbeln, wie etwa einem Bücherschrank oder der Europäischen Union einem geschlossenen Regalsystem. Diese Symbole gelten nur innerhalb der < Der SL-D950 bezieht auch dann einen geringen Europäischen Union. Wenn Sie solche Artikel Ruhestrom aus dem Stromnetz, wenn sich der ausrangieren möchten, kontaktieren Sie bitte Ihre POWER- oder STANDBY/ON-Schalter nicht in der örtlichen Behörden oder Ihren Händler und...
-
Page 96: Discs
Discs Discs, die zur Wiedergabe auf dem SL-D950 < Verwenden Sie zur Reinigung einer CD niemals geeignet sind: chemische Reinigungsmittel, wie Record-Sprays, Antistatic-Sprays oder Flüssigkeiten wie Benzin oder • Konventionelle Audio-CDs, die das Compact Disc Verdünner, da diese Substanzen irreparable Digital Audio-Logo tragen: Schäden an einer CD anrichten. -
Page 97: Notschalter
CD-Hülle abgedruckt sind oder wenden Sie sich an den Hersteller der entsprechenden CD. MP3-Kompatibilität < Der SL-D950 eignet sich zur Wiedergabe von MP3- Dateien, die auf CD-R, CD-RW oder USB- Speichergeräten vorliegen. < Bei der Namensgebung der MP3-Dateien dürfen ausschließlich alphanumerische Zeichen verwendet... -
Page 98: Anschlüsse
< Schalten Sie den SL-D950 stets aus, bevor Sie externe Komponenten daran anschließen. < Lesen Sie bitte die Bedienungsanleitungen aller Komponenten, die Sie am SL-D950 betreiben möchten. < Achten Sie beim Anschließen auf korrekten Sitz der jeweiligen Stecker. Zur Vermeidung von Brummen und Rauschen sollten Sie einzelne Anschlusskabel nicht zu einem Kabelstrang zusammenbinden oder flechten. -
Page 99: Bass Control
Kompatible iPod Software USB-Anschluss Falls Ihr iPod-Modell sich mittels SL-D950 oder Schließen Sie an diesem Anschluss Ihr USB- Fernbedienung nicht steuern lässt, kann dieses Speichergerät an. Problem durch Installieren der aktuellen Sofern hier ein iPod shuffle angeschlossen ist, Softwareversion möglicherweise behoben werden. -
Page 100: Bedienelemente Und Deren Funktion
Zur Vereinfachung beziehen sich Erklärungen und Nachdem die TIMER ON-Zeit (Weckzeit) erreicht Bedienhinweise in dieser Bedienungsanleitung auf wurde, können Sie den SL-D950 mittels dieser die Namen der Tasten und Steuerelemente auf der Taste für weitere fünf Minuten in den Standby- Gerätevorderseite... - Page 101 MP3/RDS STANDBY/ON ( Im FM TUNER-Modus können Sie mit dieser Taste einen RDS-Modus auswählen. Mittels dieser Taste können Sie den SL-D950 Betätigen Sie diese Taste während der Wiedergabe einschalten oder den Bereitschaftsmodus aktivieren. einer MP3-Disc oder einer USB-Speicherkarte, um TUNING/MULTI JOG den Namen/Dateinamen, Titel, Ordnernummer/ Dateinummer anzuzeigen.
-
Page 102: Display
Fehlfunktionen anderen Leuchtet während CD- oder USB- Wiedergabe. Infrarotsignalen zu bedienenden Geräten verursachen (5 m). Bei eingeschaltetem SL-D950 signalisieren diese Anzeigefelder die derzeit zur Wiedergabe Einlegen der Batterien ausgewählte Signalquelle. Bei aktiver Stummschaltung leuchtet diese Anzeige. Zeigt die digitale Uhr, die Frequenz, die abgelaufene Zeit, die Zeit der Einschlaffunktion, den voreingestellten Sender usw. -
Page 103: Einstellen Der Uhrzeit
Einstellen der Uhrzeit Drücken Sie die CLOCK ADJ-Taste. Der „Minutenwert“ blinkt. TIME MULTI JOG CLOCK ADJ Betätigen Sie zum Einstellen des aktuellen Drücken Sie die CLOCK ADJ-Taste. Minutenwertes die entsprechende TIME-Taste Die „12 HR“ oder die „24 HR“ blinken auf dem (‡... -
Page 104: Grundlegende Bedienschritte
Grundlegende Bedienschritte Dimmer Drücken Sie zum Einschalten des SL-D950 die STANDBY/ON-Taste ( Sie können die Helligkeit des Displays an der Vorderseite verändern. Verwenden Sie die DIMMER-Taste, um die Helligkeit in drei Stufen zu < Hierbei wird die vor dem Ausschalten aktive verändern. - Page 105 Verwenden Sie den BASS CONTROL-Drehregler auf Jedes Betätigen der SLEEP-Taste ermöglicht das der Geräterückseite. Einstellen eines Intervalls (90 bis 10 Minuten), nach dessen Verstreichen der SL-D950 sich automatisch ausschaltet und dann in den Standby-Betrieb versetzt wird. Durch jedes Betätigen der SLEEP-Taste ändert sich das angezeigte Abschaltintervall (10 Minuten) wie folgt.
-
Page 106: Wiedergabe Von Cd/Mp3 Disc
Gesamttitelanzahl Gesamtwiedergabedauer Legen Sie eine Disc mit der bedruckten Seite nach oben ein. Sofern sich eine MP3-Disc im Laufwerk Der SL-D950 schaltet die Funktion auf „CD“ um befindet. und beginnt die Wiedergabe. Gesamte Anzahl der Ordner Gesamttitelanzahl Starten Sie die Wiedergabe durch Betätigen der Wiedergabe/Pause-Taste (y/J) <... -
Page 107: Wiedergabe Von Usb Speicherkarte
< Sobald alle Titel wiedergegeben wurden, endet die Wiedergabe automatisch. < Es kann möglicherweise einige Sekunden dauern, bis der SL-D950 die Information des USB-Speichers eingelesen hat. Während des Einlesens sind die Funktionen sämtlicher Tasten außer Kraft gesetzt. Warten Sie bitte, bis die Gesamttitelanzahl sowie die Anzahl aller auf dem USB-Speichergerät... -
Page 108: Wiedergabe Von Cd/Mp3 Disc/Usb Karte
Wiedergabe von CD/MP3 Disc/USB Karte Aufsuchen eines nachfolgenden oder vorangegangenen Titels Betätigen Sie während der Wiedergabe wiederholt MULTI JOG die entsprechende Skip-Taste (.oder/), bis Sie den gesuchten Musiktitel gefunden haben. Der Pause-zum kurzzeitigen gewählte Titel wird ab Titelanfang wiedergegeben. Unterbrechen der Wiedergabe Betätigen Sie zur Titelsuche im Stoppmodus wiederholt die entsprechende Skip-Taste (.oder/) oder verwenden Sie das MULTI JOG... - Page 109 Anzeigen von MP3-Informationen Anspielfunktion Drücken Sie im Stop-Modus die INTRO-Taste. Das Gerät spielt der Reihenfolge nach jeden Titel für 10 Sekunden an. Betätigen Sie während der Wiedergabe einer MP3 Disc/eines USB Speichergeräts die MP3-Taste. Die Informationen des aktuellen Titels werden wie folgt angezeigt: Drücken Sie wiederum die INTRO-Taste, um die Wiedergabe zu beenden.
-
Page 110: Wiedergabe Programmierter Titelfolgen
Titelfolge die Stopp-Taste (H). Eine programmierte Titelfolge bleibt so lange im Betätigen Sie zur Wiedergabe von MP3- Speicher des SL-D950 erhalten, bis Sie die Disc- Dateien wiederholt die entsprechende Skip- Fach-Klappe öffnen oder die Spannungsversorgung Taste (. oder /) oder verwenden Sie das unterbrechen. - Page 111 Am Ende einer programmierten Titelfolge weitere Titel hinzufügen Drücken Sie im Stopp-Modus die MEMORY-Taste mehrmals bis „00“ oder „000“ auf dem Display erscheint. Wählen Sie mittels der entsprechenden Skip-Taste (.oder/) oder des MULTI JOG Dials eine Titelnummer aus, und betätigen Sie anschließend die MEMORY-Taste.
-
Page 112: Wiedergabewiederholung In Zufälliger Reihenfolge
Wiedergabewiederholung in zufälliger Reihenfolge Wiederholung eines Titels Wenn Sie während der Wiedergabe einmal die PLAY MODE-Taste drücken, wird der aktuelle Titel fortan wiederholt wiedergegeben. Wenn Sie durch Betätigen einer der Skip-Tasten (.oder/) einen anderen Musiktitel auswählen, wird der gewählte Titel fortan wiederholt wiedergegeben. Der zur wiederholten Wiedergabe gewünschte Titel kann auch im Stoppmodus ausgewählt werden. -
Page 113: Ipod-Wiedergabe (Bei Verwendung Der Ipod Docking Station Ds-22 Separat Erhältlich)
Betätigen Sie anschließend die Wiedergabe/Pause- Wenn sich kein iPod im Dock befindet, blinkt die Taste (y/J) des iPod oder am SL-D950. Der SL-D950 iPod-Anzeige im Display. schaltet sich automatisch ein und startet die Andocken eines iPod an diese Anlage Wiedergabe von der Musikliste des iPod. -
Page 114: Betrieb Des Ipod
Betrieb des iPod < Wird die . -Taste während der Wiedergabe betätigt, wird der aktuell wiedergegebene Titel erneut ab dessen Titelanfang wiedergegeben. Betätigen Sie die .-Taste zweimal, um an den Titelanfang des vorangegangenen Titels zu gelangen. Um zum vorherigen Menü zurückzugehen Kurzzeitiges Unterbrechen der Wiedergabe (Pause) -
Page 115: Wiedergabe Externer Signalquellen
Audiokomponente darauf, dass Sie (beispielsweise ein portables Audiogerät) über deren Wiedergabepegel entsprechend einstellen dessen PHONES-Buchse mittels mitgelieferten müssen, um ein Signal über den SL-D950 Stereo-Miniklinkenkabels an der AUX IN- wiedergeben zu können. Buchse des SL-D950 an. < Wenn Sie die Lautstärke der angeschlossenen Audiokomponente zu hoch eingestellt haben, kann dies zu Verzerrungen bei der Wiedergabe über den... -
Page 116: Radiobetrieb
Radiobetrieb oder Überprüfen der Radiofrequenz Wenn die Uhrzeit angezeigt wird, drücken Sie die DISPLAY-Taste zum Anzeigen des aktuellen TUNING Wellenbereichs und der Frequenz für 20 Sekunden. Wählen Sie „TUNER“ mit Hilfe der FUNCTION- Taste. Betätigen Sie zum Auswählen von UKW- oder MW-Empfang erneut die FM/AM Taste. -
Page 117: Sender-Presets
Sender-Presets können UKW- Aufrufen von Sender-Presets Empfangsfrequenzen in den Sender-Presets speichern. Wählen Sie UKW oder MW mit der FM/AM- Taste. Stellen Sie die Empfangsfrequenz des gewünschten Senders ein (siehe Seite 116). < Wenn die Uhrzeit angezeigt wird, drücken Sie die DISPLAY-Taste zum Anzeigen des aktuellen Wellenbereichs und der Frequenz. -
Page 118: Rds
RDS ist ein Service der Rundfunkanstalten, der neben RDS-Istzeit (CT) dem normalen Radioprogramm die Ausstrahlung Die Uhreinstellung wird automatisch entsprechend zusätzlicher Textinformationen ermöglicht. der CT-Daten reguliert. Wenn Sie einen RDS-Radiosender einstellen, der Der RDS-Dienst steht ausschließlich in Europa bei inkorrekte CT-Daten aussendet, ist die Uhr UKW-Empfang zur Verfügung. -
Page 119: Rds (Pty Suche)
RDS (PTY Suche) PTY (Programmtyp) NEWS: kurze Ansagen, Ereignisse, öffentliche Meinungen, Reportagen, aktuelle Situationen. AFFAIRS: Stellungnahmen, Nachrichten, die nicht unter NEWS fallen, Anregungen, Dokumentationen, Diskussionen, Analysen, usw. INFO: tägliche Informationen oder Berichte, wie etwa Wetterbericht, Verbraucher- Empfehlungen, medizinische Hinweise, usw. SPORT: Sport-Programme. -
Page 120: Einstellen Des Timers
Einstellen des Timers Betätigen Sie zum Einstellen des Stundenwertes die entsprechende TIME-Taste (. oder /) oder verwenden Sie das MULTI JOG Dial. Betätigen Sie anschließend die ALARM 1- oder ALARM 2-Taste. ALARM 1, ALARM 2 TIME MULTI JOG Betätigen Sie zum Einstellen des Minutenwertes <... - Page 121 < Im Timerbetrieb wird die Wiedergabelautstärke, nach Einschalten des SL-D950, langsam bis zu dem von Ihnen eingestellten Wert hoch geregelt. < Wenn Sie als Signalquelle “CD” gewählt haben, obwohl sich keine Disc im Laufwerk befindet oder “USB” gewählt haben, ohne dass ein USB- Speichergerät angeschlossen ist, schaltet die...
-
Page 122: Technische Daten
Stereo-Minilinkenkabel x 1 Bedienungsanleitung x 1 Garantiekarte x 1 Nachdem die ON-Zeit (Weckzeit) erreicht wurde, können Sie den SL-D950 mittels der SNOOZE-Taste < Änderungen der Technischen Daten sowie des für weitere fünf Minuten in den Standby-Betrieb äußeren Erscheinungsbildes sind ohne vorherige (Schlafmodus) versetzen, bevor er sich erneut Ankündigung möglich. -
Page 123: Hilfe Bei Funktionsstörungen
Vergewissern Sie sich bitte, dass der Steckkontakt, an Aussetzer bei der Wiedergabe. dem Sie den SL-D950 angeschlossen haben, nicht e Wählen Sie für die Aufstellung des SL-D950 einen über einen Schalter ausgeschaltet ist. Falls dies der stabilen, ebenen und erschütterungsfreien Fall ist, schalten Sie den Schalter ein. -
Page 124: Prima Dell'uso
Indice Prima dell’uso Grazie per aver scelto un prodotto TEAC. Leggere Leggere attentamente prima dell’uso. questo manuale attentamente per ottenere le migliori prestazioni da questo apparecchio. < Dato che durante il funzionamento l’apparecchio può scaldarsi, lasciare sempre spazio sufficiente intorno ad esso per una buona ventilazione. -
Page 125: Attenzione Alla Condensa
Mantenimento Informazioni per gli utilizzatori riguardanti la Se la superficie dell’apparecchio si sporca, pulire raccolta e l’eliminazione degli apparecchi non con un panno asciutto o con detergente non più in uso e delle batterie esaurite chimico. Assicurarsi di rimuovere qualsiasi tipo di liquido completamente. -
Page 126: Dischi
CD. Se quest’apparecchio viene usato per delle radiazioni ultraviolette. E’importante perciò leggere tali dischi, TEAC Corporation non può non conservarli in luoghi esposti alle luce solare ritenersi in alcun modo responsabile della diretta e tenerli lontano da sorgenti di calore, come riproduzione né... -
Page 127: Interruttore Di Emergenza
Interruttore di Emergenza Compatibilità con file MP3 < Questo apparecchio può leggere file MP3 registrati su CD-R, CD-RW o su memoria USB. < I nomi dei file MP3 devono essere espressi in caratteri alfanumerici. Quest'apparecchio non è in grado di visualizzare correttamente simboli e caratteri di 2 byte (come quelli giapponesi, cinesi, eccetera). -
Page 128: Collegamenti
Collegamenti ATTENZIONE: < Prima di eseguire i collegamenti, spegnete tutti gli apparecchi. < Leggete le istruzioni relative a ciascun componente che intendete utilizzare con questa unità. < Accertatevi quindi di inserire saldamente nella presa di rete le relative spine. Al fine di prevenire ronzii e rumore, evitate di raggruppare i cavi di interconnessione. -
Page 129: Bass Control
VOLUME o la manopola del VOLUME. udirà un lieve “clic”. Vedere pagina 135. Software iPod compatibile Nel caso il vostro iPod non funziona col SL-D950 o col telecomando, l’aggiornamento del software può risolvere il problema. Visitare il Web site di Apple e trasferire l’ultimo software dal sistema centrale verso i satelliti dell’iPod. -
Page 130: Descrizione Dei Controlli
Descrizione dei controlli Diffusori (Stereo) FUNCTION Seleziona una delle sorgenti d’ingresso. FM/AM In modalità TUNER premere questo tasto per passare da AM a FM e viceversa. Fessura disco ALARM 1, ALARM 2 Tenere premuti questi pulsanti per più di 2 secondi per accedere alla modalità... - Page 131 DISPLAY Sensore per telecomando In modo standby, utilizzare questo pulsante per Per azionare il sistema a distanza, il telecomando controllare l'orario di accensione/spegnimento deve essere puntato verso questo sensore. programmato. SLEEP In modo CD, USB o TUNER se viene visualizzato Premere questo tasto per fissare il tempo di l'orario, utilizzare questo pulsante per controllare la spegnimento ritardato.
-
Page 132: Display
Display Funzionamento col telecomando Il di telecomando in dotazione pemette di comandare a distanza l’apparecchio. Quando si utilizza il telecomando, puntarlo verso il sensore sul pannello anteriore dell’apparecchio. < Anche se il telecomando viene utilizzato entro la distanza efficace (5 m), il controllo a distanza potrebbe essere impossibile se vi sono degli ostacoli tra il telecomando e il lettore. -
Page 133: Regolazione Dell'orologio
Regolazione dell’orologio Premere il tasto CLOCK ADJ. La cifra indicante i “minuti” lampeggia. TIME MULTI JOG CLOCK ADJ Premere il tasto TIME (‡ o °) o ruotare la Premere il tasto CLOCK ADJ. manopola MULTI JOG per impostare i minuti Lampeggia l’indicatore “12 HR”... -
Page 134: Operazioni Di Base
Se l'iPod in modalità < Questa funzione viene disattivata premendo il tasto di riproduzione è inserito nel dock DS-22, il STANDBY/ON ( dispositivo SL-D950 si accenderà automaticamente e inizierà la riproduzione dell'iPod. Muting < Se si inserisce un disco in modo standby, il Premere il tasto MUTING e il volume di ascolto si dispositivo SL-D950 si accenderà... - Page 135 Regolare il livello dei toni bassi Spegnimento ritardato Ruotare la manopola BASS CONTROL situata sul Pressioni ripetute del tasto SLEEP permettono di pannello posteriore. predisporre l’intervallo desiderato (da 90 a 10 minuti), al termine del quale l’apparechio si spegnerà automaticamente, commutando in Standby.
-
Page 136: Riproduzione Dei Dischi Cd/Mp3
< Non utilizzare dischi di forma irregolare. nella cartella ROOT stessa. < Quando tutti i brani sono stati letti, l’SL-D950 si ferma automaticamente. Non inclinare l'unità con un disco inserito. Si rischia di danneggiare il disco e determinare un... -
Page 137: Riproduzione Mp3 (Usb)
< Potete invertire passi la loro riproduzione si avvia dal primo brano presente nella cartella ROOT stessa. < Quando tutti i brani sono stati letti, l’SL-D950 si ferma automaticamente. < Ci vogliono alcuni secondi perché l’unità carichi la memoria USB. Tutti i tasti saranno disattivati durante il caricamento. -
Page 138: Riproduzione Cd/Mp3 (Disco/Usb)
Riproduzione CD/MP3 (disco/USB) Per cercare rapidamente un brano successivo o precedente Durante la riproduzione, premere il tasto skip (. MULTI JOG o /) ripetutamente finchè viene trovato il brano desiderato. Il brano selezionato verrà riprodotto dall’inizio. Per interrompere momentaneamente la riproduzione (modo Pause) Nella modalità... - Page 139 Per visualizzare le informazioni MP3 Riproduzione della parte iniziale In modo Stop, premere il tasto INTRO. L’unità riproduce in sequenza i primi 10 secondi dell’inizio di ogni brano. Durante la riproduzione del disco MP3/memoria USB, premere il tasto MP3. Le informazioni riguardanti il brano corrente, in questa sequenza: Premere nuovamente il tasto INTRO per annullare la nome cartella/nome file (scorrevole)
-
Page 140: Riproduzione Programmata
Riproduzione programmata < I brani MP3 registrati fuori dalle cartelle si trovano nella cartella “01” (ROOT). < Saltare questo passo quando è in riproduzione un Questa funzione permette di programmare un massimo di 60 brani, nell’ordine desiderato. La funzione Shuffle non sono operative durante la riproduzione programmata. -
Page 141: Per Verificare L'ordine Dei Brani Nella Sequenza
Per aggiungere un brano al termine della sequenza programmata In modo Stop, premere ripetutamente il tasto MEMORY finché viene visualizzato il numero di brano “00” o “000”. Selezionare il numero di un brano utilizzando il tasto skip (. o /) oppure la manopola MULTI JOG e quindi premere il tasto MEMORY. -
Page 142: Riproduzione Repeat/Shuffle
Riproduzione Repeat/Shuffle Ascolto ripetuto di un solo brano Nel corso della riproduzione, premendo una sola volta il tasto PLAY MODE il brano in ascolto verrà letto ripetutamente. Si accende l’indicatore “REPEAT”. Premendo il tasto skip (. o /) e selezionando un altro brano, il brano selezionato verrà... -
Page 143: Ascolto Di Ipod (Utilizzare Il Dock Per Ipod Ds-22 Venduto Separamento)
Connessione dell'iPod al sistema per iPod (venduto separatamente) all’SL-D950. Uscita video dell'iPod Il modello compatibile è il dock per iPod TEAC DS- Per porre in uscita il segnale video a un televisore 22. Prima dell’uso, collegarlo al connettore DS-22 mentre l’Ipod è agganciato al sistema, dal menù... -
Page 144: Funzionamento Dell'ipod
Funzionamento dell'iPod Come ritornare al menù precedente Premere il tasto MENU. Questo pulsante funziona Sospendere temporaneamente la riproduzione con le stesse funzioni dell'iPod. Selezionare la voce dal menù Premere il tasto play/pause (y /J ) durante la riproduzione. La riproduzione si interrompe nella posizione corrente. -
Page 145: Ascolto Di Una Sorgente Di Segnale Esterna
Ascolto di una sorgente di segnale esterna Riprodurre la musica dal dispositivo sorgente, e regolare il volume sia del dispositivo SL-D950 che del lettore audio. Quando alla presa AUX IN viene collegata l’uscita PHONES del vostro apparecchio portabile, bisogna Collegare l’uscita PHONES di un apparecchio impostarne il livello di volume, altrimenti nessun audio portabile all’ingresso AUX IN del SL-... -
Page 146: Ascolto Della Radio
Ascolto della radio Come controllare la frequenza sintonizzata TUNING Se l’orario viene visualizzato, premere il pulsante DISPLAY per visualizzare la banda e la frequenza corrente per 20 secondi. Selezionare “TUNER” utilizzando il tasto FUNCTION. Per passare da FM a AM o viceversa, premere nuovamente il tasto FM/AM. -
Page 147: Preselezione Delle Emittenti
Preselezione delle emittenti Possono essere inseriti 20 emittenti FM e 20 emittenti Per sintonizzare emittenti AM nei canali preset. preselezionate Scegliere la gamma AM o FM con il tasto FM/AM. Sintonizzare un’emittente che si desidera ascoltare (vedere pagina 146). < Se l'orario è visualizzato, premere il pulsante DISPLAY per visualizzare la banda e la frequenza. -
Page 148: Rds
Il sistema di dati radiofonico RDS (Radio Data System) Segnale orario RDS (CT) è un servizio addizionale per la diffusione di dati L’orologio verrà regolato automaticamente secondo inserito come sottoportante nel programma i dati del CT. radiofonico tradizionale. Se è stata sintonizzata una stazione RDS che emette dei dati del CT incorretti, l’orologio potrebbe non Il servizio RDS è... -
Page 149: Rds (Ricerca Pty)
RDS (ricerca PTY) PTY (Tipo di programma) NEWS: Brevi annunci, eventi, opinioni pubbliche, rapporti, situazioni attuali. AFFAIRS: Un tipo di suggerimento che include annunci pratici diversi dalle notizie, documenti, discussioni, analisi e così via. INFO: Informazioni giornaliere o accenni quali previsioni meteo, guide al consumatore, assistenza medica, e così... -
Page 150: Predisposizione Del Timer 1
Predisposizione del timer 1 Premere il tasto TIME (. o /) oppure ruotare la manopola MULTI JOG, per impostare l’ora, quindi premere il tasto ALARM 1 o ALARM 2. ALARM 1, ALARM 2 TIME MULTI JOG Premere il tasto TIME (. o /) oppure ruotare la manopola MULTI JOG, per <... - Page 151 < Quando questa unità si accende all’ora prefissata, il volume di ascolto aumenta gradualmente fino al livello prefissato. < Se la sorgente è impostata su “CD” ma non viene caricato nessun disco o se la sorgente è impostata su “USB” ma non c'è nessuna memoria USB collegata, il timer funzionerà...
-
Page 152: Dati Tecnici
< Se il timer e la funzione Snooze sono attivati, nessuna funzione sarà utilizzabile tranne il tasto DISPLAY. < Se in modo TIMER OFF l’orario è impostato in funzione snooze, la funzione snooze viene automaticamente annullata e il dispositivo SL-D950 resta in modo standby. -
Page 153: Ricerca Guasti
RW non finalizzati. Finalizzare questi dischi in un dove è stato acquistato oppure a un Centro assistenza registratore CD e provare di nuovo. TEAC, verificare se il difetto compare nell’elenco che segue e provare a risolverlo come consigliato. Suono saltellante e Collocare l’apparecchio su un appoggio stabile,... - Page 154 Inhoud Voor gebruik Hartelijk dank dat u voor TEAC heeft gekozen. Lees dit voor gebruik Lees deze handleiding zorgvuldig door zodat u < Omdat het toestel warm kan worden in het verzekerd kunt zijn van de optimale prestaties gebruik, dient u te allen tijde voldoende van uw toestel.
- Page 155 Onderhoud Informatie voor gebruikers van inzameling en Als de oppervlakte van het toestel vuil is, kunt u dit verwijdering van oude apparaten en met een zachte doek of eventueel met een gebruikte batterijen verdunning van een neutraal reinigingsmiddel afnemen. U moet de vloeistof onmiddellijk en Deze tekens op de producten, verpakkingen volledig verwijderen.
-
Page 156: Discs
Als u dergelijke CD's gebruikt in dit toestel kunnen ze uit de buurt gehouden worden van radiatoren TEAC Corporation en haar dochterbedrijven geen en warmteproducerende elektrische apparatuur. aansprakelijkheid aanvaarden voor de eventuele gevolgen, noch enige garantie geven wat betreft <... -
Page 157: Noodtoets
Noodtoets Compatibiliteit met MP3 < Dit apparaat kan MP3-bestanden afspelen die op een CD-R, CD-RW of USB-geheugen zijn opgenomen. < Bestandsnamen van MP3-bestanden moeten uit alfanumerieke tekens bestaan. Deze speler kan symbolen en grote tekens of tekens van 2 bytes breed (bijvoorbeeld Japanse tekens, Chinese tekens enzovoort) niet juist weergeven. -
Page 158: Aansluiting
Aansluiting Waarschuwing: < Schakel de netstroom uit voordat u de aansluitingen maakt. < Zorg ervoor dat alle kabels goed zijn aangesloten. < Zorg ervoor dat u de pluggen correct in de aansluitingen stekhen. Bundel de aansluitkabels niet om brom en ruis te voorkomen. - Page 159 Compatibele iPod software USB-aansluiting Als u uw iPod niet met de SL-D950 of met de Op deze aansluiting kunt u uw USB-geheugen afstandsbediening kunt besturen dan kan dit aansluiten. probleem mogelijk door het installeren van de Wanneer een iPod shuffle op deze aansluiting is actuele softwareversie verholpen worden.
-
Page 160: Bedieningselementen En Functies
Als het apparaat op de TIMER ON tijd aan gaat voorpaneel SL-D950. kunt u het apparaat 5 minuten uit zetten. bedieningselementen op de afstandsbediening Deze toets wordt ook gebruikt om de weergave af hebben dezelfde bedieningseigenschappen als de overeenkomstige toetsen van de SL-D950. te zwakken. - Page 161 STANDBY/ON ( mapnummer/bestandsnummer aan te geven. Met deze toets kunt u de SL-D950 inschakelen of in MENU de standbystand zetten. In de iPod stand gebruikt u deze toets om naar het TUNING/MULTI JOG vorige menu terug te keren.
-
Page 162: Indicatie Van De Bedieningsfuncties
Inzetten batterijen Licht op tijdens CD of USB weergave. Als de SL-D950 aan staat dan is in het display in het voorpaneel een van de volgende indicaties verlicht: Is verlicht als de geluidsweergave tijdelijk onderbroken is. -
Page 163: Instellen Van De Klok
Instellen van de klok Druk op de CLOCK ADJ toets. De “minuten” aanduiding knippert. TIME MULTI JOG CLOCK ADJ Druk op de TIME toets (‡of°) of draai aan Druk nogmaals op de CLOCK ADJ toets. de MULTI JOG knop om de huidige minuten in te stellen. -
Page 164: Basisbediening
< Deze functie wordt gedeactiveerd als u op de was. Wanneer de iPod in de playbackstand in het STANDBY/ON toets ( ) drukt. laadstation DS-22 wordt vastgekoppeld, wordt de SL-D950 automatisch aangeschakeld en start het afspelen van de iPod. Muting Druk MUTING toets <... - Page 165 De lage tonen instellen Inslaaptimer Draai aan de BASS CONTROL knop op het Door herhaald op de SLEEP toets te drukken kunt u achterpaneel. een tijdinterval (tussen 90 en 10 minuten) instellen. Wanneer de ingestelde tijd is verstreken, schakelt het apparaat automatisch naar standby. Iedere keer dat u op de SLEEP toets drukt verandert de tijdindicatie (10 minuten) voor uitschakeling als volgt:...
-
Page 166: Weergave Van Cd's En Mp3 Discs
Wanneer u een disc laadt in eender welke functie, zal de SL-D950 overschakelen op de “CD” functie en starten met de weergave. Druk op de weergave/pauzetoets (y/J) om te beginnen met afspelen. < Forceer de disc niet wanneer u hem erin duwt. -
Page 167: Weergave Van Usb Geheugenkaarten
Weergave van USB geheugenkaarten < Gebruik GEEN USB harde schijf met hoge capaciteit Druk op de weergave/pauzetoets (y/J) om te met dit apparaat. beginnen met afspelen. Het afspelen begint bij de eerste track op het USB- Druk op de FUNCTION toets om “USB” als geheugen. -
Page 168: Weergave Van Cd's, Mp3 Discs En Usb Geheugenkaarten
Weergave van CD’s, MP3 discs en USB geheugenkaarten Naar de volgende of vorige track gaan Druk tijdens afspelen enkele malen op de MULTI JOG overslaantoets (.of/) totdat de gewenste track is gevonden. De gekozen track wordt vanaf Weergave tijdelijk onderbreken het begin afgespeeld. - Page 169 Weergave van MP3 informatie Intro-weergave Druk in de stopstand op de INTRO toets. Het apparaat speelt achter elkaar de eerste 10 seconden van elk nummer. Druk tijdens afspelen van een MP3-disc/USB- geheugen op de MP3 toets. De informatie over de huidige afspelende track wordt, voor zover aanwezig, als volgt weergegeven: Druk nog een keer op de INTRO toets om te...
-
Page 170: Geprogrammeerde Weergave
“MEMORY” knippert in het display. FUNCTION, STANDBY/ON Een geprogrammeerde reeks blijft in het geheugen < Om de programmafunctie te annuleren drukt u op SL-D950 opgeslagen totdat de stoptoets (H). netstroomtoevoer onderbroken wordt. U kunt naar geprogrammeerde weergave teruggaan door op de... - Page 171 Selecteer een nieuw tracknummer met de overslaantoets (.of/) of de MULTI JOG knop en druk dan op de MEMORY toets. Druk als de SL-D950 in de stopstand staat meerdere keren op de MEMORY toets. Het track- en het programmanummer worden in het display weergegeven.
-
Page 172: Herhaald Afspelen/Willekeurige Weergave
Het is ook mogelijk om een te herhalen track te selecteren terwijl de SL-D950 in de stopstand staat. De tracks worden herhaaldelijk of in een Druk op de PLAY MODE toets, selecteer een track willekeurige volgorde afgespeeld. -
Page 173: Luisteren Naar Weergave Via Een Ipod
Luisteren naar weergave via een iPod (gebruik van de externe iPod dock DS-22 apart verkrijgbaa) U kunt een iPod afspelen door een externe iPod De iPod-functie selecteren dock (apart verkrijgbaar) op de SL-D950 aan te sluiten. Het geschikte model is de TEAC iPod dock DS-22. -
Page 174: De Werking Van De Ipod
De werking van de iPod Terugkeren naar het vorig menu Weergave tijdelijk onderbreken (Pauzestand) Druk op de MENU toets. Deze toets werkt met dezelfde functies als zijn tegenhanger, de iPod. Selecteer het menu-element Druk tijdens afspelen op de weergave/pauzetoets (y/J). Het afspelen stopt op de huidige plaats. Om het afspelen te hervatten, drukt u nog een keer op de weergave/pauzetoets (y/J). -
Page 175: Weergave Van Een Externe Signaalbron
Weergave van een externe signaalbron Speel de bron af en regel de geluidssterkte van zowel de SL-D950 als de audio player. Als u de PHONES-aansluiting van een externe audiocomponent gebruikt dan moet u het geluidsniveau overeenkomstig instellen anders wordt er geen signaal via de SL-D950... -
Page 176: Luisteren Naar De Radio
Luisteren naar de radio De radiofrequentie controleren Wanneer de klok wordt weergegeven, druk dan op de DISPLAY toets om de huidige bandbreedte en frequentie gedurende 20 seconden weer te geven. TUNING Selecteer “TUNER” aan de hand van de FUNCTION toets. Als het ontvangstsignaal zwak is Draai voor de beste ontvangst de FM- of AM- Druk nogmaals op de FM/AM toets om FM- of... -
Page 177: Voorkeurzenders Instellen
Voorkeurzenders instellen U kunt 20 FM en 20 AM radiozenders in preset- Selecteren van kanalen opslaan. voorgeprogrammeerde zenders Selecteer AM of FM door op de FM/AM toets te drukken. Selecteer de zender waar u naar wilt luisteren (zie pagina 176). <... -
Page 178: Rds
RDS (Radio Data Systeem) is een zenderservice waarbij RDS Kloktijd (CT) u naast een normaal radioprogramma ook nog extra klok wordt automatisch ingesteld informatie kunt ontvangen. overeenkomstig de CT-gegevens. Als u op een RDS-zender hebt afgestemd die de De RDS-zenderservice is alleen in Europa en bij verkeerde CT-gegevens uitzendt, is het mogelijk dat FM-ontvangst beschikbaar. -
Page 179: Rds (Pty Zoekfunctie)
RDS (PTY Zoekfunctie) PTY Programmatype NEWS: korte berichten, evenementen, publieke opinie, verslagen, actualiteiten. AFFAIRS: algemene informatie, o.a. praktische mededelingen anders dan nieuws, documentaires, discussies, analyses, enz. INFO: alledaagse informatie referentiemateriaal zoals weerberichten, consumenten informatie, medische assistentie, enz. SPORT: programma’s over sport EDUCATE: educatieve en culturele informatie Met deze functie kunt u direct een radiozender... -
Page 180: Instellen Van De Timer
Instellen van de timer 1 Druk op de TIME toets (‡of°) of draai aan de MULTI JOG knop om het uur in te stellen en druk dan op de ALARM 1 of ALARM 2 toets. ALARM 1, ALARM 2 TIME MULTI JOG Druk op de TIME toets (‡of°) of draai aan de MULTI JOG knop om de minuten in te... - Page 181 < Als de SL-D950 via de timerfunctie ingeschakeld is dan wordt de weergavegeluidssterkte geleidelijk aan naar het vooraf door u ingestelde niveau opgevoerd. < Wanneer de bron op “CD” is ingesteld maar er geen disc is geplaatst, of als de bron op “USB” is ingesteld maar er geen USB-geheugen is aangesloten, werkt de timer in de TUNER stand.
-
Page 182: Technische Gegevens
< Tijdens het afspelen en het snoozen van de timer, kunnen niet alle functies werken, behalve de DISPLAY toets. < Wanneer de TIMER OFF stand wordt ingesteld binnen de snoozeperiode, wordt de snoozefunctie automatisch afgebroken en de SL-D950 blijft in de standby stand. -
Page 183: Foutmeldingen
Bij weergave is ruis hoorbaar. het dock. e De SL-D950 staat te dicht bij een TV of een ander e Een software-update kan een oplossing zijn voor soortgelijk toestel (computer, monitor enz.). Zet dit probleem. - Page 184 7733 Telegraph Road, Montebello, California 90640 Phone: (323) 726-0303 TEAC CANADA LTD. 5939 Wallace Street, Mississauga, Ontario L4Z 1Z8, Canada Phone: (905) 890-8008 TEAC MEXICO, S.A. de C.V. Rio Churubusco 364, Colonia Del Carmen, Delegación Coyoacàn, CP 04100, México DF, México Phone: (5255)5010-6000 TEAC UK Ltd.