Table des Matières
Publicité
Les langues disponibles
Les langues disponibles
Liens rapides
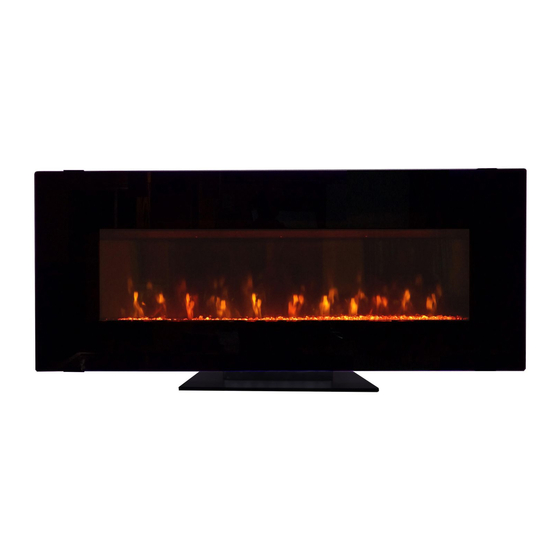
SP5736
USER MANUAL
Please carefully check the unit and make sure there is no damage when you open the carton.
QUESTIONS, PROBLEMS, OR MISSING PARTS?
Please Contact Customer Service Before Returning to Store
www.soupro.com
servicespi@sourceproinc.com
+1-844-455-4621
Keep this manual for future reference
Publicité
Chapitres
Table des Matières
Dépannage

Manuels Connexes pour komodo SP5736


Sommaire des Matières pour komodo SP5736
- Page 1 SP5736 USER MANUAL Please carefully check the unit and make sure there is no damage when you open the carton. QUESTIONS, PROBLEMS, OR MISSING PARTS? Please Contact Customer Service Before Returning to Store www.soupro.com servicespi@sourceproinc.com +1-844-455-4621 Keep this manual for future reference...
-
Page 2: Table Des Matières
Table of Contents • GENERAL INFORMATION FCC/ICSES Information Safety Instructions Warranty • ASSEMBLY INSTRUCTIONS Preparation Assembly • FIREPLACE OPERATIONS Operating Instructions Care And Maintenance Troubleshooting FCC / ICES Information This equipment has been tested and found to comply with the limits for Class B digital devices, pursuant to part 15 of the FCC rules. -
Page 3: Important Notice
• To prevent a possible fire, DO NOT block any air intakes or exhaust in any manner. DO NOT use on soft surfaces, like a bed, where opening may become blocked. • ALWAYS plug this unit directly into a wall outlet/receptacle. NEVER use with an extension cord or relocatable power tap (outlet/power strip). -
Page 4: Warranty
1-YEAR LIMITED WARRANTY Soupro Limited Inc. (hereinafter referred to collectively as “the Company”) warrants that your new KOMODO Electric Fireplace is free from manufacturing and materials defects for a period of one (1) year from date of purchase. Subject to the... -
Page 5: Preparation
Preparation IMPORTANT INfORMATION 1. Before you begin, locate the instructions and hardware. Be sure you have all of the parts and can identify them. 2. To avoid scratching the finish, assemble the product on a soft, non-abrasive surface such as carpet or cardboard. -
Page 6: Parts List
Preparation Parts List Front Cover Mounting Bracket Base Remote Control Fireplace Acrylic Shards Hardware Identification Number of spare hardware is indicated in ( ). AA x 8 + (1) BB x 8... -
Page 7: Assembly
Assembly - Wall Mount Installation Remove mounting bracket (D) from back of fireplace (C) by unscrew two screws at the top of the unit. Remove the base (B) of fireplace (C) by unscrewing three screws at the rear base of the unit. - Page 8 Assembly - Wall Mount Installation Choose a wall location to attach the mounting bracket (D). Position the mounting bracket (D) in the desired location. Use a level to align the bracket and mark the eight holes with a pencil. Minimun height: 16in Select the hardware appropriate for mounting bracket installation.
- Page 9 Assembly - Wall Mount Installation Hang the fireplace (C) on the hooks at bottom of mounting bracket (D) and push the fireplace (C) into mounting bracket (D). Re-fasten the two screws as shown.
- Page 10 Assembly - Wall Mount Installation Distribute the Acrylic Shards (F) evenly in the tray of the fireplace (C). Re-install the front glass (A) to the fireplace (C).
- Page 11 Assembly - Free Standing Installation Distribute the Acrylic Shards (F) evenly in the tray of the fireplace (C).
- Page 12 Assembly - Free Standing Installation Re-install the front glass (A) to the fireplace (C).
-
Page 13: Operating Instructions
Operating Instructions ° F ° C Power Button Timer Button • Press the POWER button to turn ON or OFF the unit. Timer Setting • When the unit is in ON mode, touch control panel light • Timer can be adjusted when heater is ON. It can will fully light up for 8 sec and then shut down if without adjusted from 0 hour (OFF) to 9 hours with 0.5 hour any others operation including remote control. -
Page 14: Care And Maintenance
Child Lock up Button ; Down Button • Control the setting of flame brightness, flame color, Activate Child Lock • When the unit is ON, hold the POWER button for 10 mood light brightness, mood light color, timer, clock and seconds to activate the Child Lock function. -
Page 15: Troubleshooting
Care And Maintenance DISPOSAL Of USED BATTERY: A battery may contain hazardous substances that could be endangering to the environment and human health. • This symbol marked on the battery and/or packaging indicates that used battery shall not be treated as municipal waste. Instead it shall be left at the appropriate collection point for recycling. •... - Page 16 QUESTIONS, PROBLEMS, OR MISSING PARTS? Please Contact Customer Service Before Returning to Store www.soupro.com servicespi@sourceproinc.com +1-844-455-4621 Crafted in China Ver.1 Distributed by Soupro Limited Inc., 72 Montgomery Court, Markham, Ontario L3R 0C1...
- Page 17 SP5736 MANUEL D'UTILISATEUR Vérifiez soigneusement l'appareil et assurez-vous qu'il n'y a pas de dommages lorsque vous ouvrez le carton. QUESTIONS, PROBLÈMES OU PIÈCES MANQUANTES? Contactez le service clientèle avant de le retourner au magasin www.soupro.com servicespi@sourceproinc.com +1-844-455-4621 Conservez ce manuel pour référence future...
-
Page 18: General Information
Table des matières • GENERAL INFORMATION Informations FCC / IC Information de securite Garantie • INSTRUCTIONS D’ASSEMBLÉE Préparation Assemblée • OPÉRATIONS DE FOYER Instructions d’operation Soins et entretien Guide de depannage Informations FCC / IC Cet article a été testé et déclaré conforme aux limites imposées aux dispositifs numériques de classe B, conformément à l’alinéa 15 du règlement de la FCC. -
Page 19: Caracteristiques
• Afin de prevenir les risques d’incendie, ne bloquez JAMAIS les ouvertures de ventilation ou de sortie d’air de quelque facon que ce soit. Ne placez PAS l’appareil sur une surface molle, comme un lit, car l’ouverture pourrait se bloquer. •... -
Page 20: Garantie
1 AN GARANTIE LIMITEE Soupro Limited Inc. (ci-apres refere comme la (compagnie) garantie que votre nouveau foyer electrique KOMODO est libre de tous defauts de fabrication pour une periode de un an de la date d’achat. Sujet aux conditions et limitations suivantes. -
Page 21: Préparation
Préparation UNE INfORMATION IMPORTANT 1. Avant de commencer, localisez les instructions et le matériel. Assurez-vous d'avoir toutes les pièces et peut les identifier. 2. Pour éviter de gratter la finition, assemblez le produit sur une surface douce et non abrasive comme le tapis ou le carton. -
Page 22: Liste Des Pieces
Préparation Liste des pieces Couvercle avant Support de Montage Base Télécommande Foyer Pierres Identification de la quincaillerie Nombre de materiel en () est separe pour la sauvegarde AA x 8 + (1) BB x 8... -
Page 23: Assemblée
Assemblée - Installation Murale Retirez le support de montage (D) à l'arrière du foyer (C) en dévissant les deux vis en haut de l'unité. Retirez la base (B) du foyer (C) en dévissant les 3 vis à la base arrière de l'appareil. - Page 24 Assemblée - Installation Murale Choisissez un emplacement sur le mur pour fixer le support de montage (D). Positionner le support de montage (D) à l'endroit désiré. Utilisez un niveau pour aligner le support et marquer les huit trous avec un crayon. Distance minimale entre les objets: 16 pouces Sélectionnez le matériel approprié...
- Page 25 Assemblée - Installation Murale Accrocher le foyer (C) sur les crochets en bas du support de montage (D) et pousser le foyer (C) dans le support de montage (D). Resserrez les deux vis retirées à l'étape 1.
- Page 26 Assemblée - Installation Murale Distribuer les pierres (F) uniformément dans le plateau du foyer (C). Réinstaller la vitre avant (A) du foyer (C).
- Page 27 Assembly - Free Standing Installation Distribuer les pierres (F) uniformément dans le plateau du foyer (C).
- Page 28 Assembly - Free Standing Installation Re-install the front glass (A) to the fireplace (C).
-
Page 29: Bouton D'alimentation
Operating Instructions ° F ° C Bouton d’Alimentation Bouton de Minuterie: • Appuyer sur le bouton d'alimentation pour mettre Réglage de la Minuterie l’appareil sous tension ou hors de l'appareil. • La minuterie peut être réglée lorsque le chauffage est •... -
Page 30: Soins Et Entretien
Verrouillage Sécuritaire Bouton BAS Bouton HAUT ; Activé le Verrouillage de Sécurité • Contrôler le réglage de la luminosité de la flamme, • Quand l’unité fonctionne, tenir le bouton POWER 10 la couleur de flamme, la luminosité de la lumière secondes pour active la fonction de verrouillage. -
Page 31: Guide De Depannage
SOINS ET ENTRETIEN Elimination de la pile usagee : Une pile contient des substances dangereuses qui peuvent etre nocives pour l’environnement ou votre sante. • Ce symbole appose sur une pile ou sur son emballage indique que la pile ne doit pas etre eliminee de la meme maniere que les dechets menagers. - Page 32 QUESTIONS, PROBLÈMES OU PIÈCES MANQUANTES? Contactez le service clientèle avant de le retourner au magasin www.soupro.com servicespi@sourceproinc.com +1-844-455-4621 Fabriqué en Chine Ver.1 Distribué par Soupro Limited Inc., 72 Montgomery Court, Markham (Ontario) L3R 0C1...