Table des Matières
Publicité
Les langues disponibles
Les langues disponibles
Liens rapides
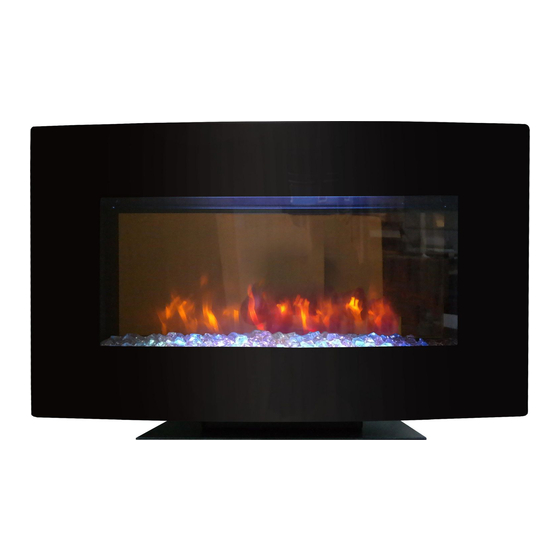
SP5735
USER MANUAL
Please carefully check the unit and make sure there is no damage when you open the carton.
QUESTIONS, PROBLEMS, OR MISSING PARTS?
Please Contact Customer Service Before Returning to Store
www.soupro.com
servicespi@sourceproinc.com
+1-844-455-4621
Keep this manual for future reference
Publicité
Chapitres
Table des Matières
Dépannage

Manuels Connexes pour komodo SP5735


Sommaire des Matières pour komodo SP5735
- Page 1 SP5735 USER MANUAL Please carefully check the unit and make sure there is no damage when you open the carton. QUESTIONS, PROBLEMS, OR MISSING PARTS? Please Contact Customer Service Before Returning to Store www.soupro.com servicespi@sourceproinc.com +1-844-455-4621 Keep this manual for future reference...
-
Page 2: Table Des Matières
Table of Contents • GENERAL INFORMATION FCC/ICSES Information Safety Instructions Warranty • ASSEMBLY INSTRUCTIONS Preparation Assembly • FIREPLACE OPERATIONS Operating Instructions Care And Maintenance Troubleshooting FCC / ICES Information This equipment has been tested and found to comply with the limits for Class B digital devices, pursuant to part 15 of the FCC rules. -
Page 3: Important Notice
• To prevent a possible fire, DO NOT block any air intakes or exhaust in any manner. DO NOT use on soft surfaces, like a bed, where opening may become blocked. • ALWAYS plug this unit directly into a wall outlet/receptacle. NEVER use with an extension cord or relocatable power tap (outlet/power strip). -
Page 4: Warranty
1-YEAR LIMITED WARRANTY Soupro Limited Inc. (hereinafter referred to collectively as “the Company”) warrants that your new KOMODO Electric Fireplace is free from manufacturing and materials defects for a period of one (1) year from date of purchase. Subject to the... -
Page 5: Preparation
Preparation IMPORTANT INFORMATION 1. Before you begin, locate the instructions and hardware. Be sure you have all of the parts and can identify them. 2. To avoid scratching the finish, assemble the product on a soft, non-abrasive surface such as carpet or cardboard. -
Page 6: Parts List
Preparation Parts List Front Cover Mounting Bracket Base Remote Control Fireplace Acrylic Shards Hardware Identification Number of spare hardware is indicated in ( ). AA x 4+(1) BB x 4+(1) -
Page 7: Assembly
Assembly - Wall Mount Installation Remove mounting bracket (D) from back of fireplace (C) by unscrew two screws at the top of the unit. Remove the base (B) of fireplace (C) by unscrewing three screws at the rear base of the unit. - Page 8 Assembly - Wall Mount Installation Choose a wall location to attach the mounting bracket (D). Position the mounting bracket (D) in the desired location. Use a level to align the bracket and mark the four holes with a pencil. Minimum distance between the object: 11.5 inch Select the hardware appropriate for mounting bracket installation.
- Page 9 Assembly - Wall Mount Installation Hang the fireplace (C) on the hooks at bottom of mounting bracket (D) and push the fireplace (C) into mounting bracket (D). Re-fasten the two screws removed in Step 1. Distribute the Acrylic Shards (F) evenly in the tray of the fireplace (C).
- Page 10 Assembly - Wall Mount Installation Re-install the front cover (A) to the fireplace (C).
- Page 11 Assembly - Free Standing Installation Assembly the base (B) of fireplace (C) by fasten three screws. Release the latches on the both side to unlock the front glass as illustrated below to removing front glass (A).
- Page 12 Assembly - Free Standing Installation Distribute the Acrylic Shards (F) evenly in the tray of the fireplace (C). Re-install the front cover (A) to the fireplace (C).
-
Page 13: Operating Instructions
Operating Instructions ° F ° C power Button Heater Button • Press the POWER button to turn ON or OFF the unit. • When the unit is in ON mode, touch control panel light • HEATER key is used to control ON/OFF of the heater. will fully light up for 8 sec and then shut down if without Push UP (“+”) or DOWN (“-”) key to to scroll through any others operation including remote control. -
Page 14: Care And Maintenance
Care And Maintenance CLEANING INFORMATION: • Make sure the unit is turned off, unplugged and the heating elements of heater are cool whenever you are cleaning the heater. • Clean the metal trim using a water-dampened, soft, and clean cloth. DO NOT use brass polish or household cleaners as these products will damage the metal trim. -
Page 15: Troubleshooting
Troubleshooting Problems Possible Causes Solutions 1. No power, logs do not 1. The unit does not have 1. Check that unit is plugged into a standard glow. power. 120 volt outlet. Then make sure power is set at "ON" position. 2. - Page 16 QUESTIONS, PROBLEMS, OR MISSING PARTS? Please Contact Customer Service Before Returning to Store www.soupro.com servicespi@sourceproinc.com +1-844-455-4621 Crafted in China Ver.2 Distributed by Soupro Limited Inc., 72 Montgomery Court, Markham, Ontario L3R 0C1...
- Page 17 SP5735 MANUEL D'UTILISATEUR Vérifiez soigneusement l'appareil et assurez-vous qu'il n'y a pas de dommages lorsque vous ouvrez le carton. QUESTIONS, PROBLÈMES OU PIÈCES MANQUANTES? Contactez le service clientèle avant de le retourner au magasin www.soupro.com servicespi@sourceproinc.com +1-844-455-4621 Keep this manual for future reference...
-
Page 18: Informations Fcc / Ic
Table des matières • GENERAL INFORMATION Informations FCC / IC Information de securite Garantie • INSTRUCTIONS D’ASSEMBLÉE Préparation Assemblée • OPÉRATIONS DE FOYER Instructions d’operation Soins et entretien Guide de depannage Informations FCC / IC Cet article a été testé et déclaré conforme aux limites imposées aux dispositifs numériques de classe B, conformément à l’alinéa 15 du règlement de la FCC. Ces limites sont destinées à assurer une protection raisonnable contre les interférences nuisibles dans un environnement résidentiel. Cet article génère, utilise et peut émettre de l’énergie radiofréquence et, s’il n’est pas installé et utilisé conformément aux instructions, risque de provoquer des interférences nuisibles lors de la réception d’émissions de radio ou de télévision (il suffit, pour le vérifier, d’allumer et d’éteindre successivement l’article). L’utilisateur devra prendre les mesures nécessaires suivantes pour tenter d’éliminer ces interférences: (a) reorienter ou deplacer l’antenne receptrice;... -
Page 19: Caracteristiques
• Afin de prevenir les risques d’incendie, ne bloquez JAMAIS les ouvertures de ventilation ou de sortie d’air de quelque facon que ce soit. Ne placez PAS l’appareil sur une surface molle, comme un lit, car l’ouverture pourrait se bloquer. •... -
Page 20: Garantie
1 AN GARANTIE LIMITEE Soupro Limited Inc. (ci-apres refere comme la (compagnie) garantie que votre nouveau foyer electrique KOMODO est libre de tous defauts de fabrication pour une periode de un an de la date d’achat. Sujet aux conditions et limitations suivantes. -
Page 21: Préparation
Préparation UNE INFORMATION IMPORTANT 1. Avant de commencer, localisez les instructions et le matériel. Assurez-vous d'avoir toutes les pièces et peut les identifier. 2. Pour éviter de gratter la finition, assemblez le produit sur une surface douce et non abrasive comme le tapis ou le carton. -
Page 22: Liste Des Pieces
Préparation Liste des pieces Couvercle avant Support de Montage Base Télécommande Foyer Pierres Identification de la quincaillerie Nombre de materiel en () est separe pour la sauvegarde AA x 4+(1) BB x 4+(1) -
Page 23: Assemblée
Assemblée - Installation Murale Retirez le support de montage (D) a l'arriere du foyer (C) en devissant les deux vis en haut de l'unite. Retirez la base (B) du foyer (C) en dévissant les 3 vis à la base arrière de l'appareil. - Page 24 Assemblée - Installation Murale Choisissez un emplacement sur le mur pour fixer le support de montage (D). Positionner le support de montage (D) à l'endroit désiré. Utilisez un niveau pour aligner le support et marquer les quatre trous avec un crayon. Distance minimale entre les objets: 11.5 pouces Sélectionnez le matériel approprié...
- Page 25 Assemblée - Installation Murale Accrocher le foyer (C) sur les crochets en bas du support de montage (D) et pousser le foyer (C) dans le support de montage (D). Resserrez les deux vis retirées à l'étape 1 Distribuer les pierres (F) uniformément dans le plateau du foyer (C).
- Page 26 Assemblée - Installation Murale Réinstaller la vitre avant (A) du foyer (C).
-
Page 27: Assemblée - Installation Avec Base
Assemblée - Installation Avec Base Assembler la base (B) du foyer (C) en vissant les trois vis. Relâchez les loquets sur les 2 côtés à la fois pour déverrouiller la vitre avant, comme illustré ci-dessous pour enlever la vitre avant (A). - Page 28 Assemblée - Installation Avec Base Distribuer les pierres (F) uniformément dans le plateau du foyer (C). Réinstaller la vitre avant (A) du foyer (C).
-
Page 29: Instructions D'operation
INSTRUCTIONS D’OPERATION ° F ° C Bouton d’alimentation • Lorsque l'horloge est en mode réglage, maintenez les • Appuyer sur le bouton d'alimentation pour mettre l’appareil touches HAUT ("+") et BAS ("-") simultanément pour sous tension ou hors de l'appareil. sélectionner le mode 12H ou 24H. -
Page 30: Soins Et Entretien
SOINS ET ENTRETIEN renseiGneMents sUr Le nettOYaGe : • Assurez-vous que l'appareil est éteint, débranché l’appareil, attendre que l’appareil soit froid avant de nettoyer. • Nettoyer la garniture métallique à l'aide d'un chiffon doux et propre imbibé d'eau. NE PAS utiliser de vernis pour laiton ou de nettoyants ménagers, car ces produits endommagerait la garniture métallique. • Les moteurs utilisés pour le ventilateur et pour la flamme sont pré-lubrifiés à vie et ne nécessitent aucune lubrification supplémentaire. Cependant, le nettoyage périodique / passer l’aspirateur dans le ventilateur, de l’élément de chauffage de l’admission d'air et des évents de sortie est recommandé. attentiOn : Assurez-vous que l'alimentation est coupee avant de proceder. Toutes les reparations electriques ou recablage de cet appareil doivent etre effectues par un electricien agree conformement aux codes nationaux et locaux. -
Page 31: Guide De Depannage
GUIDE DE DEPANNAGE prOBLÈMe CaUse pOssiBLe MesUre COrreCtiVe 1. L’appareil n’est pas 1. L’appareil n’est pas 1. Assurez-vous que le cordon d’alimentation alimenté; les bûches alimenté. est branché convenablement sur une prise ne scintillent pas. standard de 120 V. Assurez-vous ensuite que l’appareil est mis sous tension. - Page 32 QUESTIONS, PROBLÈMES OU PIÈCES MANQUANTES? Contactez le service clientèle avant de le retourner au magasin www.soupro.com servicespi@sourceproinc.com +1-844-455-4621 Fabriqué en Chine Ver.2 Distribué par Soupro Limited Inc., 72 Montgomery Court, Markham (Ontario) L3R 0C1...