Friedrich CP Line CP08 Manuel D'utilisation Et D'installation

Friedrich CP Line CP08 Manuel D'utilisation Et D'installation

Masquer les pouces Voir aussi pour CP Line CP08:

Publicité

Les langues disponibles

Les langues disponibles

Liens rapides

Room Air Conditioner
Installation and Operation
Manual
CP Line
115 Volts
Registering Your Room Air Conditioner
Model information can be found on the name plate located on the
side of the unit near the control panel. Please complete and mail
the owner registration card furnished with this product or register
on-line at www.friedrich.com (USA only). For your future
convenience, record the model information here.
MODEL NUMBER
920-151-00 (7-05)
CP08
SERIAL NUMBER
ZQ08
PURCHASE DATE
ZQ10
1

Publicité

Table des Matières
loading

Sommaire des Matières pour Friedrich CP Line CP08

  • Page 1 Model information can be found on the name plate located on the side of the unit near the control panel. Please complete and mail the owner registration card furnished with this product or register on-line at www.friedrich.com (USA only). For your future convenience, record the model information here. MODEL NUMBER...
  • Page 3: Table Des Matières

    Table of Contents Introduction ..................2 Safety Precautions...............3 How to operate your Friedrich ...........5 How to operate your Friedrich ZStar ........6 Adjusting the Air Flow Direction..........7 Care and Maintenance ..............8 Hardware Location ...............9 Installation Instructions............15...
  • Page 4: Introduction

    Introduction Before Operating Your Unit Make sure the wiring is adequate for your unit. If you have fuses, they should be of the time delay type. Before you install or relocate this unit, be sure that the amperage rating of the circuit breaker or time delay fuse does not exceed the amp rating listed in figure 1. DO NOT use an extension cord.
  • Page 5: Safety Precautions

    • If the power cord is damaged, it must generation. be replaced by the manufacturer or a Friedrich-certified service agent. Do not modify power cord Do not operate with wet Do not direct air flow directly length.
  • Page 6 When the air filter is to be Do not clean the air When the unit is to be conditioner with water. cleaned, switch the unit off, removed, do not touch the and unplug it. metal parts of the unit. • They are sharp and may cause •...
  • Page 7: How To Operate Your Friedrich

    3. Reattach the cover. To maintain optimal operation of the remote control, the remote sensor should not be exposed to direct sunlight. • The remote control can be mounted on a wall using the mountable holder.(Friedrich does not provide this.)
  • Page 8: How To Operate Your Friedrich Zstar

    How to operate your Friedrich ZStar ® Function Controls - Turns air conditioner off. HIGH HIGH COOL COOL Med Fan - Med speed fan operation without cooling. Low Fan - Low speed fan operation without cooling. High Cool - Cooling with high speed fan operation.
  • Page 9: Adjusting The Air Flow Direction

    Adjusting the Air Flow Direction Vent Control For maximum cooling efficiency, CLOSE the vent. This will allow internal air circulation. OPEN the vent to discharge stale air. Part A CLOSE VENT OPEN NOTE : Before using the ventilation feature, position the vent lever by pulling Part A out straight and snapping it into place.
  • Page 10: Care And Maintenance

    Care and Maintenance Turn the power off and unplug the power plug before cleaning the air conditioner. Air Filter The air filter behind the inlet grille should be checked and cleaned at least once every 2 weeks (or as necessary) to maintain optimal performance of the air conditioner. How to remove the air filter 1.
  • Page 11: Hardware Location

    Hardware Location Product Features CAUTION This appliance should be installed in accordance with local and national wiring regulations. This manual acts as a guide to help to explain product features. 1. CABINET 8. HORIZONTAL AIR DEFLECTOR 2. FRONT GRILLE (VERTICAL LOUVER) 3.
  • Page 12: How To Install The Unit

    How to Install the Unit 1. To prevent vibration and excess noise, Fence make sure the unit is installed securely Awning and firmly Cooled air 2. Install the unit where the sunlight does not Heat shine directly on the unit. radiation 3.
  • Page 13: Installation Kit Contents

    Installation Kit Contents NAME OF PARTS Q'TY FRAME CURTAIN SILL SUPPORT BOLT SCREW (TYPE A) SCREW (TYPE B) SCREW (TYPE C) FOAM-STRIP UPPER GUIDE FOAM-PE FRAME GUIDE WINDOW LOCKING BRACKET FOAM-PE Suggested Tool Requirements SCREWDRIVER(+, -), RULER, KNIFE, HAMMER, PENCIL, LEVEL PREPARATION OF CHASSIS Shipping Screws...
  • Page 14: Cabinet Installation

    Cabinet Installation 1. Open the window. Mark a line on center of the window stool. Carefully place the cabinet on the window stool and align the center mark on the bottom front with the center line marked in the Upper Guide window stool.
  • Page 15 6. The cabinet should be installed with a very slight tilt (about 1/2") downward toward the outside Screw(Type B) (See Fig. 5). Adjust the bolt and the nut of Sill Support balancing the cabinet. Sill Support 7. Attach the cabinet to the window stool by driving Sash track the screws [Type B: Length 16mm (5/8 inch)
  • Page 16 12. Attach the Window Locking Bracket with a Type C screw . (See Fig. 9) Window locking bracket Fig. 9 13. Attach the front grille to the cabinet by inserting the tabs on the grille into the tabs on the front of the cabinet.
  • Page 17: Installation Instructions

    Installation Instructions Read these instructions completely and carefully. Tools You Will Need Phillips-head screwdriver Scissors or knife Flat-blade screwdriver Pencil Ruler or tape measure Level Hammer Before You Begin NOTE TO INSTALLER: Leave these CAUTION: instructions with the air conditioner after Do not under any circumstances, cut or remove installation is completed.
  • Page 18: Electrical Safety

    Electrical Safety Electrical Safety Electrical Safety Electrical Safety Electrical Data Electrical Data 115V~ 115V~ Power cord may include a current Power cord may include a current interrupter device. A test and reset button is interrupter device. A test and reset button is provided on the plug case.
  • Page 19: Troubleshooting Tips

    Troubleshooting Tips Troubleshooting Tips save time and money! Review the chart below first and you may not need to call for service. Normal Operation You may hear a pinging noise caused by water being picked up and thrown against the condenser on rainy days or when the humidity is high.
  • Page 20: Warranty

    FIRST YEAR ANY PART: If any part supplied by FRIEDRICH fails because of a defect in workmanship or material within twelve months from date of original purchase, FRIEDRICH will repair the product at no charge, provided room air conditioner is reasonably accessible for service.
  • Page 21: Enregistrement De Votre Climatiseur De Pièce

    Veuillez remplir et poster la carte d'enregistrement fournie avec l'appareil ou enregistrez-vous en ligne à www.friedrich.com (USA uniquement). Veuillez consigner l'information à l'emplacement ci-dessous pour référence ultérieure. NUMÉRO DU MODÈLE NUMÉRO DE SÉRIE...
  • Page 23 Félicitations ! Vous avez fait l'achat d'un climatiseur de pièce de Friedrich. Friedrich est conçu pour offrir un maximum de confort et de douceur de fonctionnement. Table des matières Introduction ..................2 Mesures de sécurité..............Fonctionnement de la télécommande........5 Mode de fonctionnement de votre ZStar par Friedrich ..6...
  • Page 24: Introduction

    Introduction Avant d'utiliser votre appareil Assurez-vous que votre câblage électrique est conforme aux normes de fonctionnement de l'appareil. Si votre système électrique comporte des fusibles, veillez qu'ils soient de type temporisé. Avant d'installer ou de déplacer l'appareil, veillez que l'intensité de courant du disjoncteur ou du fusible temporisé n'excède pas l'intensité...
  • Page 25: Mesures De Sécurité

    Mesures de Sécurité Pour éviter des accidents corporels ou des dommages matériels, suivez ces instructions. Un mauvais fonctionnement dû à l’ignorance de ces instructions peut provoquer des préjudices corporels ou des dommages. AVERTISSEMENT Ce symbole signale un risque de blessure grave, voire mortelle. ATTENTION Ce symbole signale un risque limité...
  • Page 26 ATTENTION Lorsque le filtre à air doit Ne pas nettoyer le Quand l'unité devrait être être retiré, ne pas toucher les climatiseur avec de l'eau. nettoyée, change l'unité de, et le parties métalliques de débrancher. l'appareil. • L'eau peut s'infiltrer dans •...
  • Page 27: Fonctionnement De La Télécommande

    Fonctionnement de la télécommande Power Temp Fan Speed Timer Mode Fonctionnement de la télécommande 1. POWER Pour la déshumidification, sélectionnez le mode Appuyez sur cette touche pour activer l'appareil sans humidité. et appuyez de nouveau pour le désactiver. 4. SÉLECTEUR DE RÉGIME DU VENTILATEUR 2.
  • Page 28: Mode De Fonctionnement De Votre Zstar

    Mode de fonctionnement de votre ZStar par Friedrich Les commandes ressembleront à celles illustrées ci-dessous. Commandes de fonctionnement Off (Fermé) : Met le climatiseur hors tension. HIGH HIGH COOL COOL Med Fan (Ventilateur moyen) : Fait fonctionner le ventilateur à vitesse moyenne, sans refroidissement.
  • Page 29: Réglage De L'orientation Du Débit D'air

    Réglage de l'orientation du débit d'air Commande de l’orifice de ventilation Pour une efficacité maximum du refroidissement, fermez l'ORIFICE DE VENTILATION. Ceci activera la circulation de l'air de la pièce. OUVREZ l'orifice de ventilation afin d'évacuer l'air vicié. Pièce FERMÉ VENTILATION OUVERT NOTE : Avant d'utiliser le dispositif de ventilation, positionnez le...
  • Page 30: Soins Et Entretien

    Soins et entretien Avant de nettoyer le climatiseur, éteignez-le et débranchez la fiche d'alimentation. Filtre à air Afin de maintenir l'efficacité du climatiseur à son meilleur niveau, vous devriez nettoyer le filtre à air, situé en arrière de la grille de prise d'air, au moins à toutes les deux semaines (ou au besoin). Comment retirer le filtre à...
  • Page 31: Installation Du Matériel

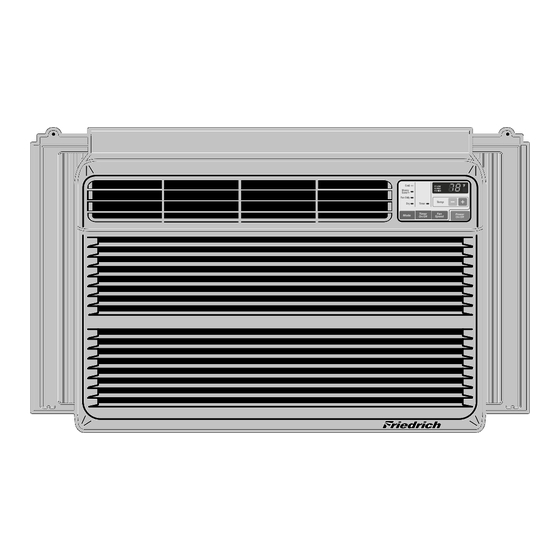
    Installation du matériel Caractéristiques particulières de l’appareil ATTENTION Cet appareil doit être installé en fonction des normes électriques locales, régionales et nationales. L'illustration suivante sert à situer les différents éléments de l'appareil. 1. BOÎTIER 8. DÉFLECTEUR D'AIR HORIZONTAL 2. GRILLE AVANT (VOLET VERTICAL) 3.
  • Page 32: Installation De L'appareil

    Installation de l’appareil 1. Installez l'appareil solidement et Clôture sécuritairement de manière à prévenir la Auvent présence de vibrations et bruits. 2. Installez l'appareil de manière à ne pas Air refroidi Radiation l'exposer directement aux rayons du soleil. de chaleur 3.
  • Page 33: Outils Recommandés

    Contenu du nécessaire d’installation NOM DES PIÈCES QTÉ VOLET D'ÉTANCHÉITÉ SUPPORT DE SEUIL BOULON ÉCROU VIS (TYPE A) VIS (TYPE B) VIS (TYPE C) BANDE EN MOUSSE RAIL DE GUIDAGE SUPÉRIEUR JOINT D'ÉTANCHÉITÉ EN MOUSSE DISPOSITIF DE GUIDAGE DU CADRE ÉTRIER DE VERROUILLAGE DE FENÊTRE JOINT D'ÉTANCHÉITÉ...
  • Page 34: Installation Du Boîtier

    Installation du boîtier 1. Ouvrez la fenêtre. Tracez une ligne au centre du rebord de fenêtre. Placez le boîtier soigneusement sur le rebord de fenêtre et alignez le repère central de sa portion inférieure avant avec la ligne tracée Rail de guidage sur le rebord de fenêtre.
  • Page 35 6. Installez le boîtier avec une inclinaison d'environ 1/2" (1,27 cm) vers l'extérieur Vis (Type B) (Voyez la fig. 5). Réglez l'écrou et le boulon des supports de seuil de manière à équilibrer le boîtier. Support de seuil 7. Fixez le boîtier au rebord de fenêtre à l'aide de Coulisse vis de type B (16 mm [5/5"] de long)
  • Page 36 12. Fixez l'étrier de verrouillage de fenêtre à l'aide d'une vis de type C . (Voyez la fig. 9) Étrier de verrouillage de fenêtre Fig. 9 13. Fixez la grille avant au boîtier en en insérant les languettes de la grille dans les encoches situées à l'avant du boîtier.
  • Page 38: Source D'alimentation

    Donnees sur l'eletricite Electrical Safety Electrical Safety Electrical Data Instructions d' installation 115V~ Utilisez ce type de prise murale Source d'alimentation R ceptacle standard de 125V a 3 fils avec mise a la masse, capacite de 15A,125V CA L'UTILISATION DE CORDONS PROLONGATEURS A cause des dangers potentiels nous vous deconseillons fortement l'utilisation de cordons prolongateurs.
  • Page 40: Garantie

    FRIEDRICH est défectueux à cause d’un défaut de main d’oeuvre ou de matériau dans les 60 mois à compter de la date d’achat initial, FRIEDRICH paiera une allocation pour les frais de main d’oeuvre et les pièces nécessaires pour réparer le système de réfrigération étanche.
  • Page 41 Complete y en envíe por correo la tarjeta de registro de propietario que se entrega con este producto, o bien regístrese por Internet en www.friedrich.com (sólo para EE.UU.) Para su conveniencia en el futuro, registre aquí la información sobre su modelo.
  • Page 43 ¡Felicitaciones! Ha comprado un acondicionador de aire para habitación Friedrich. El Friedrich está diseñado para proveer el máximo de bienestar y de tranquilidad. Contenidos Introducción..................2 Precauciones de seguridad ............3 Funcionamiento del control remoto ...........5 Cómo hacer funcionar a su Friedrich ZStar ......6...
  • Page 44: Introducción

    Introducción Antes de poner en funcionamiento su unidad Asegúrese que el tipo de cable sea el adecuado a su unidad. Si tiene fusibles, deben ser del tipo de tiempo retardado. Antes de instalar o reubicar esta unidad, asegúrese que el nivel de amperaje del disyuntor o del fusible de tiempo retardado no exceda el amperaje que figura en la figura 1.
  • Page 45 Safety Precautions Siga estas instrucciones para que no se produzcan daños en la propiedad ni daños personales. Se pueden producir daños si se utiliza el aparato de forma incorrecta al desconocer las instrucciones. ADVERTENCIA Este símbolo indica la posibilidad de lesiones mortales o graves. PRECAUCION Este símbolo indica la posibilidad de lesiones o daños materiales.
  • Page 46 PRECAUCION Cuando se vaya a quitar el No limpie el acondicionador Cuándo la unidad deberá ser filtro de aire no toque las de aire con agua. limpiada, cambia la unidad partes metálicas de la unidad lejos, y lo quita. interior. •...
  • Page 47: Funcionamiento Del Control Remoto

    Funcionamiento del control remoto Power Temp Fan Speed Timer Mode Funcionamiento del control remoto 1. POWER (encendido) 4. SELECTOR DE VELOCIDAD DEL El funcionamiento se inicia cuando se pulsa esta tecla VENTILADOR (FAN SPEED) y se detiene cuando se la presiona nuevamente. Para aumentar la capacidad mientras se refresca, seleccione una mayor velocidad del ventilador.
  • Page 48: Cómo Hacer Funcionar A Su Friedrich Zstar

    Cómo hacer funcionar a su Friedrich ZStar® La apariencia de los controles será como uno de los siguientes. Controles Off(Apagado) :Apaga el aire acondicionado. HIGH HIGH COOL COOL Med Fan(Ventilador Medio) :Permite la operación de la velocidad media del ventilador sin enfriar.
  • Page 49: Ajustar La Dirección Del Flujo De Aire

    Ajustar la dirección del flujo de aire Control de ventilación Para máxima eficiencia de frescura, CIERRE la ventilación. Esto permitirá la circulación interna de aire. ABRA la ventilación para descargar el aire viciado. Parte CERRADA VENTILACIÓN ABIERTA NOTA : Antes de usar la función de ventilación, coloque la palanca de ventilación tirando hacia fuera de la Parte A y presionándola en su lugar.
  • Page 50: Cuidado Y Mantenimiento

    Cuidado y mantenimiento Desconecte la energía y desenchufe la unidad antes de limpiar el acondicionador de aire. Filtro de Aire a El filtro de aire detrás de la parrilla de entrada debe ser controlado y limpiado por lo menos una vez cada dos semanas (o cuando sea necesario) para mantener el rendimiento óptimo del acondicionador de aire.
  • Page 51: Instalación De La Unidad

    Instalación de la unidad Funciones del producto PRECAUCIÓN Este dispositivo debe ser instalado de acuerdo con la normas nacionales de cableado. Esta guía actúa como ayuda para explicar las funciones del producto. 1. GABINETE 8. DEFLECTOR HORIZONTAL DE AIRE 2. PARRILLA FRONTAL (ALABE VERTICAL ) 3.
  • Page 52: Cómo Instalar La Unidad

    Cómo instalar la unidad 1. Para prevenir la vibración y el ruido, Cerco asegúrese que la unidad esté instalada Protección con seguridad y firmeza. 2. Instale la unidad donde la luz del sol no Aire fresco Radiación caiga directamente en la misma. de calor 3.
  • Page 53 Contenidos de los conjuntos de instalación Nº NOMBRE DE LA PARTE Cantidad MARCO DE LA CORTINA DINTEL DE SOPORTE PERNO TUERCA TORNILLO (TIPO A) TORNILLO (TIPO B) TORNILLO (TIPO C) BURLETE DE ESPUMA GUÍA SUPERIOR BURLETE de ESPUMA-PE GUÍA DEL MARCO ABRAZADERA DE FIJACIÓN A LA VENTANA BURLETE de ESPUMA-PE Requisitos sugeridos de las ventanas...
  • Page 54: Instalación Del Gabinete

    Instalación del gabinete 1. Abra la ventana. Marque una línea en el centro del asiento de la ventana. Coloque cuidadosamente el gabinete sobre el asiento de la ventana alinee la marca central de la parte inferior frontal con la línea Guía superior marcada en el centro del asiento de la Asiento de la ventana...
  • Page 55 6. El gabinete debe ser instalado con una ligera inclinación (aproximadamente 1/2") de modo Tornillo(Tipo B) que el lado externo quede hacia abajo (ver Fig. 5) Ajuste el perno y la tuerca del soporte al dintel para equilibrar el gabinete. 7.
  • Page 56 12. Agregue la abrazadera de fijación con un tornillo Tipo C (ver Fig. 9) Abrazadera de fijación Fig. 9 13. Agregue la parrilla frontal al gabinete insertando las pestañas en la parrilla dentro de las pestañas del frente del gabinete. Empuje la parrilla hasta que se fije en el lugar.
  • Page 60: Garantía

    FRIEDRICH con su unidad de aire acondicionado falla, debido a un defecto de manufactura o del material, dentro de los 60 meses siguientes a la fecha original de compra, FRIEDRICH pagará...
  • Page 61 Memo...
  • Page 62 FRIEDRICH AIR CONDITIONING CO. Visit our web site at www.friedrich.com Post Office Box 1540 • 4200 N. Pan Am Expressway • San Antonio, Texas 78295-1540 • (210) 357-4400 • FAX (210) 357-4490 P/NO.: 3828A21016C 920-151-00 (7-05)

Ce manuel est également adapté pour:

Cp line zq08Cp line zq10

Table des Matières