Sony XDR-S61D Mode D'emploi
Les langues disponibles
Les langues disponibles
4-699-483-12(1)
DIGITAL RADIO DAB/FM
Operating Instructions GB
Mode d'emploi FR
©2017 Sony Corporation
Printed in China
XDR-S61D
Listening to the Radio
1
Turn on the radio, and then select the
DAB or FM function.
When selecting the FM function for the first time
FM auto tune will start automatically when the FM function is selected for
the first time.
Tips
• Even if you select "Later" on the "Get FM station name" screen, FM station
names will be received and stored in the unit while you are listening to
broadcasts.
• FM station names may not be transmitted, depending on the station.
Assigning Stations to the Preset Buttons
1
2
Tune to the station you want to preset.
Press and hold the desired preset button (1 – 5) until
"Station saved to preset x." appears on the display.
Follow the steps in "Listening to the Radio" above.
To improve DAB/FM radio reception
Listening to Audio from an External Device
1
Connect the external device to the radio.
To AUDIO IN
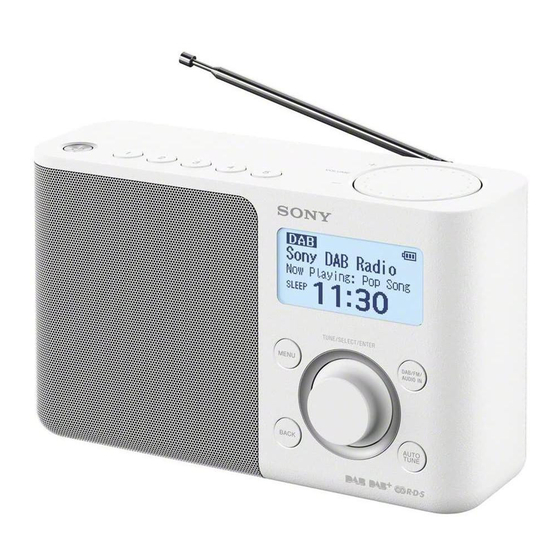
Guide to parts and controls
(power) button
DC IN jack
MENU button
Antenna
DAB/FM/AUDIO IN button
Speaker
VOLUME control dial
AUTO TUNE button
Preset buttons*
(headphones) jack
TUNE/SELECT/ENTER
control dial
AUDIO IN jack
BACK button
* Preset button
has a tactile dot.
Battery indicator
Battery indicator lights up when using the unit on batteries. The remaining battery power is displayed in
5 levels.
Battery indicator
Replace all the
batteries with
new ones when
the low battery
warning message
flashes.
Setup menu options
Example: When the DAB band is selected
Press MENU to enter the setup menu.
Turn
TUNE/SELECT/ENTER
clockwise or
counterclockwise to
select the desired
BACK
menu item or setting.
Press
TUNE/SELECT/ENTER
to confirm the
selection.
To go back to the upper menu level
Press BACK.
To exit the setup menu
Press MENU again.
2 Select "Wake station" and set a
Wake-up timer
station.
Be sure to connect the AC adaptor when using
If setting to the last
the wake-up timer. Wake-up timer cannot be
received station
used when using the unit on batteries.
Enable:
Select this option when using the
wake-up timer.
Disable:
Select this option when not using the
wake-up timer.
Wake-up timer setting:
Select this option
If selecting from the preset
when setting the wake-up timer. You can set the
station list
wake-up timer as follow.
After you have selected the setting, press
1 Select "Timer setting" and set the
BACK until the display returns to the
hour and minute.
"Wake-up timer setting" menu.
Minute
3 Select "Volume setting" and turn
TUNE/SELECT/ENTER clockwise
or counterclockwise to adjust the
volume.
After you have adjusted the volume, press
Hour
BACK until the display returns to the
"Wake-up timer" menu.
4 Select "Enable," and then press
TUNE/SELECT/ENTER.
When the wake-up timer is set, " " lights up
on the display.
Getting Started
1
Connect the AC adaptor or insert four batteries.
Then, extend the antenna.
When the AC adaptor is connected, even if batteries are
inserted, the power source will automatically switch from
batteries to AC power.
AC adaptor
(supplied)
See "Setup menu options" for manual tuning.
2
Select the desired station or service.
Turn TUNE/SELECT/ENTER clockwise or
counterclockwise to make a selection.
Assign your favourite stations to the 5 preset buttons. You can assign
up to 5 stations each for DAB and FM functions.
Example: Assigning a
station to the preset
button "".
To assign other stations to the rest of the
preset buttons, repeat the same procedure.
To make a new DAB/FM station list
If you have moved to another region, perform DAB and FM auto tunes again. Select the DAB or FM function, then press
AUTO TUNE.
Note
When adjusting the antenna, be
sure to hold it by the bottom
part. The antenna may be
damaged if you move it with
excessive force while holding it
by the upper part.
Note
Portable digital
When connecting an external device to the unit, use audio cable
music player, etc.
with a stereo (3-pole) or monaural (2-pole) mini plug. If you use
another type of plug, there may be noise interference or no
sound may be heard.
Monaural mini
plug
Compatible
1 ring
plug types
Stereo mini
plug
Audio cable (not supplied)
2 rings
Other types of
plugs cannot
3 or more rings
be used.
Delete FM station:
Sleep
unwanted stations from the FM station list.
1 Turn TUNE/SELECT/ENTER
The radio automatically turns off after a set time
clockwise or counterclockwise
has elapsed.
Select the desired timer setting (minutes) from
to select the station you want
the following:
to delete, and then press it to
Off
15 min.
30 min.
45 min.
(deactivated)/
/
/
/
confirm.
60 min.
2 Turn TUNE/SELECT/ENTER
When the sleep timer is set, "SLEEP" lights up on
clockwise or counterclockwise to
the display.
select "OK," and then press it to
confirm.
Information
Add FM station:
Displays information for the station to which you
manually tuned station, you can add the station
are listening. Turn TUNE/SELECT/ENTER
to the FM station list. Select "OK" to add the
clockwise or counterclockwise to scroll through
station to the list. Be sure to set "FM tune mode"
the following information:
to "Manual tune" before using this option.
Channel:
Channel and frequency (See the DAB
frequency table in "Specifications.")
Backlight
Multiplex name:
Ensemble label (up to
16 characters long)
Auto:
no operation is performed for 30 seconds.
Service name:
Station name
Always ON:
PTY:
PTY label (See "PTY (programme type)" in
time.
"Specifications.")
Bit rate:
Bit rate
Time
Signal level:
Displays the signal level for the
DAB station to which you are listening, ranging
Set time:
from 0 (no signal) to 100 (maximum signal).
enables the clock to synchronize with the DAB
data being received. Select "Time setting" to set
Note
the clock manually by using
If there is no ensemble label or no station name,
TUNE/SELECT/ENTER.
the space for label or name will be blank. If there
12H/24H:
is no PTY label, "No PTY" will appear on the
12-hour clock or 24-hour clock.
display.
FM tune mode
Beep
Select the tuning mode for FM.
Select "On" to activate the beep sound when you
operate the radio.
By station list:
You can select the desired
station from the list of FM stations stored by auto
DAB manual tune
tune.
When selecting this option, the display will
change to the FM station list. Select the desired
If the reception is poor and receivable DAB
station from the list.
stations cannot be completely stored by DAB
auto tune, try manual tuning.
Manual tune:
You can manually tune to the
desired FM frequency in 0.05 MHz steps. Turn
Turn TUNE/SELECT/ENTER clockwise
TUNE/SELECT/ENTER clockwise or
or counterclockwise to select the
counterclockwise to tune to the desired
frequency. In "Manual tune" mode, you can use
desired DAB channel, and then press
the scan tuning function (See "To tune to FM
it to confirm.
stations automatically (frequency scan tuning)"
The radio starts scanning for receivable stations
for details.).
in the selected channel.
Tip
Edit FM station list
The new station received by manual tuning is
stored in the DAB station list.
You can edit the FM station list.
Get FM station name:
Perform this
Initialize
operation when you want to receive RDS
information such as station names. Select "OK" to
start scanning for RDS data.
Select "OK" to initialize the radio to the factory
default settings. All settings, DAB and FM station
Notes
lists and assignment information on the preset
• Set "FM tune mode" to "By station list" before
buttons will be deleted.
you perform this operation.
• The currently stored RDS information will be
cleared once scanning starts.
• It may take a long time to receive all the
available RDS data.
Listening through headphones
Connect headphones that have a stereo or
Note
monaural* mini plug (not supplied).
When connecting headphones to the unit, use
headphones with a stereo (3-pole) or monaural
(2-pole) mini plug. If you use headphones with
another type of plug, there may be noise
interference or no sound may be heard.
Compatible
plug types
Other types of
plugs cannot
be used.
* When listening to stereo sound using
To (headphones)
monaural headphones, you will hear sound
from the left channel only.
To use the unit on batteries
Rear side
Four LR6 (size AA) batteries (not supplied)
Tips
• The backlight will turn off if no operation is performed for about 30 seconds to minimize power
consumption.
• Alkaline batteries are recommended. The use of manganese batteries is not recommended, since
this type of battery has an extremely short usage time.
Selected station
Station currently
Secondary service
being received
(after the "L" mark)
Selected station
Station currently
being received
Station name*
To change button assignment
1
Tune to a new station.
2
Press and hold the preset button you want to
change until "Station saved to preset x." appears
on the display.
The previously assigned station on the selected button
will be replaced by the new one.
Tip
The button assignment information remains in the radio's
memory even after DAB and FM auto tunes are performed.
Notes
• The currently stored station list will be cleared once the auto
The radio receives
tune process starts.
the first station in
• When the setup menu is displayed, auto tune will not be
the new station list.
performed even if AUTO TUNE is pressed.
Note on FM auto tuning
Be sure to select "By station list" in "FM tune mode" before
starting FM auto tune. When "Manual tune" is selected, scan
tuning will start instead. See "Setup menu options" for details.
2
Turn on the radio.
Maintaining the moderate volume level
You can delete any
The radio limits the maximum volume to allow
you to listen to the sound at a moderate volume
level when using the headphones. When you try
to adjust the volume to a level that exceeds the
specified level, the "Check The Volume Level"
message appears.
When listening to a
About RDS Features
What is RDS?
Introduced by the European Broadcasting Union
(EBU) in 1987, the Radio Data System (RDS) allows
information such as station names to be received
via the 57 kHz sub-carrier signal of FM
The backlight will turn off automatically if
broadcasts. However, the availability of RDS data
varies depending on the area. It therefore may
The backlight will be on all the
not be always be possible to receive RDS
information.
Using the RDS functions
This radio supports the following RDS functions.
RDS function
Description
"Auto (DAB)" is set by default. This
Station name
Displays the station name
display
you are listening to.
RT (radio text)
Displays the free-form
textual information.
Select the clock display mode,
CAUTION
Risk of explosion if the battery is replaced by an
incorrect type.
The latest EU Importer Information
This product has been manufactured by or on
behalf of Sony Corporation.
EU Importer: Sony Europe B.V.
Precautions
• Operate the unit only on the power sources
specified in "Specifications." For battery
operation, it is recommended that you use four
LR6 (size AA) alkaline batteries. For AC
operation, use only the supplied AC adaptor.
Do not use any other type of AC adaptor.
• Failure to use the supplied AC adaptor may
cause the unit to malfunction, as the polarity
of the plugs of other manufacturers may be
different.
• To use the unit on battery power, unplug the
connector of the AC adaptor from the DC IN
jack. The unit cannot be powered by batteries
if the connector of the AC adaptor is plugged
into the DC IN jack.
• Use the unit within a temperature range of 0°C
to 40°C. If it is used in temperatures higher
than this range, the display may gradually turn
black. If it is used in temperatures lower than
this range, the display may change very slowly.
(These irregularities will disappear and there
will be no damage to the unit when the unit is
used in the recommended temperature range
again.)
• Avoid exposure to temperature extremes,
direct sunlight, moisture, sand, dust or
mechanical shock. Never leave in a car parked
in the sun.
• Do not expose the unit to strong impact or
excessive force. A glass material is used for the
display in some models. If the glass chips or
cracks, it may cause injury. In that case, stop
Monaural*
using the unit immediately and make sure not
mini plug
to touch the damaged parts.
1 ring
Stereo
• Should any solid object or liquid fall into the
mini plug
unit, disconnect the AC adaptor and remove
2 rings
the batteries, and have the unit checked by a
qualified personnel before operating it any
further.
3 or more rings
• Since a strong magnet is used for the speakers,
keep personal credit cards using magnetic
coding or spring-wound watches away from
the unit to prevent possible damage from the
magnetism.
• To clean the casing, use a soft dry cloth. Do not
use any type of solvent, such as alcohol or
benzine, which may damage the finish.
• Do not operate the unit with wet hands since it
may cause a short circuit.
• Do not mix an old battery with a new one or
mix different type of batteries.
2
Turn on the radio.
To use the unit on battery
power, unplug the connector of
the AC adaptor from the DC IN
jack. The unit cannot be
powered by batteries if the
connector of the AC adaptor is
plugged into the DC IN jack.
Insert the side of the
battery first.
Scrolling text (DLS: Dynamic Label
Segment of up to 128 characters)
Station name*
* Displayed only
when RDS data
has been
received.
Scrolling text
(RT: Radio Text of up to 64 characters)*
Listening to an Assigned Station
Press the desired preset button (1 – 5).
Preset button number lights up
and the reception screen appears.
Example: When the
preset button "" is
pressed.
Note
To prevent the assigned station from being
changed by mistake, do not hold the preset
button down.
To tune to FM stations automatically (frequency scan tuning)
You can tune to receivable FM stations automatically by scanning FM frequencies in increments of
0.05 MHz.
Select the FM function, then press AUTO TUNE. Be sure to select
(See "Setup menu options.") before using this function.
3
Select the AUDIO IN function.
AUDIO IN
For external
audio device
14:00
Note
Troubleshooting
The volume is lowered automatically and the
"Volume Lowered" message appears, if you do
not lower the volume for the specified period of
Should any problem persist after you have made
time after the "Check The Volume Level" message
the following checks, consult your nearest Sony
appears.
dealer.
Display is dim, or no indication is
displayed.
• The radio is being used in extremely high or
low temperatures or in a place with excessive
moisture.
Very weak or interrupted sound, or
unsatisfactory reception.
• If you are in a building, listen near a window.
• Extend the antenna and adjust the length and
the angle for best reception. See "To improve
DAB/FM radio reception" for details.
Notes
• If a mobile phone is placed close to the radio,
a loud noise may be heard from the radio.
• The RDS functions will not be activated if the
Keep the phone away from the radio.
FM station being received is not transmitting
RDS data. They may also not work properly in
Battery gets exhausted very quickly.
areas where RDS transmissions are in the
• Check the estimated battery life described in
experimental stage.
"Specifications" and be sure to turn off the
• If the radio signal being received is weak, it
radio when not using it.
may take time to receive the RDS data.
Messages
Low Battery (flashes, and the power is
turned off)
• The batteries are exhausted. Replace all the
batteries with new ones.
No preset
• No station in the selected band (DAB or FM)
has been preset to the pressed button.
Inquiries to the EU Importer or related to product
Specifications
compliance in Europe should be sent to the
manufacturer's authorized representative, Sony
Belgium, bijkantoor van Sony Europe B.V., Da
Frequency range
Vincilaan 7-D1, 1930 Zaventem, Belgium.
DAB (Band-III): 174.928 MHz 239.200 MHz
FM: 87.5 MHz 108 MHz (0.05 MHz step)
DAB (Band-III) frequency table (MHz)
Channel
5A
5B
5C
• When you are not going to use the unit for a
5D
long time, remove the batteries to avoid
damage from battery leakage and corrosion.
6A
• Check if the batteries are inserted in the
6B
correct orientation ( and ) when the radio
6C
does not turn on after battery replacement.
6D
• Batteries have a recommended use-by date for
7A
proper use. When using expired batteries,
battery life will be extremely short. Check the
7B
use-by date on the batteries and if they are
7C
expired, replace them with new ones.
7D
• Make sure not to splash water on the unit. This
8A
unit is not waterproof.
8B
• Under certain circumstances, especially when
8C
the air is very dry, it is not uncommon to
experience a discharge of static electricity, or
8D
shock, when your body comes in contact with
9A
another object, in this case the ear buds
9B
touching your ear(s). The energy from this
natural discharge is extremely small and is not
9C
emitted by your product but rather a natural
9D
environmental occurrence.
Speaker:
• Listening at high volume levels over extended
Audio power output:
periods of time may harm your hearing. Be
Output:
particularly careful when listening through
headphones.
mini jack)
Input:
AUDIO IN jack (ø 3.5 mm, stereo mini jack)
• Sudden loud output may harm your ears.
Power requirements:
Increase the volume gradually. Be particularly
careful when listening through headphones.
alkaline batteries
External power source:
• Do not use headphones while walking, driving
Battery life (JEITA)
a car or motorcycle, cycling, etc. A traffic
accident may result.
DAB reception
Approx. 17 hours (using Sony (LR6SG)
• Do not use headphones in situations where
being unable to hear ambient sound is
alkaline batteries)
dangerous, such as at railroad crossings, on
Approx. 7 hours (using Sony (NH-AA) Ni-MH
train station platforms, and at construction
1,000 mAh batteries)
sites.
FM reception
• Excessive sound pressure from earphones and
Approx. 17 hours (using Sony (LR6SG)
headphones can cause hearing loss.
alkaline batteries)
Approx. 7 hours (using Sony (NH-AA) Ni-MH
1,000 mAh batteries)
If you have any questions or problems
AUDIO IN input
concerning your unit, please consult your
Approx. 28 hours (using Sony (LR6SG)
nearest Sony dealer.
alkaline batteries)
Approx. 11 hours (using Sony (NH-AA) Ni-MH
1,000 mAh batteries)
Dimensions:
95 mm (W/H/D) (incl. projecting parts)
Mass:
Approx. 1,040 g (incl. batteries)
When turning on the radio for the first time
DAB auto tune will start automatically when the radio is
turned on for the first time.
After DAB auto tune is
completed, the radio receives the first station in the
DAB station list stored by DAB auto tune.
If you want
to cancel DAB auto tune process, press BACK.
Tip
To cancel the auto
tune process while
To perform DAB auto
in progress, press
tune again later, see "To
BACK.
make a new DAB/FM
station list" below.
About the FM auto tune
process
"SC" lights up when
You can cancel the FM auto tune process
a secondary service
that starts after the FM function is
is received.
selected for the first time. However, if you
want to tune to stations by station list,
you will need to perform FM auto tune.
For details on how to perform FM auto
tune later, see "To make a new DAB/FM
station list."
To cancel the
auto tune
process while
in progress,
press BACK.
"Manual tune" in "FM tune mode"
If a receivable station is found,
"[ENTER]:Select" appears on the
display.
Press TUNE/SELECT/ENTER to
select the station. (If you do not
press TUNE/SELECT/ENTER
within 3 seconds, searching will
continue.)
Tip
Press BACK to stop searching FM stations.
Start playing your
selection on the
connected device.
A desired station cannot be received
when a preset button is pressed.
• You may have held down the preset button to
which the station was assigned, causing the
station to be replaced by a new one. Assign
the desired station again.
• Preset buttons cannot be used when the setup
menu is displayed.
If maintenance service is performed
All user-configured settings, such as preset radio
stations, the timer settings, and the clock, may
be initialized.
Please note your settings in case you need to
configure them again.
Service not available
• The selected station or service is currently not
broadcasting.
Supplied accessories:
AC adaptor (1)
* When "Auto" is selected for the backlight
setting and listening through the speaker.
Measured by JEITA (Japan Electronics and
Information Technology Industries Association)
Frequency
Channel
Frequency
standards. The actual battery life varies
significantly depending on battery type, usage
174.928
10A
209.936
and circumstances.
176.640
10B
211.648
Design and specifications are subject to change
178.352
10C
213.360
without notice.
180.064
10D
215.072
181.936
11A
216.928
PTY (programme type)
183.648
11B
218.640
This function indicates services in programme
185.360
11C
220.352
type, such as News or Sports, transmitted in the
DAB.
187.072
11D
222.064
If the service does not transmit the programme
188.928
12A
223.936
type, "No PTY" appears.
190.640
12B
225.648
Programme type
Display
192.352
12C
227.360
No programme type
No PTY
194.064
12D
229.072
News
News
195.936
13A
230.784
Current Affairs
Current Affairs
197.648
13B
232.496
199.360
13C
234.208
Information
Information
201.072
13D
235.776
Sport
Sport
202.928
13E
237.488
Education
Education
204.640
13F
239.200
Drama
Drama
206.352
Culture
Arts
208.064
Science
Science
Varied
Talk
Approx. 80 mm dia., 4 Ω, monaural
Pop Music
Pop Music
1.5 W
Rock Music
Rock Music
(headphones) jack (ø 3.5 mm, stereo
Easy Listening Music
Easy Listening
Light Classical
Light Classical
6 V DC, four LR6 (size AA)
Serious Classical
Classical Music
Other Music
Other Music
DC IN 5 V 0.7 A
Weather
Weather
*
Finance
Finance
Children's programmes
Children's
Social Affairs
Factual
Religion
Religion
Phone In
Phone In
Travel
Travel
Leisure
Leisure
Jazz Music
Jazz and Blues
Country Music
Country Music
National Music
National Music
Oldies Music
Oldies Music
Folk Music
Folk Music
Documentary
Documentary
Approx. 227 mm × 139 mm ×
Alarm Test
Alarm Test
Alarm
Alarm – Alarm !

Manuels Connexes pour Sony XDR-S61D


Sommaire des Matières pour Sony XDR-S61D
- Page 2 1 Sélectionnez « Timer setting », puis utilisez un casque doté d’une mini fiche stéréo êtes au volant d’une voiture ou d’une moto, Env. 17 heures (avec des piles alcalines Sony fissures sur le verre peut provoquer des 3 Sélectionnez « Volume setting »...