Cafe CVW9301 Manuel D'utilisation Et Instructions D'installation
Table des Matières
Les langues disponibles
Les langues disponibles
Liens rapides
Owner's Manual & Installation Instructions
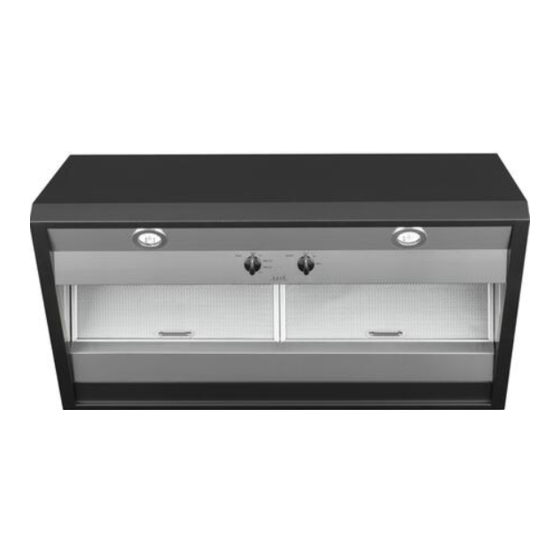
Vented Range Hoods
Models: CVW9301 and CVW9361
Contents
Safety Information . . . . . . . . . . . . . . . . . . . . . . . . . . . . . . .3
Using the Hood
Controls . . . . . . . . . . . . . . . . . . . . . . . . . . . . . . . . . . . . . .5
Care And Cleaning
Filter . . . . . . . . . . . . . . . . . . . . . . . . . . . . . . . . . . . . . . . . .6
Surfaces . . . . . . . . . . . . . . . . . . . . . . . . . . . . . . . . . . . . . .6
Lights . . . . . . . . . . . . . . . . . . . . . . . . . . . . . . . . . . . . . . . .7
Write the model and serial numbers here:
Model # _______________________________
Serial # _______________________________
You can find them on a label on the inside of the hood.
TM
Installation Instructions . . . . . . . . . . . . . . . . . . . . . . . . . .8
Troubleshooting Tips . . . . . . . . . . . . . . . . . . . . . . . . . . .20
Limited Warranty . . . . . . . . . . . . . . . . . . . . . . . . . . . . . . .22
Accessories . . . . . . . . . . . . . . . . . . . . . . . . . . . . . . . . . . .23
Consumer Support . . . . . . . . . . . . . . . . . . . . . . . . . . . . .24
49-2000061 Rev. 2 01-19 GEA
Chapitres
Table des Matières
Dépannage

Manuels Connexes pour Cafe CVW9301


Sommaire des Matières pour Cafe CVW9301
- Page 25 Manuel d'utilisation et instructions d'installation Hottes de cuisinière à évacuation Modèles : CVW9301 et CVW9361 Table des matières Sécurité ........3 Instructions d'installation .
- Page 26 MERCI DE PERMETTRE À CAFÉ DE FAIRE PARTIE DE VOTRE FOYER. Nous sommes fiers du savoir-faire, de l'innovation et du design qui font partie intégrante de tous les produits Café que nous fabriquons, et nous pensons que vous le serez aussi. À cet égard, l'enregistrement de votre appareil nous assure que nous pourrons vous fournir des informations importantes sur votre appareil et des détails sur sa garantie si vous en avez besoin.
-
Page 27: Consignes De Sécurité Importantes
CONSIGNES DE SÉCURITÉ IMPORTANTES LISEZ TOUTES LES INSTRUCTIONS AVANT D'UTILISER VOTRE APPAREIL AVERTISSEMENT AVERTISSEMENT POUR DIMINUER LES RISQUES POUR RÉDUIRE LES RISQUES DE D'INCENDIE, DE CHOC ÉLECTRIQUE OU DE BLESSURES S'IL SURVIENT UN FEU DE GRAISSE SUR BLESSURES, SUIVEZ LES CONSIGNES SUIVANTES : LA CUISINIÈRE, SUIVEZ LES CONSIGNES SUIVANTES* : A. -
Page 28: Pour Retirer La Pellicule Protectrice Et Le Ruban Adhésif D'emballage
CONSIGNES DE SÉCURITÉ IMPORTANTES LISEZ TOUTES LES INSTRUCTIONS AVANT D'UTILISER VOTRE APPAREIL AVERTISSEMENT AVERTISSEMENT POUR DIMINUER LES RISQUES POUR RÉDUIRE LES RISQUES D'INCENDIE, DE CHOC ÉLECTRIQUE OU DE D'INCENDIE, N'UTILISEZ QUE DES CONDUITS EN MÉTAL. BLESSURES, SUIVEZ LES CONSIGNES SUIVANTES : N'essayez pas de réparer ou de remplacer une pièce de la A. -
Page 29: Commandes
Commandes Les caractéristiques et l'apparence de l'appareil présenté dans ce manuel peuvent varier selon le modèle. Commande du VENTILATEUR : Commande de l'ÉCLAIRAGE : Tournez le bouton Tournez la FAN (ventilateur) sur LO (bas), MED LO (moyen-bas), commande LIGHT (lumière) à HI (élevé) pour obtenir MED HI (moyen-élevé) ou sur HI (élevé), selon le besoin. -
Page 30: Filtre
Filtre Assurez-vous que le disjoncteur électrique est en position « fermée » et que toutes les surfaces sont froides avant de nettoyer ou de réparer la hotte. Filtres à graisse métalliques réutilisables Pour retirer un filtre : La hotte est équipée de 2 filtres à graisse métalliques réutilisables. Les filtres métalliques retiennent la graisse émise par les Saisissez la languette du filtre et tirez-la vers le haut, puis aliments durant l'utilisation de la surface de cuisson. -
Page 31: Lampes
Lampes Assurez-vous que l'alimentation électrique est coupée et que toutes les surfaces sont froides avant de nettoyer ou de réparer la hotte. REMARQUE : Le couvre-ampoule ne doit être enlevé que Pour remplacer une ampoule : lorsqu'il est froid. Le port de gants en latex permet de saisir 1. -
Page 32: Instructions D'installation
Instructions Hottes de cuisinière d'installation Si vous avez des questions, visitez notre site Web : cafeappliances.com AVANT DE COMMENCER AVERTISSEMENT POUR DIMINUER LES RISQUES Lisez attentivement toutes ces instructions. D'INCENDIE, DE CHOC ÉLECTRIQUE OU DE IMPORTANT BLESSURES, SUIVEZ LES CONSIGNES SUIVANTES : •... -
Page 33: Préparatifs Avant L'installation
Préparatifs avant l'installation DIMENSIONS DE L'APPAREIL DÉGAGEMENTS POUR L'INSTALLATION Ces hottes d'évacuation ont été conçues pour être installées sur un mur. Elles peuvent être installées sous 12 po une retombée de plafond ou sous une armoire. • Ces hottes sont conçues pour s'adapter aux armoires de 12 po de profondeur. -
Page 34: Accessoires En Option
Préparatifs avant l'installation ACCESSOIRES EN OPTION PLANIFICATION PRÉLIMINAIRE Cache-conduit Planification de l'installation du conduit Un cache-conduit décoratif est disponible pour les • Cette hotte peut être ventilée verticalement à installations sur des plafonds de 8 à 10 pi. Le cache- travers les armoires supérieures, la retombée du conduit peut se déployer de 12 po au minimum ou plafond ou le plafond. -
Page 35: Cache-Conduits Décoratifs
Préparatifs avant l'installation CACHE-CONDUITS DÉCORATIFS Cette hotte doit être raccordée à un conduit rond de 7 po. Le conduit rond peut être adapté Un cache-conduit décoratif est disponible pour les deux à un conduit de 3-1/4 po x 12 po. largeurs de modèle. -
Page 36: Outils Et Matériel Nécessaires
Préparatifs avant l'installation OUTILS ET MATÉRIEL NÉCESSAIRES RETIRER L'EMBALLAGE (NON FOURNIS) Tournevis Phillips et Ruban Hotte tournevis plat adhésif Crayon et ruban à mesurer Support de fixation en bois Moteur Ensemble de pièces Douille hexagonale pivotante de 1/4 po Boîte d'expédition Perceuse électrique avec forets de 1/8 po et 3/8 po •... -
Page 37: Pièces Comprises
Préparatifs avant l'installation PIÈCES COMPRISES Repérez la boîte contenant les accessoires compris avec la hotte et vérifiez-en le contenu. Vis, fixations 2 filtres à graisse murales, rondelles Support en aluminium Conduit de transition de filtre avec registre 761Dia65 EXIGENCES RELATIVES AU Passez en revue les exemples suivants pour garantir une installation sans problème avec un cache-conduit. -
Page 38: Déterminer Les Emplacements D'installation De La Hotte, Des Conduits Et Du Câblage
Préparatifs avant l'installation DÉTERMINER LES EMPLACEMENTS D'INSTALLATION DE LA HOTTE, DES CONDUITS ET DU CÂBLAGE ÉVACUATION À • Conservez la pièce de support en bois et ses vis pour les Ligne centrale de TRAVERS LE PLAFOND utiliser ultérieurement. Ne pas jeter. 6-7/8 po au mur •... -
Page 39: Installer Le Support De La Hotte
Instructions d'installation INSTALLER LE SUPPORT INSTALLER LE CONDUIT DE LA HOTTE DE TRANSITION IMPORTANT : La charpente doit pouvoir supporter une IMPORTANT : Retirez Enlevez charge de 100 lb (45,4 kg). le ruban d'emballage le ruban d'emballage du registre et assurez- •... -
Page 40: Autre Méthode De Montage) Installer
Instructions d'installation IMPORTANT : Pour un support supplémentaire et pour (Autre méthode de montage) INSTALLER minimiser les vibrations pendant le fonctionnement, nous LA HOTTE SOUS UNE RETOMBÉE DE vous recommandons de fixer également la hotte au mur à PLAFOND OU UNE ARMOIRE l'aide des fixations murales. -
Page 41: Installer Le Support De Plafond
Instructions d'installation RACCORDER LE CONDUIT INSTALLER LE SUPPORT DE PLAFOND • Insérez le conduit sur le conduit de transition jusqu'à ce qu'il atteigne les butées. Le support de plafond doit être installé lorsque le cache- conduit est utilisé pour recouvrir un conduit d'au moins •... -
Page 42: Installer Le Moteur
Instructions d'installation INSTALLER LES CACHE-CONDUITS INSTALLER LE MOTEUR Support de Pour installer le cache-conduit de 12 po seul : • Alignez et engagez les fixation du moteur encoches du ventilateur • Placez la section de 12 po du cache-conduit décoratif avec les 3 crochets à... -
Page 43: Installer Les Filtres
Instructions d'installation INSTALLER LES FILTRES FINALISER L'INSTALLATION • Retirez la pellicule protectrice des filtres. • Reportez-vous aux instructions de fonctionnement pour tester toutes les commandes. • Insérez le filtre dans les attaches en « C » situées au haut du panneau supérieur avant vertical. •... -
Page 44: Conseils De Dépannage
Conseils de dépannage... Avant de faire une demande de service Économisez du temps et de l'argent! Reportez-vous au tableau suivant pour éviter tout appel de service qui ne serait pas nécessaire. Problème Cause possible Solutions Le ventilateur ne fonctionne Un fusible peut être grillé ou un Remplacez le fusible ou réinitialisez le disjoncteur. - Page 45 Notes 49-2000061 Rév. 2...
-
Page 46: Garantie Limitée
Garantie limitée des hottes de cuisinière à évacuation Café cafeappliances.com Toutes les réparations sous garantie sont effectuées par nos Centres de réparation ou par un technicien qualifié. Pour faire la demande d'une réparation en ligne, visitez cafeappliances.com/service. Au Canada, veuillez visiter : https://service. geappliances.ca/servicio/fr_CA/. -
Page 47: Accessoires
Accessoires Vous manquez de quelque chose? Café propose une panoplie d'accessoires qui permettent d'améliorer votre expérience de cuisson et de nettoyage! Reportez-vous à la page du service à la clientèle pour obtenir les informations sur le site Web. Les produits suivants, et d'autres, sont offerts : Pièces Ensemble de cache-conduit Ampoules de rechange... -
Page 48: Service À La Clientèle
Service à la clientèle Site Web de Café Vous avez des questions ou besoin d'assistance concernant votre appareil? Consultez le site Web de Café, accessible 24 heures sur 24, tous les jours de l'année! Vous pouvez également acheter d'autres excellents produits de Café et bénéficier de tous nos services de soutien en ligne conçus pour votre commodité.