Table des Matières
Publicité
Les langues disponibles
Les langues disponibles
Liens rapides
Publicité
Chapitres
Table des Matières

Manuels Connexes pour GF MSA 2.0


Sommaire des Matières pour GF MSA 2.0
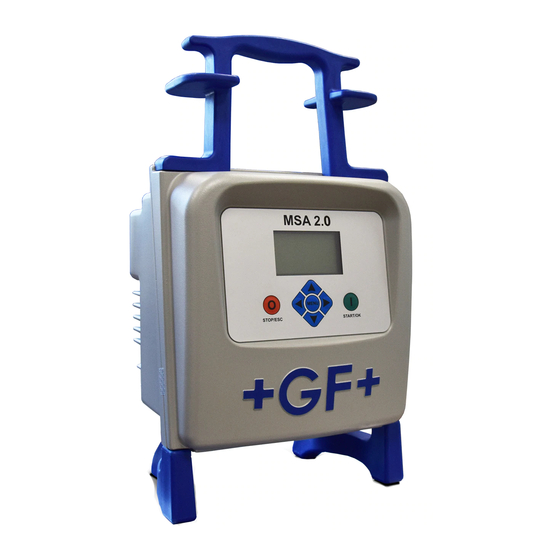
- Page 1 GF Piping Systems Instruction manual Bedienungsanleitung Manuel d‘utilisation MSA 2.0 /MSA 2.1 Polyvalent Electrofusion Units MSA 2.0 /MSA 2.1 Polyvalentes Elektroschweissgerät MSA 2.0 / MSA 2.1 Unité d‘électrosoudage polyvalente...
-
Page 3: Table Des Matières
Operating Instructions MSA 2 General Information Index Page General Information Warning notice Introduction 1.1 Product description 1.2 Components description 1.2.1 Operation Controls 1.2.2 Display 1.2.3 Ambient Temperature Sensor 1.2.4 USB Interface 1.2.5 Power Cable 1.2.6 Welding Cable 1.3 Barcode Reader Scanner 1.4 Extension Cables for Power Supply 1.5 START/STOP Card Fusion process... - Page 4 General Information Operating Instructions MSA 2 8.6 Working with safety in mind 8.7 Other disposal...
-
Page 5: I General Information
Anyway, the manufacturer reserves the right to make technical changes to MSA 2.0 which may result in differences from the pictures and information contained in this manual. To point out relevant aspects operating this electrofusion unit, symbols are frequently used. -
Page 6: Introduction
In addition, the MSA 2.0 is tracking and storing in the internal memory up to 350 welding protocols, (500 for MSA 2.1) that can be browsed by the user even days or months after the welding execution. -
Page 7: Components Description
Operating Instructions MSA 2 Introduction Components description 1.2.1 Operation Controls There are seven buttons the user can press to operate the machine. START (green button) and STOP (red button) are the most important, used to get a confirmation or a stop for all the actions. -
Page 8: Display
Introduction Operating Instructions MSA 2 1.2.2 Display The graphical display is the main user interface of the welding machine. It shows the steps to be executed in sequence, the fusion data, possible errors and alarm messages. It is possible to change its brightness using the buttons and then save permanently the new value pressing the button, in case of limited visibility due to weather conditions. -
Page 9: Welding Cable
Operating Instructions MSA 2 Introduction 1.2.6 Welding Cable The fusion cable shall be connected to the fitting pins. As standard the terminals are supplied with straight female connectors, Ø4mm. Barcode Reader Scanner The barcode scanner allows a quick reading of welding parameters by reading the related barcode, pointing the barcode (at a distance of 10-15 cm) and pressing its button. -
Page 10: Start/Stop Card
Introduction Operating Instructions MSA 2 START/STOP Card START / STOP card can be used as alternative to the buttons on the keypad. For instance, you can confirm the commands or start the welding process by scanning the START bar code on the card. -
Page 11: Fusion Process
Operating Instructions MSA 2 Fusion process Fusion process Overview of operating procedure The welding workflow is shown in the picture below t = ----s Prepare the Vo= --.-V welding and R = --.--Ω connect the fitting 12/06/12 15:50 25°C ------ t = ----s ------ Read the fusion... -
Page 12: Switching On
Connect fitting The next step consists of connecting the fitting to the machine by the operator. The MSA 2.0 asks this with a prolonged sound. The LED of the barcode scanner blinks to inform the operator it has to do it. -
Page 13: Enter Operator Code/Job Number (Msa 2.1 Only)
As soon as a fitting presence is recognized, the MSA 2.0 moves automatically forward, asking for the fusion parameters. This is also pointed out by a double short tone of the MSA 2.0 and the barcode scanner. The scanner LED switches off too, to alert the operator that it is ready to accept commands. -
Page 14: Enter Fusion Data
Fusion process Operating Instructions MSA 2 Enter fusion data After that, the user can insert the fusion parameters: • Either reading the barcode information with the scanner, • or, if the barcode cannot be read with a scanner for any reason, entering manually fusion time and voltage by pressing the START/OK ( I ) button to go in “edit”... -
Page 15: Preparation Check (Msa 2.1 Only)
Operating Instructions MSA 2 Fusion process When the operator confirms his intent of starting the fusion process, pressing the START/OK ( I ) button, the unit will start to weld. If the barcode is not correct the machine and the scanner give both a prolonged tone to ask for the correct one. -
Page 16: Fusion Process
Fusion process Operating Instructions MSA 2 Fusion process 2.7.1 Welding phase During the fusion process, the display shows the information concerning the output voltage, the remaining fusion time and the applied energy. t = 0020s Vo= 39.7V E = 003.1kJ N 150 The machine adjusts the fusion time according to the external Note... -
Page 17: Cooling Time
Operating Instructions MSA 2 Fusion process 2.7.2 Cooling time After the completion of the process, the fusion summary and the remaining cooling time, if defined in the barcode, are displayed alternately. Messages are active till the user will press the STOP/ESC (O) button, to proceed with the next welding. -
Page 18: Configuration Settings
START/OK ( I ) to confirm the setting. To cancel instead the operation press STOP/ESC (O). Since the MSA 2.0/2.1 has to be calibrated regulary, the user can check in advance the expiring revision date. Just pressing three times the MENU button the user can access such information (mm/yy). -
Page 19: Data Management
Operating Instructions MSA 2 Data Management Data Management The electro-fusion unit saves the welding protocols for each fusion cycle in the internal memory. These data can be saved in a PDF/BINARY file too (only for MSA 2.1). When the memory is full, the oldest protocol is overwritten by the most recent. -
Page 20: Protocol View
Data Management Operating Instructions MSA 2 Protocol view To view the saved protocols, press MENU once: the most recent protocol appears as first. 123 E-0 d110 [ +GF+ 12/06/12 15:54 25°C Vo=39.5V t =1000s E = 200kJ P=215V The buttons ( )( ) allow to scroll up and down the list of protocols, while the ( )( ) ones allow to see all the information related to each single protocol. -
Page 21: Protocol Export (Msa 2.1 Only)
Operating Instructions MSA 2 Data Management Protocol export (MSA 2.1 only) The protocols stored in the internal memory of the MSA 2.1 can be copied in a memory stick for being analysed in a PC in a later stage, both in PDF and BINARY format. Insert the USB stick on the USB connector available on the rear panel of the machine, then press MENU till a USB memory icon appears. -
Page 22: Error Messages
Error messages Operating Instructions MSA 2 Error messages In case of anomalies or errors, the MSA 2.0/2.1 pops up a specific message useful to identify the possible issue. The related number will be even tracked within the welding protocol, to give evidence of the accident. -
Page 23: Technical Characteristics
Operating Instructions MSA 2 Technical characteristics Technical characteristics Mains voltage and frequency 230 V (265V÷190V) 40÷70 Hz Suggested power generators 3.5kVA Welding technique Voltage controlled Fusion voltage 8÷42V (48 V) Operating temperature - 20 °C / +50°C Internal temperature - 20°C / +70°C Temperature sensor resolution ±... -
Page 24: Maintenance
Maintenance Operating Instructions MSA 2 Maintenance Cleaning Clean the unit regularly with a slightly damp cloth. The membrane keyboard and other plates can be cleaned with industrial alcohol if necessary (no solvents or Trichlor products). Under no circumstances should the unit be sprayed or immersed in water nor cleaned with compressed air. -
Page 25: Accident Prevention
Operating Instructions MSA 2 Accident Prevention Accident Prevention Operating the Unit Do not let unauthorized or untrained personnel use the unit. When the unit is not in operation, avoid unauthorized use by keeping it in a dry, locked room. Safe operation of the fusion unit can only be ensured when the following criteria are fulfilled: •... -
Page 26: Defect Unit
Accident Prevention Operating Instructions MSA 2 Defect Unit Arrange that damaged housings or other parts are replaced or repaired by an authorized service agent. If the unit is not working properly it must be sent without hesitation to an authorized service agent. - Page 27 Operating Instructions MSA 2 Accident Prevention...
- Page 28 GF Piping Systems Bedienungsanleitung MSA 2.0 /MSA 2.1 Polyvalentes Elektroschweissgerät...
- Page 29 Operating Instructions MSA 2 Inhaltsverzeichnis Page Allgemeines Warnhinweise Einleitung 1.1 Produktbeschreibung 1.2 Detailbeschreibung 1.2.1 Bedienfeld 1.2.2 Anzeige 1.2.3 Sensor für Umgebungstemperatur 1.2.4 USB-Schnittstelle 1.2.5 Netzkabel 1.2.6 Schweisskabel 1.3 Barcodescanner 1.4 Verlängerungskabel 1.5 START/STOP Karte Schweissen 2.1 Übersicht Bedienungsablauf 2.2 Gerät einschalten 2.3 Fitting anschliessen 2.4 Eingabe Bedienerausweis/ Auftragsnummer (nur MSA 2.1)
- Page 30 Operating Instructions MSA 2 8.5 Gerät öffnen 8.6 Arbeitssicherheit 8.7 Entsorgung...
-
Page 31: I Allgemeines
I Allgemeines Sehr geehrter Kunde, wir danken Ihnen für das Vertrauen in dieses Produkt und wünschen Ihnen viel Erfolg bei der Anwendung. Das Elektro - schweissgerät MSA 2.0/2.1 wurde entsprechend der aktuell gültigen technischen Standards entwickelt. Ein anderer Einsatz dieser Anleitung... -
Page 32: Warnhinweise
Allgemeines Operating Instructions MSA 2 Warnhinweise In dieser Anleitung werden Warnhinweise verwendet, um Sie vor Verletzungen oder vor Sachschäden zu warnen. Lesen und beachten Sie diese Warnhinweise immer! Warnsymbol Bedeutung Unmittelbar drohende Gefahr! Bei Nichtbeachtung drohen Ihnen Tod oder schwerste Verletzungen. Gefahr Möglicherweise drohende Gefahr! Warnung... -
Page 33: Einleitung
Schweissparameter, regelt die Leistungsabgabe und Dank der Displayanzeigen wird der Bediener durch alle notwendigen Arbeitsschritte geführt. Das MSA 2.0 speichert in einen internen Speicher bis zu 350 Schweissprotokolle ab (500 mit MSA 2.1). Um Qualitätsverbindungen sicherzustellen, stellt das Gerät entsprechend der gemesssenen Umgebungstemperatur die... -
Page 34: Detailbeschreibung
Einleitung Operating Instructions MSA 2 Detailbeschreibung 1.2.1 Bedienfeld Das Bedienfeld besteht aus sieben Tasten. START (grüne Taste) und STOP (rote Taste) sind am Wichtigsten, diese werden als Bestätigung oder Abbruch von allen Aktionen verwendet. Die anderen (blau Tasten) werden als Hilfstasten zur Menünavigation und Dateneingabe benutzt. -
Page 35: Anzeige
Operating Instructions MSA 2 Einleitung 1.2.2 Anzeige Graphikdisplay Benutzerschnittstelle Schweissmaschine. Hier werden Arbeitsschritte, Schweissdaten, mögliche Fehler und Alarme angezeigt. Die Helligkeit ist mit den Pfeiltasten veränderbar und wird mit Taste gespeichert. Diese Einstellung ist nur aktiv, wenn auf der Anzeige steht . 1.2.3 Sensor für Umgebungstemperatur Umgebungstemperatur... -
Page 36: Schweisskabel
Einleitung Operating Instructions MSA 2 1.2.6 Schweisskabel Schweisskabel werden Fittingkontakten angeschlossen. Werkseitig werden die Kabel mit Steckbuchsen Ø4,0 mm ausgeliefert. Barcodescanner Scanner ermöglichen schnelle Einlesen Schweissparametern und Bedienerdaten entsprechend der Barcodeinformation. Den Scanner nahe an den einzulesenden Barcode heranführen (10-15cm) und mit der Taste am Scanner das Einlesen starten. -
Page 37: Start/Stop Karte
Operating Instructions MSA 2 Einleitung START/STOP Karte Alternativ zu den START/STOP Tasten auf der Tastatur, können mit der START/STOP Karte Vorgänge der MSA 2.0 und MSA 2.1 über den Barcode Scanner bestätigt (START) bzw. gelöscht (STOP) werden. Um einen laufenden Schweissvorgang zu unterbrechen, empfehlen wir die STOP-Taste auf der Tastatur des MSA 2.0... -
Page 38: Schweissen
Schweissen Operating Instructions MSA 2 Schweissen Übersicht Bedienungsablauf Abgebildet ist ein Beispiel eines Bedienungsablaufs. t = ----s Fitting Vo= --.-V anschliessen R = --.--Ω 12/06/12 15:50 25°C ------ t = ----s ------ Vo= --.-V Schweissdaten einlesen R = 07.45Ω 12/06/12 15:50 25°c t = 0040s Start schweiss... -
Page 39: Gerät Einschalten
Der Stromgenerator muss vor dem Anschluss des MSA Gerätes bereits gestartet sein und eine konstante Ausgangsspannung liefern. Spannungsspitzen und–schwankungen können die Schweissqualität beeinflussen und/oder das Elektroschweissgerät beschädigen. MSA 2.0 V 2.06 S156A2362001 Verbinde das Elektroschweissgerät mit dem Netz oder mit dem... -
Page 40: Eingabe Bedienerausweis/ Auftragsnummer
Schweissen Operating Instructions MSA 2 Verbinden Sie die Schweisskabel mit den Fittingkontakten, falls nötig verwenden Adapterstücke. Wenn Elektroschweissgerät den Fitting erkannt hat, wechselt die Anzeige für die Eingabe weiterer Daten. Falls das Display nicht wechselt, prüfen Sie bitte den Anschluss der Kabel an den Fitting. -
Page 41: Schweissdaten Einlesen
Operating Instructions MSA 2 Schweissen Falls die Erfassung des Schweisserausweises Pflicht ist, blinkt die erste Zeile „---“ und das MSA 2.1 lässt keine Eingabe der Schweissparameter zu. Schweissdaten einlesen Schweissdaten werden mittels Barcodescanner oder manuell eingegeben. Als Standard ist das Einlesen mit Barcodescanner vorgesehen. -
Page 42: Schweissvorbereitung (Nur Msa 2.1)
Schweissen Operating Instructions MSA 2 Betätigen der Taste STOP/ESC (O) und gibt die Schweissdaten erneut ein. E-10 12/06/12 15:50 25°C Im manuellen Mode wählt der Anwender die Schweissspannung und Zeit am Gerät aus. Mit Hilfe der Tasten ( )( ) wird die Spannung ausgewählt und mit START/OK ( I ) bestätigt, automatisch wechselt man zu der Schweisszeit. -
Page 43: Schweissprozess
= 0020s Vo= 39.7V E = 003.1kJ N 150 Das MSA 2.0/2.1 passt die Schweisszeit entsprechend der Umgebungstemperatur an. Die resultierende Schweisszeit kann sich somit von der nominalen Zeit, welche vom Barcode gelesen wurde, unterscheiden. Der Schweissvorgang kann jederzeit mit der Taste STOP/ESC unterbrochen werden. -
Page 44: Abkühlzeit
Schweissen Operating Instructions MSA 2 2.7.2 Abkühlzeit Nach erfolgreicher Schweissung werden Datenzusammenfassung verbleibende Abkühlzeit abwechselnd angezeigt. Diese Anzeigen bleiben aktiv bis die STOP/ESC (O) Taste betätigt wird, um die nächste Verbindung zu starten. = 10’ N 150 Entfernen dre Haltevorrichtungen erst nach vollständigem Ablauf der Achtung Abkühlzeit! Gefahr vor Verbrennungen! -
Page 45: Konfiguration
Eingaben werden zum Abschluss mit START/OK ( I ) bestätigt. Um die Änderungen zu annullieren betätigen Sie STOP/ESC (O). Das MSA 2.0/2.1 sollte in regelmäßigen Abständen kalibriert werden, deshalb kann der Benutzerdas Erreichen des nächsten Revisionsdatums am Gerät abfragen. Dazu lediglich dreimal die Taste MENU drücken (MM/JJ). -
Page 46: Datenmanagement
Datenmanagement Operating Instructions MSA 2 Datenmanagement Elektroschweissgerät speichert Protokoll jeder Schweissung in einen internen Speicher. Sobald der Speicher voll ist, wird die erste Schweissung mit der aktuellen überschrieben (FIFO – Prinzip). Die Daten der Protokolle entsprechen der mehrere Norm, folgende Informationen sind verfügbar (in PDF/BINARY datei für MSA 2.1): Seriennummer des Schweissgerätes Schweissnummer... - Page 47 Operating Instructions MSA 2 Datenmanagement 123 E-0 d110 [ +GF+ 12/06/12 15:54 25°C Vo=39.5V t =1000s E = 200kJ P=230V Mit den Pfeiltasten ( )( ) blättert man durch die Protokolle, die Tasten ( )( ) ermöglichen die Anzeige sämtlicher Parameter einer ausgewählten Schweissung.
-
Page 48: Export Von Protokollen (Nur Msa 2.1)
Datenmanagement Operating Instructions MSA 2 Export von Protokollen (nur MSA 2.1) Bei Verwendung eines USB-Stickswerden alle Protokolle aus dem internen Speicher exportiert. Setzen Sie den USB-Stick in die Schnittstelle ein, drücken Sie MENU und wählen die export Ikon. Drücken Sie START/OK (I) zum Start der Übertragung auf den USB-Stick. -
Page 49: Fehlermeldungen
Operating Instructions MSA 2 Fehlermeldungen Fehlermeldungen Bei Auftreten kritischer Zustände oder Fehlern zeigt das Display eine entsprechende Fehlermeldung an. Die entsprechende Fehlernummer wird in das Schweissprotokoll eingetragen. Beispiel einer Fehler Meldung: Die Tabelle beinhaltet alle möglichen Fehlermeldungen mit einer kurzen Angabe der Fehlerursache. FEHLER DISPLAY ANZEIGE BEMERKUNG... -
Page 50: Technische Daten
Technische Daten Operating Instructions MSA 2 Technische Daten Netzspannung/Frequenz 230 V (265V – 190V) 40 – 70 Hz Empfohlene Generator 3.5kVA Leistung Schweissart Kontrollierte Spannung Invertertechnologie Schweissspannung 8 – 42V (48 V) Arbeitstemperatur - 20 °C – +50°C Gerätetemperatur (innen) - 20°C –... -
Page 51: Unterhalt
Operating Instructions MSA 2 Unterhalt Unterhalt Während der Kontrolle, Wartung und Reinigung das Gerät immer vom Netz trennen ! Gefahr Reinigung Gerät regelmässig mit einem feuchten Lappen reinigen. Die Frontplatte und Schilder können bei starker Verschmutzung mit Alkohol gereinigt werden (kein Verdünner oder Trichlor). Schweisskabel Eine regelmässige Kontrolle der Schweisskabel ist notwendig. -
Page 52: Unfallschutz Vorschriften
Unfallschutz Vorschriften Operating Instructions MSA 2 Unfallschutz Vorschriften Betrieb des Gerätes Das Gerät vor Unbefugten, nicht instruiertem Personal und Kindern fernhalten. Nichtbenutzte Geräte vor unbefugter Benutzung gesichert in einem trockenen, verschlossenen Raum aufbewahren. Der sichere Betrieb des Gerätes setzt Folgendes voraus: •... -
Page 53: Kontrolle Vor Der Benutzung
Operating Instructions MSA 2 Unfallschutz Vorschriften Kontrolle vor der Benutzung Vor jeder Benutzung das Gerät auf Beschädigungen und auf einwandfreie bestimmungsgemässe Funktionsfähigkeit kontrollieren. Gerät schützen Das Netz- und die Schweisskabel vor scharfen Kanten schützen. Beschädigte Kabel unverzüglich durch eine autorisierte Servicestelle ersetzen lassen. -
Page 54: Entsorgung
Unfallschutz Vorschriften Operating Instructions MSA 2 Arbeitssicherheit “Leisten Sie Ihren Beitrag zur Sicherheit am Arbeitsplatz." • Melden Sie unverzüglich jegliche Abweichung der Arbeitsweise des Gerätes an die verantwortlice Person in Ihrem Unternehmen. • Achten Sie immer auf Sicherheit während Ihrer Tätigkeiten. Entsorgung Getrennte Sammlung von Elektronik- und Elektrikabfall muss durch geeignete Systeme sichergestellt sein. - Page 55 Operating Instructions MSA 2 Unfallschutz Vorschriften...
-
Page 56: Unité D'électrosoudage Polyvalente
GF Piping Systems Manuel d‘utilisation MSA 2.0 / MSA 2.1 Unité d‘électrosoudage polyvalente... - Page 57 Operating Instructions MSA 2 Unfallschutz Vorschriften Table des matières Page Généralités Notice d'avertissement Introduction 1.1 Description du produit 1.2 Description des composants 1.2.1 Commandes d'utilisation 1.2.2 Affichage 1.2.3 Capteur de température ambiante 1.2.4 Interface USB 1.2.5 Câble d'alimentation électrique 1.2.6 Câble de soudage 1.3 Lecteur de codes à...
- Page 58 Unfallschutz Vorschriften Operating Instructions MSA 2 8.4 Unité défectueuse 8.5 Ouverture de l'unité 8.6 Travailler en toute sécurité 8.7 Élimination des déchets...
-
Page 59: I Généralités
I Généralités Cher client, Nous vous remercions d'avoir choisi ce produit. La conception de l'unité d'électrosoudage MSA 2.0 repose sur les technologies les plus récentes. Son utilisation à d'autres fins que celles décrites dans ce manuel est susceptible d'occasionner des lésions corporelles à... -
Page 60: Notice D'avertissement
Généralités Operating Instructions MSA 2 Notice d'avertissement Les notices d'avertissement s'utilisent pour informer les lecteurs des risques de lésions corporelles ou de dommages matériels. Veuillez lire attentivement ces avertissements et en tenir compte ! Cet appareil ne peut pas être utilisé pour des branchements de gaz naturel. -
Page 61: Introduction
à aider l'opérateur à exécuter au mieux toutes les opérations requises. En outre, l'unité MSA 2.0 assure le suivi et l'enregistrement dans sa mémoire interne de quelque 350 protocoles de soudage que l'utilisateur est à même de parcourir plusieurs jours ou plusieurs mois après l'exécution des soudures concernées. -
Page 62: Description Des Composants
Introduction Operating Instructions MSA 2 Description des composants 1.2.1 Commandes d'utilisation Sept boutons de commande de la machine sont à la disposition de l'utilisateur. Les commandes START (bouton vert) et STOP (bouton rouge) sont les plus importantes ; elles servent à obtenir confirmation ou à... -
Page 63: Affichage
Operating Instructions MSA 2 Introduction 1.2.2 Affichage L'écran d'affichage graphique constitue la seule interface utilisateur de cette machine à souder. Il affiche la séquence des opérations à exécuter, les données de soudage, les anomalies éventuelles et les messages d'alarme. Il est possible d'en modifier la luminosité en agissant sur les boutons et , puis d'enregistrer définitivement la nouvelle valeur en appuyant sur le bouton... -
Page 64: Câble De Soudage
Introduction Operating Instructions MSA 2 figure, la sélection d'un générateur d'une puissance de sortie appropriée n'obéit à aucune règle déterministe. Les exigences varient en fonction du rendement du générateur ainsi que d'autres facteurs telles que la puissance requise par le raccord. 1.2.6 Câble de soudage Il convient de raccorder le câble de soudage aux broches du... -
Page 65: Rallonges D'alimentation Électrique
2.0 et MSA 2.1 avec le scanner pour codes-barres, comme les touches START /STOP du clavier. Pour arrêter un soudage en cours nous conseillons d'utiliser le touche d'arrêt (STOP) sur le clavier de la MSA 2.0 ou de la MSA 2.1... -
Page 66: Processus De Soudage
Processus de soudage Operating Instructions MSA 2 Processus de soudage Vue d'ensemble de la procédure d'exécution Le schéma ci-après illustre le processus de soudage Préparez le t = ----s soudage et Vo= --.-V branchez le R = --.--Ω raccord d'électrosoudage 12/06/12 15:50 25°C t = ----s... -
Page 67: Mise Sous Tension
Connexion du raccord La prochaine étape consiste à connecter le raccord à la machine. L'unité MSA 2.0 demande à l'opérateur de s'exécuter en émettant un son prolongé. La LED du lecteur de codes à barres clignote pour informer l'opérateur qu'il doit agir. -
Page 68: Entrée De L'identité De L'utilisateur Et Le Code De La Tâche (Msa 2.1 Uniquement)
Cette demande s'accompagne également de l'émission d'une double tonalité brève par l'unité MSA 2.0 et le lecteur de codes à barres. La LED du lecteur de codes à barres s'éteint aussi pour avertir l'opérateur que l'instrument est prêt à accepter des commandes. -
Page 69: Entrée Des Données De Soudage
Operating Instructions MSA 2 Processus de soudage JSMITH t = ----s A116… Vo= --.-V R = 07.45Ω 12/06/12 15:50 25°C Si le code de l’utilisateur est obligatoire la première ligne '----' clignote et la phase de soudage ne démarre pas tant que les données ne sont pas saisies. - Page 70 START/OK ( I ), l'unité démarre le processus de soudage. Si le code à barres est incorrect, l'unité MSA 2.0 et le lecteur de codes à barres émettent tous deux une tonalité prolongée pour demander la saisie du code approprié. En cas d'incohérence entre les paramètres mesurés et les paramètres scannés, l'unité...
-
Page 71: Vérification Des Préparatifs (Msa 2.1 Uniquement)
Operating Instructions MSA 2 Processus de soudage Vérification des préparatifs (MSA 2.1 uniquement) Avant de démarrer le processus de soudage, l'unité MSA 2.1 affiche un rappel à l'intention de l'opérateur, pour s'assurer de la bonne exécution des préparatifs. Dès que l'opérateur confirme en appuyant sur le bouton START/OK, le processus de soudage démarre. -
Page 72: Durée De Refroidissement
Processus de soudage Operating Instructions MSA 2 Remarque L'unité MSA 2.0 règle la durée de soudage en fonction de la température extérieure et des données fournies par le code à barres. Donc, les durées finales de soudage sont susceptibles de différer légèrement des valeurs nominales extraites du code à... -
Page 73: Vérification Du Soudage
Operating Instructions MSA 2 Processus de soudage = 40’ N 150 Avertissement Ne déposez la bride externe qu'après l'expiration du temps de refroidissement ! Risque de brûlure ! La zone d'assemblage est brûlante ! Soyez attentif lors de la dépose des câbles. Danger Lorsque la période de refroidissement est achevée ou sur le point de l'être, un signal acoustique avertit l'utilisateur que le... -
Page 74: Paramètres De Configuration
Paramètres de configuration Operating Instructions MSA 2 Paramètres de configuration L'unité MSA 2.0 ne nécessite aucun paramétrage. Le réglage de la date et de l'heure en fonction des différents fuseaux horaires est la seule modification susceptible d'être apportée. Pour accéder à ce menu, appuyez à deux reprises sur le bouton MENU. -
Page 75: Gestion De Données
Operating Instructions MSA 2 Gestion de données Gestion de données L'unité d'électrosoudage enregistre dans sa mémoire interne les protocoles de soudage associés à chaque cycle de soudage. Les données restent mémorisées jusqu'à ce que l'opérateur les efface. En cas de saturation de la mémoire, le protocole le plus ancien est écrasé... -
Page 76: Affichage De Protocoles
Operating Instructions MSA 2 Affichage de protocoles Pour examiner les protocoles enregistrés, n'appuyez qu'une fois sur MENU : le protocole le plus récent s'affiche d'abord. 123 E-0 d110 [ +GF+ 12/06/12 15:54 25°C Vo=39,5 V t =1000 s E = 200 kJ... -
Page 77: Exportation De Protocoles (Msa 2.1 Uniquement)
Operating Instructions MSA 2 Gestion de données Exportation de protocoles (MSA 2.1 uniquement) Les protocoles enregistrés dans la mémoire interne de l'unité MSA 2.1 sont copiables sur une clé de mémoire aux fins d'analyse ultérieure sur un PC. Insérez la clé USB dans le port USB situé au dos de la machine, appuyez ensuite sur MENU jusqu'à... -
Page 78: Messages D'erreur
Messages d'erreur Operating Instructions MSA 2 Messages d'erreur En cas d'anomalie ou d'erreur, l'unité MSA 2.0 affiche un message spécifique d'une grande utilité pour identifier le problème rencontré. Le numéro en rapport figurera même dans le protocole de soudage pour témoigner de l'accident. -
Page 79: Caractéristiques Techniques
Operating Instructions MSA 2 Caractéristiques techniques Caractéristiques techniques Tension et fréquence du courant 230 V (265 V÷180 V) 40÷70 Hz d'alimentation Générateurs recommandés 3,5 kVA Technique de soudage Régulation de tension Tension de soudage 8÷42 V (48 V) Température d'exploitation - 20 °C / +50°C Température interne - 20 °C / +70°C... -
Page 80: Maintenance
Maintenance Operating Instructions MSA 2 Maintenance Nettoyage Nettoyez régulièrement l'unité à l'aide d'un chiffon humecté d'eau. Si nécessaire, nettoyez à l'alcool industriel le clavier à membrane et autres panneaux (abstenez-vous d'utiliser des solvants ou des produits à base de trichloroéthylène). Il faut impérativement s'abstenir d'asperger cette unité, de la plonger dans l'eau ou de la nettoyer à... -
Page 81: Prévention Des Accidents
Operating Instructions MSA 2 Prévention des accidents Prévention des accidents Exploitation de l'unité Interdisez l'utilisation de cette unité à toute personne ne possédant ni les compétences ni les autorisations requises. Lorsque l'unité n'est pas en exploitation, rangez-là dans un local sec et fermé... -
Page 82: Unité Défectueuse
Prévention des accidents Operating Instructions MSA 2 Unité défectueuse Veillez à ce que tout boîtier ou autre élément endommagé soit immédiatement réparé remplacé agent maintenance agrée. Si le fonctionnement de l'unité de soudage laisse à désirer, n'hésitez pas à l'expédier chez un agent de maintenance agréé. - Page 83 Operating Instructions MSA 2 Prévention des accidents Remarque pictogramme ci-après indiquant collecte séparée d'équipements électriques et électroniques conformément à la directive DEEE (déchets d'équipements électriques électroniques).
- Page 84 The following product : Fusion control unit Die Bauart der Machine : Schweissautomat Il seguente prodotto : Saldatrice automatica MSA 2.0, MSA2.1 Le produit suivant: Machine à souder automatique El producto siguiente : Maquina de fusión O produto seguinte: Máquina de eletrofusão...
- Page 88 GF Piping Systems Worldwide at home Our sales companies and representatives ensure local customer support in over 100 countries www.gfps.com Argentina / Southern South America Finland Mexico / Northern Latin America Singapore Georg Fischer Central Plastics Georg Fischer AB Georg Fischer S.A. de C.V.