Publicité

Les langues disponibles
  • FR

Les langues disponibles

  • FRANÇAIS, page 45

Liens rapides

User Manual
Electric Scooter

Publicité

Table des Matières
loading

Sommaire des Matières pour Ducati PRO-I PLUS

  • Page 1 User Manual Electric Scooter...
  • Page 2 English Electric Scooter User Manual...
  • Page 3: Product And Accessories

    1. Product and Accessories User Manual Electric Scooter 1. Scooter 2. Manual 3. Accessories: - Allen key - n° 4 screws - Spare inner tube - Spare Stickers - Tyre inflation adapter 4. Battery charger...
  • Page 4 2. Diagram Functions Front Light Accelerator Control panel Brake Battery Folding Folding closure mechanism Disc brake Brake light Motor Kickstand Charging port Speed Mode Motor Fault Velocity indicator Battery indicator Cruise Control Front light Power ON/OFF Button...
  • Page 5 � 1. Power on: Press Power on button for 3 seconds. � 2. Power off: Press Power off button for 3 seconds. � 3. How to turn on/off light: After power on the e-scooter, press the power on/off button for 1 second, front light is turned on. Press again to turn off. �...
  • Page 6 Function Fault: Fault Code Instruction E-accelerator fault Battery voltage over 42V Battery voltage below 32V Output Current exceeds 14A Motor Hall wire fault Motor stuck Motor phase line fault Brake failure...
  • Page 7 3. Assembly 1. Lock the column 2.Install the handlebar/- and open the closure control panel on the at the base. column. 3. Use the screws and 4. After finishing, turn on Allen key provided to the device to make sure secure the handlebar.
  • Page 8 4. Recharging 1. Open the rubber cap. 2. Insert the charger plug. 3. When the battery is full,remove the charger and close the rubber cap. The red light on the power supply will turn green when charging is complete. 5. Starting to Use the Product There is a risk of falling while using the device.
  • Page 9: Safety Standards

    6. Safety Standards � Avoid driving in the rain. � Slow down on bumpy roads, sidewalks or other special road surfaces. On very uneven roads, please maintain a low speed (between 3,11 and 6,21 mph at most). Remaining flexi- ble on the knees makes it easier to adapt to bumpy roads. �...
  • Page 10 7. Close and Transport he Product Closing Opening � Switch off the appliance, open the locking system by turning the locking lever, bend the body of the scooter and attach the column lock to the mudguard lock. � Make sure that the locks are locked correctly. �...
  • Page 11 8. Maintenance Cleaning and storage: � To clean the device it is necessary to use a soft and slightly damp cloth. If cleaning is more difficult than expected, you can use a toothbrush for stubborn dirt. Caution: Do not use alcohol, petrol or other solvents, corrosive chemicals, otherwise the device may be damaged both in appearance and structure.
  • Page 12 Brake adjustment � If the brake is too tight, use the supplied key and turn it counterclockwise to release the brake cable pressure, then shorten the cable and tighten with the key. If the brake is too slow, do the opposite and extend the brake cable. Brake cable Shaky direction column �...
  • Page 13: Technical Specifications

    9. Technical Specifications Index Details Parameters L × P × A 108×43×114cm Size When folded: L × P × A 108×43×49cm Weight Article weight 12Kg Maximum load 100Kg Minimum age 16 years old Driving requirements Minimum height 120cm Maximum speed 25Km/h ( (varies according to soil and weight) Autonomy...
  • Page 14 Treatment of the electrical or electronic device at the end of its life (applicable in all countries of the European Union and in other European systems with separate collection system) This symbol on the product or on the packaging indicates that the product should not be considered as normal household waste, but should instead be delivered to a collection point approved for the recycling of electrical and electronic equipment...
  • Page 15 Treatment of spent batteries (applicable in all countries of the European Union and in other European schemes with separate collection systems) This symbol on the product or on the packaging indicates that the battery should not be considered normal household waste. On some battery types this symbol may be used in combination with a chemical symbol.
  • Page 16 Italiano Monopattino Elettrico Manuale d’uso...
  • Page 17 1. Prodotti e Accessori Manuale d’uso monopattino elettrico 1. Monopattino 2. Manuale 3. Accessori: - Chiave a brugola - n° 4 viti - Camera d’aria di scorta - Stickers di ricambio - Adattatore per gonfiaggio gomme 4. Caricabatteria...
  • Page 18 2. Schema delle Funzioni Luce frontale Acceleratore Pannello di controllo Freno Scomparto batteria Meccanismo Chiusura ripiegamento di ripiegamento Freno a disco Luce del freno Motore Cavalletto Porta di ricarica Modalità Problema al Motore (impostazione velocità) Indicatore di velocità Indicatore livello batteria Cruise Control Luce Pulsante ON/OFF...
  • Page 19 � 1. Accensione: Premere il pulsante ON/OFF per 3 secondi. � 2. Spegnimento: Premere il pulsante ON/OFF per 3 secondi. � 3. Come accendere/spegnere le luci: Dopo aver acceso il Monopattino, premere il pulsante ON/OFF per 1 secondo, la luce frontale si accenderà. Premere il pulsante ON/OFF nuovamente per spegnere la luce.
  • Page 20 Segnalazione di problemi: Codice Errore Indicazioni Problema all’acceleratore Voltaggio batteria superiore a 42V Voltaggio batteria inferiore a 32V La corrente in uscita eccede i 14A Guasto al cavo motore Motore bloccato Guasto alla linea di fase del motore Guasto al freno Premendo la leva Acceleratore, fino alla massima escursione, per 10”...
  • Page 21 3. Assemblaggio 1. Bloccare la colonna 2. Installare il manu- e aprire la chiusura brio/pannello di controllo alla base. sulla colonna. 3. Usare le viti e la chiave 4. Dopo aver terminato, fornite nella confezione accendere il dispositivo per fissare il manubrio. per assicurarsi che tutto funzioni.
  • Page 22 4. Ricarica 1. Aprire il tappo in gomma. 2. Inserire lo spinotto del caricabatterie. 3. Quando la batteria è carica, estrarre il caricabatte- rie e richiudere il tappo in gomma. La luce rossa presente sull’alimentatore diventerà verde quando l’operazione di carica- mento sarà...
  • Page 23: Norme Di Sicurezza

    6. Norme di Sicurezza � Evitare di guidare sotto la pioggia. � Rallentare su strade dissestate, marciapiedi o un altro rivestimento stradale particolare. Su strade molto dissestate si prega mantenere una velocità bassa (tra 5 e 10 km/h al mas- simo).
  • Page 24 7. Richiudere e Trasportare Il Prodotto Chiusura Apertura � Spegnere l'apparecchio, aprire il sistema di chiusura girando la leva di blocco, piegare il corpo del monopattino e agganciare la chiusura della colonna a quella del parafango. � Assicurarsi che le chiusure siano bloccate correttamente. �...
  • Page 25 8. Manutenzione Pulizia e conservazione: � Per pulire il dispositivo è necessario utilizzare un panno morbido e leggermente umido. Se la pulizia risulta più difficile del previsto, è possibile utilizzare uno spazzolino da denti per lo sporco più ostinato. Attenzione: non utilizzare alcol, benzina o altri solventi, prodotti chimici corrosivi, altrimenti si potrebbe danneggiare il dispositivo sia nell'aspetto che nella struttura inter- na.
  • Page 26 Regolazione del freno � Se il freno risulta troppo stretto, utilizzare la chiave in dotazione e ruotarla in senso antiorario per rilasciare la pressione del cavo del freno, quindi accorciare il cavo e serrare con la chiave. Se il freno è troppo lento, fare l’operazione opposta e prolunga- re il cavo del freno.
  • Page 27: Specifiche Tecniche Del Prodotto

    9. Specifiche Tecniche del Prodotto Indice Dettagli Parametri L × P × A 108×43×114cm Dimensioni Quando piegato: L × P × A 108×43×49cm Peso Peso dell’articolo (kg) 12Kg Carico massimo 100Kg Requisiti di guida Età minima 16 anni Altezza minima 120cm Velocità...
  • Page 28 Trattamento del dispositivo elettrico o elettronico a fine vita (applicabile in tutti i paesi dell’unione europea ed in altri sistemi europei con sistema di raccolta differenziata) Questo simbolo sul prodotto o sulla confezione indica che il prodotto non deve essere considerato come un normale rifiuto domestico, ma deve invece essere consegnato ad un punto di raccolta appropriato per il riciclo di apparecchi elettrici ed elettronici (RAEE).
  • Page 29 Trattamento delle pile esauste (applicabile in tutti i paesi dell’unione europea ed in altri sistemi europei con sistema di raccolta differenziata) Questo simbolo sul prodotto o sulla confezione indica che la pila-batteria non deve essere considerato un normale rifiuto domestico. Su alcuni tipi di pile questo simbolo potrebbe essere utilizzato in combinazione con un simbolo chimico.
  • Page 30 Español Patinete Eléctrico Manual de Usuario...
  • Page 31 1. . Productos y Accesorios Manual de usuario Patinete eléctrico 1. Patinete 2. Manual 3. Accesorios: - llave Allen - n° 4 tornillos - Cámara de aire de repuesto - Pegatinas de repuesto - Adaptador para inflar neumáticos 4. Cargador...
  • Page 32 2. Esquema de las Funciones Luz delantera Acelerador Panel de control Freno Compartimiento batería Mecanismo Cierre plegable de plegado Freno de disco Luz de freno Motor Pata de cabra Puerto de carga Modalidad Problema del Motor (configuración velocidad) Indicador de velocidad Indicador nivel batería Cruise Control Botón ON/OFF...
  • Page 33 � 1. Encender: pulse el botón ON / OFF durante 3 segundos. � 2. Apagar: Presione el botón ON / OFF durante 3 segundos. � 3. Cómo encender y apagar las luces: Después de encender el scooter, presione el botón ENCENDIDO / APAGADO durante 1 segundo, la luz delantera se encenderá. Presione otra vez el botón ON / OFF para apagar la luz.
  • Page 34 Notificación de problemas: Código error Indicaciones Problema del acelerador Voltaje batería superior de 42V Voltaje batería inferior de 32V La corriente de salida supera en 14A Falla del cable del motor Motor bloqueado Falla de línea de fase del motor Falla del freno Al presionar la palanca del acelerador, hasta la excursión máxima, durante 10 "(segundos), el scooter mantendrá...
  • Page 35 3. Ensamblaje 1. Bloquee la columna 2. Instale el manillar / y abra el cierre en la panel de control en la base. columna. 3. Utilice los tornillos y la 4. Después de terminar, llave provistos encienda el dispositivo paquete para fijar el para asegurarse de que manillar.
  • Page 36 4. Carga 1. Abra la tapa de goma. 2. Inserte el enchufe del cargador.. 3. Cuando la batería esté cargada, retire el cargador y cierre la tapa de goma. La luz roja en la fuente de alimentación se volverá verde cuando se complete la operación de carga.
  • Page 37: Normas De Seguridad

    6. Normas de Seguridad � Evite conducir bajo la lluvia. � Disminuya la velocidad en carreteras en mal estado, aceras u otra superficie particular de la carretera. En este tipo de carreteras, mantenga la velocidad baja (entre 5 y 10 km / h como máximo).
  • Page 38 7. Cerrar y Transportar el Producto Cierre Apertura � Apague el aparato, abra el sistema de bloqueo girando la palanca de bloqueo, doble el cuerpo del scooter y enganche el cierre de la columna a la del guardabarros. � Asegúrese de que los cierres estén correctamente bloqueados. �...
  • Page 39 8. Mantenimiento Limpieza y conservación: � Para limpiar las manchas superficiales, use un paño suave y húmedo. En caso de man- chas persistentes, puede utilizar un paño suave con pasta de dientes; luego limpie con un paño húmedo. Advertencia: no utilice alcohol, gasolina u otros disolventes, productos químicos corrosi- vos, de lo contrario, el dispositivo podría dañarse tanto en la apariencia como en la estruc- tura interna.
  • Page 40 Ajuste de freno � Si el freno está demasiado apretado, use la llave provista y gírela en sentido antiho- rario para liberar la presión del cable del freno, luego acorte el cable y apriételo con la llave. Si el freno es demasiado lento, haga lo contrario y extienda el cable del freno. cable del freno Columna de dirección inestable �...
  • Page 41: Especificaciones Técnicas Del Producto

    9. Especificaciones Técnicas del Producto Indicador Detalles Parámetros L × P × A 108×43×114cm Dimensiones Cuando plegado: L × P × A 108×43×49cm Peso Peso del artículo (kg) 12Kg Carga máxima 100Kg Requisitos de Edad mínima 16 años conducción Altura mínima 120cm Velocidad max 25Km/h (può...
  • Page 42 Tratamiento del dispositivo eléctrico o electrónico al final de la vida (aplicable en todos los países del Unión Europea y en otros sistemas europeos con sistema de reciclaje). Este símbolo en el producto o en el empaque indica que el producto no debe considerarse como basura doméstica normal, sino que debe entregarse en un punto de recolección adecuado para el reciclaje de equipos eléctricos y electrónicos (WEEE).
  • Page 43 Tratamiento de pilas usadas (aplicable en todos los países de la Unión Europea y en otros sistemas europeos con un sistema separado de recogida selectiva) Este símbolo en el producto o en el embalaje indica que la pila-batería no debe considerarse una basura doméstica normal.
  • Page 44: Trottinette Électrique

    Français Trottinette Électrique Manuel d’utilisation...
  • Page 45: Produits Et Accessoires

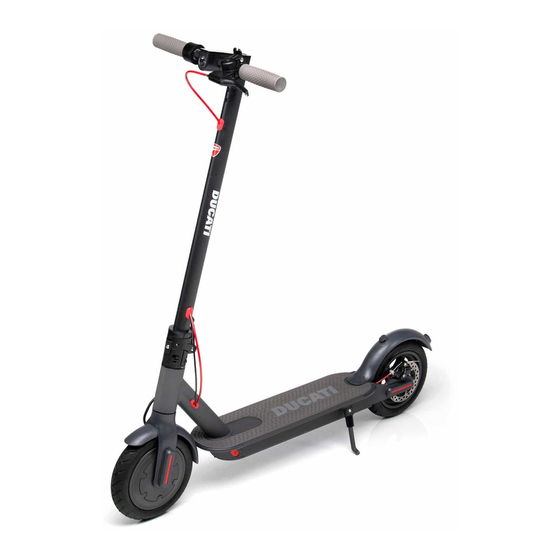
    1. Produits et Accessoires Manuel d’utilisation trottinette électrique 1. Trottinette 2. Manuel 3. Accessoires: - Clé Allen - n° 4 vis - Chambre à air de rechange - Autocollants de rechange - Adaptateur pour gonfler les pneus 4. Chargeur de batterie...
  • Page 46: Diagramme Des Fonctions

    2. Diagramme des Fonctions Eclairage avant Accélérateur Panneau de commande Frein Compartiment de la batterie Mécanisme Fermeture du mécanisme de pliage de pliage Frein à disque Eclairage du frein Moteur Béquille Port de charge Mode vitesse Défaut moteur Indicateur de vitesse Voyant de batterie Cruise Control Feu avant...
  • Page 47 � 1. Mise sous tension: Appuyez sur le bouton ON/OFF pendant 3 secondes. � 2. Mise hors tension: Appuyez sur le bouton ON/OFF pendant 3 secondes. � 3. Comment allumer/éteindre les lumières: Après avoir allumé le scooter, appuyez sur le bouton ON/OFF pendant 1 seconde, le feu avant s'allumera. Appuyez de nouveau sur la touche ON/OFF pour éteindre la lumière.
  • Page 48 Fonction Fault: Code d'erreur Instruction Défaut de l'accélérateur électronique Tension de la batterie supérieure à 42V Tension de la batterie inférieure à 32V Courant de sortie supérieur à 14A Défaillance du câble moteur Moteur coincé Défaut ligne de phase moteur Guasto al freno En appuyant sur le levier de l'accélérateur, jusqu'à...
  • Page 49: Assemblage

    3. Assemblage Verrouillez 2. Installez le guidon/le colonne de direction panneau de commande et ouvrez la ferme- sur la colonne. ture à la base. 3. Utilisez les vis et la clé 4. Après avoir terminé, fournies dans l’embal- allumez l’appareil pour lage pour fixer le guidon.
  • Page 50: Première Utilisation Du Produit

    4. Recharge 1. Ouvrez le cache en caoutchouc. 2. Insérez la fiche du chargeur de batterie. 3. Lorsque la batterie est chargée, retirez le chargeur de batterie et fermez le cache en caoutchouc. le voyant rouge du bloc d’alimentation passe au vert lorsque l’opération de charge est terminée.
  • Page 51: Consignes De Sécurité

    6. Consignes De Sécurité • Évitez de conduire sous la pluie. • Vous devez ralentir sur les chaussées abîmées, les trottoirs et les autres revêtements particuliers. Sur des chaussées en très mauvais état, veuillez maintenir une vitesse faible (entre 5 et 10 km/h maximum). Rester souple sur les genoux facilite l’adaptation aux chaussées en mauvais état.
  • Page 52: Replier Et Transporter Le Produit

    7. Replier et Transporter le Produit Fermeture Ouverture � Éteignez l’appareil, ouvrez le système de verrouillage en tournant le levier de verrouil- lage, pliez le corps de la trottinette et accrochez la fermeture de la colonne à celle du garde-boue. �...
  • Page 53: Entretien

    8. Entretien Nettoyage et Conservation: � Pour nettoyer l’appareil, utilisez un chiffon doux légèrement humide. Si le nettoyage est plus difficile que prévu, vous pouvez utiliser une brosse à dents pour éliminer les salis- sures tenaces. Attention: ne pas utiliser d’alcool, d’essence ou d’autres solvants, ni de produits chimiques corrosifs, sinon l’appareil pourrait être endommagé...
  • Page 54 Réglage des freins � Si le frein est trop serré, utilisez la clé fournie et tournez-le dans le sens contraire des aiguilles d’une montre pour relâcher la pression du câble de frein, puis raccourcis- sez le câble et serrez à l’aide de la clé. Si le frein est trop lent, effectuez l’opération inverse et rallongez le câble de frein.
  • Page 55: Spécifications Techniques Du Produit

    9. Spécifications Techniques du Produit Sommaire Détails Paramètres L × P × A 108×43×114cm Dimensions Une fois plié: L × P × A 108×43×49cm Poids Poids de l’article (kg) 12Kg Charge maximale 100Kg Exigences de conduite Âge minimum 16 ans Hauteur minimale 120cm Vitesse maximum...
  • Page 56 Traitement du dispositif électrique ou électronique en fin de vie (applicable dans tous les pays de l’Union européenne et dans d’autres systèmes européens avec système de collecte des déchets séparé) Ce symbole sur le produit ou sur l’emballage indique que le produit ne doit pas être considéré...
  • Page 57 Traitement des piles usagées (applicable dans tous les pays de l’Union euro- péenne et dans d’autres systèmes européens avec système de collecte des déchets séparé) Ce symbole sur le produit ou sur l’emballage indique que la pile-batterie ne doit pas être considérée comme un déchet ménager normal.
  • Page 58 Deutsch Elektroroller Bedienungsanleitung...
  • Page 59 1. Produkte und Zubehör Bedienungsanleitung Elektroroller 1. Roller 2. Handbuch 3. Zubehör: - Innensechskantschlüssel - 4 Schrauben - Ersatzschlauch - Ersatzaufkleber - Adapter zum Aufpumpen von Reifen 4. Ladegerät...
  • Page 60 2. Funktionsdiagramm Frontlicht Beschleuniger Bedienfeld Bremse Akkufach Falt- Faltverschluss mechanismus Scheibenbremse Bremslicht Motor Ständer Ladeanschluss Modus Motorproblem (Drehzahleinstellung) Geschwindigkeitsanzeige Batteriezustandsanzeige Temporegler Licht EIN/AUS-Taste...
  • Page 61 � 1. Einschalten: Drücken Sie die ON/OFF-Taste für 3 Sekunden. � 2. Ausschalten: Drücken Sie die ON/OFF-Taste für 3 Sekunden. � 3. So schalten Sie das Licht ein/aus: Nachdem Sie den Roller eingeschaltet haben, drücken Sie die EIN/AUS-Taste für 1 Sekunde, das Frontlicht schaltet sich ein. Drücken Sie die EIN/AUS-Taste erneut, um das Licht auszuschalten.
  • Page 62 Probleme melden: Fehlercode Anfahrtsbeschreibung Beschleunigerproblem Batteriespannung über 42V Batteriespannung unter 32V Der Ausgangsstrom überschreitet 14A Motorkabelfehler Motor gesperrt Motorphasenlinienfehler Bremsenfehler Beschleunigerproblem Wenn Sie den Gashebel für 10"; (Sekunden) auf maximalen Hub drücken, hält der Roller die gleiche Geschwindigkeit, auch wenn der Hebel losgelassen wird. Überprüfen Sie den Lad ezustand des Akkus, während der Roller steht.
  • Page 63: Montage

    3. Montage 1. Halten Sie die Lenker- 2. Montieren Sie den säule fest und öffnen Lenker/das Bedienfeld Sie den Verschluss an an der Lenkersäule der Unterseite. 3. Verwenden Sie die im 4. Schalten Sie nach dem Lieferumfang enthaltenen Beenden das Gerät ein, Schrauben und den Schlüs- um sicherzustellen, dass sel,...
  • Page 64 4. Aufladung 1. Öffnen Sie die Gummikappe. 2. Stecken Sie den Stecker des Ladegeräts ein. 3. Wenn der Akku aufgeladen ist, entfernen Sie das Akkuladegerät und schließen Sie die Gummikappe. Die rote LED am Netzteil leuchtet grün, wenn der Ladevorgang abgeschlossen ist. 5.
  • Page 65 6. Sicherheitsanforderungen � Fahren Sie nicht im Regen. � Verlangsamen Sie auf schlechten Straßen, Gehwegen oder anderen Straßenbelägen. Halten Sie auf sehr schlechten Straßen die Geschwindigkeit niedrig (zwischen 5 und maximal 10 km/h). Flexibilität in den Knien hilft dabei, Straßen in schlechterem Zustand einfacher zu navigieren.
  • Page 66 7. Abschliessen und Transport des Produkts Verriegelung Entriegelung � Schalten Sie das Gerät aus, öffnen Sie das Verriegelungssystem durch Drehen des Verriegelungshebels, klappen Sie den Körper des Scooters zusammen und haken Sie den Säulenverschluss am Kotflügel ein. � Stellen Sie sicher, dass die Verriegelungen richtig eingerastet sind. �...
  • Page 67 8. Instandhaltung Reinigung und Aufbewahrung � Verwenden Sie zum Reinigen des Geräts ein weiches, leicht angefeuchtetes Tuch. Wenn die Reinigung schwieriger ist als erwartet, können Sie bei hartnäckigen Verschmutzun- gen eine Zahnbürste verwenden. Warnung: Verwenden Sie keinen Alkohol, Benzin oder andere Lösungsmittel oder ätzen- de Chemikalien.
  • Page 68 Einstellungen der Bremse � Wenn die Bremse zu fest ist, verwenden Sie den mitgelieferten Schlüssel und drehen Sie ihn gegen den Uhrzeigersinn, um den Druck des Bremszugs zu lösen. Kürzen Sie dann den Zug und ziehen Sie ihn mit dem Schlüssel fest. Wenn die Bremse zu langsam ist, führen Sie den umgekehrten Vorgang aus und verlängern Sie den Bremszug.
  • Page 69 9. Technische Spezifikationen des Produkts Inhaltsverzeichnis Details Parameter L × P × A 108×43×114cm Abmessungen Wenn gefaltet: L × T × H 108×43×49cm Gewicht Produktgewicht (kg) 12Kg Maximale Traglast 100Kg Anforderungen an Mindestalter 16 Jahre das Fahren Mindestgröße 120cm Höchstgeschwindigkeit 25Km/h (kann je nach Boden und Gewicht variieren) Eigenständiges Fahren 20 - 25Km...
  • Page 70 Behandlung des elektrischen oder elektronischen Geräts am Ende seiner Lebensdau- er (anwendbar in allen Ländern der Europäischen Union und in anderen europäischen Systemen mit getrenntem Abfallsammelsystem) Dieses Symbol auf dem Produkt oder der Verpackung weist darauf hin, dass das Produkt nicht als normaler Hausmüll ange- sehen werden darf, sondern an einer geeigneten Sammelstelle für das Recycling von Elektro- und Elektronikgeräten (WEEE) abgegeben werden muss.
  • Page 71 Behandlung erschöpfter Batterien (anwendbar in allen Ländern der Europäischen Union und in anderen europäischen Systemen mit getrenntem Abfallsammelsystem) Dieses Symbol auf dem Produkt oder der Verpackung weist darauf hin, dass die Batterie/der Akku nicht als normaler Haushaltsmüll betrachtet werden darf. Bei einigen Batterietypen kann dieses Symbol in Kombina- tion mit einem chemischen Symbol verwendet werden.
  • Page 72 Magyar Elektomos Roller Használati Utasítás...
  • Page 73 1. Termék ès Tartozékai Használati Utasítás E- Roller 1. Roller 2. Használati utasítás 3. Tartozékok: - Imbuszkulcs - 4 csavar - tartalék belső cső - tartalék matrica - felfújó adapter 4. Akku töltő...
  • Page 74 2. Diagram Funkciók Elülső fény Gázpedál Ellenőrző panel Fék Akku Összecsukó Összecsukó zár rendszer Tárcsafék Féklámpai Motor Kitámasztó Töltőpont Sebességmód kijelző Motorhiba Sebesség kijelző Akku kijelző Tempomat Elülső fény KI/BE kapcsoló gomb...
  • Page 75 � 1. Bekapcsolás: Nyomja meg az ON/OFF gombot 3 másodpercig � 2. Kikapcsolás: Nyomja meg az ON/OFF gombot 3 másodpercig � 3. A világítás ki és bekapcsolása: Miután bekapcsolta az e-rollert , nyomja meg az ON/OFF gombot 1 másodpercig , ekkor az elülső világítás bekapcsol. Nyomja meg az ON/OFF gombot a lámpa kikapcsolásához.
  • Page 76 Hibaüzenet: Hibakód Instrukció E-gázpedál hiba Akku feszültség 42V felett Akku feszültség 32V alatt Kimeneti áram meghaladja a 14A -t Motorcsarnok vezeték hiba Motorleállás Motorfázis vezeték hiba Fékhiba A gázkart a maximum sebességig nyomva , a robogó még 10 másodpercig megtartja a sebességét ,ha a kart elengedi.
  • Page 77 3. Összeszerelés 1. Nyissa ki a lezáró rendszert a 2. Szerelje fel a fogantyút kar elforgatásával ,majd rögzítse ,kontroll panelt az oszlopon. az oszlopot függőleges irányba és rögzítse a zárókart. 3. Az imbuszkulccsal szorítsa meg a 4. Ennek befejezése után ,kapcsolja csavart a fogantyú...
  • Page 78 4. Töltés 1. Nyissa ki a gumi kupakot 2. Helyezze be a töltő dugóját 3. Ha az akkumulátor feltöltött , vegye ki a töltőt és helyezze vissza a gumikupakot. A töltés befejezése után a tápegység piros fénye zöldre vált. 5. A Termék Használatba Vétele A készülék használata közben fennáll a leesés veszélye .
  • Page 79: Biztonsági Szabályok

    6. Biztonsági Szabályok � Kerülje az esőben való vezetést � Lassítson az egyenetlen utakon , járdákon vagy más speciális útfelületen . Nagyon egyenetlen utakon tartsa alacsonyan a sebességet ( legfeljebb 5 és 10 km/h között ) A térdek rugalmasságával egkönnyíthető az egyenetlen utakon történő haladás . �...
  • Page 80 7. A Termék Összezárása ès Szállítása Bezárás Bezárás � Kapcsolja ki a készüléket , nyissa ki a lezáró rendszert a zárókar elforgatásával ,hajlítsa meg a robogó testét és rögzítse az oszlopzárat a sárvédő zárjához . � Ellenőrizze , hogy a zárak megfelelően vannak rögzítve . �...
  • Page 81 8. Karbantartás Tisztítás és tárolás: � A készülék tisztításához puha és enyhén nedves ruhát javasolt használni. Ha a tisztítás a várnál nehezebb , használjon fogkefét a makacs szennyeződések eltávolításához. Figyelem : Ne használjon alkoholt , benzint vagy más oldószert , korróziót okozó vegyi anyagot , mert a készülék külseje és szerkezete is megsérülhet .
  • Page 82 Fék beállítása � Ha a fék túl szoros , használja a mellékelt kulcsot és fordítsa el az óramutató járásával ellentétes irányba , a fékkábel kioldásához , majd rövidítse meg a kábelt , állítsa megfele- lő pozícióba és húzza meg a kulcsot . Ha a fék nem fog megfelelően, végezze el az ellen- kezőjét és hosszabbítsa a fékkábelt .
  • Page 83: Műszaki Adatok

    9. Műszaki Adatok Index Jellemzők Paraméterek L × P × A 108×43×114cm Méret Öszzezárt állapot: L × P × A 108×43×49cm Súly Termék súly 12Kg Max. terhelhetőség 100Kg Vezetési minimum használói életkor 16 év követelmények min.használói magasság 120cm Maximum sebsség 25Km/h (súlytól függhet) Hatótávolság 20 - 25Km...
  • Page 84 Az elektromos vagy elektronikus készülékek kezelése azok élettartama végén alkalmazandó az (Európai Únió valamennyi országában és más , elkölönített gyűjtőrendszerekkel rendelke- ző európai országokban ) Ez a szimbólum a terméken vagy a csomagoláson azt jelzi , hogy a terméket nem szabad szokásos háztartási hulladéknak tekinteni , hanem azt az elektromos és elektronikus berendezések (WEEE) újrahasznosítására jóváhagyott gyűjtőhelyekre kell szállítani.
  • Page 85 Elhasznált akkumulátorok kezelése ( alkalmazandó az európai únió valamennyi országában és más európai területen melyek külön gyűjtési rendszerrel rendelkeznek Ez a szimbólum a terméken , vagy a csomagoláson azt jelzi , hogy az akkumulátort nem szabad háztartási hulladéknak tekinteni. Néhány elemtípusnál ez a szimbólum vegyi szim- bólummal együtt használható.
  • Page 86 Imported and distributed by M.T. Distribution Calderara di Reno, Bologna www.mtdistribution.it...

Table des Matières