Masquer les pouces Voir aussi pour AAC7000:

Publicité

Les langues disponibles
  • FR

Les langues disponibles

  • FRANÇAIS, page 12

Liens rapides

SUMMER BREEZE
220
792
50
240
Watts
Hz
Volts
DE
Bedienungsanleitung
FR
Mode d'emploi
NL
Handleiding
INSTRUCTION MANUAL
EN
Instruction manual
Istruzioni per l'uso
IT
ES
Manual del usuario
AAC7000

Publicité

Table des Matières
loading

Sommaire des Matières pour Bestron AAC7000

  • Page 1 SUMMER BREEZE AAC7000 Watts INSTRUCTION MANUAL Volts Bedienungsanleitung Instruction manual Mode d’emploi Istruzioni per l’uso Handleiding Manual del usuario...
  • Page 3 HERZLICHEN GLÜCKWUNSCH! Herzlichen Glückwunsch zum Erwerb dieses Bestron-Produktes. In dieser Gebrauchsanweisung erläutern wir die Funktion und die Benutzung. Lesen Sie somit diese Gebrauchsanweisung aufmerksam durch, bevor Sie das Gerät benutzen. Verwenden Sie das Gerät nur so, wie es in der Gebrauchsanweisung beschrieben ist. Bewahren Sie die Gebrauchsanweisung danach sorgfältig auf.
  • Page 4 ausreichend frei ist und nicht mit brennbarem Material in Kontakt kommen kann. Elektrogeräte dürfen nie bedeckt werden. • Sorgen Sie dafür, dass Elektrogeräte, Kabel oder Stecker nicht mit Wasser in Berührung kommen. • Tauchen Sie Elektrogeräte, Kabel oder Stecker nie in Wasser oder eine andere Flüssigkeit.
  • Page 5: Ce-Konformitätserklärung

    UMWELT • Werfen Sie Verpackungsmaterial, wie zum Beispiel Plastik und Karton, in die dazu bestimmten Container. • Dieses Produkt am Ende der Nutzungsdauer nicht als normalen Haushaltabfall entsorgen, sondern bei einer Sammelstelle zur Wiederverwendung von elektrischem und elektronischem Gerät. Achten Sie auf das Symbol auf dem Produkt, der Gebrauchsanweisung oder Verpackung.
  • Page 6 FUNKTION - Allgemein Das Gerät ist nur für den Hausgebrauch vorgesehen und nicht für die professionelle Verwendung. 1. Oberseite Gehäuse 6. Luftaustritt 2. Griff 7. Vorderer Teil des Gehäuses 3. Hinterer Teil des Gehäuses 8. EVA-Filter 4. Räder 9. Anschluss für kontinuierliche Wasserableitung 5.
  • Page 7 MONTAGE - Wärmeableitung installieren 1. Wählen Sie einen Standort in der Nähe eines Fensters und einer Steckdose, um das Gerät aufzustellen. 2. Schrauben Sie die beiden Kunststoffenden des Luftschlauches (Abbildung 1, Nr. 14) auf den Luftschlauch (siehe Abbildung 2). 3. Montieren Sie den Luftschlauch am Warmluf- taustritt (10) auf der Rückseite des Gerätes (siehe Abbildung 2).
  • Page 8 BETRIEB - Modus einstellen Das Gerät ist mit drei Betriebsmodi ausgestattet, mithilfe derer Sie den Raum belüften, entfeuchten und kühlen können. Belüften 1. Drücken Sie die Taste “ ” ein- oder mehrmals (Abbildung 1, g), bis die Kontrollleuchte bei “ ”...
  • Page 9 BETRIEB - Fernbedienung Das Gerät kann auch über die mitgelieferte Fernbedienung gesteuert werden. Die Fernbedienung verwendet zwei AAA-Batterien (nicht im Lieferumfang enthalten). Öffnen Sie das Batteriefach auf der Unterseite, legen Sie die Batterien ein und schließen Sie die Abdeckung. Die Tasten auf der Fernbedienung funktionieren genauso wie die Tasten auf dem Bedienfeld.
  • Page 10 1. Schalten Sie das Gerät aus und ziehen Sie den Netzstecker. 2. Lösen Sie die Kappe und den Stopfen der Öffnung der kontinuierlichen Wasserableitung (Abbildung 1, Nr. 9), siehe Abbildung 7. 3. Schließen Sie einen Ablaufschlauch (nicht im Lieferumfang enthalten) an die Öffnung der kontinuierlichen Wasserableitung an und stellen Sie sicher, dass das Ende des Schlauchs zu einem Ablauf, Eimer oder einem anderen Auffangbehälter führt.
  • Page 11 Schaltkreise von einem Fachmann überprüfen GARANTIEBESTIMMUNGEN Bestron handhabt unter den folgenden Bedingungen eine Garantie von 60 Monaten ab Kaufdatum gegen Defekte, die durch Herstellungs- und/oder Materialfehler entstanden sind. 1. Im genannten Garantiezeitraum werden keine Kosten für Arbeitslohn und Material berechnet.
  • Page 12: Ce Que Vous Devez Savoir Au Sujet Des Appareils Électriques

    FÉLICITATIONS ! Nous vous félicitons pour l’achat de votre produit Bestron. Dans le présent manuel d’utilisation, nous vous expliquons comment celui fonctionne et comment vous devez l’utiliser. Nous vous invitons par conséquent à lire attentivement les instructions d’utilisation avant d’utiliser l’appareil.
  • Page 13: Ce Que Vous Devez Savoir Au Sujet De Cet Appareil

    produisent de sorte à éviter tout risque d’incendie. Vérifiez par con- séquent s’il y a suffisamment d’espace autour de l’appareil et faites en sorte que celui-ci ne puisse entrer en contact avec du matériel inflam- mable. Les appareils électriques ne doivent jamais être couverts. •...
  • Page 14: Environnement

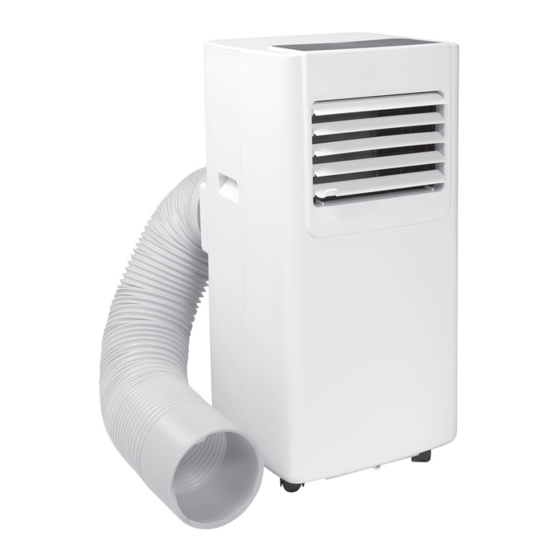
    ENVIRONNEMENT • Débarrassez-vous du matériel d’emballage comme le plas- tique et les boîtes dans les containers destinés à cet effet. • À la fin de sa durée de vie, ne jetez pas ce produit comme un simple déchet ménager mais remettez-le à un centre de collecte de recyclage des produits électriques et électroniques.
  • Page 15 FONCTIONNEMENT - Généralités L’appareil est destiné uniquement à l’utilisation domestique, et non à l’usage professionnel. 1. Avant du boîtier 6. Sortie d’air 2. Poignée 7. Avant du boîtier 3. Arrière du boîtier 8. Filtre EVA 4. Roues 9. Raccordement pour évacuation continue de l’eau 5.
  • Page 16 MONTAGE - Installer l’évacuation de la chaleur 1. Choisissez un endroit à proximité d’une fenêtre et d’une prise de courant pour placer l’appareil. 2. Faites pivoter les deux extrémités en plastique du tuyau d’évacuation (figure 1, n° 14) sur le tuyau d’évacuation (voir figure 2).
  • Page 17 UTILISTATION - Définir le mode L’appareil est pourvu de 3 modes de fonctionnement, avec lesquels vous pouvez ventiler, déshumidifier ou rafraîchir la pièce. Ventiler 1. Appuyez une ou plusieurs fois sur le bouton “ ” (figure 1, g), jusqu’à ce que le voyant lumineux près mode de “...
  • Page 18 UTILISTATION - Télecommande Il est possible de commander l’appareil grâce à la télécommande. La télécommande fonctionne avec 2 piles AAA (non comprises). Ouvrez le compartiment à piles à l’arrière, placez les piles et refermez le couvercle. Les boutons sur la commande fonctionnent de la même manière que les boutons sur le panneau de commande.
  • Page 19: Problème Solution

    NETTOYAGE ET ENTRETIEN - Nettoyage du filtre Pour un résultat optimal, il faut nettoyer le filtre EVA au moins une fois toutes les deux semaines et le remplacer au moins une fois par an, ou plus souvent s’il s’avère que le filtre est visiblement bouché. Nettoyez aussi le filtre avant de ranger l’appareil pour ne plus l’utiliser pendant un long moment ou quand vous l’utilisez de nouveau après une longue période.
  • Page 20: Dispositions Concernant La Garantie

    DISPOSITIONS CONCERNANT LA GARANTIE Le présent produit Bestron bénéficie – aux conditions ci-après – d’une garantie de 60 mois suivant la date d’achat et couvrant toute panne résultant d’un défaut/vice de fabrication et/ou de fonctionnement. 1. Pendant la période de garantie précitée, aucun frais ne sera facturé au titre des coûts de main-d’œuvre et de matériel.
  • Page 21 PROFICIAT! Proficiat met de aankoop van dit Bestron-product. In deze gebruiksaanwijzing leggen we de werking en het gebruik uit. Lees de gebruiksaanwijzing dus aandachtig door vóór u het apparaat gaat gebruiken. Gebruik het apparaat alleen zoals beschreven in de gebruiksaanwijzing. Bewaar de gebruiksaanwijzing daarna zorgvuldig.
  • Page 22 • Zorg ervoor dat elektrische apparaten, snoeren of stekkers niet in aanraking komen met water. • Dompel elektrische apparaten, snoeren of stekkers nooit onder in water of een andere vloeistof. • Pak elektrische apparaten niet op wanneer ze in het water zijn gevallen.
  • Page 23: Ce-Conformiteitsverklaring

    MILIEU • Werp verpakkingsmateriaal zoals plastic en dozen in de daarvoor bestemde containers. • Dit product aan het eind van de gebruiksduur niet inleveren als normaal huishoudelijk afval, maar bij een inzamelpunt voor hergebruik van elektrische en elektronische apparatuur. Let op het symbool op het product, de gebruiksaanwijzing of de verpakking.
  • Page 24 WERKING - Algemeen Het apparaat is alleen bedoeld voor huishoudelijke doeleinden, niet voor professioneel gebruik. 1. Bovenkant behuizing 6. Luchtuitlaat 2. Handvat 7. Voorste deel van de behuizing 3. Achterste deel van de behuizing 8. EVA-filter 4. Wielen 9. Aansluiting voor continu-waterafvoer 5.
  • Page 25 MONTAGE - Warmteafvoer installeren 1. Kies een plek in de buurt van een raam en een stopcontact om het apparaat neer te zetten. 2. Draai de twee kunststof uiteindes van de afvoer- slang (figuur 1, nr. 14) op de afvoerslang (zie figuur 2).
  • Page 26 GEBRUIK - Modus instellen Het apparaat is voorzien van drie werkmodi, waarmee u de ruimte kunt ventileren, ontvochtigen en koelen. Ventileren 1. Druk één of meerdere keren op de knop “ ” (figuur 1, g), totdat het indicatielampje bij “ ”...
  • Page 27 GEBRUIK - Afstandsbediening Het apparaat kan ook via de bijgeleverde afstandsbediening bediend worden. De afstandsbediening werkt op twee AAA-batterijen (niet inbegrepen). Open het batterijvakje op de onderkant, plaats de batterijen en sluit het deksel. De knoppen op de afstandsbediening werken hetzelfde als de knoppen op het bedieningspaneel. Voor een optimale werking: •...
  • Page 28: Probleemoplossing

    REINIGING EN ONDERHOUD - Filter reinigen Voor een optimaal resultaat dient u het EVA-filter iedere twee weken te reinigen en minstens 1x per jaar te vervangen, of vaker als blijkt dat het filter zichtbaar dicht zit. Reinig het filter ook voordat u het apparaat opbergt om langere tijd niet te gebruiken of wanneer u het na langere tijd weer in gebruik neemt.
  • Page 29: Garantiebepalingen

    9. Aanspraak op garantie kan alleen bij uw (web-)winkelier of rechtstreeks bij de Bestron Service Dienst. Stuur echter nooit zomaar iets op. Het pakket kan dan namelijk geweigerd worden en eventuele kosten zijn voor uw rekening.
  • Page 30 CONGRATULATIONS! Congratulations with the purchase of this Bestron product. These instructions tell you how the product works and how to use it. Read the instructions carefully before you start using the appliance. Only use the appliance in the manner described in the instructions. Keep these instructions in a safe place for future reference.
  • Page 31 • Never immerse electrical appliances, cords or plugs in water or any other liquid. • Do not touch electrical appliances if they have fallen in the water. Immediately pull the plug out of the socket. Stop using the appliance. • Make sure that electrical appliances, cords and plugs do not come into contact with heat sources, such as a hot hob or open fire.
  • Page 32: Ce Declaration Of Conformity

    ENVIRONMENT • Dispose of packaging material such as plastic and cardboard boxes in the designated containers. • Do not dispose of this product as normal domestic waste at the end of its life, but hand it in at a collection point for the reuse of electric and electronic equipment.
  • Page 33 OPERATION - General The appliance is intended only for domestic use, not for professional use. 1. Upside casing 6. Air outlet 2. Handle 7. Front of the casing 3. Back of the casing 8. EVA-filter 4. Wheels 9. Connection for continuous water drainage 5.
  • Page 34 INSTALLATION - Installing heat exhaust 1. Choose a place near a window and socket to place the device. 2. Screw the two plastic exhaust hose ends (figure 1, No. 14) onto the exhaust hose (see figure 2). 3. Install the drainage hose onto the hot air outlet (10) on the back of the device (see figure 2).
  • Page 35 USAGE - Setting the mode The device has three operating modes, with which you can ventilate, dehumidify, and cool the room. Ventilating 1. Press the button “ ” (figure 1, g), until the indication light lights up at “ ”. The device is now mode functioning as ventilator.
  • Page 36 USAGE - Remote control The device can also be controlled with the included remote control. The remote control requires two AAA- batteries (not included). Open the battery compartment on the underside, place the batteries, and close the lid. The buttons on the remote control function the same as the buttons on the control panel. For an optimal functioning: •...
  • Page 37: Problem Solving

    CLEANING AND MAINTENANCE - Cleaning the filter For an optimal result, you have to clean the EVA-filter every two weeks, and replace at least 1x per year, or more often if the filter is visibly full. Also clean the filter before you store it for longer periods of time, or when you use it again after a long time.
  • Page 38: Warranty Conditions

    8. The warranty does not entitle the purchaser to compensation for any damage other than replacement or repair of the faulty parts. Bestron cannot in any event be held liable for any indirect or consequential losses caused by or in relation to the equipment it has provided.
  • Page 39 COMPLIMENTI! Congratulazioni per l’acquisto di questo prodotto Bestron. Nelle presenti istruzioni per l’uso viene spiegato il funzionamento e l’impiego dell’apparecchio. Pertanto, prima di utilizzarlo, leggerle attentamente. Utilizzare l’apparecchio esclusivamente come di seguito descritto. Conservare queste istruzioni in luogo sicuro. In caso di guasto: Nel caso indesiderato in cui l’unità...
  • Page 40 • Evitare il contatto di apparecchi, cavi o spine elettriche con l’acqua. • Mai immergere apparecchi elettrici, cavi o spine in acqua o in altri liquidi. • Se gli apparecchi elettrici dovessero cadere in acqua, mai tentare di raccoglierli. Scollegare immediatamente la spina dalla presa elettrica e non riutilizzare l’apparecchio.
  • Page 41: Dichiarazione Di Conformità Ce

    DISPOSIZIONI AMBIENTALI • Smaltire i materiali di imballaggio, come plastica e scatole di cartone, negli appositi contenitori. • Al termine della sua vita utile, non smaltire il prodotto come un normale rifiuto domestico, ma conferire presso un punto di raccolta per il riciclaggio di apparecchiature elettriche ed elettroniche.
  • Page 42 FUNZIONAMENTO - Avvertenze generali Questo apparecchio è concepito esclusivamente per l’impiego domestico e non per l’uso professionale. 1. Lato superiore dell’alloggiamento 6. Presa d’aria 2. Manico 7. Parte anteriore dell’alloggiamento 3. Parte posteriore dell’alloggiamento 8. Filtro EVA 4. Ruote 9. Collegamento per lo scarico continuo dell’acqua 5.
  • Page 43 MONTAGGIO - Installazione dell’apparecchio 1. Scegliere un punto vicino a una finestra e una presa in cui inserire il dispositivo. 2. Ruotare le due estremità in plastica del tubo di scarico (figura 1, n. 14) sopra al tubo di scarico (vedi figura 2).
  • Page 44 UTILIZZO - Impostazione della modalità L’apparecchio ha tre modalità operative, con le quali è possibile ventilare, deumidificare o raffreddare la stanza. Ventilare 1. Premere il tasto “ ” (figura 1, g) una o più volte finché la spia non si accende su “ ”.
  • Page 45 UTILIZZO - Telecomando Il dispositivo può essere utilizzato anche tramite il telecomando in dotazione. Il telecomando funziona con due batterie AAA (non incluse). Aprire il vano batterie sul fondo, inserire le batterie e chiudere con il coperchio. I tasti del telecomando funzionano allo stesso modo dei pulsanti sul pannello di controllo. Per un funzionamento ottimale: •...
  • Page 46: Risoluzione Dei Problemi

    PULIZIA E MANUTENZIONE - Pulizia del filtro Per un risultato ottimale, è necessario pulire il filtro EVA ogni due settimane e sostituirlo almeno una volta all’anno, o anche più spesso nel caso in cui il filtro sia visibilmente ostruito. Pulire il filtro anche prima di conservare l’apparecchio spento per un lungo periodo di tempo o quando lo si utilizza di nuovo dopo un lungo periodo di tempo.
  • Page 47: Disposizioni Di Garanzia

    DISPOSIZIONI DI GARANZIA In base alle seguenti condizioni, Bestron garantisce questo apparecchio per la durata di 60 mesi dalla data di acquisto contro i guasti causati da difetti di fabbricazione e/o del materiale. 1. Durante il periodo di garanzia non verranno addebitati costi di manodopera e per i materiali necessari.
  • Page 48 ¡FELICIDADES! Felicidades por la compra de este producto Bestron. En estas instrucciones le explicamos su funcionamiento y cómo usarlo. Antes de usar el aparato, lea bien el manual de instrucciones. Utilice el aparato únicamente tal y como se describe en el manual de instrucciones.
  • Page 49 • Nunca sumerja los aparatos eléctricos, cables o enchufes en agua ni en ningún otro líquido. • No toque los aparatos eléctricos si se han caído al agua. Desenchúfelo inmediatamente de la toma de corriente. No vuelva a usar el aparato. •...
  • Page 50: Medio Ambiente

    MEDIO AMBIENTE • Tire el material de embalaje, como plástico y cajas, en el contenedor apropiado. • Al final de su vida útil, no se desprenda de este producto como un residuo normal. Llévelo a un punto blanco de su ciudad para el reciclaje de aparatos eléctricos y electrónicos.
  • Page 51 FUNCIONAMIENTO - General Este aparato está concebido únicamente para uso doméstico, no para uso profesional. 1. Carcasa superior 6. Salida de aire 2. Asa 7. Parte delantera de la carcasa 3. Parte trasera de la carcasa 8. Filtro EVA 4. Ruedas 9.
  • Page 52 INSTALACIÓN – Instalar drenaje caliente 1. Elija un lugar cerca de una ventana y de una toma de corriente para colocar el aparato. 2. Conecte los dos extremos plásticos de la manguera de drenaje (figura 1, número 14) en la manguera de drenaje (véase figura 2). 3.
  • Page 53 USO - Modo de configuración El aparato tiene tres modos de funcionamiento, con los cuales puede ventilar, deshumidificar y refrigerar el ambiente. Ventilación 1. Pulse el botón “ ” (figura 1, g), hasta que la luz indicadora se encienda en “ ”.
  • Page 54 USO - Mando a distancia El aparato también puede manejarse con el mando a distancia, que viene incluido y requiere dos pilas AAA (no incluidas). Abra el compartimento para las pilas, en la parte inferior, colóquelas y cierre la tapa. Los botones del mando a distancia funcionan del mismo modo que los botones del panel de control.
  • Page 55: Resolución De Problemas

    LIMPIEZA Y MANTENIMIENTO - Limpieza del filtro Para un resultado óptimo, debe limpiar el filtro EVA cada dos semanas, y reemplazarlo al menos una vez por año, o más a menudo si observa que está visiblemente lleno. También debe limpiar el filtro antes de guardar el aparato durante un largo período, o cuando vuelva a usarlo después de mucho tiempo.
  • Page 56: Condiciones De Garantía

    CONDICIONES DE GARANTÍA Bestron ofrece 60 meses de garantía después de la fecha de compra de este equipo. La garantía cubre las averías por errores de fabricación y/o material y se atiene a las siguientes condiciones. 1. La garantía no cubre ningún gasto por mano de obra ni material.
  • Page 60 v181220-03 NEED HELP? CHAT WITH US! WHATSAPP CUSTOMER SERVICE B E S T R O N . C O M / W H A T S A P P...

Table des Matières