Table des Matières
Publicité
Les langues disponibles
Les langues disponibles
Liens rapides
Publicité
Table des Matières

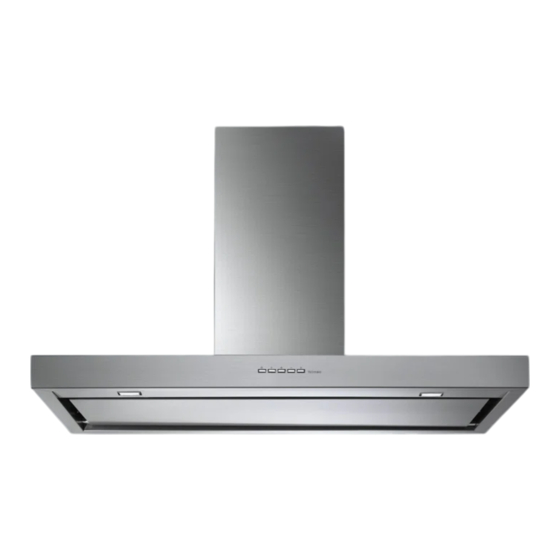
Manuels Connexes pour FALMEC ARARX36I5SG


Sommaire des Matières pour FALMEC ARARX36I5SG
- Page 1 INSTRUCTIONS BOOKLET LIVRET D’INSTRUCTIONS MANUAL DE INSTRUCCIONES Ed. 2008...
-
Page 2: Product Code
Para pedir los filtros de recambio de carbón activo, utilice el cupón adjunto a la cubierta. Product code ARARX36I5SG FDKRS36I5SG ARMEX36I5SS FFPLN36I5FS... - Page 3 Fig. C Ø8 Ø8 C+C1 Fig. O1b Fig. O1a Fig. O2...
- Page 4 Fig. O3...
- Page 5 ISTRUZIONI PER PANNELLO ASPORTABILE INSTRUCTION FOR REMOVABLE PANEL Fig. H3...
- Page 6 INSTRUCTIONS BOOKLET WARNINGS This instruction booklet must be kept together with the appliance for future reference. If the appliance is sold or consigned to other parties, check that the booklet is supplied with it, to ensure that the new user has the correct informa- tion on the operation of the range hood and is aware of the warnings.
-
Page 7: Technical Specifications
TECHNICAL SPECIFICATIONS The technical data pertaining to the electric appliance The technical specifica- tions of the appliance are shown on the rating plates located inside the range hood. INSTALLATION (Section reserved for qualified installers of the range hood) Minimum distance: distance between the main top of the cooking appliance and the bottom-most section of the hood. - Page 8 into contact with hot parts (over 75°C). - fit a plug that is suitable for the load to the power cable, and connect it to a suitable power outlet. If local codes permit, the power cord may be removed and the hood may be connected to a hard wired electrical connection.
-
Page 9: Electronic Control Panel
OPERATION 1. FIVE BUTTON CONTROL PANEL LIGHT- button Pressed: the light is on Released: the light is off MOTOR button - 1, 2, 3, OFF 1: starts the motor at minimum speed 2: starts the motor at medium speed 3: starts the motor at maximum speed OFF: stops the motor 2. -
Page 10: Charcoal Filters
– and + pushbutton: increase/decrease speed (to start the motor press either the + or the – pushbutton). Timer pushbutton: see instructions below. Instructions for changing the code (only in case of malfunctions caused by interferences): Disconnect the hood from the power supply Remove the cover of the remote control, change the code with the levers. -
Page 11: Light Bulb
the motor box. To install the new fi lters see picture. To order new filters, use the coupon enclosed with this booklet or provided by the distributor. 3. REMOVABLE PANEL Follow the instructions on fig. H3 to remove the panel. LIGHTING ASSEMBLY AND REPLACEMENT 1. - Page 12 Round halogen light How to replace the dicroic lamp: a) Check that the equipment is disconnected from the power supply. b) Remove the lamp with the help of a screwdriver (see figure) c) Replace the lamp with a similar one (dichroic, max 20 W, 12 Volt). Lamp Dicroic spot How to replace a square halogen light:...
-
Page 13: Maintenance And Cleaning
MAINTENANCE AND CLEANING Constant maintenance ensures the correct operation and efficiency of the appli- ance over time. Special attention should be paid to the metal grease-trapping filters and the charcoal filters. Frequent cleaning of the filters and their supports will ensure that fats and grease do not accumulate on the range hood, with the consequent risk of fire. - Page 14 Never cook on “open” flames under the range hood. Check deep-fryers during use: superheated oil may be flammable. - Ensure there is adequate ventilation of the room when the rangehood is used at the same time as appliances burning gas or other fuels. - Do not flambe under the rangehood - The exhaust air must not be discharged into a flue which is used for exhaust- ing fumes from appliances burning gas or other fuels.
- Page 15 sion assembly downwards. (Fig. O3e). - Connect the pipe to the connection of the ceiling discharge hole. (Fig. O3f). - Make electrical connections only after having removed electrical power sup- ply. - Fasten the extension to the lattice-work (C) by means of the 4 M4 metric screws(V3), without tightening them completely(Fig.
-
Page 16: Avertissements
LIVRET D’INSTRUCTIONS AVERTISSEMENTS Conserver cette notice avec l’appareil pour pouvoir la consulter en cas de be- soin. Si l’appareil est vendu ou cédé à tiers, veiller à ce que la notice soit fournie en même temps pour que le nouvel utilisateur puisse avoir toutes les indications concernant le fonctionnement de la hotte et les avertissements correspondan- La notice a été... -
Page 17: Caractéristiques Techniques
de colle ou de produit de protection et les taches de graisse ou d’huile. Pour exécuter cette opération, le constructeur recommande l’utilisation des lingettes détergentes fournies avec la lampe. Le fabricant décline toute responsabilité pour les dommages éventuels en cas d’emploi d’autres types de détergents. - Page 18 Important: La hotte est fournie équipée d’un câble d’alimentation de 1,5 m (5 pieds) avec une fiche moulée NEMA 5-15 pour la connexion à une prise de courant de 120 Vca, 60 Hz, 15 A. Cette prise de courant doit être située dans la zone de la couverture du tuyau d’évacuation au-dessus de la hotte.
-
Page 19: Hotte Version À Recyclage D'air
Indication spécifique pour l’Allemagne : Quand la hotte fonctionne en même temps que des appareils alimentés avec de l’énergie autre que celle électrique, la pression négative dans le local ne doit pas dépasser les 4 Pa (4 x 10⁻⁵ bar). HOTTE VERSION À... - Page 20 Bouton + Les vitesses 1, 2 et 3 sont indiquées grâce au voyant correspondant qui s’allume, à l’exclusion du voyant lumière et de la minuterie. (Dans la version à 4 vitesses, la touche + a une lumière qui clignote. La 4e vitesse (ou vitesse intensive) est temporisée et le moteur passe auto- matiquement à...
-
Page 21: Filtres Métalliques
FILTRES INSTRUCTIONS POUR LES ENLEVER ET LES REMPLACER 1. FILTRES MÉTALLIQUES Pour extraire le filtre métallique anti-graisse, il suffit d’agir sur la poignée A jusqu’à ce qu’il sorte du rail avant, l’incliner alors légèrement vers le bas et le faire sortir du rail arrière. Procéder de la même façon pour le remonter mais en sens inverse. -
Page 22: Éclairage
ÉCLAIRAGE MONTAGE ET REMPLACEMENT 1. PLAFONNIER Pour remplacer l’ampoule : a) S’assurer que l’appareil est débranché. b) Dévisser la vis de soutien A. c) Remplacer l’ampoule par une du même modèle que celle originale (max. 25 W, voir indication à proximité de l’ampoule). ATTENTION ! Les ampoules ayant une forme et un débit autre que celle origi- nale pourraient abîmer sérieusement le logement de l’ampoule. -
Page 23: Entretien Et Nettoyage
Pour remplacer la lampe du “Square halogen light”: a) S’assurer que l’appareil est bien débranché du réseau électrique. b) Ouvrir complètement le panneau jusqu’à un angle de 90° (voir figure) en appuyant sur PUSH c) Remplacer la lampe par une lampe similaire (halogène max. 20 W, 12 Volt culot G4). -
Page 24: Nettoyage Extérieur De La Hotte
3. NETTOYAGE EXTÉRIEUR DE LA HOTTE Nettoyer la hotte avec un chiffon humide et un peu de détergent liquide neutre ou avec de l’alcool dénaturé. Ne nettoyer qu’avec un chiffon souple trempé dans de l’eau contenant du savon neutre si la surface a subi un traitement anti-empreinte (Fasteel), en ayant soin de rincer et d’essuyer soigneusement. -
Page 25: Garantie
GARANTIE Votre nouvel appareil est couvert par la garantie. Les conditions de garantie sont reportées en entier au dos de cette notice. Le fabricant décline toute responsabilité pour les inexactitudes, imputables à des erreurs d’impression ou de transcription, contenues dans cette notice. Il se réserve le droit d’apporter les modifications qu’il juge nécessaires ou utiles à... - Page 26 MANUAL DE INSTRUCCIONES ADVERTENCIAS Es muy importante conservar este libro de instrucciones junto al aparato para cualquier consulta futura. Si el aparato tuviera que ser vendido o traspasado a otra persona, asegúrese que el libro vaya incluido, de modo que el nuevo usuario pueda ponerse al corriente del funcionamiento de la campana y de las advertencias correspon- dientes.
-
Page 27: Características Técnicas
eliminar los resíduos de plásticos protecto y eventuales manchas de grasa y aceite. Para esta operación aconsejamos la utilización de nuestro producto es- pecífico disponible a la venta. La utilización de otra tipologia de detergentes exime al fabricante de la respon- sabilidad de los daños que se puedan derivar. - Page 28 Importante: La campana está equipada de un cable de alimentación de 1,5 metros (5 pies) con un enchufe NEMA 5-15 para la conexión a una toma de 120 VAC, 60 Hz, 15 A. Hay que colocar esta toma en el área de cobertura del tubo de escape sobre la campana.
- Page 29 CAMPANA EXTRACTORA EN LA VERSIÓN CON RECICLADO INTERIOR (filtrante) En esta versión el aire pasa a través de los filtros de carbón activo para ser purificado y ser reciclado en el ambiente de la cocina. Controle que los filtros de carbón activo estén montados en el motor, en caso contrario debe montarlos siguiendo las instrucciones del punto H.
- Page 30 15 minutos aproximadamente, el motor pasa automáticamente a 3ª veloci- dad. Pulsador de modalidad Función: encendido y apagamiento del motor de la campana. La función velocidad deseada permite arrancar el motor con la última velo.cidad seleccionada antes del apagamiento anterior. Opcional: versión con telemando (sólo disponible en algunas versiones).
-
Page 31: Filtros De Carbón Activo
2. FILTROS DE CARBÓN ACTIVO Para sustituir el filtro de carbono proceder de la forma siguiente: saque el filtro metálico como se indica arriba. De este modo se accede fácilmente a los 2 filtros que están sujetos a los lados, derecho e izquierdo del motor. Para el montaje ver figúra. - Page 32 2. FARO Para sustituir la lámpara (“Round halogen light”): a) Asegúrese de que el aparato no esté enchufado a la red eléctrica. b) Quite, haciendo palanca con un destornillador, el anillo de sujeción del cri- stal A. c) Quite el cristal B, para acceder al vano lámpara. d) Sustituya la lámpara por una análoga (halógena máx 20 W, 12 Volt enganche G4).
-
Page 33: Mantenimiento Y Limpieza
3. FLUORESCENTE (Parte reservada por personal cualificado). Substitución del tubo fluorescente: a) Asegurarse que el aparatoestá desconectado de corriente elétrica; b) Quitar el panel de acero desatornillando los tornillos de fijación; Sustituir el fluorescente por uno del mismo modelo que el original (8W-13W-21W-28W según el modelo);... -
Page 34: Limpieza Interior
4. LIMPIEZA INTERIOR Se prohíbe limpiar las partes eléctricas o las partes relativas al motor del interior de la campana extractora, con líquidos o solventes. No use productos que contengan substancias abrasivas. Realice todas estas operaciones desenchufando previamente el aparato de la red eléctrica. SEGURIDAD ADVERTENCIAS La instalación eléctrica está... - Page 35 MONTAJE CAMPANA DE ISLETA CON BASTIDOR Fase 1 - Determinar la altura (H1=65 cm - 25,6”) requerida para la colocación de la campana. - Deslizar los bastidores (C) y (C1) hasta que se consiga la altura requerida (H2), sucesivamente fijarlos con 4 tornillos (V2) autorroscantes (Fig.O1a). - Fijar el bastidor (C) en el techo utilizando 8 tacos fischer de Ø...