Publicité

Les langues disponibles

Les langues disponibles

Liens rapides

COMMERCIAL PANINI/
TOASTING GRILLS
PARRILLAS/SANDWICHERAS
COMERCIALES
GRILS/PRESSE-PANINI COMMERCIAUX
WPG250TSWE /WPG250TSW/WPG250TSWC
For your safety and continued enjoyment of this product,
always read the instruction book carefully before using.
Para su seguridad y para disfrutar plenamente de este producto,
siempre lea cuidadosamente las instrucciones antes de usarlo.
Afin que votre appareil vous procure en toute sécurité beaucoup de satisfaction,
lire attentivement le mode d'emploi avant de l'utiliser.

Publicité

Table des Matières
loading

Sommaire des Matières pour Waring Commercial WPG250TSWE

  • Page 1 TOASTING GRILLS PARRILLAS/SANDWICHERAS COMERCIALES GRILS/PRESSE-PANINI COMMERCIAUX WPG250TSWE /WPG250TSW/WPG250TSWC For your safety and continued enjoyment of this product, always read the instruction book carefully before using. Para su seguridad y para disfrutar plenamente de este producto, siempre lea cuidadosamente las instrucciones antes de usarlo.
  • Page 2: Important Safeguards

    IMPORTANT SAFEGUARDS When using electrical appliances, basic safety precautions should always be taken, including the following: READ ALL INSTRUCTIONS. 2. Unplug from outlet when not in use, before putting on or taking off parts and before cleaning. 3. Always unplug from outlet prior to handling or cleaning. 4.
  • Page 3: Grounding Instructions

    SAVE THESE INSTRUCTIONS APPROVED FOR COMMERCIAL USE GROUNDING INSTRUCTIONS This appliance must be grounded while in use to protect the operator from electrical shock. The appliance is equipped with a 3-conductor cord and 3-prong grounding-type plug to fit the proper grounding-type receptacle.
  • Page 4 GROUNDING METHOD The lightning flash with arrowhead symbol within an equilateral triangle is intended to alert the user to the presence of uninsulated dangerous voltage within the product’s enclosure that may be of sufficient magnitude to constitute a risk of fire or electric shock to persons. The exclamation point within an equilateral triangle is intended to alert the user to the presence of important operating and maintenance (servicing) instruction in the...
  • Page 5 PARTS 1. Thermo-insulated handles 2. Temperature dial 3. ON/OFF power switch 4. Removable drip tray 5. Stainless steel housing 6. Bottom grill plate (ribbed) 7. Top grill plate (ribbed) 8. Ready indicator light 9. Timer...
  • Page 6 Model Description Voltage Power Cooking Surface WPG250TSWE/ Large Panini Grill with 120 Volt 1800 Watt 14.5" x 11" WPG250TSW/ Ribbed Plates WPG250TSWC INSTRUCTIONS FOR USE 1. Remove Waring Commercial Panini/Toasting Grill from ® packaging. 2. Place on a firm and stable surface.
  • Page 7 NON-STICK SHEET ASSEMBLY INSTRUCTIONS Remove drip tray. Locate the bottom non-stick sheet. Open the top lid and slide the top non-stick sheet from the front so the back edge is protruding between top and bottom plates on the back. Place sheet onto bottom grill plate. Assemble top sheet to clip on the...
  • Page 8 PANINI GRILL HANDLE ADJUSTMENT INSTRUCTIONS Your Waring Commercial Panini grill comes with a handle tension control. This device allows you to adjust the tension on the rear hinges with the allen wrench provided, so the top plate will remain open at the appropriate level and maneuver to your satisfaction.
  • Page 9 SHOWN IN CLOSED POSITION future access. TIMER INSTRUCTIONS The WPG250TSWE/WPG250TSW/WPG250TSWC are equipped with a timer that can be easily installed. The timer does not control the power of the unit. Timer Installation 1. Installing the batteries •...
  • Page 10: Timer Operation

    • To remove the timer, place your fingers on the two tabs on the sides of the timer and firmly depress while gently pulling toward you. This will release the timer unit. • If you have trouble using your fingers, you may use a flat head screwdriver to gently press tabs and pull the timer out of position.
  • Page 11 To clean drip tray, carefully remove tray, wash with warm, soapy water and dry, or you may place the tray in the dishwasher. Tray must be completely dry before putting back into the unit. LIMITED ONE-YEAR WARRANTY Waring warrants every new Waring Commercial Panini/Toasting ®...
  • Page 12: Medidas De Seguridad Importantes

    MEDIDAS DE SEGURIDAD IMPORTANTES Al usar aparatos eléctricos, siempre debe tomar precauciones básicas de seguridad, incluso las siguientes: LEA TODAS LAS INSTRUCCIONES. 2. Desconecte el aparato cuando no está en uso, antes de instalar/sacar piezas y antes de limpiarlo. 3. Desconecte el aparato antes de cualquier manipulación o mantenimiento.
  • Page 13 15. Supervise el uso de este aparato cuidadosamente cuando sea usado por o cerca de niños. 16. No utilice el aparato para ningún otro fin que no sea el indicado. GUARDE ESTAS INSTRUCCIONES APROBADO PARA USO COMERCIAL INSTRUCCIONES DE PUESTA A TIERRA Para su protección, este aparato está...
  • Page 14: Método De Puesta A Tierra

    MÉTODO DE PUESTA A TIERRA El símbolo representado por un relámpago con punta de flecha dentro de un triángulo equilátero tiene como fin alertar al usuario de la presencia de voltajes peligrosos no aislados en el interior del aparato, los cuales pueden ser de suficiente magnitud para constituir un riesgo de incendio o electrocución.
  • Page 15 PIEZAS 1. Asas termoaislantes 2. Control de temperatura 3. Botón de encendido/apagado 4. Bandeja de goteo amovible 5. Cuerpo de acero inoxidable 6. Placa inferior (estriada/“parrilla”) 7. Placa superior (estriada/“parrilla”) 8. Luz de listo 9. Temporizador...
  • Page 16 Modelo Descripción Voltaje Potencia Placa WPG250TSWE/ Parrilla/Sandwichera 120 V 1800 W 37 cm x 28 cm WPG250TSW/ grande con placas WPG250TSWC estriadas INSTRUCCIONES DE USO 1. Retire el aparato de la caja. 2. Ponga el aparato sobre una superficie llana y segura.
  • Page 17 INSTALACIÓN DE LA HOJA ANTIADHERENTE Retire la bandeja de goteo. Prepare la hoja antiadherente inferior. Abra las placas y deslice la hoja hacia el fondo de tal manera que salga entre las placas en la parte trasera del aparato. Sujete la hoja Coloque la hoja sobre la placa inferior.
  • Page 18 Hoja antiadherente instalada Pase el lado de la pinza por la hendidura en la hoja. Haga lo mismo del otro lado. Repita los pasos 7 a 9 en la parte delantera de la placa superior. CÓMO AJUSTAR LA TENSIÓN EN LAS BISAGRAS El mecanismo del asa controla la tensión en las bisagras, haciendo que la placa superior pueda quedarse abierta a la posición deseada durante la cocción.
  • Page 19 IMPORTANTE: guarde la llave Allen sobre el cable, para siempre tenerla al alcance de la mano. TEMPORIZADOR Los modelos WPG250TSWE, WPG250TSW y WPG250TSWC cuentan con un temporizador fácil de instalar. Nota: el temporizador no Tapa del tornillo de ajuste de tensión controla el encendido/apagado del aparato.
  • Page 20: Funcionamiento Del Temporizador

    Funcionamiento del temporizador NOTA: el temporizador no apagará automáticamente el aparato. Al final del tiempo, emitirá 5 pitidos. El temporizador ofrece dos opciones de tiempo: 30 segundos y 45 segundos. Presione el botón correspondiente al tiempo deseado. El indicador luminoso correspondiente empezará a parpadear y parpadeará...
  • Page 21 Commercial reparará o reemplazará toda pieza que, tras estar inspeccionada por nuestro servicio posventa, demuestre defectos de materiales o fabricación, siempre que el producto se regrese a un centro de servicio autorizado o se entregue con franqueo pagado a: 314 Ella T. Grasso Ave., Torrington, CT 06790. Esta garantía: a) no se aplica a ningún producto desgastado, defectuoso, dañado o roto debido a uso, reparaciones/servicio realizados por personas no autorizadas, o abuso, mal uso, sobrecarga o daños intencionales;...
  • Page 22: Importantes Consignes De Sécurité

    IMPORTANTES CONSIGNES DE SÉCURITÉ L'utilisation d'appareils électriques requiert la prise de précautions élémentaires, parmi lesquelles les suivantes : LIRE TOUTES LES INSTRUCTIONS. 2. Débrancher l'appareil après usage et avant toute manipulation ou entretien. 3. Débrancher l'appareil avant toute manipulation ou entretien. 4.
  • Page 23: Instructions De Mise À La Terre

    15. Il convient d'exercer une surveillance étroite lorsque cet appareil est utilisé par ou près d’enfants. 16. Ne pas utiliser cet appareil à des fins autres que celles pour lesquelles il a été conçu. GARDER CES INSTRUCTIONS USAGE COMMERCIAL AUTORISÉ INSTRUCTIONS DE MISE À...
  • Page 24: Méthode De Mise À La Terre

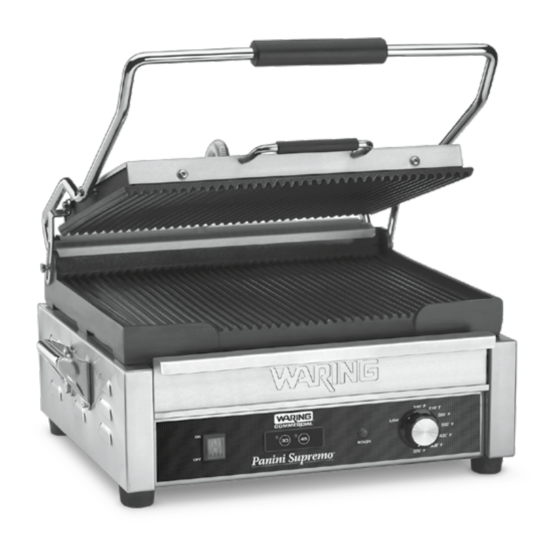
    MÉTHODE DE MISE À LA TERRE Le symbole composé d’une flèche en forme d’éclair à l'intérieur d'un triangle équilatéral, a pour objet d'alerter l'utilisateur de la présence d'une tension dangereuse non- isolée à l'intérieur du boîtier, qui peut être d'une ampleur suffisante pour constituer un risque d'incendie ou de choc électrique.
  • Page 25 PIÈCES 1. Poignées thermo-isolantes 2. Réglage de température 3. Interrupteur 4. Bac de récupération des graisses amovible 5. Boîtier en acier inoxydable 6. Plaque inférieure (striée/“gril”) 7. Plaque supérieure (striée/“gril”) 8. Voyant de préchauffage 9. Minuteur...
  • Page 26 Modèle Description Tension Puissance Surface de cuisson WPG250TSWE/ Grand gril/Presse-panini 120 V 1800 W 37 cm x 28 cm WPG250TSW/ avec plaques “gril” WPG250TSWC MODE D'EMPLOI 1. Sortir l'appareil de la boîte. 2. Placer l'appareil sur une surface stable et nivelée.
  • Page 27: Installation De La Feuille Antiadhésive

    INSTALLATION DE LA FEUILLE ANTIADHÉSIVE Retirer le bac de récupération des graisses. Préparer la feuille antiadhésive du bas. Ouvrir les plaques et faire glisser la feuille vers le fond de façon à ce qu’elle ressorte entre les plaques à l’arrière de l'appareil.
  • Page 28: Réglage De Tension Des Charnières

    Feuille antiadhésive installée Glisser l’autre côté de la pince dans la fente. Répéter de l’autre côté. Répéter les étapes 7 à 9 à l’avant de la plaque supérieure. RÉGLAGE DE TENSION DES CHARNIÈRES Le mécanisme de la poignée contrôle la tension des charnières, permettant à...
  • Page 29: Installation Du Minuteur

    à portée de main. MINUTEUR Couvercle de la vis de réglage de tension Les modèles WPG250TSWE, WPG250TSW et (ILLUSTRÉ EN POSITION FERMÉE) WPG250TSWC incluent un minuteur facile à installer. Remarque : le minuteur ne contrôle pas la mise sous/hors tension de l’appareil.
  • Page 30: Fonctionnement Du Minuteur

    • Au besoin, utiliser un tournevis plat pour presser les pattes. Faire attention de ne pas abîmer le minuteur et de ne pas vous blesser. Fonctionnement du minuteur REMARQUE : le minuteur n'éteindra pas automatiquement l'appareil. À la fin du temps, il sonnera 5 fois. Le minuteur offre deux options : 30 secondes et 45 secondes.
  • Page 31: Garantie Limitée D'un An

    GARANTIE LIMITÉE D’UN AN Waring garantit tout nouveaux gril/presse-panini Waring Commercial ® contre tout vice de matière ou de fabrication pendant une période d'un an suivant sa date d’achat, à condition qu’il ait été utilisé uniquement avec des produits alimentaires, des liquides non-abrasifs (autres que des détergents) et des semi-liquides non-abrasifs, à...
  • Page 32 ésta pertenecen a sus titulares respectivos. Toutes marques déposées ou marques de commerce ci-incluses appartiennent à leurs propriétaires respectifs. ©2016 Waring Commercial 314 Ella T. Grasso Avenue Torrington, CT 06790 www.waringcommercialproducts.com Printed in China Impreso en China Imprimé en Chine 16WC021073 WPG250TSWE/WPG250TSW/ WPG250TSWC IB IB-14358...

Ce manuel est également adapté pour:

Wpg250tswWpg250tswc

Table des Matières