EMS miniMaster Mode D'emploi

Manuels Connexes pour EMS miniMaster


Sommaire des Matières pour EMS miniMaster
- Page 1 OPERATION INSTRUCTIONS MODE D'EMPLOI BEDIENUNGSANLEITUNG INSTRUCCIONES DE EMPLEO ISTRUZIONI PER L'USO BRUKSANVISNING...
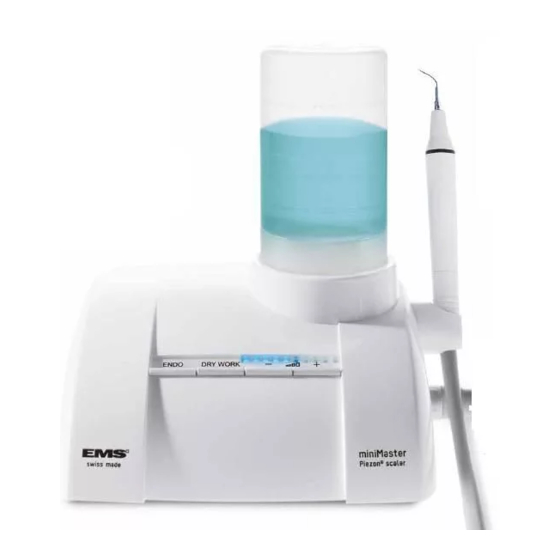
- Page 2 ® miniMaster LED...
- Page 3 SystemBox SystemBox EMS suministra aparatos con diversos accesorios. La EMS fornisce unità dotate di vari accessori. Nella "distinta EMS utrustar enheterna med olika tillbehör. Packlistan "Lista de contenido" indica exactamente lo que se incluye di spedizione" sono elencati esattamente tutti gli articoli visar exakt vad som medföljer denna enhet.
- Page 4 DEAR CUSTOMERS, CHERS CLIENTS, SEHR GEHERTE KUNDEN, Thank you for buying a new EMS product. It meets Nous vous félicitons de l'acquisition de ce nouveau Wir gratulieren Ihnen zum Kauf Ihres neuen the highest quality and safety standards. produit EMS. Il répond aux plus hautes exigences EMS-Produkts.
- Page 5 Le agradecemos que haya adquirido un nuevo Grazie di aver acquistato un nuovo prodotto EMS Tack för att du har köpt en EMS-produkt. Den producto de EMS. Éste satisface las exigencias che soddisfa gli standard di qualità e di sicurezza uppfyller högt ställda kvalitets- och säker-...
-
Page 6: A Propos De Ce Manuel
Les illustrations de ce mode d'emploi repré- Wenn nichts anderes angegeben ist, represent the miniMaster LED (unless otherwise sentent le miniMaster LED (sauf si autrement beziehen sich die Abbildungen in der Bedienungs- specified); however, these instructions also apply spécifié); cependant, ces instructions s'appliquent anleitung auf den miniMaster LED. -
Page 7: Presentación Del Manual
No dude en ponerse en Questo prodotto richiede precauzioni hetsåtgärder vad gäller elektromagnetisk kompati- contacto con su distribuidor local de EMS si desea speciali in materia di compatibilità elettromagnetica bilitet och måste installeras och driftsättas i enlighet información adicional. - Page 8 To prevent possible patient or user injury or Pour prévenir de possibles accidents corporels Zur Vermeidung von Personenschäden oder damage to the miniMaster or miniMaster LED, ou dommages au miniMaster ou miniMaster LED, Sachschäden am miniMaster oder miniMaster please note the corresponding directives:...
- Page 9 Para evitar posibles lesiones en el paciente o Per impedire possibili lesioni al paziente o För att förhindra patientskador eller skador på usuario, o daños al miniMaster o miniMaster LED, all'utente o danni al miniMaster o al miniMaster miniMaster eller miniMaster LED ska följande nótense las directrices correspondientes:...
-
Page 10: Table Des Matières
Warranty ............58 Garantie ............58 Garantie ............58 Accessories............ 58 Accessoires ............ 58 Zubehör ............58 EMS Service ..........60 Service EMS ..........60 EMS-Service ..........60 Symbols ............62 Symboles ............62 Symbole ............62 Technical data ..........68 Caractéristiques techniques ...... - Page 11 Garantía ............59 Garanti ............59 Smaltimento ........... 59 Accesorios ............. 59 Tillbehör ............59 Garanzia ............59 Servicio técnico de EMS ........ 61 EMS-service ..........61 Accessori ............59 Símbolos ............63 Symboler ............63 Servizio assistenza EMS ....... 61 Datos técnicos ..........
-
Page 12: Installation And Connection
INSTALLATION AND INSTALLATION ET INSTALLIEREN UND CONNECTION BRANCHEMENT ANSCHLIESSEN 24 VDC Always check that the unit is installed in Toujours s'assurer que l'appareil est installé Das Gerät muss sicher und stabil aufgestellt en position stable et sûre. Une chute éventuelle werden. -
Page 13: Instalación Y Conexión
INSTALACIÓN Y CONEXIÓN INSTALLAZIONE E INSTALLATION OCH CONNESSIONE ANSLUTNING miniMaster LED miniMaster standard Compruebe siempre que el aparato esté Controllare sempre che l'unità sia installata Se alltid till att enheten installeras på en instalado en un lugar seguro y estable. Si se in una posizione sicura e stabile. -
Page 14: Preparing For Treatment
PREPARING FOR TREATMENT PRÉPARATION POUR VORBEREITEN FÜR LE TRAITEMENT DIE BEHANDLUNG Connecting the handpiece Connexion de la pièce à main Aufstecken des Handstücks Clean, disinfect and sterilize the different Nettoyer, désinfecter et stériliser les diffé- Die einzelnen Bestandteile des Geräts pieces and accessories of this product before each rentes pièces et accessoires de ce produit avant müssen vor jeder Verwendung gereinigt, desinfi-... -
Page 15: Preparación Para El Tratamiento
PREPARACIÓN PARA PREPARAZIONE PER FÖRBEREDELSER INFÖR EL TRATAMIENTO IL TRATTAMENTO BEHANDLING Conexión del mango Connessione del manipolo Ansluta handstycket Limpie, desinfecte y esterilice las distintas Prima dell'uso pulire, disinfettare e steri- Rengör, desinficera och sterilisera piezas y accesorios de este producto antes de lizzare le varie parti e accessori del prodotto. -
Page 16: Attaching The Instruments
Für die Befestigung des EMS-Instruments am Handstück mit dem korrekten Drehmoment EMS instrument on the handpiece to the correct fixer l'instrument EMS sur la pièce à main au darf nur der CombiTorque verwendet werden. torque. Once the instrument is screwed all the couple approprié. -
Page 17: Acoplamiento De Los Instrumentos
Per serrare lo strumenti EMS sul manipolo Använd endast CombiTorque för att dra con il valore corretto di coppia utilizzare esclu- ajustar el instrumento de EMS del mango al par fast EMS-instrumentet på handstycket till rätt sivamente il CombiTorque. Una volta che lo de torsión correcto. -
Page 18: Installing The Bottle
Installing the bottle Mise en place de la bouteille Aufsetzen der Flasche Always check the condition of the bottle cap Toujours contrôler l'état du joint O-ring du Kontrollieren Sie vor jedem Aufsetzen der Flasche den O-Ring im Flaschendeckel. O-ring before installing the bottle. Please refer to bouchon de la bouteille avant la mise en place Beachten Sie hierzu die Hinweise im Abschnitt the "Maintenance"... -
Page 19: Instalación Del Bote
Instalación del bote Installazione del flacone Installera flaskan Compruebe siempre el estado de la junta Prima dell'installazione del flacone, Kontrollera alltid att flasklockets O-ring är hel tórica de la tapa del bote antes de instalarlo. controllare sempre la condizione dell'anello di innan flaskan installeras. -
Page 20: Solutions Compatible With The Circuit
® /..Solutions désinfectantes pour laver le circuit Disinfecting solutions for washing the circuit Desinfektionslösungen zum Reinigen des Geräts • EMS Ultra Clean (H • EMS Ultra Clean (H • Peroxide d'hydrogène (H ) 5% • EMS Ultra Clean (H •... -
Page 21: Soluciones Compatibles Con El Circuito
/..Soluzioni disinfettanti per il lavaggio del Desinfektionslösningar för tvätt av slingan Soluciones desinfectantes para lavar el circuito circuito • EMS Ultra Clean ( 6 %) • EMS Ultra Clean ( al 6 %) • Väteperoxid ( ) 5 % •... -
Page 22: Operating The Unit
OPERATING THE UNIT UTILISATION DE L’APPAREIL BEDIENEN DES GERÄTS The default mode is the "Standard" mode Le mode par défaut est le mode "Standard" Die werksseitige Einstellung des Geräts and the power is set to the minimum when the unit et la puissance est réglée au minimum lorsque lautet auf "Standard"-Modus. -
Page 23: Utilización Del Aparato
UTILIZACIÓN DEL APARATO FUNZIONAMENTO DELL'UNITÀ ANVÄNDA ENHETEN El modo predeterminado es el modo La modalità predefinita è quella standard e Standardläget är det förinställda läget och "estándar" y la potencia se pone al mínimo al la potenza è impostata al minimo, quando l'unità effekten är inställd på... -
Page 24: Standard" Mode
"Standard" mode Mode "Standard" "Standard"-Modus The unit has preset modes to optimize the L'appareil dispose de modes prédéfinis pour Das Gerät verfügt über werksseitig eingestellte power range of the ultrasound according to the optimiser la plage de puissance des ultrasons en Modi, die je nach Behandlung eine optimale treatment. -
Page 25: Modo "Estándar
Modo "estándar" Modalità "Standard" Standardläge El aparato dispone de modos predeterminados L'unità ha delle modalità predefinite per ottimizzare Enheten har förinställda lägen som optimerar para optimizar el intervalo de potencia de los l'intervallo di potenza degli ultrasuoni in base al ultraljudets effektintervall efter den behandling ultrasonidos según el tratamiento. -
Page 26: Endo" Mode
"ENDO" mode Mode "ENDO" "ENDO"-Modus The "ENDO" mode reduces by half the power Le mode "ENDO" réduit de moitié la puissance Der "ENDO"-Modus reduziert die Ultraschallin- of the ultrasound; only this reduced range is des ultrasons; seule cette plage réduite est dispo- tensität um die Hälfte. -
Page 27: Modo "Endo
Modo "ENDO" Modalità "ENDO" ENDO-läge El modo "ENDO" reduce a la mitad la potencia de La modalità "ENDO" riduce della metà la potenza I ENDO-läget halveras ultraljudets effekt och los ultrasonidos; sólo se dispone de esta potencia degli ultrasuoni; è disponibile solo questo intervallo endast detta reducerade intervall är tillgängligt. -
Page 28: Dry Work" Mode
"DRY WORK" mode Mode "DRY WORK" "DRY WORK"-Modus Irrigation is set on hold and the power setting LEDs L'irrigation est suspendue et les LEDs du réglage Bei der Aktivierung des "DRY WORK"-Modus wird die Wasserzufuhr abgeschaltet und die Kontroll- flash when the "DRY WORK" mode is activated. de puissance clignotent lorsque le mode "DRY LEDs blinken. -
Page 29: Modo "Dry Work
Modo "DRY WORK" Modalità "DRY WORK" DRY WORK-läge Cuando se activa el modo "DRY WORK" (funcio- L'irrigazione viene impostata in attesa e i LED di Spolningen stängs av och lysdioderna för effekt- namiento en seco) la irrigación se interrumpe y los impostazione della potenza lampeggiano quando è... -
Page 30: Setting The Ultrasound Power
Setting the ultrasound power Réglage de la puissance des ultrasons Einstellen der Ultraschallleistung Using the "+" or "-" keys increases or decreases Appuyer sur les touches "+" ou "-" pour augmenter Durch Drücken der "+"- oder "-"-Taste erhöhen the power of the ultrasound. ou diminuer la puissance des ultrasons. -
Page 31: Ajuste De La Potencia De Los Ultrasonidos
Ajuste de la potencia de los Impostazione della potenza degli Ställa in ultraljudseffekten ultrasonidos ultrasuoni Con las teclas "+" o "-" se aumenta o disminuye Con i tasti "+" o "-" si può aumentare o diminuire Öka och minska ultraljudets effekt med hjälp av la potencia de los ultrasonidos. -
Page 32: Setting The Liquid Flow Rate
Setting the liquid flow rate Réglage du débit de liquide Einstellen der Flüssigkeitsmenge miniMaster miniMaster standard Beachten Sie für die optimale Einstellung Optimal settings for the liquid flow rate for Les informations précises sur le réglage der Flüssigkeitsmenge die Bedienungsanlei- optimal du débit de liquide pour chaque instrument... -
Page 33: Ajuste Del Flujo De Líquido
Ajuste del flujo de líquido Impostazione della portata del Ställa in flödeshastigheten flusso liquido Los ajustes óptimos del flujo de líquido de Le impostazioni ottimali per la portata del Information om optimala inställningar av cada instrumento se indican en las instrucciones flusso liquido per ciascun strumento sono indicate flödeshastighet för olika instrument finns i Piezon- de empleo de los sistemas Piezon. -
Page 34: Foot Pedal Functions
Foot pedal functions Fonction de la pédale de commande Funktionen des Fußschalters Liquid Irrigation Flüssigkeit Ultrasonics with liquid Ultrasons avec irrigation Ultraschall mit Flüssigkeit... -
Page 35: Funciones Del Pedal De Mando
Funciones del pedal de mando Funzioni della pedale di comando Fotpedalens funktioner Líquido Liquido Vätska Ultrasonidos con líquido Ultrasuoni con liquido Ultraljud med vätska... -
Page 36: Piezon Handpiece Led
Piezon handpiece LED Pièce à main Piezon LED Piezon-Handstück-LED (miniMaster LED only) (nur miniMaster LED) (miniMaster LED uniquement) The Piezon handpiece LED lights up when La pièce à main Piezon LED s'éclaire Die LED des Piezon-Handstücks leuchtet the foot pedal is activated. It remains lighted up lorsque la pédale de commande est activée. -
Page 37: Led Del Mango Piezon
LED del mango Piezon LED del manipolo Piezon Piezon-handstyckets lampa (sólo miniMaster LED) (solo LED miniMaster) (endast miniMaster LED) 20 seconds El LED del mango Piezon se ilumina Il LED del manipolo Piezon si illumina Piezon-handstyckets lampa tänds när cuando se activa el pedal de mando . Permanece quando la pedale di comando si attiva. -
Page 38: End Of Treatment
END OF TREATMENT FIN DU TRAITEMENT ENDE DER BEHANDLUNG Clean the instrument with running water Nettoyer les instruments à l’eau courante Spülen Sie das Instrument vor der Desin- before disinfection. avant de les désinfecter. fektion unter fließendem Wasser ab. Please conform to the recommendations of Veuillez vous conformer aux recomman- Beachten Sie die Empfehlungen des the "Reprocessing Instructions"... -
Page 39: Fin Del Tratamiento
FIN DEL TRATAMIENTO FINE TRATTAMENTO AVSLUTA BEHANDLINGEN Limpie el instrumento con agua corriente Pulire lo strumento con acqua corrente Rengör instrumentet under rinnande vatten antes de desinfectarlo. prima della disinfezione. före desinfektion. Siga las recomendaciones del manual Attenersi alle raccomandazioni del manuale Följ rekommendationerna i handboken "Reprocessing Instructions"... -
Page 40: Circuit Washing
Circuit washing Lavage du circuit Spülen des Kreislaufs 50 ml H (distilled water) Once the treatment has been completed, Dès que le traitement est achevé, laver Spülen Sie den Kreislauf nach dem Ende wash the circuit with 50 ml of distilled (or deminer- le circuit avec 50 ml d’eau distillée (ou déminé- der Behandlung mit 50 ml destilliertem (oder alized) water to avoid a possible reaction caused... -
Page 41: Lavado Del Circuito
Lavado del circuito Lavaggio del circuito Tvätta slingan Una vez completado el tratamiento, lave Una volta completato il trattamento, lavare il När behandlingen är klar tvättas slingan el circuito con 50 ml de agua destilada (o desmi- circuito con 50 ml di acqua distillata (o deminera- med 50 ml destillerat (eller avsaltat) vatten för neralizada) para prevenir una posible reacción lizzata) per evitare una possibile reazione causata... -
Page 42: Cleaning, Disinfecting And Sterilizing
CLEANING, DISINFECTING NETTOYAGE, DÉSINFECTION REINIGEN, DESINFIZIEREN AND STERILIZING ET STÉRILISATION UND STERILISIEREN 135°C Please conform to the recommendations of Veuillez vous conformer aux recommanda- Beachten Sie die Empfehlungen des Handbuchs "Reprocessing Instructions", das the Reprocessing Instructions manual delivered tions contenues dans le manuel "Reprocessing im Lieferumfang Ihres Produkts enthalten ist, with your product regarding procedure of cleaning, Instructions"... -
Page 43: Limpieza, Desinfección Y Esterilización
LIMPIEZA, DESINFECCIÓN PULIZIA, DISINFEZIONE RENGÖRING, DESINFEKTION Y ESTERILIZACIÓN E STERILIZZAZIONE OCH STERILISERING 135°C 135°C Siga las recomendaciones del manual Attenersi alle raccomandazioni del manuale Följ rekommendationerna i handboken ”Reprocessing Instructions” som medföljer "Reprocessing Instructions" suministrado con "Istruzioni per la riprocessazione" in dotazione al produkten vad gäller procedurer för rengöring, su producto con respecto al procedimiento de prodotto sulle procedure di pulizia, disinfezione,... -
Page 44: Cleaning The Bottle And The Unit
Cleaning the bottle and the unit Nettoyage de la bouteille Reinigen der Flasche und des Geräts et de l’appareil Bottles can be washed in a dishwasher Les bouteilles peuvent être nettoyées dans Die Flasche kann in einer Spülmaschine gereinigt und in einem Thermodesinfektor bei and disinfected at up to 95 °C in a washer disin- le lave-vaisselle et désinfectées jusqu’à... -
Page 45: Limpieza Del Bote Y Del Aparato
Limpieza del bote y del aparato Pulizia del flacone e dell'unità Rengöra flaskan och enheten Los botes se pueden lavar en un lavavajillas I flaconi possono essere lavati in lavasto- Flaskor kan tvättas i diskmaskin och y desinfectarse a un máximo de 95 °C en una viglie e disinfettati fino a 95 °C in una lavatrice/ desinficeras vid upp till 95 °C i en tvättare/desin- lavadora desinfectante. -
Page 46: Désinfection Du Circuit
Disinfecting the circuit Désinfection du circuit Desinfektion des Kreislaufs 50 ml 50 ml H disinfecting (distilled water) liquid It is recommended to disinfect the liquid Il est recommandé de désinfecter le circuit Eine tägliche Desinfektion des Flüssigkeits- kreislaufs wird empfohlen. circuit daily. - Page 47 Desinfección del circuito Disinfezione del circuito Desinficera slingan 50 ml H (sterile water) 5 min Se recomienda desinfectar el circuito de Si consiglia di disinfettare giornalmente il Vi rekommenderar att vätskeslingan desin- circuito del liquido. líquido a diario. ficeras dagligen. La disinfezione è...
-
Page 48: Maintenance
O-Rings bitte die Anweisungen, die mit dem with the maintenance set to replace an O-ring. un O-ring. Wartungssatz geliefert werden. Always use EMS original parts. Using non Utiliser exclusivement des pièces originales Verwenden Sie nur Originalteile von EMS. original instruments may damage the unit, and EMS. -
Page 49: Mantenimiento
finns i anvisningarna som medföljer underhålls- tórica. satsen. Usare sempre parti di ricambio originali Use siempre piezas originales de EMS. Si EMS. L'utilizzo di strumentazione non originale Använd alltid originaldelar från EMS. se utilizan instrumentos que no sean originales può danneggiare l'unità e il medico o il paziente Om instrument som inte är originalinstrument... -
Page 50: Replacing The Pump
Replacing the pump Remplacement de la pompe Austauschen der Pumpe The pump of the unit is a wear element, it is recom- La pompe de l'appareil est un élément d'usure, Die Pumpe des Geräts ist ein Verschleißteil. Es mended to change it every 18 months. il est recommandé... -
Page 51: Sustitución De La Bomba
Sustitución de la bomba Sostituzione della pompa Byta ut pumpen La bomba del aparato es un elemento que se La pompa dell'unità è un elemento soggetto ad Enhetens pump är en förbrukningsartikel som bör desgasta; se recomienda cambiarla cada 18 usura, si consiglia di sostituirla ogni 18 mesi. -
Page 52: Safety Precautions
SAFETY PRECAUTIONS REMARQUES CONCERNANT SICHERHEITSHINWEISE LA SÉCURITÉ EMS and the dealer of this product accept no EMS et le distributeur de ce produit ne peuvent EMS und der Vertreiber des Produkts haften liability for direct or consequential injury or damage être tenus responsables d’éventuels préjudices... -
Page 53: Precauciones Sobre Seguridad
PRECAUCIONES SOBRE PRECAUZIONI DI SICUREZZA SÄKERHETSFÖRESKRIFTER SEGURIDAD EMS y el distribuidor de este producto no aceptan L'EMS ed il rivenditore di questo prodotto non EMS och produktens återförsäljare påtar sig inget ninguna responsabilidad por daños o lesiones si assumono alcuna responsabilità per danni o ansvar för direkta skador eller följdskador som... - Page 54 être utilisé oder ein beschädigtes Gerät dürfen nicht mehr must be replaced. Use original EMS spare parts et doit être remplacé. N’utiliser que des pièces et verwendet und müssen ersetzt werden. Verwenden and accessories only.
- Page 55 EMS. Portare a riparare questo prodotto esclu- Använd ingen annan extern strömadapter Repare este producto exclusivamente en sivamente in un centro di assistenza EMS än den som medföljer EMS-enheten. un centro de reparación autorizado de EMS. approvato. Vissa typer av mobil kommunikationsut- Utilice exclusivamente la alimentación...
-
Page 56: Storing The Product
STORING THE PRODUCT ENTREPOSAGE DU PRODUIT AUFBEWAHREN DES GERÄTS Keep the original packaging until the product Conserver l’emballage d’origine jusqu’à la Bewahren Sie die Originalverpackung bis is to be disposed of permanently. It can be used mise au rebut du produit. Il peut ainsi être utilisé à zur endgültigen Entsorgung Ihres Produkts auf. -
Page 57: Almacenamiento Del Producto
ALMACENAMIENTO STOCCAGGIO DEL PRODOTTO FÖRVARA PRODUKTEN DEL PRODUCTO Guarde el embalaje original hasta que vaya Conservare l'imballo originale fino a quando Behåll originalförpackningen tills produkten a desechar el producto de forma permanente. il prodotto non debba essere smaltito definitiva- kasseras permanent. Den kan återanvändas för Puede servir para su transporte o almacenamiento mente. -
Page 58: Disposal
European fin de vie appartenant aux clients localisés dans Geräten im Besitz von Kunden in der Europäi- Union may be shipped to EMS for recycling in l'Union Européenne peuvent être envoyés à EMS schen Union können gemäß der WEEE-Richtlinie accordance to the WEEE regulations. -
Page 59: Eliminación
(RAEE) que pertenezcan a clientes que se fuori uso appartenenti a clienti residenti nella UE EU kan skickas till EMS för återvinning i enlighet encuentren en la Unión Europea pueden enviarse potranno essere spedite a EMS per il riciclaggio med WEEE-direktivet. -
Page 60: Ems Service
Des réparations sans autorisation ou le non-respect durch Nichtbeachtung der Bedienungsanleitung tions, EMS accepts no liability whatsoever. This du mode d’emploi dégagent EMS de toute respon- entbinden EMS von jeglicher Haftung. Der Garan- will also void the warranty. sabilité et annulent la garantie. -
Page 61: Servicio Técnico De Ems
En el caso de reparaciones no autorizadas o daños In caso di riparazioni non autorizzate o di danni EMS påtar sig inget som helst ansvar vid oaukto- debidos a la no adherencia a las instrucciones de dovuti a mancata osservanza delle istruzioni riserade reparationer eller skador som beror att empleo, EMS no aceptará... -
Page 62: Symbols
SYMBOLS SYMBOLES SYMBOLE Manufacturer’s logo Logo du fabricant Herstellerlogo "ENDO" key Touche "ENDO" Taste "ENDO" "DRY WORK" key Touche "DRY WORK" Taste "DRY WORK" Increase of the values Augmentation des valeurs Erhöhen der Werte Decrease of the values Diminution des valeurs Verringern der Werte Display of the ultrasound power setting Affichage du réglage de puissance des ultrasons... -
Page 63: Símbolos
SÍMBOLOS SIMBOLI SYMBOLER Logo del fabricante Logo del produttore Tillverkarens logotyp Tecla "ENDO" Tasto "ENDO" Knappen ”ENDO” Tecla "DRY WORK" Tasto "DRY WORK" Knappen ”DRY WORK” Aumento de los valores Aumento dei valori Öka värde Disminución de los valores Diminuzione dei valori Minska värde Visualización del ajuste de potencia de los ultrasonidos Visualizzazione dell'impostazione della potenza degli ultrasuoni... - Page 64 Plug 24 VDC Prise 24 VDC Stecker 24 V DC Output Sortie Ausgang Foot pedal connection Connexion pour la pédale de commande Anschluss der Fußschalter Double insulation - Class 2 Double isolation - Classe 2 Doppelte Isolierung - Klasse 2 Applied part, type BF Partie appliquée du type BF Anwendungsteil Typ BF...
- Page 65 Toma de 24 Vcc Spina 24 V CC Kontakt 24 V DC Salida Uscita Utgång Conexión por el pedal de mando Connessione per la pedale di comando Uttag för fotpedal Doble aislamiento - Clase 2 Doppio isolamento - Classe 2 Dubbel isolering - klass 2 Componente aplicado de tipo BF Parte applicata, tipo BF...
- Page 66 Sterilizable at up to 135 °C 135°C Stérilisable à 135 °C maximum Sterilisierbar bei maximal 135 °C Liquid flow rate Réglage du débit de liquide Einstellung der Flüssigkeitsmenge Disposal of waste electrical & electronic equipment (applicable in the European Union and other European countries with separate collection systems) Traitement des appareils électriques et électroniques en fin de vie (applicable dans les pays de l’Union Européenne et aux autres pays européens disposant de systèmes de collecte sélective)
- Page 67 Esterilizable a 135 °C como máximo 135°C Sterilizzabile fino a 135 °C Kan steriliseras vid upp till 135 °C Flujo de líquido Portata del flusso liquido Flödeshastighet Eliminación de aparatos eléctricos y electrónicos usados (aplicable en la Unión Europea y en otros países europeos con sistemas de recogida independiente) Smaltimento di apparecchiature elettriche ed elettroniche in disuso (applicabile nell’'Unione Europea e in altri paesi con sistemi di raccolta differenziati)
-
Page 68: Technical Data
TECHNICAL DATA CARACTÉRISTIQUES TECHNIQUES Description Description Manufacturer EMS ELECTRO MEDICAL SYSTEMS SA, Fabricant EMS ELECTRO MEDICAL SYSTEMS SA, CH-1260 Nyon, Switzerland CH-1260 Nyon, Suisse Models miniMaster & miniMaster LED Modèles miniMaster & miniMaster LED Classification EN 60601-1 - Class II Classification EN 60601-1... -
Page 69: Technische Daten
TECHNISCHE DATEN DATOS TÉCNICOS Beschreibung Descripción Hersteller EMS ELECTRO MEDICAL SYSTEMS SA, Fabricante EMS ELECTRO MEDICAL SYSTEMS SA, CH-1260 Nyon, Schweiz CH-1260 Nyon, Suiza Modelle miniMaster u. miniMaster LED Modelos miniMaster y miniMaster LED Klassifikation EN 60601-1 - Klasse II Clasificación EN 60601-1... -
Page 70: Dati Tecnici
DATI TECNICI TEKNISKA DATA Descrizione Beskrivning Produttore EMS ELECTRO MEDICAL SYSTEMS SA, Tillverkare EMS ELECTRO MEDICAL SYSTEMS SA, CH-1260 Nyon, Svizzera CH-1260 Nyon, Schweiz Modelli miniMaster & miniMaster LED Modeller miniMaster & miniMaster LED Classificazione EN 60601-1 - Classe II Klassificering EN 60601-1... -
Page 72: Troubleshooting
• Proceed to a circuit washing without the handpiece and check that liquid exits the handpiece cord; if it is the case, the handpiece is plugged; send the handpiece to an approved EMS repair center • Unscrew the pump cover and check that the peristaltic pump functions; if the rollers do not turn, replace the pump (the rotation of the rollers can be seen by transparency) •... -
Page 73: Mesures À Prendre En Cas D'incident
Remplacer la bouteille • Remplacer la pompe péristaltique • Envoyer la pièce à main et le cordon de pièce à main à un centre de réparation agréé EMS Eclairage de la pièce à main Piezon • Remplacer le guide lumière •... -
Page 74: Fehlerbehebung
• Ersetzen Sie die Flasche • Ersetzen Sie die Peristaltikpumpe • Senden Sie Handstück und Handstückschlauch an ein von EMS autorisiertes Reparaturzentrum Unzureichende Leuchtkraft der LED • Ersetzen Sie den Lichtleiter • Senden Sie das Gerät an ein von EMS autorisiertes Reparaturzentrum... -
Page 75: Solución De Problemas
• Realice un lavado del circuito sin el mango y compruebe que salga líquido por el cable del mango; si es así, el mango estará atascado; envíe el mango a un centro de reparación autorizado de EMS • Desenrosque la tapa de la bomba y compruebe que la bomba peristáltica funciona; si los cilindros no giran, cambie la bomba (la rotación de los cilindros se puede ver por transparencia) -
Page 76: Risoluzione Dei Problemi
• Procedere al lavaggio del circuito senza manipolo e controllare che il liquido esca dal cavo del manipolo; in tal caso il manipolo è intasato. Inviare il manipolo ad un centro assistenza EMS approvato. • Svitare il coperchio della pompa e controllare che la pompa peristaltica funzioni; se i rulli non girano, sostituire la pompa (la rotazione dei rulli si può... -
Page 77: Felsökning
• Tvätta slingan utan handstycket och kontrollera att det kommer ut vätska ur sladden till handstycket. Om det gör det är handstycket igensatt. Skicka handstycket till ett godkänt EMS-reparationscenter. • Skruva bort pumpskyddet och kontrollera att pumpen fungerar. Om spolarna inte roterar byter du pumpen (man kan enkelt se om spolarna roterar). - Page 80 Tel. +39 02 3453 8111 Fax +49 89 42 71 61 60 Fax +39 02 3453 2778 e-mail: info@ems-ch.de e-mail: dental@ems-italia.it SPAIN EMS Electro Medical Systems España SL EMS Corporation Bernardino Obregón 14 bis 11886 Greenville Avenue #120 E-28012 Madrid Dallas, TX 75243, USA Tlf.