
Manuels Connexes pour Saba SBS525WDIL


Sommaire des Matières pour Saba SBS525WDIL
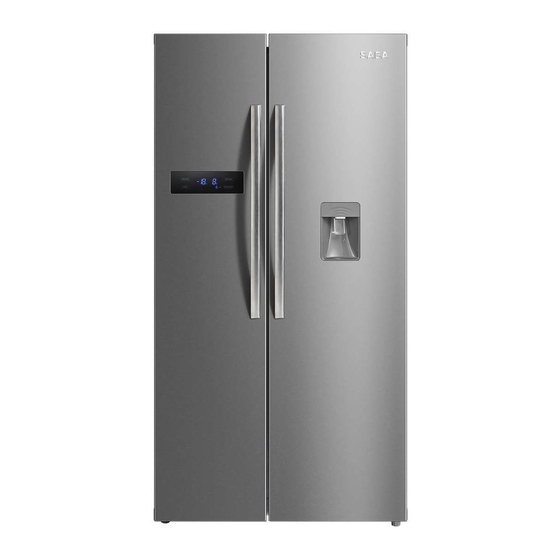
- Page 1 SBS525WDIL CONFORAMA France SA 80 Boulevard du Mandinet LOGNES 77432 Marne la Vallée Cedex 2 FRANCE...
-
Page 2: Table Des Matières
MANUEL D’UTILISATION Nous vous remercions d’avoir choisi la qualité SABA. Ce produit a été créé par notre équipe de professionnels et selon la réglementation européenne. Pour une meilleure utilisation de votre nouvel appareil, nous vous recommandons de lire attentivement ce manuel d’instructions et de le conserver pour toute référence... -
Page 3: Consignes De Sécurité
• Cet appareil est destiné à être utilisé dans des CONSIGNES DE SÉCURITÉ applications domestiques et analogues telles • Cet appareil peut être utilisé par des enfants que : âgés d'au moins 8 ans s'ils sont correctement – s e ’ i s i surveillés ou si des instructions relatives à... -
Page 4: Spécifications Techniques
SPÉCIFICATIONS TECHNIQUES sont du type recommandé par le fabricant. Marque SABA SBS525WDIL • Ne stockez pas dans cet appareil des Catégorie d’appareil substances explosives, par exemple des de réfrigération bonbonnes d’aérosols contenant un gaz domestique Classe énergétique... -
Page 5: Description De L'appareil
DESCRIPTION DE L’APPAREIL Classe climatique + SN / N / ST Plage de température (+10 °C à +38°C) ambiante Emissions acoustiques 43 dB(A) re 1 pW dans I’air Tension et fréquence 220-240V 50Hz / nominales / Puissance d'entrée Puissance lampe Module LED 12VDC -5 W Réfrigérant /... -
Page 6: Installation
INSTALLATION UTILISATION Positionnez l’appareil et laissez-le reposer deux à • Cet appareil est conçu pour fonctionner à une trois heures avant de l’allumer pour la première température ambiante comprise entre 10 °C et fois afin de pe mettre au système de se stabiliser. 38 °C. -
Page 7: Utiliser Le Panneau De Contrôle
UTILISER LE PANNEAU DE CONTRÔLE Sélectionner le mode de fonctionnement : Mise sous tension initiale Le panneau de contrôle se trouve sur la porte Lors de la première mise sous tension de gauche du réfrigérateur. Lisez les instructions l'appareil, le panneau de contrôle entre dans le suivantes : mode SMART initial après 2 secondes : -18 °C dans le compartiment congélateur et 5 °C dans le... -
Page 8: Mode Congélation Rapide
Appuyez sur la touche (C) pour régler la Remarque importante : Quand ce mode est température du réfrigérateur. À la première sélectionné, tous les aliments et toutes les pression, la température du réfrigérateur clignote. boissons doivent être retirés du réfrigérateur. Continuez d'appuyer pour régler la température Mode congélation rapide entre 2 °C et 8 °C. -
Page 9: Mode Congélation Et Réfrigération Rapides
Mode congélation et réfrigération rapides l'écran. Pour quitter le mode congélation et Ce mode est conçu pour le cas où la réfrigération rapides, appuyez sur la touche mode température des compartiments réfrigérateur jusqu'à ce que les icônes correspondantes ne et congélateur est anormalement élevée suite à une coupure secteur prolongée ou par temps de Mode réfrigération rapide canicule. - Page 10 la porte est fermée ou quand vous appuyez sur la Écrou de touche mode pendant plus 2 s. réglage Axe fixe Non aligné Remarque : si un code d'erreur du type E1/E2/ E5/E6/E7 s'affiche, contactez le service après- Clé appropriée Pied réglable vente pour dépanner l'appareil.
-
Page 11: Instructions Pour Le Distributeur D'eau
Si « OK » n’apparaît pas, la température INSTRUCTIONS POUR LE DISTRIBUTEUR D'EAU moyenne de cette zone est trop élevée. Avertissement Réglez le thermostat sur une position 1. Utilisez exclusivement de l'eau bouillie plus froide. refroidie ou de l'eau purifiée a ec ce A chaque modification du réglage du thermostat, distributeur d'eau. - Page 12 prolongée, retirez-le et nettoyez-le avant de Description du distributeur d’eau l'utiliser. 8. Si de l'eau contenue dans le distributeur est restée inutilisée pendant longtemps, il est préférable de la vider du distributeur, puis de le remplir avec de l'eau propre avant de l'utiliser normalement.
- Page 13 Remplir le réservoir avec de l’eau potable Démonter et nettoyer le distributeur d'eau Ouvrez le réservoir d'eau, ouvrez le couvercle de 1. Sortir le réservoir d'eau en le saisissant à deux remplissage et ajoutez de l'eau. mains et le tirant vers le haut dans un angle incliné...
-
Page 14: Entretien
ENTRETIEN 2. Après le nettoyage, remonter le réservoir DÉGIVRER LE CONGÉLATEUR dans le sens contraire en alignant les rainures Remarque : Faites attention quand vous effectuez des deux parties. la procédure suivante : • L'appareil est sans givre, il n'est pas donc normalement pas nécessaire de le dégivrer. -
Page 15: Bruits Générés Par Votre Appareil
Le dégivrage peut être accéléré en mettant des Inspectez régulièrement les contenus des bols d'eau chaude (mais non bouillante) dans compartiments. le congélateur et en décollant le givre avec un Stockez les aliments préparés achetés dans le racloir en plastique approprié. commerce en respectant les instructions fournies BRUITS GÉNÉRÉS PAR VOTRE APPAREIL sur leur emballage. -
Page 16: Changer Les Ampoules
Utilisez exclusivement un racloir en plastique. probable qu'elle tombe en panne, elle doit être remplacée par un technicien qualifi . Ne mettez pas d’aliments chauds dans l’appareil. Laissez-les refroidir jusqu’à la température NETTOYAGE ambiante. 1. Débranchez l'appareil. Ne mettez pas des bouteilles remplies de liquide 2. -
Page 17: Conseils D'économies D'énergie
• Ne surchargez pas l'appareil sinon cela CONSEILS D'ÉCONOMIES D’ÉNERGIE bloquera la circulation de l'air froid maintenant • N'installez pas l'appareil près de sources de l'appareil froid et des poches d'air chaud se chaleur, par exemple une table de cuisson, un formeront. -
Page 18: Le Réfrigérateur Ne Refroidit Pas
LE RÉFRIGÉRATEUR NE REFROIDIT PAS ENLÈVEMENT DES APPAREILS MÉNAGERS USAGÉS SUFFISAMMENT. La directive européenne 2012/19/EU sur Si la porte a été ouverte trop souvent ou si elle les Déchets des Equipements Electriques a été laissée ouverte un certain temps, il faut du et Electroniques (DEEE), exige que temps pour que l'appareil atteigne la température les appareils ménagers usages ne soient...