Table des Matières
Publicité
Les langues disponibles
Les langues disponibles
Liens rapides
Publicité
Table des Matières

Manuels Connexes pour Pioneer AVH-290BT


Sommaire des Matières pour Pioneer AVH-290BT
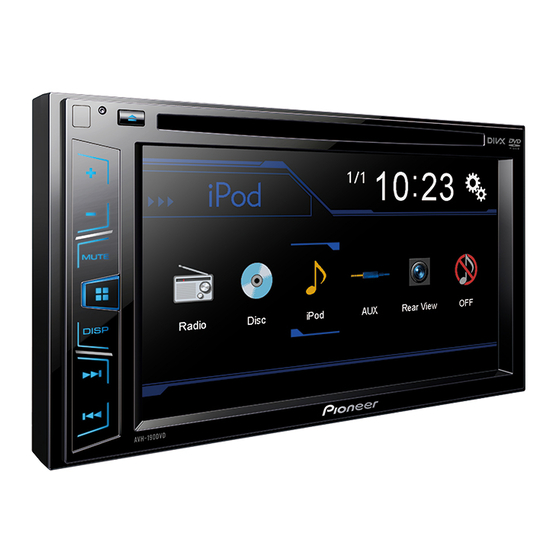
- Page 1 AVH-290BT AVH-190DVD DVD RDS AV RECEIVER AUTORADIO AV RDS LECTEUR DE DVD SINTOLETTORE DVD RDS CON AV RADIO AV RDS CON DVD DVD-RDS-AV-EMPFÄNGER DVD RDS AV-ONTVANGER Installation Manual Manuel d’installation Manuale d’installazione Manual de instalación Installationsanleitung Installatiehandleiding...
- Page 2 (fuse holder, fuse resistor or filter, etc.) may For connecting a power amp or other devices to this product, Pioneer does not recommend that you install this fail to work properly. refer to the manual for the product to be connected.
-
Page 3: Power Cord
The pin position of the ISO connector will differ depending 1 Microphone 3 m on the type of vehicle. Connect 5* and 6* when Pin 5 is an (AVH-290BT) aerial control type. In another type of vehicle, never connect 2 This product 5* and 6*. -
Page 4: Power Amp (Sold Separately)
Connection Violet: Rear right + With internal amp Violet/black: Rear right – k ISO connector In some vehicles, the ISO connector may be divided into two. Important In this case, be sure to connect to both connectors. Front speaker and Rear speaker signals are output from the The position of the handbrake switch depends on the vehicle speaker leads when this connection is in use. - Page 5 Connection For details, refer to Operation Manual. 7 Mini-jack AV cable (CD-RM10) (sold separately) Camera 8 Yellow 9 Red, white External video component and About rear view camera a To Yellow the display When you use the rear view camera, the rear view image is b To Red, white automatically switched from the video by moving the gearstick c To video output...
- Page 6 Installation Improper installation of the unit with the surface tilted more Precautions before installation than these tolerances increases the potential for errors in the vehicle’s location display, and might otherwise cause CAUTION reduced display performance. Never install this product in places where, or in a manner that: ...
-
Page 7: Installation Using The Screw Holes On The Side Of This Product
Installation 1 Microphone lead 2 Groove 2 Attach the microphone clip to the sun visor. 1 Trim ring 2 Groove Attach the trim ring with the side with a groove facing 1 Factory radio-mounting bracket downward. 2 If the pawl interferes with installation, you may bend it down out of the way. -
Page 8: Adjusting The Microphone Angle
Installation 1 Double-sided tape 2 Clamps Use separately sold clamps to secure the lead where neces- sary inside the vehicle. 3 Keeping it away from the steering wheel. Adjusting the microphone angle... -
Page 9: Connexion
Ce produit ne peut pas être installé dans un véhicule qui n’interfère pas avec les pièces en mouvement du ne possède pas de position ACC (accessoire) sur le com- Pioneer vous recommande de ne pas installer ce produit véhicule. Fixez les câbles de manière à les empêcher mutateur d’allumage. -
Page 10: Cordon D'alimentation
Utilisé pour détecter le statut MARCHE/ARRÊT du frein à main. Ce fil doit être raccordé au côté alimentation élec- 1 Microphone 3 m trique du contacteur de frein à main. (AVH-290BT) 2 Ce produit f Méthode de raccordement 3 Prise antenne 1 Fixez le fil. -
Page 11: Amplificateur De Puissance (Vendu Séparément)
Connexion Vert/noir : Arrière gauche – Pour en savoir plus sur la connexion, le fonctionnement et Violet : Arrière droit + la compatibilité d’un iPhone, reportez-vous au Manuel de Violet/noir : Arrière droit – fonctionnement. k Connecteur ISO Dans certains véhicules, le connecteur ISO peut être divisé iPod / iPhone avec connecteur en deux. -
Page 12: Élément Vidéo Externe Et Affichage
Connexion Élément vidéo externe et affichage 1 Port USB 1 Caméra de rétrovisée (ND-BC8) (vendue séparément) 2 Entrée AUX 2 Vers sortie vidéo 3 Câble USB 1,5 m 3 Câble RCA (fourni avec ND-BC8) 4 Câble d’interface USB pour iPod / iPhone (CD-IU201V) 4 Ce produit (vendu séparément) 5 Marron (R.C IN) -
Page 13: Précautions À Prendre Avant L'installation
Connexion Installation 9 Rouge, blanc Précautions à prendre avant Remarques sur l’installation a Vers jaune l’installation b Vers rouge, blanc N’installez pas ce produit dans un endroit soumis à des c Vers sortie vidéo températures élevées ou à l’humidité. Par exemple : d Vers sorties audio ... -
Page 14: Installation Avec Le Support
Installation 1 Anneau de garniture 1 Tableau de bord 2 Insérez les clés de démontage fournies dans les 4 Attachez l’anneau de garniture. deux côtés de l’appareil jusqu’au déclic. 3 Tirez l’appareil hors du support. 1 Support de montage radio d’usine 2 Si le cliquet interfère avec l’installation, vous pouvez l’incli- ner pour le sortir du passage. -
Page 15: Installation Sur La Colonne De Direction
Installation 2 Fente 2 Fixez l’agrafe pour micro au pare-soleil. 1 Bande adhésive à double face 2 Serre-fils Utilisez des serre-fils vendus séparément pour fixer le fil conducteur aux endroits nécessaires dans le véhicule. 1 Agrafe pour micro 2 Serre-fils 3 ... - Page 16 ACC (acces- a temperature elevate. Se l’isolamento si scalda, il filo Pioneer, dotato di addestramento speciale ed esperienza sori). può danneggiarsi e causare cortocircuiti o malfunzio- nell’elettronica mobile, si occupi del montaggio e dell’in-...
-
Page 17: Cavo Di Alimentazione
Usato per rilevare lo stato ON/OFF del freno di staziona- mento. Questo cavo deve essere collegato al lato alimenta- 1 Microfono da 3 m zione dell’interruttore del freno di stazionamento. (AVH-290BT) 2 Questo prodotto f Metodo di collegamento 3 Jack antenna 1 Fissare il cavo. - Page 18 Collegamenti Verde/nero: Posteriore sinistro – iPod / iPhone con connettore Viola: Posteriore destro + Lightning Viola/nero: Posteriore destro – k Connettore ISO In alcuni veicoli, il connettore USO potrebbe essere diviso in due. In tal caso, assicurarsi di collegare entrambi i Collegamento tramite la porta USB connettori.
- Page 19 Collegamenti Componente video esterno e display 1 Porta USB 1 Telecamera di visione posteriore (ND-BC8) (venduta 2 Ingresso AUX separatamente) 3 Cavo USB da 1,5 m 2 All’uscita video 4 Cavo di interfaccia USB per iPod / iPhone (CD-IU201V) 3 Cavo RCA (in dotazione con ND-BC8) (venduto separatamente) 4 Questo prodotto 5 iPhone con connettore a 30 pin...
-
Page 20: Precauzioni Prima Dell'installazione
Collegamenti Installazione 8 Giallo In luoghi dove batte direttamente il sole, come sul cruscotto. Precauzioni prima 9 Rosso, bianco Posizioni che possono essere esposte alla pioggia, come dell’installazione a A giallo vicino alla portiera o sul pavimento del veicolo. b A rosso, bianco ... -
Page 21: Installazione Con Il Supporto
Installazione 1 Cornice di finitura 1 Cruscotto 2 Inserire le chiavi di estrazione fornite in 4 Fissare la cornice di finitura. entrambi i lati dell’unità fino a quando si saranno fissate con un clic. 3 Estrarre l’unità dal supporto. 1 Staffa di montaggio radio predisposta in fabbrica 2 Se il nottolino interferisce con l’installazione, è... -
Page 22: Montaggio Sul Parasole
Installazione Montaggio sul parasole Installazione sulla colonna di Regolazione dell’angolazione sterzo del microfono 1 Adattare il cavo del microfono nella fessura. 1 Scollegare la base del microfono dal mor- setto facendola scorrere mentre si preme la linguetta. 1 Cavo del microfono 2 Scanalatura 2 Fissare il morsetto del microfono al parasole. 1 Linguetta 2 Base del microfono 2 Montare il microfono sulla colonna di sterzo. - Page 23 No enrute cables que vayan a estar sometidos a altas ADVERTENCIA temperaturas. Si se calienta el aislamiento, los cables Pioneer aconseja que no realice usted mismo la insta- pueden resultar dañados y, como consecuencia, lación del producto. Este producto se ha diseñado para puede producirse un cortocircuito o una avería y el...
-
Page 24: Cable De Alimentación
Conéctelo al terminal de control de relé de la antena auto- mática (máx. 300 mA 12 V CC). 1 Micrófono de 3 m c Azul/blanco (AVH-290BT) Conéctelo al terminal de control del amplificador de poten- 2 Este producto cia del sistema (máx. 300 mA 12 V cc). -
Page 25: Amplificador De Potencia (Se Vende Por Separado)
Conexión Verde/negro: Trasero izquierdo – iPod / iPhone con conector Violeta: Trasero derecho + Lightning Violeta/negro: Trasero derecho – k Conector ISO En algunos vehículos, el conector ISO puede dividirse en dos. En este caso, asegúrese de conectarlo a ambos Conexión mediante el puerto USB conectores. -
Page 26: Componente De Vídeo Externo Y Pantalla
Conexión Componente de vídeo externo y pantalla 1 Puerto USB 1 Cámara de retrovisor (ND-BC8) (se vende por separado) 2 Entrada AUX 2 A la salida de vídeo 3 Cable USB de 1,5 m 3 Cable RCA (suministrado con ND-BC8) 4 Cable de interfaz USB para iPod / iPhone (CD-IU201V) (se 4 Este producto vende por separado) -
Page 27: Antes De La Instalación
Conexión Instalación 9 Rojo, blanco Precauciones antes de la Notas acerca de la instalación a Al amarillo instalación b Al rojo, blanco No instale este producto en lugares en los que pueda estar c A la salida de vídeo expuesto a altas temperaturas o a humedad, como por d A salidas de audio ejemplo:... -
Page 28: Instalación Con El Soporte
Instalación Extienda la parte superior y la parte inferior del anillo embellece- dor hacia fuera para extraer el anillo embellecedor. 1 Tablero de instrumentos 4 Coloque el anillo embellecedor. 1 Anillo embellecedor 2 Introduzca las llaves de extracción suminis- tradas en ambos lados de la unidad hasta que queden encajadas en su sitio. -
Page 29: Instalación En La Columna De Dirección
Instalación 1 Cable del micrófono 1 Lengüeta 2 Ranura 2 Base del micrófono 2 Fije el clip del micrófono al parasol. 2 Monte el micrófono en la columna de dirección. 1 Cinta de doble cara 1 Clip del micrófono 2 Abrazaderas 2 Abrazaderas Utilice abrazaderas (se venden por separado) para fijar el Utilice abrazaderas (se venden por separado) para fijar el... - Page 30 Lenkrads, des Schalthebels, der Hand- ker fern vom der Masse dieses Produktes erden. Die bremse, der Sitzführungsschienen, der Türen und der Pioneer empfiehlt nicht, dieses Produkt eigenhändig Verbindung von Massen kann einen Brand und/oder Bedienelemente des Fahrzeugs, behindern oder sich zu installieren.
-
Page 31: Anmerkung Zum Blau/Weißen Kabel
Entnehmen Sie Einzelheiten zum Anschluss eines Leistungsverstärkers oder anderen Geräten an dieses Produkt dessen Bedienungsanleitung. 1 Mikrofon 3 m Anmerkung zum blau/weißen (AVH-290BT) 2 Dieses Produkt Kabel 3 Antennenanschluss 4 Kabelgebundener Fernsteuerungseingang Wenn der Zündschalter eingeschaltet ist (ACC... - Page 32 Verbindung 1 Zur Stromversorgung Grün: Hinten links + 2 Je nach Fahrzeugart kann die Funktion von 2* und 4* abwei- Grün/schwarz: Hinten links – chen. In diesem Fall müssen Sie 1* mit 4* und 3* mit 2* Violett: Hinten rechts + verbinden.
- Page 33 Verbindung iPod / iPhone mit Lightning Connector Anschluss über den USB-Anschluss Der Anschluss erfolgt über ein USB-Schnittstellenkabel für iPod / iPhone (CD-IU52) (getrennt erhältlich). 1 USB-Port 1 Heckkamera (ND-BC8) (separat erhältlich) 2 AUX-Eingang 2 An Videoausgang 3 USB-Kabel 1,5 m 3 Cinch-Kabel (mitgeliefert mit ND-BC8) 4 USB-Schnittstellenkabel für iPod / iPhone (CD-IU201V) 4 Dieses Produkt...
-
Page 34: Vor Der Installation Zu Beachten
Verbindung Einbau 9 Rot, Weiß Externe Videokomponente und Vor der Installation zu a An Gelb Display beachten b An Rot, Weiß c An Videoausgang d An Audioausgänge VORSICHT e Externe Videokomponente (separat erhältlich) Die geeignete Einstellung ist zur Nutzung der externen Dieses Produkt niemals so einbauen, dass: Videokomponente erforderlich. -
Page 35: Einbau Mit Der Halterung
Einbau Ziehen Sie die obere und die untere Seite des Abdeckrings nach Hinweise zur Befestigung außen, um den Abdeckring zu entfernen. Bauen Sie dieses Produkt nicht an einem Ort ein, wo eine hohe Temperatur oder Feuchtigkeit herrschen kann, wie z. ... -
Page 36: Einbau Des Mikrofons
Einbau 1 Mikrofonkabel 1 Zunge 2 Nut 2 Mikrofonsockel 2 Befestigen Sie den Mikrofon-Clip an der 2 Befestigen Sie das Mikrofon auf der Lenksäule. Sonnenblende. 1 Vorinstallierter Radio-Montagebügel 2 Falls die Sperrklinke bei der Installation stört, können Sie sie nach unten biegen. 3 Armaturenbrett oder Konsole 4 Flachrundschraube oder Senkschraube Verwenden Sie unbedingt die mit diesem Produkt mitgelie-... -
Page 37: Voorkomen Van Beschadigingen
WAARSCHUWING beschadigd raken, waardoor er kortsluiting of een sto- ring ontstaat en er mogelijk permanente beschadiging Pioneer raadt u af het product zelf in te bouwen. Dit pro- aan dit product optreedt. duct mag alleen door een vakman worden ingebouwd. - Page 38 Aansluiten op de bedieningsaansluiting van het relais voor een automatische antenne (max. 300 mA 12 V DC). c Blauw/wit 1 Microfoon 3 m Aansluiten op de systeembedieningsaansluiting van de (AVH-290BT) eindversterker (max. 300 mA 12 V DC). 2 Dit product d Violet/wit 3 Antenne-aansluiting...
- Page 39 Verbinding Groen/zwart: Achter links – iPod / iPhone met Violet: Achter rechts + Lightning-connector Violet/zwart: Achter rechts – k ISO-aansluiting In sommige voertuigen kan de ISO-aansluiting in twee gesplitst zijn. Zorg in dat geval dat u beide connectors Aansluiten via de USB-poort aansluit.
- Page 40 Verbinding Externe videocomponent en het display 1 USB-poort 1 Achteruitkijkcamera (ND-BC8) (los verkrijgbaar) 2 AUX-ingang 2 Naar video-uitgang 3 USB-kabel 1,5 m 3 RCA-kabel (meegeleverd met ND-BC8) 4 USB-interfacekabel voor de iPod / iPhone (CD-IU201V) (los 4 Dit product verkrijgbaar) 5 Bruin (R.C IN) 5 iPhone met 30-pens connector 6 Voeding...
-
Page 41: Voorzorgen Voor Installatie
Verbinding Inbouwen 9 Rood, wit Voorzorgen voor installatie Opmerkingen betreffende de a Naar geel installatie b Naar rood, wit BELANGRIJK c Naar video-uitgang d Naar audio-uitgangen Installeer dit product nooit op plaatsen waar, of op een Installeer dit product niet op plaatsen die kunnen worden e Externe videocomponent (los verkrijgbaar) blootgesteld aan hoge temperaturen of vocht, zoals: manier waardoor het:... -
Page 42: De Microfoon Installeren
Inbouwen 3 Installeer dit product in de houder. Voor u dit product inbouwt 1 Verwijder de afwerkingsrand. Buig de bovenkant en de onderkant van de afwerkingsrand naar buiten om deze te verwijderen. 1 Dashboard 4 Bevestig de afwerkingsrand. 1 Afwerkingsrand 2 Steek de bijgeleverde uittreksleutels in beide zijden van het apparaat totdat deze op de plaats vastklikken. -
Page 43: Installatie Op Stuurkolom
Inbouwen 1 Microfoonkabel 1 Lipje 2 Groef 2 Microfoonvoet 2 Bevestig de microfoonklem aan de zonneklep. 2 Bevestig de microfoon op de stuurkolom. 1 Dubbelzijdig plakband 1 Microfoonklem 2 Klemmen 2 Klemmen Gebruik los verkrijgbare klemmen om de draad waar nodig Gebruik los verkrijgbare klemmen om de draad waar nodig binnenin de auto te bevestigen. - Page 44 © 2016 PIONEER CORPORATION. All rights reserved. < QRD3468-A > EU...