OVE MELBA 60 Mode D'emploi
Table des Matières
Les langues disponibles
Les langues disponibles
Liens rapides
Measures: millimeter [inch]
2000
[78 3/4]
Purchase date: _________________________
Before returning to your retailer, call our customer service department at
2017-04-28
An installation video guide can be found on our Youtube channel.
Questions, problems, missing parts?
1-866-839-2888, 9 a.m. - 5 p.m., EST, Monday - Friday
2000
[78 3/4]
CSA Markings
Product Tracking Reference: ________________________
1
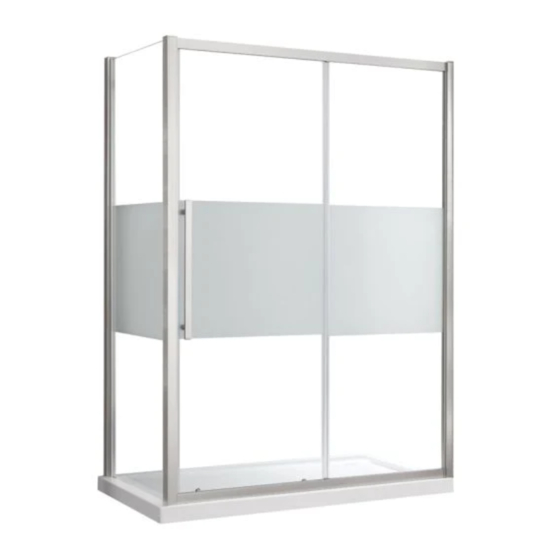
MELBA 60
ITEM #0665836
MODEL #MELBA-GP60
Opening
620
[24 7/16]
2800 Etienne Lenoir, Laval
Quebec H7R 0A3 Canada
Chapitres
Table des Matières

Manuels Connexes pour OVE MELBA 60


Sommaire des Matières pour OVE MELBA 60
- Page 17 MELBA 60 ARTICLE #0665836 MODÈLE #MELBA-GP60 Mesures: millimètres [pouces] Ouverture [24 7/16] 2000 2000 [78 3/4] [78 3/4] Marques CSA Un guide d’installation video est disponible sur notre chaîne Youtube. Date de l’achat: _______________________ Numéro de référence du produit: ______________________ Questions, problèmes ou pièces manquantes?
-
Page 18: Information Sur La Sécurité
INFORMATION SUR LA SÉCURITÉ AVERTISSEMENT Veuillez lire attentivement les importantes consignes de sécurité suivantes avant la manutention et l’installation de cette douche. La manipulation de ce produit présente un risque de blessure grave. Pour minimiser ces risques, veuillez prendre note de ce qui suit: • Toujours porter des lunettes et des gants de sécurité... - Page 19 TABLE DES MATIÈRES CONTENU DE L’EMBALLAGE ......................... 21 QUINCAILLERIE FOURNIE ..........................22 OUTILS REQUIS ............................... 22 CETTE DOUCHE EST RÉVERSIBLE ....................... 23 MESURES MUR À MUR............................ 23 GUIDE D’INSTALLATION DE LA BASE (OPTIONNEL) ................... 24 INSTALLATION DU CADRE DE LA DOUCHE....................25 INSTALLATION DES RAILS MURAUX ......................
-
Page 20: Contenu De L'emballage
CONTENU DE L’EMBALLAGE... - Page 21 CONTENU DE L’EMBALLAGE DESCRIPTION CODE QUANTITÉ # DE PIÈCE Panneau de verre fixe 99SG10047-WM Panneau de la porte 99SGD0032-WM Rail d’aluminium 99STR3601-WM Joint d’aluminium 99STR3602-WM Rail magnétique 99STR3603-WM Poignée de la porte 99SHA3601-WM Pince 99SGC3601-WM Bande de caoutchouc 99SRU3601 Rail magnétique 99SRU3602 Barre coulissante 99SGS0022-WM Capuchon 99SDS3601-WM...
-
Page 22: Quincaillerie Fournie
QUINCAILLERIE FOURNIE Ancrage mural ø8x30mm ST5x30mm ST4x10mm ST4x30mm Capuchon 10+2 OUTILS REQUIS Perceuse avec foret à ceramique Crayon Tournevis Niveau ø3mm (1/8po) & 8mm (5/16po) Ruban à mesurer Silicone Maillet en caoutchouc Exacto Clé à Rochet Lunettes de sécurité Échelle 5mm Bit socket... -
Page 23: Cette Douche Est Réversible
CETTE DOUCHE EST RÉVERSIBLE • Utilisez ces instructions pour une ouverture de la porte de droite à gauche (illustration B). • Pour une installation de gauche à droite (illustration A), suivez ces mêmes instructions mais permutez l’emplacement des panneaux: effet miroir. Installez le pommeau de douche du côté... -
Page 24: Guide D'installation De La Base (Optionnel)
GUIDE D’INSTALLATION DE LA BASE (OPTIONNEL) Montant mural Mur de tuiles Base de douche Placoplâtre Ciment Silicone Plancher Base de douche Cale en bois Bride Montant mural Placoplâtre Silicone... -
Page 25: Installation Du Cadre De La Douche
INSTALLATION DU CADRE DE LA DOUCHE 1-3. Placez les barres coulissantes (L) au panneau fixe (B) et au rail magnétique (G). 4-5. Installez la barre coulissante (L) à l’aide des vis (DD). Note : Pivotez le panneau fixe une fois installé à la droite. Placez la vitre texturée à l’extérieur. Important! Utilisez une échelle pour faciliter l’installation. -
Page 26: Installation Des Rails Muraux
INSTALLATION DES RAILS MURAUX 1-2. Placez les deux rails d’aluminium (E) sur le cadre de la douche. 3. Placez la structure de la douche sur la base. 4-5. Marquer la position du rail (E). 6. Retirez le cadre de la douche. - Page 27 INSTALLATION DES RAILS MURAUX 1. Placez les rails muraux (E) à la position respective et marquez l’emplacement des trous. 2. Retirez les rails muraux et percez des trous guides avec un foret de 8mm (5/6po). 3-4 Insérez les ancrages muraux (AA) au mur. Replacez et sécurisez les rails (E) avec les vis (BB). Ne pas serrer trop fermement.
- Page 28 INSTALLATION DES RAILS MURAUX 1. Insérez les attaches (I) dans les rails (E). 2-3. Assurez-vous que les pinces (I) sont bien positionnées et marquez l’emplacement des trous. 4-5. Percez des trous avec un foret de 3mm (1/8po) et installez la pince (I) en utilisant les vis (CC). ø3 mm 1/8po...
-
Page 29: Installation De La Porte
INSTALLATION DE LA PORTE 1-2. Placez la porte (C) sur la barre coulissante (L). 3. Placez la bande magnétique (K) à la porte (C). 4-6. Ajustez l’angle de la porte (C) afin de s’assurer l’étanchéité entre la porte (C) et le rail magnétique (G). Note : Lorsque vous installez la porte du côté gauche, veuillez enlever avant les roulettes supérieures et inférieures (O&P). - Page 30 INSTALLATION DE LA PORTE 1-2. Placer les bandes d’étanchéité (J) sur la porte (C) et le panneau de retour (B). 3-4. Placez la latte verticale (F) au panneau fixe (B) et au rail magnétique (G). 5-6. Installez les capuchons décoratifs (M&N&Q) sur le rail.
-
Page 31: Installation De La Poignée Et Scellage
INSTALLATION DE LA POIGNÉE ET SCELLAGE 1. Installez la poignée de porte (H). 2. Assurez-vous que la porte se ferme hermétiquement et s’ouvre doucement, et que le châssis et la barre et la barre de support soient étroitement fixés aux panneaux de verre. Appliquez un scellant étanche à base de silicone sur le contour extérieur de toutes les composantes de la douche, et verticalement entre le mur, le châssis et tous les panneaux de verre). -
Page 32: Garantie Limitée Du Produit
Garantie limitée: OVE garantit à l’acheteur original que dans un délai raisonnable après réception d’un avis de sa part, OVE réparera ou remplacera le produit, ou toute partie ou composante du produit visé, distribué par OVE, dont la défectuosité de matériel ou de fabrication est établie à la satisfaction d’OVE, et qui est survenue pendant l’utilisation normale et pendant la période couverte par la garantie.