Publicité
Les langues disponibles
Les langues disponibles
Liens rapides
Installation and
Installation and
Maintenance
Maintenance
Instructions
Instructions
EQUIP
SINGLE HOLE
DECK-MOUNT
FAUCETS AND
PRE-RINSE UNITS
Limited One Year Warranty
Equip warrants the original purchaser (other than
for purposes of resale) that such product is free from
defects in material and workmanship for a period
of one (1) year from the date of purchase. During
this warranty period, if the product is found to be
defective, equip shall, at its option, repair and/or
replace it. To obtain warranty service, products
must be returned to:
Equip Foodservice Accessories
Attn: Warranty Repair Department
P .O. Box 1088, 2 Saddleback Cove
Travelers Rest, SC 29690
S h i p p i n g, f r e i g h t , i n s u r a n c e , a n d o t h e r
transportation charges of the product to equip and
the return of repaired or replaced product to the
purchaser are the responsibility of the purchaser.
Repair and/or replacement shall be made within
a reasonable time after receipt by Equip of the
returned product. This warranty does not cover
items which have received secondary finishing or
have been altered or modified after purchase, or
for defects caused by physical abuse to or misuse of
the product, or shipment of the products.
P/N: 098-013850-45 Rev.3
Date: 01-15-16
Drawn: TEH
Checked: DMH 02-09-16
Approved: JHB 02-23-16
Any express warranty not provided herein, and
any remedy for Breach of Contract which might
arise, is hereby excluded and disclaimed. Any
implied warranties of merchantability or fitness
for a particular purpose are limited to one year in
duration. Under no circumstances shall Equip be
liable for loss of use or any special consequential
costs, expenses or damages.
Some states do not allow limitations on how
long an implied warranty lasts or the exclusion
or limitation of incidental or consequential
damages, so the above limitations or exclusions
may not apply to you. Specific rights under this
warranty and other rights vary from state to state.
Attention California Residents:
"WARNING: This product contains chemicals
known to the State of California to cause cancer,
and birth defects or other reproductive harm."
Español:
Instrucciones de instalación y mantenimiento
Français:
Instructions pour l'installation et la maintenance
Deutsch:
Installations- und Wartungsanleitungen
中文:
安装与维护说明
Publicité

Manuels Connexes pour T&S equip Brass 5F-1SLX10


Sommaire des Matières pour T&S equip Brass 5F-1SLX10
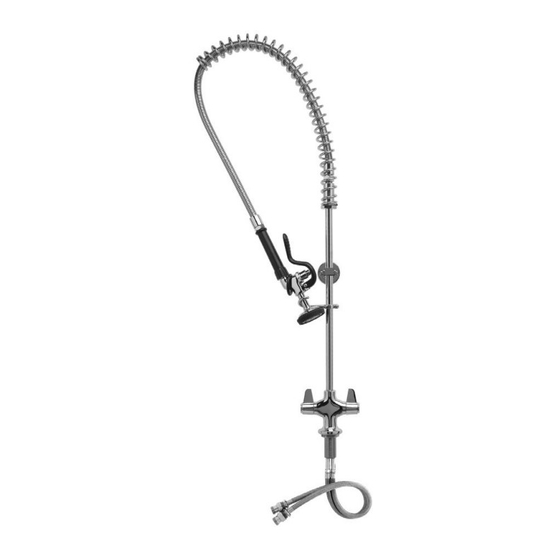
- Page 1 Installation and Installation and Maintenance Maintenance Instructions Instructions EQUIP SINGLE HOLE DECK-MOUNT FAUCETS AND PRE-RINSE UNITS Limited One Year Warranty Equip warrants the original purchaser (other than Any express warranty not provided herein, and for purposes of resale) that such product is free from any remedy for Breach of Contract which might defects in material and workmanship for a period arise, is hereby excluded and disclaimed.
- Page 2 Instructions STEP 1 STEP 3 STEP 2 deck or sink STEP 7 STEP 8 STEP 11 STEP 11...
- Page 3 Instructions Note: If unit is equipped with a rigid or swivel spout/gooseneck, install spout/ gooseneck fi rst. Rigid Gooseneck Installation: 1. Apply Tefl on tape, Loctite, or pipe joint compound to threads of gooseneck. Thread gooseneck into outlet hole of body until joint is secure and gooseneck faces desired direction.
- Page 4 Instrucciones PASO 1 PASO 3 PASO 2 Cubierta o lavabo PASO 7 PASO 8 PASO 11 PASO 11...
- Page 5 Instrucciones Nota: Si la unidad está equipada con un surtidor/cuello de cisne rígido o giratorio, instale primero el surtidor/cuello de cisne. Instalación del cuello de cisne rígido: 1. Coloque cinta tefl ón, Loctite o compuesto para juntas de tubos en las roscas del cuello de cisne.
- Page 6 Instructions ÉTAPE 1 ÉTAPE 3 ÉTAPE 2 plateau ou évier ÉTAPE 7 ÉTAPE 8 ÉTAPE 11 ÉTAPE 11...
- Page 7 Instructions Remarque : si le dispositif est équipé d’un bec / col de cygne rigide ou pivotant, commencer par installer ledit bec / col de cygne. Installation du col de cygne rigide : 1. Appliquer du ruban de téfl on, du Loctite ou de la pâte à joint sur les fi letages du col de cygne.
- Page 8 Anleitung SCHRITT 1 SCHRITT 3 SCHRITT 2 Arbeitsplatte oder Spüle SCHRITT 7 SCHRITT 8 SCHRITT 11 SCHRITT 11...
- Page 9 Anleitung Hinweis: Falls die Einheit mit einem starren oder schwenkbaren Auslauf/ Schwanenhals ausgestattet ist, zunächst den Auslauf/Schwanenhals montieren. Installation des starren Schwanenhalses: 1. Tefl onband, Loctite oder einen Fugendichtstoff für Rohrverbindungen an dem Gewinde des Schwanenhalses anbringen. Den Schwanenhals in die Auslassbohrung des Gehäuses einschrauben, bis eine sichere Verbindung entsteht und der Schwanenhals in die gewünschte Richtung zeigt.
- Page 10 安装说明 第1步 第3步 第2步 台面或 水槽 第7步 第8步 第11步 第11步...
- Page 11 安装说明 注意:如果部件配有固定或旋转式水嘴/鹅颈管,请先安装水嘴/鹅颈管。 固定式鹅颈管安装: 1. 在鹅颈管的螺纹处缠上特氟龙胶带(生料带),或涂上乐泰胶水/管道胶 合剂。把鹅颈管拧紧在本体上,并将鹅颈管调整至所需方位。 摇摆水嘴/旋转式鹅颈管安装: 注意:在出厂装运前,龙头本体旋腔内壁均已涂硅油,无需再涂其他润滑脂。 2. 取下本体出水口上的塑料盖。 3. 插入水嘴/鹅颈管。 4. 用扳手拧紧锁紧螺帽。 龙头本体安装: 5. 冲掉水管内的杂质,然后关闭供水开关。 6. 在安装水龙头的台面或水槽上钻一个孔,直径如下: • 单温龙头:Ø 1” (25mm)至1-1/4”(32mm) • 冷热混水龙头: Ø 1-1/4” (32mm)至1-1/2”(38mm) 7. 把垫圈和螺母暂从龙头底部直柄上拿下来,在本体法兰边缘涂上油灰, 将直柄穿过台面或水槽上的孔,用螺母和垫圈固定。 8. 对于冷热混水龙头: a. 将弹性不锈钢软管插入龙头底部直柄的螺纹孔内,拧紧。 b. 如配备了进水管止回阀,请把软管另一端上的螺帽和金属环拿掉,将 软管的外螺纹端旋紧在止回阀的内螺纹端。 c. 连接软管至供水开关。 9.
-
Page 12: Part Numbers
Part Numbers Equip Faucet and Pre-Rinse Unit Parts List Ceramic Cartridge, Hot 013787-45 Ceramic Cartridge, Cold 013788-45 Handle Screw, Plain (10) 013849-45 Lever Handle Kit (includes color coded screws) 5-HDL-L 3/4-27 UN Full Flow Laminar Outlet 014250-45 3” Rigid Gooseneck w/ Laminar Outlet 5SP-03 Nut, Swivel 013839-25...