Publicité

Les langues disponibles
  • FR

Les langues disponibles

  • FRANÇAIS, page 28

Liens rapides

User Manual
Manuel d'utilisation - Benutzerhandbuch - Manual
de usuario - Manuale utente - Instrukcja obsługi -
Használati utasítás

Publicité

Table des Matières
loading

Sommaire des Matières pour Archos VR

  • Page 1 User Manual Manuel d’utilisation - Benutzerhandbuch - Manual de usuario - Manuale utente - Instrukcja obsługi - Használati utasítás...
  • Page 2 Safety Notice for Battery Please read the user handbook carefully and then keep it in a safe place for future reference and maintenance. - Only use the provided charger. - When you install the battery, you must follow the electrode instructions.
  • Page 3 Charging Instructions for the Battery 1. Connect the drone battery with USB cable first then choose one of the methods as on the picture below to connect with USB plug. 2. The red USB indicator light is on when charging and the light turns green when fully charged( The switch must be powered off when charging).
  • Page 4 Check List Before Your Flight 1. Make sure the drone’s battery and transmitter’s battery are fully charged. 2. Make sure the left lever of the transmitter is in the middle position. 3. Please strictly follow the instructions to turn on and turn off before operation.
  • Page 5 Instructions for Drone and Transmitter Drone Propeller A Propeller B Front Micro-SD card Drone Cover slot Housing Left Right ON/OFF Propeller B Propeller A Rear Camera Front LED Front LED Rear LED Rear LED Battery holder...
  • Page 6 Transmitter Phone holder Power Switch Left lever Right lever (Throttle / Rudder) (Forward/Backward) Take Off/Landing/ Heading Hold Mode Emergency Stop Button High / Medium/Low Trimmer mode button Speed button Battery compartment...
  • Page 7 Left lever Move the lever forward / backward / left / right to fly the drone up / down / turn left / turn right. Right lever Move the lever forward / backward / left / right to fly the drone forward / backward / left / right. Power Switch Push up the power switch to turn on the transmitter, and pull...
  • Page 8 Unfold the drone Pull out the arm bracket as per the below arrow shows (picture 1) , it will make a click sound, then it means fully opened(picture 2). On the contrary, then it’s folded. Pull out the arm bracket as per the below arrow shows (picture 3) , it will make a click sound, then it means fully opened(picture 4).
  • Page 9 VR Glasses Headband Upper phone holder Lens Lower phone holder Phone holder slot PU Foam Left lens Right lens...
  • Page 10: Installing The Batteries

    Installing the batteries: Open the battery cover on the back side of the transmitter and put 4 alkaline batteries (AAA, not included) into the box in accordance with electrode instructions, as picture shown. 4X1.5V Alkaline Batteries Battery cover Notice: 1. Make sure the electrodes match. 2.
  • Page 11 Picture 3 Picture 2 Picture 1 2. Install the Lipo battery into the drone, power on the drone. (Press for about 2 seconds). Picture 4 3. Put the drone on the flat surface, the drone body lights turn from flashing to solid bright, which indicates successful frequency pairing.
  • Page 12 Checklist before Flight 1. The camera is in front of the drone. Keep the drone front away from you. 2. Power on the drone and check the direction of the rotating propellers. The left front and right rear A propellers rotating clockwise while the right front and left rear B propellers rotating counterclockwise.
  • Page 13: Calibration Instructions

    Calibration Instructions Please follow below steps to calibrate the drone if the drone becomes imbalanced after crashing during the flight, and can not be adjusted by trimmer button and causes flight difficulties. 1. Turn off the drone, then turn off the transmitter switch.
  • Page 14 1. Turn on the drone and put it on a flat surface in a horizontal position. The drone’s body lights change from flashing to solid bright, which indicates successful frequency pairing. 2. Do not move the left lever before successful calibration. Push the right lever as Picture 8 shown and then release.
  • Page 15 Push the lever up, the drone takes off Pull the lever down, the Left Stick drone descends. Turn the lever to the left, the drone turns to left. Turn the lever to the right, the drone turns to right.
  • Page 16 Push the lever up, the drone goes forward. Right Stick Pull the lever down, the drone goes backward. Turn the lever to the left, the drone turns to left Turn the lever to the right, the drone turns to right...
  • Page 17 Forward and backward trimmer During take off, if the drone tilts forward, press down the left lever in the center, and push the right lever backwards. Otherwise push forwards. Left and right turning trimmer During take off, if the drone head rotates to left, then press down the left lever in the center and push left lever to right.
  • Page 18 Functions Introduction Two Take Off Methods 1. Method 1 (Take off) : After successful frequency pairing, move the Left and Right levers at the same time as shown Picture 5 (inward 45 degree) to start the motors. Push up the Left lever to fly the drone to a certain altitude and then release the lever.
  • Page 19 Emergency Stop: When the drone in emergency situation and going to hit people or an obstacle etc., press the Take Off / Landing / Emergency Stop Button immediately and hold it for more than 1s. The propellers will stop immediately. Tip: Do not use the emergency stop function unless in emergency situation.
  • Page 20 High / Medium/Low Speed Mode Switch Press down this button,then it will sound “ di”, it means low speed mode “L”; when it sounds “ di.di”,means medium speed “M”; and sounds “ di.di.di” means high speed mode “H”. Low Speed Mode(Mode 1) 1.
  • Page 21: Low Battery Alarm

    Prerequisite: Position the drone in such a way that its front is your front (see Picture 1). Tip: Do not change the orientation of the transmitter (see Picture 2) after entering heading hold mode. Picture 2 Picture 1 To turn on Heading Hold Mode, press Heading Hold Mode button and the drone LED lights flash, which indicates the drone enters heading hold mode.
  • Page 22 Didi..didi.. didi... to warn the user to fly back immediately. Or the drone may lose control and fly away. Download the ARCHOS application to control the drone The APP is suitable for mobile phone with iOS or Android...
  • Page 23 Make sure the VR center line overlapping Adjust the headband: Take out the headband and put into VR, adjust the tightness of the three headbands to the most comfortable position.
  • Page 24 For short-sighted user, please move the lens by left or right until proper pupil distance. Shade cloth: When the light is too strong to view the video clearly, hitched the VR glasses by the shade cloth to protect the screen from strong lights.
  • Page 25 N° Problem Problem cause Solution 1. Low battery 1.Replace the transmitter’s 2. The battery transmitter battery. light is off positive pole and 2.Install the battery negative pole are in in accordance with reverse order. the user manual. 3. Poor contact. 3.Clean the dirt 4.
  • Page 26 The drone 1. The propeller is 1. Replace propeller. could not deformed seriously. 2. Replace the motor hover and 2. The motor holder holder. tilts to is deformed. 3. Put the drone on one side. 3. The gyro did not the flat ground for reset after violent about 10 s or restart...
  • Page 27 Manuel d’utilisation...
  • Page 28: Mesures De Sécurité Pour La Batterie Du Drône

    Mesures de sécurité pour la batterie du drône Veuillez lire le manuel d’utilisateur attentivement et gardez-le à portée de main pour toute réutilisation future. - N’utilisez que le chargeur fourni. - Lors de l’installation de la batterie, respectez bien la polarité. Une mauvaise installation de la batterue peut causer un court-circuit.
  • Page 29: Chargement De La Batterie

    Chargement de la batterie 1. Connectez la batterie du drône avec le câble USB, puis choisissez l’une des méthodes ci-dessous pour brancher la prise USB. 2. Le témoin de chargement est rouge lorsque la batterie est en charge. Il devient vert lorsque la batterie est chargée.
  • Page 30: Vérifications À Faire Avant Le Vol

    Vérifications à faire avant le vol Assurez-vous que la batterie du drone et la batterie de la télécommande sont bien chargées. Assurez-vous que le Joystick gauche de l’émetteur est en position médiane. Suivez strictement les instructions fournies pour allumer et éteindre. Allumez d’abord la télécommande, puis allumez le drone;...
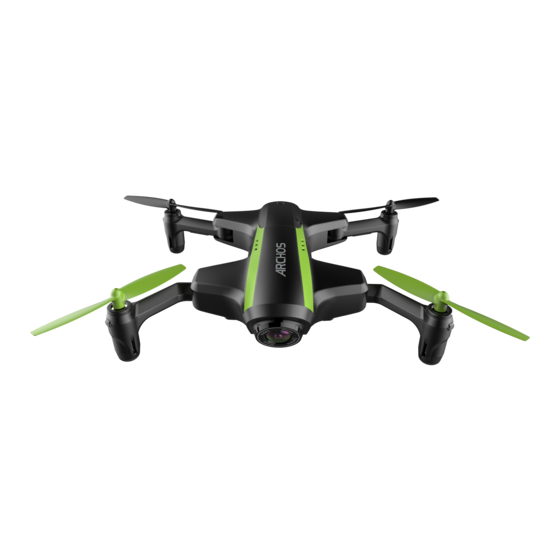
  • Page 31: Description Du Drone Et De La Télécommande

    Description du Drone et de la télécommande Drone Hélice A Avant Hélice B Emplacement Carte Micro-SD Partie supérieure Gauche Droite Interrupteur Hélice B Hélice A Arrière Caméra Diode avant Diode avant Diode arrière Diode arrière Support de batterie...
  • Page 32: Télécommande

    Télécommande Porte-téléphone Interrupteur ON/ Joystick gauche Joystick droit (accélérateur / (avant / arrière / gouvernail de gauche / droit) direction) Mode Tenue Bouton Arrêt / de cap Atterrissage / Arrêt d’urgence Mode Haute / Bouton du mode Moyenne / Basse Trimmer (appuyez Vitesse sur le bouton en...
  • Page 33 Joystick gauche Déplacer le Joystick vers l’avant / arrière / gauche / droite pour faire monter / descendre le drone / tourner à gauche / tourner à droite. Joystick droit Déplacer le Joystick vers l’avant / vers l’arrière / gauche / droite pour faire avancer / reculer / avancer / avancer le drone.
  • Page 34: Déploiement Du Drone

    Déploiement du drone Ouvrez complètement les bras du drone dans le sens des flèches du schéma 1 ci-dessous jusqu'à entendre le clic (schéma 2) de butée. Ouvrez complètement les bras du drone dans le sens des flèches du schéma 3 ci-dessous jusqu'à entendre le clic (schéma 4) de butée.
  • Page 35 Lunettes VR Bandeau Support supérieur du téléphone Lentille Support inférieur du Emplacement pour téléphone téléphone Mousse PU Lentille Lentille droite gauche...
  • Page 36: Installation Des Piles

    Installation des piles : Mise en place des piles : Ouvrez le compartiment des piles situé derrière la télécommande et insérez 3 piles alcalines (non fournies) en respectant les indications de polarité. 4 piles alcalines 1,5 V Couvercle des piles Remarque : 1.Veillez à...
  • Page 37 Image 3 Image 2 Image 1 2.Installez la batterie dans son emplacement, puis allumez le drone. Image 4 3.Posez le drone sur une surface plane ; les LED clignotent, puis restent allumées en continu, indiquant que l’appairage a réussi. Remarque importante : pour que le drone puisse fonctionner correctement, il est indispensable que le gyroscope du circuit récepteur soit à...
  • Page 38: Liste De Contrôles Avant Le Vol

    Liste de contrôles avant le vol 1. La caméra se trouve devant le drone. Placez le drone loin de vous. 2. Mettez le drone sous tension et vérifiez le sens des hélices en rotation. Les hélices A avant gauche et arrière droite tournent dans le sens des aiguilles d’une montre tandis que les hélices B avant droite et arrière gauche tournent dans le sens inverse des aiguilles...
  • Page 39: Instructions Pour Le Calibrage

    Instructions pour le calibrage Si, à la suite d’une chute en vol, vous remarquez que le drone est déséquilibré et difficile à piloter, et si les compensateurs ne permettent pas de corriger le déséquilibre, procédez de la manière suivante pour calibrer le drone.
  • Page 40: Contrôle Du Vol

    3. Allumez le drone et posez-le sur une surface plane,à l’horizontale. Les LED clignotent, puis restent allumées en continu, indiquant que l’appairage a réussi. 4. Ne touchez pas la manette de gauche tant que le calibrage n’est pas terminé. Actionnez la manette de droite de la manière indiquée sur la Image 8 figure 8, puis...
  • Page 41 Poussez le Joystick vers le haut, le drone décolle Poussez le Joystick vers Joystick le bas, le drone descend. gauche Tournez le Joystick vers la gauche, le drone tourne à gauche. Tournez le Joystick vers la droite, le drone tourne à droite.
  • Page 42 Poussez le Joystick vers le haut, le drone va de l’avant. Joystick droit Poussez le Joystick vers le bas, le drone va en arrière. Tourner le Joystick vers la gauche, Le drone tourne à gauche Tourner le Joystick vers la droite, Le drone tourne à...
  • Page 43 Trimmer avant et arrière Pendant le décollage, si le drone s’incline vers l’avant,Appuyez sur le Joystick gauche en l’enfonçant, et poussez le Joystick droit vers l’arrière.Sinon, poussez vers l’avant. Trimmer droit et gauche Pendant le décollage, si l’avant du drone tourne vers la gauche, appuyez alors sur le Joystick gauche en l’enfonçant puis poussez le vers la droite.
  • Page 44 Initiation aux fonctions 2 méthodes de décollage Méthode 1 (normale) : démarrez le moteur en actionnant la manette de gauche et la manette de droite de la manière indiquée sur la figure 5, puis relâchez-les. Ensuite, levez progressivement la manette de gauche pour faire monter le drone jusqu’à la hauteur souhaitée, puis relâchez-la.
  • Page 45: Mode De Maintien D'altitude

    Arrêt d’urgence : Lorsque le drone est dans une situation d’urgence (ex : lorsqu’il est sur le point de heurter une personne ou un obstacle), appuyez immédiatement sur le bouton de décollage/ atterrissage/arrêt d’urgence et gardez-le enfoncé pendant plus d’1 seconde. Les hélices s’arrêtent immédiatement.
  • Page 46 Mode haute / moyenne / basse vitesse 1. Le mode basse vitesse (mode 1) convient aux débutants. 2. Le mode de vitesse moyenne (mode 2) est adapté pour les pilotes habiles à jouer dans la brise douce. 3. Le mode haute vitesse (mode 3) convient aux experts pour faire des expériences aériennes en extérieur Mode haute/moyenne/basse vitesse...
  • Page 47 Condition : Positionnez le drone avec l’avant vers l’avant par rapport à vous (voir fig. 1). Conseil : Une fois en mode de tenue de cap, évitez de changer l’orientation de la télécommande (voir fig. 2). Figure 2 Figure 1 Pour activer le mode de tenue de cap, appuyez sur le bouton correspondant de la télécommande ;...
  • Page 48: Alarme De Batterie Épuisée

    Alarme de batterie épuisée Lorsque la batterie du drone est presque épuisée, la télécommande émet un bip sonore continu ; faites atterrir le drone le plus vite possible. La fonction de rotation est automatiquement désactivée lorsque la batterie est presque épuisée. Alarme hors de portée Lorsque le drone va voler hors de la distance maximale de contrôle, la télécommande émettra un bip Didi..didi..
  • Page 49: Télécharger Et Installer L'application : Archos Drone Remote

    Android, vous pouvez la télécharger à partir de la boutique en ligne suivante : 1. Pour les téléphones portables avec système iOS : ARCHOS Drone Remote. 2. Pour les téléphones portables avec système Android : ARCHOS Drone Remote. 3. Scannez le code QR sur l’emballage.
  • Page 50: Fonctionnement Des Lunettes Vr

    Assurez-vous que les lignes centrales de la VR sont superposées. Ajustement du bandeau : prenez le bandeau, insérez-le dans les lunettes VR, puis ajustez les trois bandeaux pour assurer le maintien le plus confortable possible. Pour faciliter leur fixation, leurs systèmes d'attache Velcro sont tournés...
  • Page 51 Voile : lorsque la forte luminosité gène le visionnage de vidéos, attachez le voile au casque VR pour protéger l'écran des fortes lumières. Pour sortir du mode d'écran partagé : Cliquez sur l'écran pour faire apparaître l'icône...
  • Page 52 N° Problème Cause du problème Solutions Le témoin 1. Batterie épuisée. 1. Changez les piles de la de la 2. Vous avez peut- télécommande. télécommande être inversé les 2. Installez les piles de la est éteint pôles plus et moins. manière 3.
  • Page 53 Le drone 1. L’hélice est très 1. Changez l’hélice. n’arrive pas déformée. 2. Changez le support à se stabiliser en 2. Le support du du moteur. vol et penche moteur est déformé. 3. Posez le drone sur d’un côté. 3. Le gyroscope n’a pas une surface plane pu redémarrer suite à...
  • Page 54 Benutzerhandbuch...
  • Page 55 Sicherheitshinweis für Drohnen-Akkus Das Benutzerhandbuch muss aufmerksam gelesen und für die Einsichtnahme und Wartung an einem sicheren Ort aufbewahrt werden. - Nur das mitgelieferte Ladegerät verwenden. - Beim Einbau des Akkus müssen die Anweisungen zur Polarität beachtet werden. Es ist nicht erlaubt, den Akku umzudrehen, was Kurzschlüsse verursachen kann.
  • Page 56 Anweisungen zum Laden des Drohnen-Akkus 1. Den Drohnen-Akku an das USB-Kabel anschließen und danach eine der in der Abbildung unten gezeigten Methoden wählen, um den USB-Stecker anzuschließen. 2. Die USB-Kontrollleuchte leuchtet rot und wechselt nach Abschluss des Ladevorgangs auf Grün (während des Ladens muss der Schalter ausgeschaltet sein).
  • Page 57 Checkliste vor dem Drohnenflug 1. Vergewissern Sie sich, dass der Drohnen-Akku und der Sender-Akku voll aufgeladen sind. 2. Vergewissern Sie sich, dass sich der linke Hebel des Senders in der mittleren Position befindet. 3. Befolgen Sie vor dem Betrieb unbedingt die Anweisungen zum Ein- und Ausschalten.
  • Page 58: Beschreibung

    Beschreibung Drohne A-Propeller Vorderseite B-Propeller Obere Micro-SD- Abdeckung Kartensteckplatz Links Rechts ON/OFF B-Propeller A-Propeller Rückseite Kamera Vordere Vordere Lampenabdeckung Lampenabdeckung Hintere Hintere Lampenabdeckung Lampenabdeckung Batteriehalter...
  • Page 59 Sender Batteriehalter Einschaltknopf Rechter Hebel (Vorwärts / Linker Hebel Rückwärts / Links / (Gas/Ruder) Rechts) Heading Hold- Abheben / Modus Landen / Not-Stopp- Taste Modus Hohe/Mittlere / Niedrige Trimmer-Modus- eschwindigkeit Taste (nach unten drücken) Batteriefach...
  • Page 60 Linker Hebel Den Hebel nach vorne / hinten / links / rechts drücken, um die Drohne nach oben / unten / mit Linksdrehung / Rechtsdrehung zu steuern Rechter Hebel Den Hebel nach vorne / hinten / links / rechts drücken, um die Drohne nach vorne / hinten / links / rechts zu steuern Einschaltknopf Den Einschaltknopf zum Einschalten des Senders...
  • Page 61 Auseinanderfalten der Drohne Ziehen Sie die Armhalterung in Pfeilrichtung heraus, wie unten abgebildet (Bild 1), bis diese mit einem Klicken einrastet und somit voll ausgefahren ist (Bild 2). Zum Zusammenfalten in die entgegengesetzte Richtung drücken. Ziehen Sie die Armhalterung in Pfeilrichtung heraus, wie unten abgebildet (Bild 3), bis diese mit einem Klicken einrastet und somit voll ausgefahren ist (Bild 4).
  • Page 62 VR Brillen Kopfband Oberer Telefonhalter Objektiv Unterer Telefonhalter Telefonhalteraufnahme Schaumstoff Linkes Rechtes Objektiv Objektiv...
  • Page 63: Einlegen Des Akkus

    Einlegen des Akkus: Öffnen Sie den Deckel des Batteriefachs auf der Rückseite des Senders und legen Sie vier Alkali- Mangan-Batterien (im Lieferumfang nicht enthalten) in der Richtung wie angegeben in das Fach ein. 4X1,5 V Alkali- Mangan-Batterien Batteriefachabdeckung Hinweis: 1. Achten Sie darauf, dass die Elektroden korrekt positioniert sind. 2.
  • Page 64 Abb. 3 Abb. 2 Abb. 1 2. Schalte die Drohne ein. Abb. 4 3. Setzen Sie die Drohne auf eine flache Oberfläche, die Drohnenkörperlichter drehen von blinkend zu festen hellen, was eine erfolgreiche Frequenzpaarung anzeigt. Wichtiger Hinweis: Bitte stellen Sie sicher, dass die Drohne nach dem Einschalten der Drohne auf die horizontale Position gebracht wird, damit die Drohne gut funktionieren kann.
  • Page 65: Checkliste Vor Dem Flug

    Checkliste vor dem Flug 1. Die Kamera befindet sich an der Vorderseite der Drohne. Die Vorderseite der Drohne sollte sich an der von Ihnen abgewandten Seite befinden. 2. Schalten Sie die Drohne ein und überprüfen Sie die Drehrichtung der Propeller. Die Propeller A links vorne und rechts hinten drehen sich im Uhrzeigersinn, während sich die Propeller B rechts vorne und links hinten im Gegenuhrzeigersinn drehen.
  • Page 66 Anleitung für das Kalibrieren Bitte befolgen Sie die nachfolgend beschriebenen Schritte, um die Drohne zu kalibrieren, wenn diese nach einem Sturz ein Ungleichgewicht zeigt oder das Gleichgewicht durch die Trimmer-Taste nicht hergestellt werden kann und der Betrieb der Drohne schwierig ist. 1.
  • Page 67 1. bewegt sich automatisch zurück in die Mittelposition. Der Sender begibt sich in den Modus für die Frequenzpaarung. 2. Schalten Sie die Drohne ein und legen Sie sie horizontal auf eine flache Oberfläche. Die LED- Leuchten, die bisher geblinkt haben, leuchten nach erfolgreicher Abb.
  • Page 68 Flugkontrolle Hinweis Bewegen Sie bei jedem Start der Drohne gleichzeitig den linken und den rechten Hebel wie in Abbildung 5 gezeigt (45 Grad nach innen), um die Motoren zu starten. Drücken Sie den linken Hebel langsam nach oben, um die Drohne zu fliegen oder drücken Sie auf die Taste zum Abheben.
  • Page 69 Den Hebel nach oben drücken: Die Drohne hebt ab Den Hebel nach unten Linker Stick ziehen: Die Drohne sinkt. Den Hebel nach links bewegen. Die Drohne dreht sich nach links Den Hebel nach rechts bewegen. Die Drohne dreht sich nach rechts...
  • Page 70 Den Hebel nach oben drücken: Die Drohne fliegt nach vorne. Rechter Stick Den Hebel nach unten ziehen: Die Drohne fliegt rückwärts. Den Hebel nach links bewegen: Die Drohne dreht sich nach links Den Hebel nach rechts bewegen: Die Drohne dreht sich nach rechts...
  • Page 71 Trimmer für vorwärts und rückwärts Drücken Sie beim Start, wenn die Drohne nach vorne kippt, den linken Hebel zur Mitte, und drücken Sie danach den rechten Hebel nach hinten. Oder drücken Sie ihn nach vorne. Trimmer für Links- und Rechtsdrehung Drücken Sie beim Start, wenn sich der Kopf der Drohne nach links dreht, den linken Hebel in der Mitte nach unten und den linken Hebel nach...
  • Page 72 Die zwei Startmethoden 1. Methode 1 (Start): Bewegen Sie sowohl den linken, als auch den rechten Schalthebel wie in der Abbildung gezeigt, um den Motor zu starten, und lassen Sie dann beide Schalthebel wieder los. Schieben Sie anschließend den linken Schalthebel nach oben, um die Drohne in eine gewisse Höhe zu bringen, und lassen Sie den Schalthebel dann wieder los.
  • Page 73 lang gedrückt. Die Propeller stehen sofort still. Tipp: Verwenden Sie die Notabschaltung ausschließlich in Notsituationen. Wenn die Propeller stillstehen, fällt die Drohne wie ein Stein zu Boden Höhenhaltungs-Modus Im Höhenhaltungs-Modus fliegt die Drohne in konstant gleicher Höhe und kann in dieser Höhe ganz normal gesteuert werden.
  • Page 74 Modusschalter Hohe / Mittlere / Niedrige Geschwindigkeit 1. Der Modus Niedrige Geschwindigkeit (Modus 1) eignet sich für Anfänger. 2. Der Modus Mittlere Geschwindigkeit (Modus 2) eignet sich für geschickte Piloten bei leichtem Wind. 3. Der Modus Hohe Geschwindigkeit (Modus 3) eignet sich für Experten für Stunts im Freien Modusschalter Hohe/Mittlere/ Niedrige Geschwindigkeit...
  • Page 75 Voraussetzung: Sie müssen die Drohne so positionieren, dass deren Vorderseite Ihrer Vorderseite entspricht. Tipp: Ändern Sie die Richtung des Senders nicht mehr, nachdem der Neutral-Modus begonnen hat. Um den Neutral-Modus einzuschalten, drücken Sie die Taste für den Neutral- Modus. Die LED-Lichter der Drohne blinken - der Neutral-Modus wurde aktiviert.
  • Page 76 Kontakt mit der Drohne ab und sie fliegt weiter. Laden Sie folgendes App herunter und installieren Sie es: ARCHOS Drone Remote Das App steht für Handys mit iOS oder Android zur Verfügung. Laden Sie das App bitte im entsprechenden Store herunter: 1.Für Handys mit iOS-System suchen Sie bitte nach...
  • Page 77 Achten Sie auf eine mittige Ausrichtung Einstellung des Kopfbandes: Montieren Sie das Kopfband auf dem VR und passen Sie die Spannung der drei Einstellbänder so an, bis es für Sie optimal sitzt. (Um das Kopfband anpassen zu können, müssen die Klettverschlüsse nach außen zeigen.)
  • Page 78 Bild richtig angezeigt wird. Kurzsichtige Benutzer verschieben das Objekt nach links oder rechts, bis der Pupillenabstand korrekt ist. Sonnenschutz: Bei zu grellem Licht kann ein Sonnenschutz an die VR- Brille montiert werden, was für ein klares Bild sorgt. Split-Screen-Modus beenden:...
  • Page 79 N° Problem Ursache Lösungen 1. Schwacher 1. Tauschen Sie die Kontrollleuchte Batteriestand Batterien des Senders aus. des Senders 2. Die Batterien wurden 2. Legen Sie die Batterien leuchtet nicht. falsch eingelegt, Plus- genauso ein, wie dies und Minus-Pole wurden im Benutzerhandbuch vertauscht.
  • Page 80 Die Drohne 1. Der/die Propeller ist/ 1. Propeller ersetzen. kann nicht sind massiv verformt. schweben und 2. Die Motorenhalterung neigt sich nach hat sich verformt. einer Seite. 3. Nach einem schweren Sturz stellt sich das Gyroskop nicht automatisch neu ein. 4.
  • Page 81 Manual de usuario...
  • Page 82 Consignas de seguridad sobre la batería del dron Lea detenidamente el manual de usuario y guárdelo en un lugar seguro para consultas futuras y operaciones de mantenimiento. - Utilice únicamente el cargador suministrado. - Al instalar la batería, respete la posición correcta de los electrodos. La inversión de la posición de la batería podría provocar un cortocircuito.
  • Page 83 Instrucciones de recarga de la batería del dron 1. Conecte primero el cable USB a la batería del dron y luego escoja alguno de los métodos que aparecen en la imagen siguiente para conectar la clavija USB a una fuente de alimentación.
  • Page 84 Lista de verificación antes de su vuelo 1. Asegúrese de que la batería del drone y la batería del transmisor estén completamente cargadas. 2. Asegúrese de que la palanca izquierda del transmisor esté en la posición intermedia. 3. Siga estrictamente las instrucciones para encender y apagar antes de la operación.
  • Page 85 Descripción Dron Pala A Pala B Parte frontal Ranura para tarjeta Tapa superior Micro-SD Derecha Izquierda Encendido Apagado Pala B Pala A Parte trasera Cámara Tulipa de luz Tulipa de luz delantera delantera Tulipa de luz Tulipa de luz trasera trasera Soporte de la batería...
  • Page 86: Mando De Control

    Mando de control Soporte para teléfono Interruptor de encendido Palanca izquierda Palanca derecha (Acelerador / Timón) (Adelante / Atrás / Izquierda / Derecha) Modo de Despegue / Mantenimiento Aterrizaje / de rumbo Botón de parada de emergencia Modo de velocidad Calibrador (presionar) Alta/Media / Baja Compartimiento de...
  • Page 87 Palanca izquierda Mueva la palanca hacia delante / atrás / izquierda / derecha para pilotar el dron arriba / abajo / girar a izquierda / derecha. Palanca derecha Mueva la palanca hacia delante / atrás / izquierda / derecha para pilotar el dron hacia delante / atrás / izquierda / derecha.
  • Page 88 Despliegue del dron Tire el soporte de cada brazo hacia afuera según ilustran las flechas del dibujo (imagen 1); cuando se oiga un “clic”, el brazo está totalmente abierto (imagen 2). En sentido contrario, indicará que está plegado. Tire del soporte del brazo según ilustran las flechas inferiores (imagen 3), cuando se oiga un “clic”, significa que el brazo está...
  • Page 89 VR Gafas Bandas de sujeción Soporte superior del teléfono Lente Soporte inferior del teléfono Ranura de sujeción del teléfono Espuma de PU Lente del ojo Lente del ojo izquierdo derecho...
  • Page 90: Instalación De Las Pilas

    Instalación de las pilas: abra la tapa del compartimento de las pilas situada en la posterior del mando de control e instale en su interior 4 pilas alcalinas (no incluidas) observando la polaridad correcta. 4 pilas alcalinas de 1,5 V Tapa del compartimento de las pilas...
  • Page 91 Foto 3 Foto 2 Foto 1 2. Instale el acumulador en su correspondiente compartimento y encienda el dron. Foto 4 3.Coloque el dron sobre una supercie plana. Su iluminación LED parpadeará al principio y permanecerá después encendida con una luminosidad intensa indicativa de que la sincronización se ha llevado a cabo con éxito.
  • Page 92 Lista de chequeo antes del vuelo 1. La cámara está en la parte frontal del dron. Manténgase alejado de esta parte frontal. 2. Encienda el dron y compruebe el sentido de las hélices giratorias. Las hélices frontal izquierda y posterior derecha A deben girar en el sentido de las agujas del reloj, mientras que las hélices frontal derecha y posterior izquierda B girarán en sentido contrario a las agujas del reloj.
  • Page 93: Instrucciones De Calibración

    Instrucciones de calibración Siga los pasos indicados a continuación a n de calibrar el dron en caso de que no vuele de manera estable y resulte difícil de controlar tras haber sufrido una colisión y no sea posible ajustarlo utilizando los botones de corrección del comportamiento en vuelo del mando.
  • Page 94 1. Encienda el dron y colóquelo en posición horizontal sobre una supercie plana. La iluminación LED del dron parpadeará al principio y permanecerá después encendida con una luminosidad intensa indicativa de que la sincronización se ha llevado Foto 8 a cabo con éxito. 2.
  • Page 95: Control De Vuelo

    Control de vuelo Nota: Antes de iniciar el despegue del dron, mueva siempre las palancas izquierda y derecha al mismo tiempo como se muestra en la Figura 5 (45 grados hacia el interior) para activar los motores. Empuje lentamente hacia arriba la palanca izquierda para izar el dron o presione el botón de despegue.
  • Page 96 Palanca hacia arriba, el dron despega Palanca hacia abajo, el Palanca dron desciende izquierda Palanca hacia la izquierda, el dron gira a la izquierda Palanca hacia la derecha, el dron gira a la derecha...
  • Page 97 Palanca hacia arriba, el dron se desplaza hacia delante Palanca derecha Palanca hacia abajo, el dron se desplaza hacia atrás Palanca hacia la izquierda, el dron gira a la izquierda Palanca hacia la derecha, el dron gira a la derecha...
  • Page 98 Ajuste del movimiento adelante y atrás Durante el despegue, si el dron se inclina hacia delante, presione la palanca izquierda en el centro y empuje la palanca derecha hacia atrás. Si se inclina hacia atrás, empuje la palanca hacia delante. Ajuste del giro a izquierda y derecha Durante el despegue, si la cabeza del dron gira a la izquierda, presione la palanca...
  • Page 99 Functions Introduction Podrán utilizarse dos métodos de despegue 1. Método 1 (Despegue manual): desplace las Palancas de control izquierda y derecha según se muestra en la ilustración 12 a n de poner en marcha el motor y, a continuación, suéltelas. Desplace después hacia arriba la Palanca de control izquierda para hacer que el dron se eleve a cierta actitud y, a continuación, suéltela.
  • Page 100 Parada de emergencia: de producirse alguna situación de emergencia en la que el dron vaya a colisionar con peatones, un obstáculo, etc., pulse inmediatamente el botón de Despegue/ Aterrizaje/Parada de emergencia y manténgalo pulsado durante más de 1 segundo. Las palas de los rotores se tendrán de forma inmediata.
  • Page 101 Interruptor de modo de velocidad Alta / Media / Baja 1. El modo de velocidad Baja (Modo 1) es adecuado para principiantes. 2. El modo de velocidad Media (Modo 2) es adecuado para pilotos con experiencia y cuando la brisa es suave. 3.
  • Page 102 Requisitos preliminares: Posicione el dron de manera que su parte frontal sea la más alejada de usted (véase la ilustración 1). Consejo: no cambie la orientación del mando de control (véase la ilustración 2) una vez activado el modo de orientación inteligente. Activación del Modo de orientación inteligente, pulse el botón del Modo de orientación inteligente.
  • Page 103 De lo contrario, se perdería el control del dron y este podría desaparecer. Descargue e instale la aplicación: ARCHOS Drone Remote Esta aplicación es adecuada para móviles con sistema operativo iOS o Android;...
  • Page 104 Asegurar un correcto centrado sobre el VR Ajuste de las bandas de sujeción: móntelas en el VR y ajuste la tensión de las tres bandas para obtener una sujeción cómoda (para facilitar el ajuste, la cinta velcro de las tres bandas...
  • Page 105 Funda parasol: cuando la luz ambiente es demasiado fuerte para una visión correcta, ponga la funda parasol sobre el VR para proteger la pantalla de luces externas intensas. Para salir del modo de pantalla partida: haga clic en la pantalla y aparecerá...
  • Page 106 N° Problema Causa de la anomalía Solución El testigo 1. Pilas agotadas. 1.Replace la batería del del mando 2. Las pilas se han transmisor. de control instalado con la 2.Instale la batería de no se polaridad invertida. acuerdo con el manual del enciende.
  • Page 107 El dron no 1. Alguna de las palas 1. Sustituya la pala se mantiene de los rotores está pertinente. estacionario severamente deformada. 2. Sustituya el soporte del y se inclina 2. Algún soporte de motor pertinente. hacia un lado motor está deformado. 3.
  • Page 108: Manuale Utente

    Manuale utente...
  • Page 109 Avviso di sicurezza per la batteria del drone Leggere attentamente il libretto per l’utente e conservarlo in un luogo sicuro per eventuali consultazioni e manutenzione future. - Utilizzare solo il caricatore in dotazione. - Per installare la batteria, attenersi a quanto indicato sull’elettrodo. Non è...
  • Page 110 Istruzioni per la carica della batteria 1. Per prima cosa, collegare il cavo USB alla batteria del drone, quindi scegliere uno dei metodi per il collegamento della presa USB tra quelli mostrati nella figura di seguito. 2. Durante la carica sarà acceso l’indicatore USB rosso, che diventerà...
  • Page 111 Elenco di controllo prima del decollo 1. Assicurarsi che la batteria del drone e la batteria del trasmettitore siano completamente cariche. 2. Assicurarsi che la leva sinistra del trasmettitore sia in posizione centrale. 3. Seguire pedissequamente le istruzioni di accensione e e spegnimento prima di procedere.
  • Page 112 Istruzioni per Drone e Trasmettitore Drone Elica A Fronte Elica B Copertura superiore Sinistra Destra Elica B Elica A Retro Camera Led frontale Led frontale Led posteriore Led posteriore Supporto batteria...
  • Page 113 Trasmettitore Supporto telefonico Switch di accensione Leva destra (avanti Leva sinistra / indietro / sinistra / (throttle / rudder) destra) Modalità Heading Pulsante di decollo / Hold Mode atterraggio / stop di emergenza Modalità velocità alta / media / Pulsante modalità trim bassa (premere) Compartimento della...
  • Page 114 Leva sinistra Spostare la leva avanti/indietro/a sinistra/a destra per far andare il drone su/giù/a sinistra/a destra. Leva destra Spostare la leva avanti/indietro/a sinistra/a destra per far andare il drone avanti/indietro/a sinistra/a destra. Interruttore di Spostare in alto lo switch per accendere il accensione trasmettitore e spostarlo in basso per spegnere.
  • Page 115 Aprire il drone Tirare fuori la staffa del braccio come mostra la freccia sotto (figura 1); farà uno scatto, che significa che è completamente aperto (figura 2). In caso contrario, è piegato. Tirare fuori la staffa del braccio come mostra la freccia sotto (figura 3);...
  • Page 116 Vetri VR Fascia Supporto superiore del telefono Lenti Supporto inferiore del Alloggiamento per il telefono telefono Schiuma poliuretanica Lente sinistra Lente destra...
  • Page 117: Installazione Delle Batterie

    Installazione delle batterie: aprire il coperchio del vano batterie situato sul retro del trasmettitore e inserire 4 batterie alcaline (non incluse) rispettando la polarità indicata. 4Xbatterie alcaline 1,5 V Coperchio vano batterie Note: 1.Orientare le batterie correttamente. 2.Non mischiare batterie nuove e vecchie. 3.Non mischiare batterie di tipo diverso.
  • Page 118 2.Installare la batteria nell’apposito vano e accendere il drone. Immagine 4 3.Posizionare il drone su una superficie piana; le luci del drone smetteranno di lampeggiare e rimarranno accese, a indicare che l’abbinamento è avvenuto correttamente. Nota importante: assicurarsi che il giroscopio della scheda di ricezione sia in posizione orizzontale dopo aver acceso il drone, affinché...
  • Page 119 Immagine 5 3. Muovere contemporaneamente la leva sinistra e la leva destra come mostrato in Figura 5 (verso l’interno a 45°) per avviare i motori e ripetere il passaggio precedente per bloccare i motori. 4. Dopo aver avviato i motori, spostare lentamente verso l’alto la leva sinistra per far decollare il drone, quindi spostarla lentamente verso il basso (fino al massimo) per far atterrare il drone.
  • Page 120 Istruzioni per la calibrazione Se il drone è difficile da controllare o diventa sbilanciato dopo una caduta e non è possibile risolvere il problema con i pulsanti di calibrazione, seguire la procedura descritta di seguito per calibrarlo. 1. Spegnere il drone, quindi spegnere il trasmettitore. 2.
  • Page 121 1. Accendere il drone e posizionarlo orizzontalmente su una superficie piana. Le luci LED smetteranno di lampeggiare e rimarranno accese, a indicare che l’abbinamento è avvenuto correttamente. 2. Non spostare la leva sinistra prima del termine della calibrazione. Spostare la leva destra come indicato in Immagine Figura 10 e rilasciarla.
  • Page 122 Leva in su, il drone decolla. Leva in giù, il drone Leva sinistra scende. Leva a sinistra, il drone gira a sinistra. Leva a destra, il drone gira a destra.
  • Page 123 Leva in su, il drone avanza. Leva destra Leva in giù, il drone indietreggia. Leva a sinistra, il drone gira a sinistra. Leva a destra, il drone gira a destra.
  • Page 124 Trimmer avanti e indietro Durante il decollo, se il drone si inclina in avanti, spingere in basso verso il centro la leva sinistra e spingere indietro la leva destra. Altrimenti spingere avanti. Trimmer per girare a destra e a sinistra Durante il decollo, se il muso del drone ruota a sinistra, spingere in basso verso il centro la leva sinistra e spingere a destra la leva...
  • Page 125 Metodi di decollo 1. Metodo 1 (decollo manuale): spostare la leva sinistra e la leva destra come indicato in Figura 12 per avviare il motore, quindi rilasciarle. Spostare la leva sinistra verso l’alto per portare il drone a una certa altitudine, quindi rilasciare la leva. 2.
  • Page 126 Arresto di emergenza: Quando il drone si trova in situazioni di emergenza ed è in procinto di colpire persone, ostacoli, ecc., premere immediatamente il pulsante di decollo/atterraggio/arresto di emergenza e tenerlo premuto per più di 1 secondo. Le eliche si arresteranno immediatamente. Suggerimento: utilizzare la funzione di arresto di emergenza solo in caso di reale pericolo.
  • Page 127: Modalità Headless

    Switch modalità velocità alta/media/bassa 1. La modalità di velocità bassa (Modalità 1) è adatta ai principianti. 2. La modalità di velocità media (Modalità 2) è adatta ai piloti abili in condizioni di vento lieve. 3. La modalità di velocità alta (Modalità 3) è adatta ai piloti esperti per fare evoluzioni all’aperto.
  • Page 128: Allarme Batteria Scarica

    Prerequisito: posizionare il drone in modo che sia rivolto nella stessa direzione dell’utente (Figura 1). Suggerimento: non modicare l’orientamento del trasmettitore (Figura 2) dopo l’attivazione della modalità Headless. Per attivare la modalità Headless, premere il pulsante di modalità Headless; le luci LED del drone lampeggeranno, a indicare che il drone è...
  • Page 129: Scaricare E Installare L'app Archos Drone Remote

    Remote Scaricare e installare l’app ARCHOS Drone Remote L’app è adatta agli smartphone iOS o Android; scaricarla dal rispettivo app store: 1. Per gli smartphone iOS, cercare ARCHOS Drone Remote. 2. Per gli smartphone Android, cercare ARCHOS Drone Remote. 3. Scansire il codice QR sulla confezione.
  • Page 130 Assicurarsi che la linea centrale VR si sovrapponga Regolare la fascia: Togliere la fascia e inserirla in VR, regolare la tenuta delle tre fasce in base alla posizione più...
  • Page 131 Panno parasole: Quando la luce è troppo forte per visualizzare il video in modo chiaro, agganciare gli occhiali VR con il panno parasole per proteggere lo schermo da luci forti. Per uscire dalla modalità schermo diviso: Cliccare sullo schermo e apparirà...
  • Page 132 N° Problema Causa Soluzione La spia del 1. Batteria scarica. 1. Sostituire trasmettitore 2. I poli positivo e le batterie nel è spenta. negativo delle trasmettitore. batterie sono 2. Installare le posizionati batterie come scorrettamente. descritto 3. Contatto difettoso. nel manuale. 3.
  • Page 133 Il drone non 1. Eliche deformate. 1. Sostituire le eliche. staziona in 2. Il vano motore è 2. Sostituire il vano volo e si deformato. motore. inclina da 3. Il giroscopio non si 3. Posizionare il un lato. resetta dopo drone su una una caduta violenta.
  • Page 134: Instrukcja Obsługi

    Instrukcja obsługi...
  • Page 135 Wskazówki bezpieczeństwa dotyczące akumulatora drona Wskazówki bezpieczeństwa dotyczące akumulatora drona Prosimy o dokładne zapoznanie się z odręcznikiem użytkownika, a następnie o przechowywanie jej w bezpiecznym miejscu w celu wykorzystania w przyszłości oraz w celu dokonania konserwacji. Należy używać wyłącznie dostarczonej ładowarki. Podczas montażu akumulatorów, należy przestrzegać...
  • Page 136 W celu uniknięcia uszkodzenia lub wybuchu, nie należy umieszczać akumulatora w miejscu o wysokiej temperaturze, na przykład w ogniu lub na urządzeniu grzewczym. Nie uderzaj akumulatorem o twardą powierzchnię. Nie należy umieszczać akumulatora w wodzie i przechowuj go w suchym miejscu. Nie otwieraj akumulatora.
  • Page 137 Instrukcje dotyczące ładowania akumula- tora drona 1. Najpierw podłącz przewód USB do akumulatora, a następnie wybierz jeden ze sposobów podłączenia z USB, zgodnie z poniższym rysunkiem. 2. Podczas ładowania czerwona lampka USB jest włączona, po całkowitym naładowaniu lampka świeci się na zielono (podczas ładowania urządzenie musi być...
  • Page 138 Lista kontrolna przed lotem 1. Upewnij się, czy akumulator drona i akumulator nadajnika są w pełni naładowane. 2. Upewnij się, czy lewa dźwignia nadajnika znajduje się w położeniu środkowym. 3. Należy ściśle przestrzegać instrukcji dotyczących włączania i wyłączania. Przed lotem najpierw włącz zasilanie nadajnika, a następnie włącz zasilanie drona;...
  • Page 139 Opis Dron A Śmigło Z przodu B Śmigło Gniazdo kart micro-SD Górna pokrywa Lewa Włącz / Prawa Wyłącz B Śmigło A Śmigło Tył Kamera Z przodu Z przodu Wstecz Led Wstecz Led Uchwyt baterii...
  • Page 140 Nadajnik Uchwyt telefonu Przełącznik zasilania Prawa dźwignia Lewa dźwignia (Do przodu / Do (Przepustnica / Ster) tyłu / W lewo / W prawo) Tryb “Heading Przycisk startu Hold” / lądowania / zatrzymania awaryjnego Tryb wysokiej / Przycisk trybu trymera średniej / niskiej (Nacisnąć) prędkości Komora baterii...
  • Page 141 Lewa dźwignia Przesuń dźwignię do przodu / do tyłu / w lewo / w prawo, by skierować dron do góry / w dół / skręcić w lewo / skręcić w prawo. Prawa dźwignia Przesuń dźwignię do przodu / do tyłu / w lewo / w prawo, by skierować...
  • Page 142 Rozłóż dron Wyciągnij wspornik ramienia zgodnie z poniższą strzałką (ilustracja 1). Usłyszysz kliknięcie, co oznacza, że jest w pełni otwarty (ilustracja 2). Dron składa się odwrotny sposób. Wyciągnij wspornik ramienia zgodnie z poniższą strzałką (ilustracja 3). Usłyszysz kliknięcie, co oznacza, że jest w pełni otwarty (ilustracja 4). Dron składa się...
  • Page 143 Okulary VR Opaska na głowę Górny uchwyt telefonu Soczewka Dolny uchwyt telefonu Gniazdo uchwytu telefonu Pianka PU Lewa Prawa soczewka soczewka...
  • Page 144: Instalacja Baterii

    Instalacja baterii: Otwórz pokrywę komory baterii znajdującą się z tyłu nadajnika i umieść 4 baterie alkaliczne (brak w zestawie) zgodnie ze wskazówkami ułożenia biegunów. 4X1.5V Baterie alkaliczne Pokrywa baterii Uwaga: 1. Upewnij się, że bieguny baterii są zorientowane prawidłowo. 2. Nie łącz baterii nowych z używanymi. 3.
  • Page 145 Rysunek 3 Rysunek 2 Rysunek 1 2. Włóż akumulator do komory akumulatora i włącz zasilanie drona. Rysunek 4 3. Umieść drona na płaskiej powierzchni. Światła pozycyjne drona przestaną migać, a zaczną świecić światłem ciągłym, co oznacza pomyślne ukończenie procesu parowania częstotliwości. Ważna uwaga: By dron działał...
  • Page 146 Lewe przednie i prawe tylne śmigła A obracają się w prawo, podczas gdy prawe przednie i lewe tylne śmigła B obracają się w lewo. 3.W celu uruchomienia silników przesuń jednocześnie lewy i prawy drążek, jak wskazano na Rysunku 5 (do wewnątrz pod kątem 45 stopni), powtórz poprzedni krok, by zatrzymać...
  • Page 147 Instrukcja kalibracji Wykonaj poniższe kroki, by skalibrować drona, jeżeli po upadku podczas lotu straci on równowagę, a korekty przy użyciu przycisku trymera okażą się nieskuteczne i będą występować trudności w obsłudze urządzenia. 1. Wyłącz drona, a następnie wyłącz nadajnik. 2. Włącz nadajnik, pociągnij lewy drążek w skrają dolną...
  • Page 148 kalibracja drona. Gdy światła na korpusie drona zaczną świecić światłem ciągłym, oznacza to pomyślne zakończenie kalibracji. Uwaga: Nieudana kalibracja może spowodować utratę funkcji drona. Sterowanie lotem Uwaga: Przed każdym startem drona, przesuń jednocześnie lewą i prawą dźwignię, jak wskazano na Rysunku 5 (do wewnątrz pod kątem 45 stopni) w celu Rysunek...
  • Page 149 Przesuń dźwignię w górę, dron wystartuje Przesuń dźwignię w dół, Lewy dron zacznie opadać drążek Przesuń dźwignię w lewo, dron skręci w lewo. Przesuń dźwignię w prawo, dron skręci w prawo.
  • Page 150 Przesuń dźwignię w górę, dron poleci do przodu. Prawy drążek Przesuń dźwignię w dół, dron poleci do tyłu Przesuń dźwignię w lewo, dron skręci w lewo Przesuń dźwignię w prawo, dron skręci w prawo...
  • Page 151 Trymer pochylenia w przód i w tył Jeżeli podczas startu dron przechyli się do przodu, naciśnij lewą dźwignię i przesuń prawą dźwignię do tyłu. W przeciwnym przypadku przesuń ją do przodu. Trymer skręcania w lewo i w prawo Jeżeli podczas startu głowica drona skręci w lewo, naciśnij lewą...
  • Page 152 Dwa sposoby startu 1. Metoda 1 (Start): Pchnij lewy drążek i prawy drążek tak jak na Rysunku 12, by uruchomić silnik, a następnie zwolnij oba drążki. Następnie, pchnij lewy drążek, by wznieść drona na określoną wysokość, a następnie puść drążek. 2.
  • Page 153 Zatrzymanie awaryjne: Gdy dron znajdzie się w sytuacji awaryjnej, w której może na przykład uderzyć w idących ludzi lub w przeszkodę itp., natychmiast naciśnij przycisk Start/Lądowanie/Zatrzymanie awaryjne i przytrzymaj go przez ponad 1s. Śmigła zostaną natychmiast zatrzymane. Wskazówka: Nie należy korzystać z funkcji zatrzymania awaryjnego, jeżeli dron nie znajduje się...
  • Page 154 Przełącznik trybu wysokiej / średniej / niskiej prędkości 1. Tryb niskiej prędkości (Tryb 1) jest odpowiedni dla początkujących. 2. Tryb średniej prędkości (Tryb 2) jest odpowiedni dla doświadczonych pilotów do latania przy delikatnym wietrze. Przełącznik trybu wysokiej / średniej / niskiej prędkości Tryb wysokiej prędkości (Tryb 3) jest odpowiedni dla ekspertów do wykonywania akrobacji powietrznych.
  • Page 155 Gdy dron znajduje się w trybie utrzymania kursu, pchnij lewy drążek do przodu / do tyłu / w lewo / w prawo, a dron będzie lecieć odpowiednio do przodu / do tyłu / w lewo / w prawo. Warunek: Drona należy ustawić w taki sposób, by jego przód był przodem dla użytkownika (patrz Rysunek 1).
  • Page 156 1. W przypadku telefonu komórkowego z systemem iOS należy szukać aplikacji o nazwie ARCHOS Drone Remote. 2. W przypadku telefonu komórkowego z systemem Android należy szukać aplikacji o nazwie ARCHOS Drone Remote. 3. Zeskanuj kod QR na opakowaniu.
  • Page 157 Sprawdź, czy linia środkowa VR nakłada się Wyreguluj opaskę na głowę: Wyjmij opaskę i załóż VR. Dostosuj naciągnięcie trzech opasek tak, aby uzyskać wygodne ustawienie. (W celu ułatwienia dopasowania magiczna taśma na trzech opaskach...
  • Page 158 źrenic. Osłona zaciemniająca: Gdy zbyt silne światło uniemożliwia wyraźne widzenie obrazu, zamontuj do okularów VR osłonę zaciemniającą, aby zabezpieczyć ekran przed silnym światłem. Aby wyjść z trybu dzielonego ekranu: Kliknij ekran.
  • Page 159 L.p. Problem Przyczyna problemu Rozwiązanie Lampa 1. Niski poziom 1. Wymień baterie kontroln naładowania nadajnika. 2. Bieguny dodatni i 2. Włóż baterie nadajnik ujemny zgodnie z opisem w a nie baterii są w instrukcji obsługi. świeci się odwrotnym 3. Wyczyść brud, ułożeniu.
  • Page 160 Dron nie 1. Śmigło jest 1. Wymień śmigło. jest w poważnie 2. Wymień obsadę stanie 2. Zdeformowana silnika. unosić się obsada silnika. 3. Umieść drona na 3. Żyroskop nie płaskiej ziemi na ok. powietrzu i zresetował się po 10s lub ponownie przechyla gwałtownym uruchom drona, by go...
  • Page 161 Használati utasítás...
  • Page 162 Biztonsági figyelmeztetések a Drón Akkumulátorhoz Kérjük, olvassa el a Használati Utasítást alaposan, majd tartsa ezt egy biztonságos helyen a jövőre nézve, és a karbantartás végett is. Csak a mellékelt töltővel használható. Amikor beszereli az akkumulátort, kövesse az elektróda utasításokat. Nem megengedett, az elemeket felcserélni, melyek rövidzárlatot okozhatnak.
  • Page 163 akkumulátort magas hőmérsékletű helyre, mint például tűzbe, vagy egy fűtőberendezésre, hogy elkerülje a károsodást vagy robbanást. Ne csapja az akkumulátort kemény felületre. Ne tegye be az akkumulátort vízbe és tartsa száraz helyen. Ne nyissa fel az akkumulátort. Ne hagyja az akkumulátort felügyelet nélkül, ha töltődik.
  • Page 164 Töltési utasítások a Drón Akkumulátorhoz 1. Csatlakoztassa a Drón akkumulátort az USB kábellel, majd válasszon a módszerek közül egyet, mint az, az alábbi képen látható, USB plug csatlakozásához. 2. A piros USB jelző világít, ha a tölt és a fény zöldre vált, ha teljesen fel van töltve (Kikapcsolva kell tartani, ha a tölt).
  • Page 165 Ellenőrző lista a repülés indítás előtt 1. Győzödjön meg róla, hogy a drón és a távirányító akkumulátora teljesen fel van töltve. 2. Győződjön meg róla, hogy a távirányító bal karja középső helyzetben van-e. 3. Kérjük, szigorúan kövesse az utasításokat a működtetés előtt bekapcsoláskor és kikapcsoláskor.
  • Page 166 Leírás Drone A Propeller B Propeller Elülső fel fedél Jobb B Propeller A Propeller Hátulsó Kamera Első Led Első Led Vissza Led Vissza Led Akkumulátor tartó...
  • Page 167 Akkumulátor rekesz Telefontartó Hálózati kapcsoló Jobb kar (előre/ Bal kar hátra/balra/ (Fojtószelep/ jobbra) oldalkormány) Címtartás tartás Leszállítás/landolás/ mód vészleállító gomb Nagy/Közepes/ Alacsony Trimmer üzemmód gomb (nyomja lefelé) sebesség Akkumulátor rekesz...
  • Page 168 Bal kar Mozgassa a kart előre/hátra/balra/jobbra, hogy a drón fel/le/balra/jobbra repüljön. Jobb kar A kart előre/hátra/balra/jobbra hogy a drón előre/ hátra/ balra/jobbra repüljön. Tápkapcsoló Nyomja fel a tápkapcsolót a bekapcsoláskor a távirányítón, és nyomja lefelé kikapcsoláskor Iránytartási mód Nyomja meg a gombot, hogy belépjen az iránytartó...
  • Page 169 A drón karjainak kinyitása A lenti ábrán látható nyíl irányában (1. kép) húzza ki a kar tartószerkezetét; kattanó hang jelzi, amikor a kar a teljesen kinyitott állapotba kerül (2. kép). Ellenkező irányba mozgatva ismét összecsukható. A lenti ábrán látható nyíl irányában (3. kép) húzza ki a kar tartószerkezetét;...
  • Page 170 VR szemüvegek Fejpánt Felső telefontartó Lencse Alsó telefontartó Telefontartó nyílása PU-habszivacs Bal oldali Jobb oldali lencse lencse...
  • Page 171: Elemek Behelyezése

    Elemek behelyezése: nyissa ki az elemtartó fedelét a Távirányító hátoldalán helyezzen be 4 alkáli elemet (nem tartozék) a dobozba az elektróda utasításoknak megfelelően. 4X1.5V Alkaline Batteries Elemtartó fedél Figyelmeztetés: 1. Győződjön meg róla, az elektródák kifogástalanok. 2. Ne használjon vegyesen régi és új elemeket. 3.
  • Page 172 3 ábra 2 ábra 1 ábra 2. Helyezze be az akkumulátort a rekeszbe, és kapcsolja be a drone-t. 4 ábra 3. Helyezze a drone-t sík felületre, a drone test fény villogása átvált folyamatos világításra, ami jelzi a sikeres frekvencia párosítást. Fontos figyelmeztetés:Ellenőrizze a jelfogó...
  • Page 173 5.ábra járásával ellentétes irányban forognak. 3. Mozgassa a bal kart és jobb kart egyidejűleg, mint az 5. képen látható (befelé 45 fok) motorok indításához és ismételje meg az előző lépést újra a motorok leállításához. 4. A motorok beindítása után, tolja fel a bal kart a drón lassú...
  • Page 174 Kalibrációs útmutató Kérjük, kövesse az alábbi lépéseket a drone kalibrálásához, ha a drone egyensúlyát veszti ütközés után repülés alatt, és nem lehet beállítani trimmer gombbal, ami bonyolult művelet. 1. Kapcsolja ki a drone-t, majd kapcsolja ki a Távirányító kapcsolót. 2. Kapcsolja be a Távirányító kapcsolót, nyomja a bal kart egészen a legalsó...
  • Page 175 1. Kapcsolja be a drone-t és tegye sima felületre vízszintes helyzetbe. A LED világítás villogásból folyamatos világítássá változik, amely jelzi a sikeres frekvencia párosítást. 2. Ne mozgassa a bal oldali kart a sikeres kalibráció előtt. Tolja el a jobb kart a 10.
  • Page 176 Nyomja a kart felfelé, a drón leszáll Húzza le a kart, a Bal kar drón leereszkedik. Fordítsa a kart balra, a drón balra fordul. Fordítsa a kart jobbra, a drón jobbra fordul.
  • Page 177 Nyomja a kart felfelé, a drón megy előre. Jobb kar Nyomja a kart lefelé, a drón megy hátra. Fordítsa a kart balra, a drón balra fordul. Fordítsa a kart jobbra, a drón jobbra fordul.
  • Page 178 Előre és hátra kiegyensúlyozás Miközben leteszi, a drónt előre billen, ez esetben nyomja le a bal kart a középpont felé, és nyomja meg a jobb kart hátra. Egyébként tolja előre. Bal és jobb fordulat kiegyensúlyozás Miközben leteszi, a drónt fej balra forog, ez esetben nyomja le a bal kart a középpont felé...
  • Page 179 Két reptetési metódus 1. Első Metódus Elreptetés): Nyomja meg a bal és jobb kart, mint a 12. kép mutatja a motor indításához, majd engedje el. Ezután nyomja fel a bal kart, hogy a drone bizonyos magasságba felrepüljön, majd engedje el a kart. 2.
  • Page 180 Vészleállító: Amikor a drone vészhelyzetben van, nekimegy a gyalogosnak vagy az akadálynak, stb. Nyomja meg azonnal a Letétel/landolás/vészleállító gombot és tartsa több mint 1 mp-ig. A hajócsavar azonnal leáll. Tipp: Ne használja a vészleállító funkciót kivéve csak vészhelyzetben. A drone le fog esni miután hirtelen minden propeller megáll. Magasságtartó...
  • Page 181 Nagy/Közepes/Alacsony sebesség kapc- soló 1. Kis sebességű üzemmód (1) a kezdőknek megfelelő. 2. Közepes sebességű üzemmód (2) az ügyes pilótáknak megfelelő a lágy szellőben reptetéskor. 3. Nagy sebességű üzemmód (3) a szakavatottaknak ajánlott, a szabadban légi mutatványok gyakorlására. Nagy/Közepes/Alacsony sebesség kapcsoló Iránytartási üzemmód *Drone-nak általában van eleje és hátulja, melyet a LED lámpák vagy a színes propellerek jeleznek.
  • Page 182 Szükséges betartani: Pozicionálja a drone-t úgy, hogy az eleje Önnel szembe legyen (lásd 1. Kép). Tipp: Ne változtassa meg a Távirányító pozicióját (lásd 2. kép) az iránytartási üzemmód elindítása után. Iránytartási üzemmód bekapcsolása, nyomja meg az iránytartási üzemmód gombot, és a drone LED villog, a drone elindította az iránytartási üzemmódot.
  • Page 183 átfordító bekapcsolódik automatikusan, ha a drone akku alacsony szintre kerül. Hatótávolságon túli riasztás Amikor a dróne a max hatótávolságból kirepül, a távirányító sípolni kezd, Didi..didi ..Didi ..., hogy figyelmeztesse a használót, hogy azonnal repüljön vissza. Vagy ha nem, a drón felett elveszti az irányítást, és elrepül.
  • Page 184 Töltse le és telepítse az APP-ot: ARCHOS Drone Remote Az APP alkalmas iOS vagy Android rendszerű mobiltelefonhoz, kérem töltse le a mobiltelefon szoftver áruházból: 1. Az iOS rendszerű mobiltelefonhoz, kérjük keresse az ARCHOS Drone Remote-t. 2. Az Android rendszerű mobiltelefonhoz, kérjük keresse az ARCHOS Drone Remote-ot.
  • Page 185 úgy, hogy a képernyő a lencse irányába nézzen, igazítsa be a telefont a legjobb nézőszögbe, majd engedje fel a felső telefontartót. Ügyeljen arra, hogy a VR-középpont a megfelelő helyen legyen. Fejpánt beállítása: Vegye kézbe a fejpántot, állítsa VR módba, majd állítsa be a három rögzítőpántot...
  • Page 186 Árnyékolókendő: Ha túl erős a fény ahhoz, hogy tisztán lássa a videót, rögzítse az árnyékolókendőt a VR-szemüvegre, így megvédi a képernyőt az erős fényektől. Kilépés az osztott képernyős üzemmódból: Koppintson a képernyőre; ekkor megjelenik a ikon.
  • Page 187 Probléma Probléma oka Megoldás 1. Alacsony 1. Cseréljen Távirányító akkumulátor szint. Távirányító akkut. indikátor 2. Az akkumulátor 2.Helyezze be az fény nem pozitív és negatív akkumulátort a világít pólusa fordított Használati utasítás sorrendben van. szerint. 3. Gyenge érintkezés 3. Tisztítsa meg a szennyeződéstől az akkumulátort és annak vágatát.
  • Page 188 A drone 1. A propeller 1. Cserélje ki a nem tud komolyan propellert. körözni, eldeformálódott 2.Cserélje ki a billenni 2. A motortartó motortartót. az egyik eldeformálódott. 3. Tegye a drone-t a oldalára. 3. A giroszkóp nem sík felületre kb. indítható újra 10 mp-ig, vagy indítsa erőteljes ütközés újra a kalibráláshoz.
  • Page 189 Archos company (Contact address : ARCHOS SA 12 Rue Ampère 91430 Igny France) declares that this device ARCHOS Drone VR is in compliance with the essential requirements and other relevant provisions of Directive 2014/53/EU: https://www.archos.com/products/conformity.html Par la présente, ARCHOS (adresse de contact : ARCHOS SA 12 Rue Ampère 91430 Igny France) déclare que l’appareil ARCHOS...

Table des Matières