ViewSonic VSD242 Guide De L'utilisateur

ViewSonic VSD242 Guide De L'utilisateur

Masquer les pouces Voir aussi pour VSD242:
Table des Matières

Publicité

Les langues disponibles

Les langues disponibles

Liens rapides

VSD242
Smart Display
User Guide
Guide de l'utilisateur
Guía del usuario
使用手册
Model No. VS16340

Publicité

Table des Matières
loading

Sommaire des Matières pour ViewSonic VSD242

  • Page 1 VSD242 Smart Display User Guide Guide de l’utilisateur Guía del usuario 使用手册 Model No. VS16340...
  • Page 2 Thank you for choosing ViewSonic With over 25 years as a world leading provider of visual solutions, ViewSonic is dedicated to exceeding the world’s expectations for technological evolution, innovation, and simplicity. At ViewSonic, we believe that our products have the potential to make a positive impact in the world, and we are confident that the ViewSonic product you have chosen will serve you well.
  • Page 3: Compliance Information

    Compliance Information Please read before proceeding • Use only the batteries and power adapter provided by the manufacturer. The use of unauthorized accessories may void your warranty. • Do not store your device in temperatures higher than 50°C (122°F). • The operating temperature for this device is from 0°C (32°F) to 35°C (95°F). CE Conformity for European Countries The device complies with the EMC Directive 2014/30/EU and Low Voltage Directive 2014/35/EU.
  • Page 4 Declaration of RoHS2 Compliance This product has been designed and manufactured in compliance with Directive 2011/65/ EU of the European Parliament and the Council on restriction of the use of certain hazardous substances in electrical and electronic equipment (RoHS2 Directive) and is deemed to comply with the maximum concentration values issued by the European Technical Adaptation Committee (TAC) as shown below: Proposed Maximum...
  • Page 5: Important Safety Instructions

    Important Safety Instructions DO NOT place objects on top of the device, as objects may scratch the screen. DO NOT expose the device to dirty or dusty environments. DO NOT place the device on an uneven or unstable surface. DO NOT insert any foreign objects into the device. DO NOT expose the device to strong magnetic or electrical field.
  • Page 6 ® Disclaimer: ViewSonic Corporation shall not be liable for technical or editorial errors or omissions contained herein; nor for incidental or consequential damages resulting from furnishing this material, or the performance or use of this product.In the interest of continuing product improvement, ViewSonic Corporation reserves the right to change product specifications without notice.
  • Page 7: Product Registration

    _______________________________ Product disposal at end of product life ViewSonic respects the environment and is committed to working and living green. Thank you for being part of Smarter, Greener Computing. Please visit ViewSonic website to learn more. USA & Canada: http://www.viewsonic.com/company/green/recycle-program/ Europe: http://www.viewsoniceurope.com/uk/support/recycling-information/...
  • Page 8: Table Des Matières

    Table of Contents Table of Contents 1 VSD242 Smart Display Features 2 Set Up Your VSD242 Smart Display 2.1 Connection ................. 2 2.2 Get Your Smart Display Ready for Use ......2 2.3 Power on Your Device ............3 2.4 Power Off Your Device ............4 3 About Your VSD242 Smart Display 3.1 Touch Screen ..............
  • Page 9: Vsd242 Smart Display Features

    Table of Contents VSD242 is a Smart Display with 23.6-inch quad-core display running on Android 5.1 (Lollipop) Comes with 1920x1080p HD resolution, allow you to work with HDMI, full-sized USB connectivity as well. 1 VSD242 Smart Display Features This section introduces you to the features of your Smart Display.
  • Page 10 Table of Contents No. Components Descriptions Touch screen - Touch the screen to control the on-screen configurations including menu items,applications, buttons,keyboard and so on. Power button Press to power on / lock the smart display. - Press about 0.5 seconds to power on the power. - Lock the smart display when the display is on.
  • Page 11: Left Side

    VSD242 Smart Display Features Back View LEFT SIDE RIGHT SIDE LEFT SIDE No. Components Descriptions RJ45 Connector Connect to a RJ45 cable for network connection. Connect to digital high quality device for video and HDMI OUT audio configurations (e.g. PC Monitor, BD Player...
  • Page 12: Set Up Your Vsd242 Smart Display

    Set Up Your VSD242 Smart Display 2 Set Up Your VSD242 Smart Display 2.1 Connection USB Type-A Printer PC Monitor HDMI OUT USB Type-A USB Storage Notebook HDMI IN External USB Type-A Computer DVD Player Keyboard Headset Earphone USB Type-A...
  • Page 13: Power On Your Device

    Set Up Your VSD242 Smart Display Connect the Power Cord Connect the included power cord to the power jack. Connect the other end of the power cord to a suitable power outlet. 2.3 Power on Your Device Press the power button gently to power on your device...
  • Page 14: Power Off Your Device

    Set Up Your VSD242 Smart Display Touch and slide the lock icon to unlock the screen if necessary. The device is ready for use when the Home screen is displayed. 2.4 Power Off Your Device Press and hold the power button for about 3 seconds.
  • Page 15: About Your Vsd242 Smart Display

    About Your VSD242 Smart Display 3 About Your VSD242 Smart Display 3.1 Touch Screen The main way to control the device is using your finger to touch the sensitive surface of the screen directly. You can manipulate icons, buttons, menu...
  • Page 16: Applications, Widgets And Shortcuts

    About Your VSD242 Smart Display 3.2 Applications, Widgets and Shortcuts The soft buttons or icons offer a variety of functions and shortcuts. On the Home screen, it is your starting point to access all the features on your device. It displays application icons, widgets, shortcuts and so on.
  • Page 17 About Your VSD242 Smart Display 3 4 5 Items Descriptions Use the Google Search application to search Google Search the web faster and easier from Google. Navigation Flick and drag the screen horizontally until Area the desired Home screen is displayed.
  • Page 18: Navigation Buttons

    About Your VSD242 Smart Display Items Descriptions You can add an application shortcut to the Home screen and move it freely by touching Shortcuts and holding the specified icon. This icon allows you to open a shortcut item quickly. 3.4 Navigation buttons...
  • Page 19: Status Bar

    About Your VSD242 Smart Display 3.5 Status Bar The upper right corner of the screen displays current time, and specified icon (status bar). Items Descriptions Time Displays the current time. Specified Icon Show you the enabled icon. Show you the current state of your device just like Owner, Status Menu Brightness, Settings, and WIFI Settings.
  • Page 20: Customizing Your Home Screen

    About Your VSD242 Smart Display 3.6 Customizing Your Home Screen 3.6.1 Add an Item (Shortcut) • Touch the Home button to go back the central Home screen. • Drag on the screen horizontally to select a Home screen where you want to add the item.
  • Page 21: Navigating The Applications

    About Your VSD242 Smart Display • Some wallpaper allows you to change the wallpaper color, ex. Magic Smoke. If “Settings…” displays during the changing wallpaper. Touch it , and on the top of screen will display “Tap to change”, touch the screen to configure the wallpaper color.
  • Page 22: Application Shortcuts

    About Your VSD242 Smart Display 3.7.2 Application Shortcuts To quickly launch applications on the Home screen, you can add shortcuts for frequently- used application to the Home screen. For more information, please Refer to Customizing Your Home Screen. Use the shortcut to open an application Touch the Home button on the system bar.
  • Page 23: Screen Lock Wallpaper

    About Your VSD242 Smart Display 3.7.4 Screen Lock Wallpaper You can set the display to turn off automatically after a timeout period of inactivity, or power it off manually by touching Power button. When you touch the Power button to wake up the display, the screen lock wallpaper appears to avoid unintentional touch of the screen.
  • Page 24: Connecting To Hdmi-Compliant Devices Via Hdmi Input

    You can obtain the best user experience for video playback and gaming via HDMI. VSD242 is equipped with a HDMI input for connection to an external HDMI- compliant device. You can connect your PC, notebook, Blu-ray player or any other HDMI-compliant device to VSD242 for high-definition video display.
  • Page 25: Osd Menu

    C O N T R A S T B R I G H T N E S S Select the Menu/Exit button on side of your VSD242 to launch OSD configuration screen. The OSD configuration screen can be used to configure the Contrast/Brightness, Input Select, Audio Adjust, Color Adjust, Information, Manual Image Adjust, Setup Menu and Memory Recall.
  • Page 26: Functions Items

    Color Adjust: Include sRGB, Bluish, Cool, Native, Warm and user color items. Information: Select this item to show you the information about your VSD242 including the Resolution, H.Frequency, V.Frequency, Pixel Clock, Model Number and Website. Manual Image Adjust: Include Sharpness, Dynamic Contrast, Aspect Ratio, Overscan, ECO Mode, ViewMode and Blue Light Filter.
  • Page 27: Osd Notice

    OSD Menu 4.3 OSD Notice idling: The OSD menu will close and go back to the original processing screen automatically during your OSD menu is idling that reached to the OSD time out value. No signal: • The HDMI connection is not ready. •...
  • Page 28: Troubleshooting

    - Ensure that the DC connector is fully inserted into the correct No power socket on the rear of the VSD242 located under the cover - Check the power socket with another device (i.e. table lamp) - If there is still no power then contact ViewSonic support or...
  • Page 29: Appendix

    Appendix 6 Appendix Specification LCD Spec. Size 60cm (23.6” viewable) Resolution 1920x1080 Brightness 250 cd/m Backlight Thickness 47 mm Touch screen PCT 10 points touch supported Hardware Buttons Power button *1 Control keys *4 Power LED Indicator Blue (on) / Amber (saving) I/O ports LAN RJ45, supports 10/100/1000 Mbps HDMI-OUT...
  • Page 30: Accessories

    Appendix Input: 110V~230V Adaptor Output: 12V, 4A (48W) Physical 593mm x365x47(mm) 23.35x14.37x1.85(inches) 5.62Kg (Net) Weight 8.12Kg (Gross) Android 5.1 (Lollipop) System CPU/SoC Rockchip RK3288 Speed 1.8GHz Cores Quad-core Graphic Embedded Memory DDR3 2GB, Speed to 800Mbps Storage eMMC (NAND), 16GB WLAN 802.11 b/g/n Environment...
  • Page 31: Customer Support

    C= http://www.viewsonic.com/la/ Latin America (Mexico) www.viewsonic.com/la/ soporte@viewsonic.com soporte/servicio-tecnico Nexus Hightech Solutions, Cincinnati #40 Desp. 1 Col. De los Deportes Mexico D.F. Tel: 55) 6547-6454 55)6547-6484 Other places please refer to http://www.viewsonic.com/la/soporte/servicio-tecnico#mexico C= http://www.viewsonic.com/la/ Latin America (Peru) www.viewsonic.com/la/ soporte@viewsonic.com soporte/servicio-tecnico Macau www.hk.viewsonic.com...
  • Page 32 ® What the warranty covers: ViewSonic warrants its products to be free from defects in material and workmanship, under normal use, during the warranty period. If a product proves to be defective in material or workmanship during the warranty period, ViewSonic will, at its sole option, repair or replace the product with a like product.
  • Page 33 Exclusion of damages: ViewSonic’s liability is limited to the cost of repair or replacement of the product. ViewSonic shall not be liable for: 1. Damage to other property caused by any defects in the product, damages based...
  • Page 34 évolutions technologiques, l’innovation et la simplicité. Chez ViewSonic, nous croyons que nos produits ont le potentiel d’avoir un impact positif sur le monde, et sommes confiants que le produit ViewSonic que vous avez choisi vous sera utile.
  • Page 35: Informations De Conformité

    Informations de conformité Veuillez lire la section suivante avant de continuer • Utilisez seulement les batteries et l’adaptateur secteur fournis par le fabricant. L’utilisation d’accessoires non autorisés peut annuler la garantie. • Ne rangez pas votre téléphone dans des endroits où la température est plus de 50ºC ou 122ºF.
  • Page 36: Déclaration De Conformité Rohs2 (Lsdeee2)

    Déclaration de conformité RoHS2 (LSDEEE2) Ce produit a été conçu et fabriqué dans le respect de la directive 2011/65/EU du Parlement Européen et du Conseil relative à la limitation de l’utilisation de certaines substances dangereuses dans les équipements électriques et électroniques (Directive RoHS2 - LSDEEE2) et il est déclaré...
  • Page 37: Importantes Instructions De Sécurité

    Importantes instructions de sécurité NE PAS placer d'objet sur l'appareil. Les objets peuvent le rayer ou pénétrer dans l'écran. NE PAS exposer l'appareil à la saleté ou à la poussière. NE PAS placer l'appareil sur une surface instable ou irrégulière. NE PAS faire pénétrer un objet étranger dans l'appareil.
  • Page 38 ViewSonic Corp. décline également toute responsabilité vis-à- vis des performances ou de l’utilisation de ce produit.Dans un souci amélioration constant de ses produits, ViewSonic Corporation se réserve le droit de modifier les spécifications du produit sans avis préalable. Les informations contenues dans ce document peuvent changer sans préavis.
  • Page 39: Enregistrement Du Produit

    _______________________________ Elimination du produit en fin de vie ViewSonic respecte l’environnement et fait des efforts allant dans le sens d’un environnement de travail et de vie écologiques. Merci d’oeuvrer aussi pour une informatique plus intelligente et plus écologique. Pour en savoir plus, veuillez visiter le site web de ViewSonic.
  • Page 40 Table des matières Table des matières 1 Caractéristiques du Smart Display (Écran intelligent) VSD242 2 Configurer votre Smart Display VSD242 2.1 Connexion ................2 2.2 Préparer votre Smart Display avant de l'utiliser ....2 2.3 Allumez votre appareil ............3 2.4 Éteignez votre appareil ............
  • Page 41: Caractéristiques Du Smart Display (Écran Intelligent) Vsd242

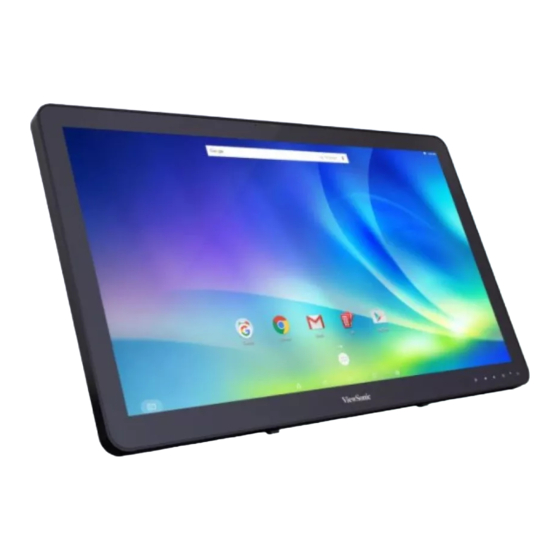
    Table des matières VSD242 est un Smart Display (écran intelligent) avec un affichage de 23,6-pouces quad-core fonctionnant sous Android 5.1 (Lollipop). Il est fourni avec une résolution HD de 1920 x 1080p, ce qui vous permet de travailler avec : HDMI, et aussi une connectivité USB.
  • Page 42 Table des matières Numéro Composants Descriptif Micro Sert à recevoir une entrée audio. Ecran tactile Touchez l'écran pour contrôler les configurations d'écran, dont les éléments de menu, les applications, les boutons, le clavier, etc. Bouton d'alimentation Appuyez pour allumer / verrouiller l'écran intelligent.
  • Page 43: Côté Gauche Côté Droit

    Caractéristiques du Smart Display (Écran intelligent) VSD242 Vue arrière CÔTÉ GAUCHE CÔTÉ DROIT CÔTÉ GAUCHE Numéro Composants Descriptif Connecteur Pour raccorder l'écran à un câble RJ45 pour une connexion réseau. RJ45 SORTIE HDMI Connecter à un appareil numérique de qualité...
  • Page 44: Configurer Votre Smart Display Vsd242

    Configurer votre Smart Display VSD242 2 Configurer votre Smart Display VSD242 2.1 Connexion USB Type-A Printer PC Monitor HDMI OUT USB Type-A USB Storage Notebook HDMI IN External USB Type-A Computer DVD Player Keyboard Headset Earphone USB Type-A Microphone Mouse...
  • Page 45: Allumez Votre Appareil

    Configurer votre Smart Display VSD242 Branchez le cordon d'alimentation Branchez le cordon d'alimentation fourni à la prise électrique. Branchez l'autre extrémité du cordon d'alimentation à une prise de courant adaptée. 2.3 Allumez votre appareil Appuyez doucement sur le bouton d'alimentation pour allumer votre appareil Faites glisser l'icône de verrouillage pour déverrouiller l'écran...
  • Page 46: Éteignez Votre Appareil

    Configurer votre Smart Display VSD242 L'écran de déverrouillage va apparaître après une courte période de démarrage. (Si la fonction d'écran de verrouillage est activée). Touchez et faites glisser l'icône de verrouillage pour déverrouiller l'écran si nécessaire. L'appareil est prêt à l'utilisation quand l'écran Accueil s'affiche.
  • Page 47: Propos De Votre Smart Display Vsd242

    À propos de votre Smart Display VSD242 3 À propos de votre Smart Display VSD242 3.1 Ecran tactile Pour contrôler l'appareil, la méthode principale est d'utiliser votre doigt pour toucher directement la surface sensible de l'écran. Vous pouvez manipuler les icônes, les boutons, les éléments du menu, le clavier à l'écran et d'autres éléments sur l'écran tactile à...
  • Page 48: Applications, Widgets Et Raccourcis

    À propos de votre Smart Display VSD242 3.2 Applications, widgets et raccourcis Les boutons programmables ou icônes offrent multiples fonctionnalités et raccourcis. Sur l'écran Accueil, ils servent de point de départ pour accéder à toutes les fonctionnalités de votre appareil. Ils affichent des icônes d'applications, des widgets, des raccourcis, etc.
  • Page 49 À propos de votre Smart Display VSD242 3 4 5 Numéro Éléments Descriptif Utilisez l'application de recherche Google pour Recherche rechercher le Web plus rapidement et plus Google facilement à partir de Google. Feuilletez et déplacez l'écran de gauche à...
  • Page 50: Boutons De Navigation

    À propos de votre Smart Display VSD242 3.4 Boutons de navigation Sur le bas de l'écran (la barre système), vous pouvez trouver les boutons de navigation décrits ci-dessous : Boutons Descriptif - Touchez ce bouton pour retourner à l'écran ou à l'option précédent(e).
  • Page 51: Barre De Statut

    À propos de votre Smart Display VSD242 3.5 Barre de statut Le coin supérieur droit de l'écran affiche l'heure actuelle, et l'icône spécifiée (barre d'état). Éléments Descriptif Heure Affiche l'heure actuelle. Icône spécifiée Vous indique l'icône activée. Tout comme le Owner (propriétaire), affichez l'état actuel Menu État...
  • Page 52: Votre Écran Accueil Personnalisé

    À propos de votre Smart Display VSD242 3.6 Votre écran Accueil personnalisé 3.6.1 Ajoutez un élément (raccourci) • Touchez le bouton Accueil pour retourner à l'écran Accueil central. • Déplacez-le sur l'écran de gauche à droite pour sélectionner un écran Accueil sur lequel vous voulez ajouter l'élément.
  • Page 53: Navigation Des Applications

    À propos de votre Smart Display VSD242 • Une fois la sélection de papier peint terminée, touchez «Set wallpaper (Régler le papier peint)» pour renouveler le papier peint de l'écran Accueil. • Certains papiers peints vous permettent de changer la couleur du papier peint, par exemple : Magic Smoke (Fumée magique).
  • Page 54: Raccourcis Des Applications

    À propos de votre Smart Display VSD242 3.7.2 Raccourcis des applications Pour lancer rapidement des applications sur l'écran Accueil, vous pouvez ajouter des raccourcis sur ledit écran pour des applications utilisées fréquemment. Pour plus d'informations, veuillez consulter la 3.6 Votre écran Accueil personnalisé.
  • Page 55: Papier Peint De Verrouillage De L'écran

    À propos de votre Smart Display VSD242 3.74 Papier peint de verrouillage de l'écran Vous pouvez configurer l'affichage pour qu'il s'éteigne automatiquement après une période de temporisation d'inactivité, ou l'éteindre manuellement en appuyant sur bouton d'alimentation. Lorsque vous appuyez sur le bouton d'alimentation pour réactiver l'écran, le papier peint de verrouillage d'écran...
  • Page 56: Connexion À Des Appareils Compatibles Hdmi Via Une Entrée Hdmi

    Vous pouvez obtenir via HDMI la meilleure expérience utilisateur pour une lecture vidéo et des jeux. L'écran VSD242 est équipé d'une entrée HDMI pour une connexion à un appareil externe compatible HDMI.
  • Page 57: Menu Osd

    C O N T R A S T B R I G H T N E S S Appuyez sur le bouton Menu/sortie sur le côté de votre VSD242 pour lancer la configuration de l'écran OSD. L'écran de configuration OSD peut être utilisé...
  • Page 58: Éléments De Fonctions

    éléments de couleur de l'utilisateur. Information Sélectionnez cet élément pour afficher les informations concernant votre VSD242, y compris la résolution, la haute fréquence (HF), la très haute fréquence (VHF), l'horloge Pixel, le numéro de modèle et le site Web.
  • Page 59: Notice Osd

    Menu OSD 4.3 Notice OSD ralenti : Le menu OSD se fermera et retournera automatiquement à l'écran de traitement d'origine quand menu OSD est au ralenti et a atteint la valeur de limite de l'OSD. Aucun signal : • La connexion HDMI n'est pas prête. •...
  • Page 60: Dépannage

    - Assurez-vous que l'adaptateur d'alimentation est branché dans une prise de courant adaptée - S'assurer que le connecteur CC est entièrement inséré dans la bonne prise sur l'arrière du VSD242 situé sous le couvercle - Vérifiez la prise d'alimentation avec un autre appareil...
  • Page 61: Annexe

    Annexe 6 Annexe Spécifications Spécifications de l'affichage LCD. Taille 60cm (23,6” viewable) Résolution 1920x1080 Luminosité 250 cd/m Rétroéclairage Épaisseur 47 mm Ecran tactile PCT 10 points contact soutenu Matériel Boutons Bouton d'alimentation *1 Touches de contrôle *4 Voyant DEL Bleu (en marche) / Orange (enregistrement) d’alimentation Ports E/S LAN (RJ45, prend en charge 10/100 Mbit/s) *1...
  • Page 62 Annexe Android 5.1 (Lollipop) Système CPU/SoC Rockchip RK3288 Vitesse 1,8GHz Cœurs Quadricœur Graphique Incorporé Mémoire DDR3 2 Go, vitesse jusqu'à 800 Mbit/s En stockage eMMC (NAND), 16Go WLAN 802,11 b/g/n Environnement Température et humidité Fonctionnement : 20% ~ 90% @ 35 C sans condensation En stockage : 90% H.R.
  • Page 63: Service Clientèle

    Pays /Région Site Internet Courrier électronique F= Fax France et autres pays www.viewsoniceurope. www.viewsoniceurope.com/fr/ service_fr@viewsoniceurope.com francophones en Europe com/fr/ support/call-desk/ T (Numéro vert)= 1-866-463-4775 Canada www.viewsonic.com T= 1-424-233-2533 service.ca@viewsonic.com F= 1-909-468-3757 www.viewsoniceurope. www.viewsoniceurope.com/de/ Suisse service_ch@viewsoniceurope.com com/de/ support/call-desk/ www.viewsoniceurope. www.viewsoniceurope.com/fr/ Belgique (Français) service_be@viewsoniceurope.com...
  • Page 64: Garantie Limitée Viewsonic ® Smart Display

    état. Durée de la garantie : Les appareils ViewSonic Smart Display sont garantis de 1 à 3 ans en fonction du pays d’achat; cette garantie s’applique à tous les composants, y compris la source lumineuse, et comprend la main d’oeuvre à compter de la première date d’achat du produit.
  • Page 65 Exclusion des dommages : La responsabilité de viewsonic se limite au coût de réparation ou de remplacement du produit. La sociéte viewsonic ne pourra pas être tenue pour responsable: 1. Des dommages causés à d’autres biens en raison d’un défaut du produit, les dom- mages résultant d’une gêne, de l’impossibilité...
  • Page 66 Gracias por elegir ViewSonic Con más de 25 años como proveedor líder mundial de soluciones visuales, ViewSonic se dedica a superar las expectativas del mundo en lo que a evolución, innovación y simplicidad tecnológicas se refiere. En ViewSonic, creemos que nuestros productos tienen el potencial necesario para impactar positivamente en el mundo y confiamos en que el producto de ViewSonic que ha elegido le proporcione un buen servicio.
  • Page 67: Información De Conformidad

    Información de conformidad Lea estas instrucciones antes de continuar • Use exclusivamente las baterías y el adaptador de alimentación suministrados por el fabricante. El uso de accesorios no autorizados puede invalidar la garantía. • No almacene el teléfono en lugares con temperaturas superiores a 50 ºC o 122 ºF. •...
  • Page 68 Declaración de Cumplimiento de RoHS2 Este producto ha sido diseñado y fabricado cumpliendo la Directiva 2011/65/EU del Parlamento Europeo y el Consejo para la restricción del uso de ciertas sustancias peligrosas en equipos eléctricos y electrónicos (Directiva RoHS2) y se considera que cumple con los valores de concentración máximos publicados por el European Technical Adaptation Committee (Comité...
  • Page 69 Importantes Instruciones de Seguridad NO coloque ningún objeto sobre el dispositivo. Los objetos pueden arañar la pantalla o entrar en ella. NO exponga el dispositivo a entornos sucios o polvorientos. NO coloque el dispositivo en una superficie irregular o inestable. NO inserte ningún objeto extraño en el dispositivo.
  • Page 70 La información contenida en este documento puede cambiar sin previo aviso.Queda prohibida la copia, reproducción o transmisión de este documento por ningún medio ni para ningún fin, sin el previo consentimiento por escrito de ViewSonic Corporation. Información de derechos de propiedad intelectual Los derechos de todas las tecnologías y productos que componen este dispositivo son...
  • Page 71: Registro Del Producto

    ViewSonic es respetuoso con el medioambiente y está comprometido a trabajar y vivir de una manera que sea respetuosa con el medioambiente. Gracias por ser parte de una forma de Computación más Inteligente y más Verde. Visite el sitio web de ViewSonic para saber más.
  • Page 72 Conexión .....................2 Preparar la pantalla inteligente para utilizarla ........2 Encender el dispositivo ...............3 Apagar el dispositivo ................4 3 Información acerca de la pantalla inteligente VSD242 Pantalla táctil ..................5 Aplicaciones, widgets y accesos directos ...........6 Pantalla de inicio .................6 Botones de navegación ..............8 Barra de estado ..................9...
  • Page 73: Funciones De La Pantalla Inteligente Vsd242

    Tabla de contenido VSD242 es una pantalla inteligente de 23,6 pulgadas y cuatro núcleos que tiene instalado Android 5.1 (Lollipop). Cuenta con una resolución HD de 1920x1080p, permite trabajar con HDMI y también tiene opciones de conectividad USB de tamaño completo.
  • Page 74 Tabla de contenido Nº Componentes Descripciones Pantalla táctil Toque la pantalla táctil para controlar las configuraciones en pantalla, como por ejemplo elementos de menú, aplicaciones, botones, teclado, etc. Botón de encendido y Presione este botón para encender o bloquear la apagado pantalla inteligente.
  • Page 75: Vista Posterior

    Funciones de la pantalla inteligente VSD242 Vista posterior LADO IZQUIERDO LADO DERECHO LADO IZQUIERDO Nº Componentes Descripciones Conector RJ45 Permite conectar un cable RJ45 para conexión de red. SALIDA HDMI Permite conectar dispositivos digitales de alta calidad para configuraciones de vídeo y audio (por...
  • Page 76: Configurar La Pantalla Inteligente Vsd242

    Configurar la pantalla inteligente VSD242 2 Configurar la pantalla inteligente VSD242 2.1 Conexión USB Type-A Printer PC Monitor HDMI OUT USB Type-A USB Storage Notebook HDMI IN External USB Type-A Computer DVD Player Keyboard Headset Earphone USB Type-A Microphone Mouse...
  • Page 77: Encender El Dispositivo

    Configurar la pantalla inteligente VSD242 Conectar el cable de alimentación Conecte el cable de alimentación incluido a la toma de alimentación. Conecte el otro extremo del cable de alimentación a la toma de corriente adecuada. 2.3 Encender el dispositivo Presione el botón de alimentación suavemente para encender el dispositivo.
  • Page 78: Apagar El Dispositivo

    Configurar la pantalla inteligente VSD242 La pantalla de desbloqueo aparecerá después de un período breve de puesta en marcha. (Si la función de pantalla de bloqueo está habilitada). Si es necesario, toque y desplace el icono del candado para desbloquear la pantalla.
  • Page 79: Información Acerca De La Pantalla Inteligente Vsd242

    Información acerca de la pantalla inteligente VSD242 3 Información acerca de la pantalla inteligente VSD242 3.1 Pantalla táctil La principal forma de controlar el dispositivo es con los tocando directamente la superficie sensible de la pantalla. Puede manipular iconos, botones, elementos de menú, el teclado en pantalla y otros elementos de la pantalla...
  • Page 80: Aplicaciones, Widgets Y Accesos Directos

    Información acerca de la pantalla inteligente VSD242 3.2 Aplicaciones, widgets y accesos directos Los botones en pantalla o los iconos ofrecen una gran variedad de funciones y accesos directos. La pantalla Inicio, es su punto de partida para acceder a todas las funciones del dispositivo.
  • Page 81 Información acerca de la pantalla inteligente VSD242 3 4 5 Nº Elementos Descripciones Google Utilice la aplicación Google Search de Google Search para navegar por Internet más rápido y fácil. Área de Pase y arrastre la pantalla horizontalmente hasta navegación que aparezca la pantalla Inicio que desee.
  • Page 82: Botones De Navegación

    Información acerca de la pantalla inteligente VSD242 3.4 Botones de navegación En la parte inferior de la pantalla (barra del sistema) se encuentran los botones de navegación que se describen a continuación: Botones Descripciones - Toque este botón para volver a la pantalla u opción anterior.
  • Page 83: Barra De Estado

    Información acerca de la pantalla inteligente VSD242 3.5 Barra de estado La esquina superior derecha de la pantalla muestra la hora actual y el icono especificado (barra de estado). Elementos Descripciones Hora Muestra la hora actual. Icono especificado Muestra el icono habilitado.
  • Page 84: Personalizar La Pantalla Inicio

    Información acerca de la pantalla inteligente VSD242 3.6 Personalizar la pantalla Inicio 3.6.1 Agregar un elemento (acceso directo) • Toque el botón Inicio para volver a la pantalla Inicio central. • Arrastre la pantalla horizontalmente para seleccionar una pantalla de inicio en la que desee agregar el elemento.
  • Page 85: Recorrer Las Aplicaciones

    Información acerca de la pantalla inteligente VSD242 • Algunos fondos de pantalla permiten cambiar el color del mismo, por ejemplo Magic Smoke (Humo mágico) Si “Settings… (Configuración...)” aparece durante el cambio del fondo de pantalla. Tóquelo y en la parte superior de la pantalla aparecerá “Tap to change (Pulsar para cambiar)”.
  • Page 86: Accesos Directos De Aplicación

    Información acerca de la pantalla inteligente VSD242 3.7.2 Accesos directos de aplicación Para ejecutar rápidamente aplicaciones en la pantalla Inicio, puede agregar accesos directos para aplicaciones usadas frecuentemente a la pantalla Inicio. Para obtener más información, consulte la sección 3.6 Personalizar la pantalla Inicio.
  • Page 87: Papel Tapiz De Bloque De Pantalla

    Información acerca de la pantalla inteligente VSD242 3.7.4 Papel tapiz de bloque de pantalla Puede establecer que la pantalla se apague automáticamente después de un período de espera de inactividad o apagarla manualmente tocando el botón de alimentación. Cuando toque el botón de alimentación para reactivar la pantalla, aparecerá...
  • Page 88: Conectar Dispositivos Hdmi A Través De La Entrada Hdmi

    VSD242 cuenta con una entrada HDMI que permite conectar dispositivos HDMI externos. Puede conectar su equipo de sobremesa, equipo portátil, reproductor Blu-ray o cualquier otro dispositivo HDMI a la pantalla VSD242 para visualización de vídeo de alta definición. Cómo empezar Debe tener disponible un cable HDMI de tipo A (HDMI) a tipo A (HDMI).
  • Page 89: Menú Osd

    B R I G H T N E S S Seleccione el botón Menu/Exit (Menú/Salir) situado en el lateral de la pantalla VSD242 para iniciar la pantalla de configuración del menú OSD. La pantalla de configuración del menú OSD se puede ajustar para definir los siguientes parámetros: Contrast/Brightness (Contraste y brillo), Input Select...
  • Page 90: Elementos De Funciones

    Cool (Frío), Native (Nativo), Warm (Cálido) y elementos de color del usuario. Information (Información): Seleccione este elemento para mostrar información de la pantalla VSD242. Los elementos de información que se puede mostrar son los siguientes: Resolution (Resolución), H.Frequency (Frecuencia H.), V.Frequency (Frecuencia V.), Pixel Clock (Reloj de píxeles), Model Number (Número de modelo) y Website (Sitio Web).
  • Page 91: Aviso Sobre El Menú Osd

    Menú OSD 4.3 Aviso sobre el menú OSD Inactividad: El menú OSD se cerrará y regresará a la pantalla de procesamiento original automáticamente si dicho menú OSDha estado inactivo durante el tiempo establecido en la opción OSD Time Out (Tiempo de espera OSD). No signal (No hay señal): •...
  • Page 92: Solucionar Problemas

    - Asegúrese de que el conector de CC está completamente insertado en la toma correcta situada en la parte posterior de la unidad VSD242 que se encuentra debajo de la tapa. - Compruebe la toma de corriente con otro dispositivo, como por ejemplo con una lámpara de mesa.
  • Page 93: Apéndice

    Apéndice 6 Apéndice Especificaciones Especificaciones de la pantalla LCD Tamaño 60 cm (23,6”) Resolución 1920x1080 Brightness (Brillo) 250 cd/m Retroiluminación Grosor 47 mm Pantalla táctil PCT 10 puntos de contacto soportado Hardware Botones Botón de alimentación *1 Botones de control *4 Indicador LED de Azul (encendido) / Naranja (ahorro) encendido...
  • Page 94 Apéndice Android 5.1 (Lollipop) System (Sistema) CPU/SoC Rockchip RK3288 Velocidad 1,8GHz Núcleos Cuatro núcleos Tarjeta gráfica Incrustada Medio DDR3 2 GB, 800 Mbps de velocidad Almacenamiento eMMC (NAND), 16 GB WLAN 802.11 b/g/n Entorno Temperatura y humedad Funcionamiento: 20% ~ 90% @ 35 C sin condensación Almacenamiento: H.R.
  • Page 95: Servicio De Atención Al Cliente

    Latinoamérica (México) www.viewsonic.com/la/ T= 001-8882328722 soporte@viewsonic.com Renta y Datos, 29 SUR 721, COL. LA PAZ, 72160 PUEBLA, PUE. Tel: 01.222.891.55.77 CON 10 LINEAS Electroser, Av Reforma No. 403Gx39 y 41, 97000 Mérida, Yucatán. Tel: 01.999.925.19.16 Other places please refer to http://www.viewsonic.com/la/soporte/index.htm#Mexico...
  • Page 96 Duración de la garantía: ViewSonic Smart Display tiene una garantía de entre 1 y 3 años, dependiendo del país donde se hayan comprado, para todas las piezas, incluida la fuente de luz, y para toda la mano de obre desde la fecha del primer día de compra por el consumidor.
  • Page 97 Exclusión de daños: La responsabilidad de viewsonic se limita al coste de la reparación o sustitución del producto. Viewsonic no se hace responsable de: 1. Daños a otras pertenencias causados por defectos del producto, inconvenientes, pérdida de uso del producto, de tiempo, de beneficios, de oportunidades comer-...
  • Page 98 感谢您选择 ViewSonic 作为超过 25 年的世界领先显示解决方案提供商,ViewSonic 一直专注在技术发 展、创新和简单化方面超过世界的预期。在 ViewSonic,我们相信我们的产品能 够对世界产生积极的影响,并且我们深信您选择的 ViewSonic 产品会很好地为 您服务。 再次感谢选择 ViewSonic!...
  • Page 99 符合性信息 请先阅读下列信息 • 只使用制造商提供的电池和电源适配器。若使用未经授权的附件,可能失去保修资 格。 • 请勿将您的设备存放在温度高于 50°C (122°F) 的地方。 • 此设备的工作温度范围是 0°C (32°F) 到 35°C (95°F)。 下列信息仅适用于欧盟成员国: 右侧所示的标志表示符合“废旧电气和电子设备指令 2012/19/EU”(WEEE)。 此标志表明不得按非分类市政垃圾废弃设备,而应根据当地法律使用回收系统。 如果此设备内含的电池、蓄电池和纽扣电池带有化学符号 Hg、Cd 或 Pb,则意 味着电池内重金属含量超过 0.0005% 汞或 0.002% 镉或 0.004% 铅。 中国电子信息产品污染控制标识要求 本产品有毒有害物质或元素的名称及含量标识如下表: 有毒有害物质或元素 部件名称 铅 汞 镉 六价铬 多溴联苯...
  • Page 100 重要安全注意事项 1. 请勿在此设备上放置任何物品,以免刮伤屏幕。 2. 请勿将此设备放置于脏乱或多尘的环境中。 3. 请勿将此设备放置在不平整或不稳定的表面上。 4. 请勿将任何异物插入此设备。 5. 请勿让此设备暴露于强电磁场。 6. 请勿让阳光直接照射此设备,以免损坏液晶屏幕。使其远离热源。 7. 请勿在雨中使用此设备。 8. 请咨询当地相关部门或零售商以了解如何处理处理废弃的产品。 9. 此设备和适配器在正常操作或充电时会产生热量。请勿将此设备放在腿上使用, 以免因受热而产生不适或伤害。 10. 功率输入额定值:参见此设备上的额定值标签,确保电源适配器与额定值相符。 仅使用制造商指定的附件。 11. 不要用钢笔或任何尖锐物件点击屏幕。 12. 用软布清洁屏幕。如果需要,在清洁前可略微蘸湿软布。切勿使用研磨剂或清洁 剂。 13. 在安装或卸下不支持热插拔的外部设备之前,务必先关闭此设备的电源。 14. 在清洁此设备之前,先关闭此设备的电源并从电源插座上拔掉电源线。 15. 请勿拆解此设备。应由取得认证的技术服务人士进行修理。 16. 此设备通过散热孔进行散热。请勿堵塞此设备的通风散热孔,以免其因温度过高而 发生故障。 17. 用户必须使用 USB 2.0 或以上版本的 USB 接口连接。 18.
  • Page 101 是 Video Electronics Standards Association 的注册商标。DPMS 和 DDC 是 ® VESA ® 的商标。 ENERGY STAR 是美国环境保护局 (EPA) 的注册商标。 ® 作为 ENERGY STAR 的合作伙伴,ViewSonic Corporation 确认此产品符合 ENERGY ® STAR ® 的能效指导方针。 免责:ViewSonic Corporation 对于本资料中包含的技术或编辑错误或疏漏,包括因提 供本资料而导致的偶然或必然的损失以及本产品的性能或使用,不应承担责任。为了不 断改进产品,ViewSonic Corporation 保留变更本产品规格而无须另行通知的权利。本 文档中的信息如有变更,恕不另行通知。 未经 ViewSonic Corporation 事先书面许可,不得出于任何目的以任何形式复印、复制...
  • Page 102 产品注册 为了满足您的未来需求,并接收我们在以后提供的更多产品信息,请注册您的产品, 网址是:www.viewsonic.com。 记录内容 VSD242 产品名称: ViewSonic Smart Display VS16340 型号: VSD242_UG_SCH Rev. 1A 02-24-16 文档号: _______________________________ 序列号: _______________________________ 购买日期: 产品达到使用寿命后废弃产品 ViewSonic 注重环境保护,致力于绿色工作和生活。感谢您参与“更加智能和环保的计 算”行动。如需更多信息,请访问 ViewSonic 网站。 美国和加拿大:http://www.viewsonic.com/company/green/recycle-program/ 欧洲:http://www.viewsoniceurope.com/uk/support/recycling-information/ 台湾:http://recycle.epa.gov.tw/recycle/index2.aspx 注意:本手册请保留备用。...
  • Page 103 目录 目录 1 VSD242 桌上型平板电脑特性 2 设置您的 VSD242 桌上型平板电脑 2.1 连接 ..................3 2.2 准备使用您的桌上型平板电脑 ..........3 2.3 打开电源设备 ..............4 2.4 关闭设备的电源 ..............5 3 关于您的 VSD242 智能显示器 3.1 触摸屏 ................. 6 3.2 应用程序、小部件和快捷方式 ..........7 3.3 主画面 ................. 7 3.4 导航按钮...
  • Page 104: Vsd242 桌上型平板电脑特性

    VSD242 桌上型平板电脑特性 VSD242 是一款桌上型平板电脑,采用 21.5 英寸四核显示屏,运行 Android 5.1 (Lollipop) 系统。它提供 1920x1080p HD 分辨率,支持 HDMI、全尺寸 USB 等多种连接。 1 VSD242 桌上型平板电脑特性 此部分向您介绍此桌上型平板电脑的各项特性。 注意 • 本用户手册中介绍的特性或应用可能因您购买的型号不同而存在差异。 前部概览 编号 组件 说明 - 拍摄正面照片,类似于自拍。 前面板摄像头 - 利用支持的 Web 应用程序进行视频通话。 麦克风 接收音频或音频输入。 触控屏 通过触摸屏幕控制屏幕上的配置,包括菜单项目、 应用程序、按钮、键盘等。...
  • Page 105 VSD242 桌上型平板电脑特性 编号 组件 说明 电源按钮 按此按钮打开电源/锁定桌上型平板电脑。 - 按住约 0.5 秒打开电源。 - 当显示器处于工作状态时,锁定桌上型平板电 脑。 - 当桌上型平板电脑处于锁定状态时,恢复非锁定 状态的显示。 - 当显示器处于工作状态时,按住此按钮约 3 秒可 以关闭桌上型平板电脑(在 Android 模式下)。 LED 指示灯 - 处于开机状态时,LED 显示蓝色。 - 当桌上型平板电脑处于锁定状态时,LED 变为橙 色。 OSD 菜单/退出 按此按钮启动 OSD 配置菜单,再按一次退出。 使用箭头按钮(向上/向右和向下/向左)在 OSD 菜...
  • Page 106 VSD242 桌上型平板电脑特性 后部概览 左视图 右视图 左视图 编号 组件 说明 RJ45 接口 连接 RJ45 网线以接入网络。 HDMI OUT 连接数字高质量设备进行视频和音频配置(如 DVD 播放机、BD 播放机 VPG 或笔记本电脑)。 HDMI IN 耳机插孔 连接耳机。 麦克风输入 将兼容的麦克风插入设备。 Micro SD 卡插槽 USB 上行网络摄像头的外部显示模式和触摸屏控 制功能。 Mini USB 端口 连接到 Windows 计算机以传输数据。(需要 MTP 驱动程序)...
  • Page 107: 设置您的 Vsd242 桌上型平板电脑

    设置您的 VSD242 桌上型平板电脑 2 设置您的 VSD242 桌上型平板电脑 2.1 连接 USB Type-A Printer PC Monitor HDMI OUT USB Type-A USB Storage Notebook HDMI IN External USB Type-A Computer DVD Player Keyboard Headset Earphone USB Type-A Microphone Mouse Microphone USB Type-B Computer...
  • Page 108: 打开电源设备

    设置您的 VSD242 桌上型平板电脑 连接电源线 将随附的电源线插入电源插孔。 将电源线另一端插入合适的电源插座。 2.3 打开电源设备 轻按电源按钮打开设备的电源 滑动锁图标解锁屏幕(若启用了滑动锁定屏幕功能) 连接电源线后,可以按住电源按钮 0.5 秒打开设备电源。 打开电源后,LED 指示灯显示稳定蓝色。 经过短暂引导时间后,出现解锁显示。(若启用了锁定屏幕功能) 按住并滑动锁图标以解锁屏幕(若需要)。...
  • Page 109: 关闭设备的电源

    设置您的 VSD242 桌上型平板电脑 主屏幕显示出来后,即可使用此设备了。 2.4 关闭设备的电源 按住电源按钮约 3 秒钟。 当关闭电源菜单出现时,按 OK(确定) 。...
  • Page 110: 关于您的 Vsd242 智能显示器

    关于您的 VSD242 智能显示器 3 关于您的 VSD242 智能显示器 3.1 触摸屏 此设备的主要控制方式是用手指直接触按屏幕的敏感表面。您可以利用下列方 法操控触摸屏上的图标、按钮、菜单项目、屏幕键盘、以及其他项目: 方法 说明 触按 用手指触按项目。 - 操作屏幕上的项目,包括应用程序和设置图标。 - 使用屏幕键盘键入字母和符号。 - 按屏幕上的按钮。 按住 按住屏幕上的项目:触按后不提起手指,直至发生操作。 拖动 用手指按住并移动项目,直至其到达目标位置。 - 在屏幕上移动项目。 - 滚动主屏幕、网页、列表、条目、照片缩略图、联系人等。 滑动 手指触按屏幕表面后,快速滑过屏幕表面(不停留)。 缩小 在屏幕上捏合两个手指,缩小图像或网页视图。 放大 在屏幕上分开两个手指,放大图像或网页视图。 注意 • 您可以连接三点以缩放整个显示频率,或者用两个手指旋转和缩放显示(如 Google 地图),以及调整专为盲人用户设计的语音输出、手势模式导航等功能。...
  • Page 111: 应用程序、小部件和快捷方式

    关于您的 VSD242 智能显示器 3.2 应用程序、小部件和快捷方式 软按钮或图标提供各种功能和快捷方式。主屏幕是您访问设备所有功能的起 点。它显示应用程序图标、小部件、快捷方式等。 应用程序: 软件用于执行特定任务。打开您设备的电源,它已预装了多种应用 程序。您还可以从 Google Play Store 下载更多应用程序。 小部件: 小部件是您可以在主屏幕上直接使用的一些应用程序。示例:模拟时 钟、书签、相框、Google 搜索栏等。 快捷方式: 您可以在主屏幕上创建链接,以快速访问您安装的应用程序。 3.3 主画面 打开设备电源并解锁屏幕后,首先显示中心主屏幕。您也可以按 “主屏幕” 按钮转到主屏幕。在主屏幕上,您可以访问设备中安装的所有功能。 主屏幕由 5 个屏幕面板组成。在中心主屏幕上向左或向右滑动手指,可以查看 各个屏幕面板上的更多小部件、快捷方式、以及其他项目。此外,还可以在各 个屏幕面板上添加快捷方式、小部件或更换桌面壁纸。...
  • Page 112 关于您的 VSD242 智能显示器 3 4 5 编 项目 说明 号 使用 Google 搜索应用程序更快更方便地从 Google 搜索 Google 搜索 Web。 轻轻地水平拖动屏幕,直至所需的主屏幕显 导航区域 示出来。 返回 返回之前的屏幕或选项。 主屏幕 此按钮可让您随时返回中心主屏幕。 按此按钮时,显示您最近访问的应用程序的 最近应用程序 图像列表。触按列出的图像可以打开相应的 应用程序。 屏幕截图 点击此按钮截取屏幕图像。 按应用程序按钮启动您设备中安装的所有应 应用程序 用程序。 启用了 Wi-fi 功能时, 屏幕右上角显示 Wi-fi Wi-fi...
  • Page 113: 导航按钮

    关于您的 VSD242 智能显示器 3.4 导航按钮 在屏幕底部(系统栏),您会看到如下所述的导航按钮: 按钮 说明 - 按此按钮返回之前的屏幕或选项。 - 屏幕上显示键盘时,此按钮变为 返回 。按它可以关闭屏 幕键盘。 - 在查看其他主屏幕时,按此按钮返回中心主屏幕。 - 在设备上启动任何功能时,按此按钮返回您之前查看的 主屏幕 主屏幕。或者,再次按此按钮返回中心主屏幕。 这是您打开最新访问的应用程序的一种快捷途径。选择并 最近应用程序 触按列表中的一个图像,即可直接打开相应的应用程序。 音量降低快键 连续点击时,音量减小 音量增加快键 连续点击时,音量增大...
  • Page 114: 状态栏

    关于您的 VSD242 智能显示器 3.5 状态栏 屏幕右上角显示当前时间以及特定图标(状态栏)。 项目 说明 时间 显示当前时间。 特定图标 显示已启用图标。 显示您设备的当前状态,如所有者、亮度、设置以及 WIFI 状态菜单 设置等。 3.5.1 管理状态菜单 触按并向下拖动状态栏上的时间区域,会显示 状态菜单。 • 按 OWNER(所有者) 项目可以查看您系统中保存的联系人。 • 按 BRIGHTNESS(亮度) 项目可以调整亮度。 • 按 SETTINGS(设置) 项目可以进入 Settings(设置)菜单,以便您更改显 6 自定义您的VSD242智能显示器 示设置。有关的详细信息,请参见 。 • 按 WI-FI 项目可以进入 WIRELESS & NETWORKS(无线和网络)配置菜...
  • Page 115: 自定义您的主屏幕

    关于您的 VSD242 智能显示器 3.6 自定义您的主屏幕 3.6.1 添加项目(快捷方式) • 按主屏幕按钮返回中心主屏幕。 • 在屏幕上水平拖动以选择您要添加项目的主屏幕。 • 按屏幕底部的 Apps(应用程序) 按钮 。 • 在 Apps(应用程序) 屏幕上,按 APPS(应用程序) 或 WIDGETS(小部 件) 标签进入应用程序或小部件配置屏幕。 • 选择您要添加的一个 APPS(应用程序) 或 WIDGETS(小部件) 项目。 • 按住该项目,将其添加到所选的主屏幕上。 3.6.2 移动项目 • 在主屏幕上,按住您要移动的项目。 • 将项目移到指定的位置。 • 松开手指,将项目添加到新位置。...
  • Page 116: 应用程序导航

    关于您的 VSD242 智能显示器 • 有些壁纸允许您更换壁纸颜色,如 Magic Smoke。如果在更换壁纸过程 中显示“ Settings…(设置...) ”。触按它,屏幕顶部会显示“ Tap to change(点击更换) ”,触按屏幕以配置壁纸颜色。点击屏幕可以切换不 同颜色。 • 您可以按 Back(返回) 按钮返回之前的屏幕,而不应用任何更改的设置。 注意 • 所有主屏幕共用相同的背景。您不能为各个主屏幕面板设置不同的壁纸。 3.7 应用程序导航 在“所有应用程序”菜单中,您可以看到您设备中可用的各个应用程序: 3.7.1 应用程序屏幕 打开应用程序屏幕 您可以通过按屏幕底部的 Apps(应用程序) ,从任意主屏幕访问 Apps(应用程 按钮 序) 屏幕。 Apps(应用程序) 屏幕显示设备 中安装的所有应用程序,包括您下载的应用程 序。 应用程序页面导航...
  • Page 117: 应用程序快捷方式

    关于您的 VSD242 智能显示器 3.7.2 应用程序快捷方式 为了在主屏幕上快速启动应用程序,您可以在 主屏幕上添加常用应用程序的快捷方式。有关 3.6 自定义您的主屏幕 的详细信息,请参见 。 使用快捷方式打开应用程序 按系统栏中的主屏幕按钮。 如果主屏幕上显示所需应用程序的快捷方式,按该快捷方式启动应用程 序。...
  • Page 118: 最近应用程序

    关于您的 VSD242 智能显示器 3.7.3 最近应用程序 打开最近使用的应用程序 按“最近应用程序”按钮 查看最近 使用的应用程序。 滚动最近使用的应用程序的列表,按所需应用程序的缩略图以启动该应 用程序。 再次按“最近应用程序”按钮 关闭最近使用的应用程序的列表。 3.7.4 锁屏壁纸 您可以将显示屏设为在空闲特定时间后自动关闭,或者设为按电源按钮手动关 闭。在您按电源按钮唤醒显示屏时,会出现锁屏壁纸,以免意外触按屏幕。 当锁屏壁纸出现时,按住锁图标,将其拖到环绕它的大圆的边缘,即可解锁屏 2.3 开启设备 幕。参见 。 注意 • 设置在进入休眠模式之前屏幕保持开启的时间长度,按 Home(主屏幕)按钮│Apps (应用程序)按钮│Settings(设置)│Display(显示)│Sleep(休眠)。...
  • Page 119: 通过 Hdmi 输入连接到 Hdmi 兼容设备

    容设备。您可以将 PC、笔记本电脑、Blu-ray 播放机或其他 HDMI 兼 容设备 连接到 VSD242,以显示高清视频。 如何开始 必须准备一条“A 型(HDMI)转 A 型(HDMI)”线。将线缆的 A 型 HDMI 接头连接到所需的 HDMI 兼容设备。 将 HDMI 线的 A 型接头连接到 VSD242 后部的 HDMI 端口。选择 SELECT(选择)键切换到显示模式。 若是连接 PC 或笔记本电脑,务必设置合适的分辨率。VSD242 支持的最 大分辨率是 1920*1080。 为了启用 KVM 功能,需将 USB 线的一端连接到 VSD242 的 USB B-type...
  • Page 120: Osd菜单

    C O N T R A S T / B R I G H T N E S S C O N T R A S T B R I G H T N E S S 按下 VSD242 的 Menu/Exit(菜单/退出)按钮启动 OSD 配置屏幕。在 OSD 配置屏幕中,可以配置对比度/亮度、输入信号选择、音频调整、彩色调整、 信息、图像手动调整、设定菜单、以及设定恢复。...
  • Page 121: 功能项目

    OSD菜单 4.2 功能项目 Input Select(输入信号选择) :选择输入源:HDMI 或 Android。在选择 HDMI 项目之前,切记要检查 HDMI 连接是否成功。 Color Adjust(色彩调整) :包括 sRGB、偏蓝、冷色、预设、暖色、以及用 户自定义色彩等项目。 Information(信息) :选择此项目时,显示与您的 VSD242 相关的信息,包 括分辨率、水平频率、垂直频率、像素时钟、型号以及网址等。 Manual Image Adjust(手动图像调整) :包括清晰度、动态对比度、画面比 例、过扫描、ECO 模式、影像调校、以及蓝色光过滤器等。 Setup Menu(设置菜单) :包括语言选择、分辨率通知、OSD 位置、OSD 显示时间、OSD 背景、电源指示灯、以及休眠。 Memory Recall(设定恢复) : 选择 Memory Recall(记忆恢复)功能可将 OSD 配置恢复至出厂设置。...
  • Page 122: Osd 声明

    OSD菜单 4.3 OSD 声明 空闲: 在 OSD 菜单空闲时间达到 OSD 显示时间值后,OSD 菜单将自动关闭并返回 原来的处理屏幕。 无信号: • HDMI 连接未准备就绪。 • HDMI 设备与此桌上型平板电脑的连接处于非正常状态。 4.4 OSD 和热键设置 菜单锁定:按住 [ ] 和向上箭头 [▲] 10 秒钟。这样按住任意键,将显示 OSD Locked(菜单已锁定)3 秒钟。 菜单锁定解除:再次按住 [ ] 和向上箭头 [▲] 10 秒钟。 电源按键锁定:按住 [ ] 和向下箭头...
  • Page 123: 故障排除

    的触摸功能无法正常 运作。 5.2 其他问题 问题 解决办法 按住 LED 电源指示灯至少 1-2 秒,如果 LED 不随着设备启动 不通电 而显示蓝色,则: - 确保电源适配器插入合适的电源插座 - 确保直流插头完全插入 VSD242 后部盖板下面的正确插口 - 用另一个设备(如台灯)检查电源插座是否供电 - 如果仍不通电,请联系 ViewSonic 支持人员或者联系向您销 售此设备的经销商 检查外部 HDMI 或 D-Sub 设备和连接。 没有显示 按 LED 电源指示灯重新启动。 锁定 应用程序不工作 联系应用程序作者。...
  • Page 124 附录 6 附录 规格 LCD规格 60 cm (23.6”) 尺寸 1920x1080 分辨率 250 cd/m 亮度 背光灯 47 mm 厚度 PCT10点触控支持 触摸屏 硬件 电源按钮 *1 按钮 控制键 *4 电源LED指示灯 蓝色(工作)/橙色(省电) I/O端口 LAN(RJ45,支持 10/100 Mbps)*1 HDMI-OUT HDMI-IN 耳机插孔 麦克风输入 SD 卡槽 *1 Mini USB *1 (OTG) 直流输入插孔...
  • Page 125 附录 系统 CPU/SoC Rockchip RK3288 1.8GHz 速度 内核 四核 图形 内置 DDR3 2GB,最高速度 800Mbps 内存 eMMC (NAND),16G 内部存储器 WLAN 802.11 b/g/n 环境 温度和湿度 工作时:20%~90% @ 35 C(无冷凝) 存放时:90% R.H. 0~2,000m 海拔高度 附件 电源线(视区域而定) 电源适配器 *1 快速入门指南 *1...
  • Page 126 客户支持 关于技术支持或产品服务,请参照下表或洽询经销商。 注意:您需要提供产品序列号。 国家/ 网站 电话 电子邮件 地区 www.viewsonic.com.cn 4008 988 588 service.cn@cn.viewsonic.com 中国 www.hk.viewsonic.com 852 3102 2900 service@hk.viewsonic.com 香港 www.hk.viewsonic.com 853 2870 0303 service@hk.viewsonic.com 澳门...
  • Page 127 产品外部原因,如电源波动或故障。 d. 使用不符合 ViewSonic 规格的耗材或部件。 e. 正常磨损和破损。 f. 与产品缺陷无关的任何其他原因。 3. 在产品上长时间显示静态图像而导致“图像残留”的任何产品。 4. 拆卸、安装、保险和设置服务费用。 如何获取服务: 1. 有关如何获得保修服务的信息,请联系 ViewSonic 客户支持(请参见网站和客户 支持页面)。您需要提供产品的序列号。 2. 为获得保修服务,您需要提供 (a) 注明日期的原始销售凭证、(b) 您的姓名、(c) 您 的地址、(d) 故障描述、以及 (e) 产品序列号。 3. 将产品放在原始包装箱中,送到或运到(预付运费)ViewSonic 授权服务中心或 ViewSonic。 4. 如需其他信息或最近 ViewSonic 服务中心的名称,请与 ViewSonic 联系。...
  • Page 128 1. 由于本产品缺陷而导致的其他财产损失、由于不方便而导致的损失、使用本产品的 损失、时间损失、收益损失、商业机会丧失、信誉损失、干扰商业关系、或其他商 业损失,即使被告知这些损失的可能性也不例外。 2. 偶然、必然或其他形式的任何损失。 3. 任何其他方对客户的任何索赔。 4. 由未经 ViewSonic 授权的人员进行修理或尝试修理。 OTA更新免责: ViewSonic Corporation 对所显示信息中的任何错误或疏漏不承担任何责任。此固件更 新专门用于 ViewSonic ® 桌上型平板电脑。对于因在任何设备上进行更新而导致的数据 丢失或任何损失,或者与产品相连的其他设备的损坏或故障,无论是偶然的、必然的还 是其他形式的,ViewSonic 不承担任何责任。您同意对所有文件和数据承担全部责任, 并在执行任何更新之前维护设备中存储的文件和数据的合适备份。用户应对获取必要权 限访问和使用任何第三方内容承担责任。ViewSonic 对第三方产品和服务的性能、可用 性和使用不承担任何责任。此处涉及的各公司名称和商标分别是其所属公司的资产。版 权所有 © 2015 ViewSonic Corporation。保留所有权利。 4.3: ViewSonic Smart Display Warranty SD_LW01 Rev. 1A 08-21-12...

Ce manuel est également adapté pour:

Vs16340

Table des Matières